OneDeck Help Center
How to Filter and Sort Results
OneDeck allows you to streamline your workflow and enhance data analysis through advanced filtering and sorting techniques. This allows you to manage various businesses effectively. For example, you can filter records to show only 'Active' and ‘Assign’ to you, then sort by Date of last modified to prioritize recent interactions.
In this documentation, we’ll walk you through the steps to:
- Navigation
- Filter Results
- Sort Results
Let’s get started 🚀
Navigation
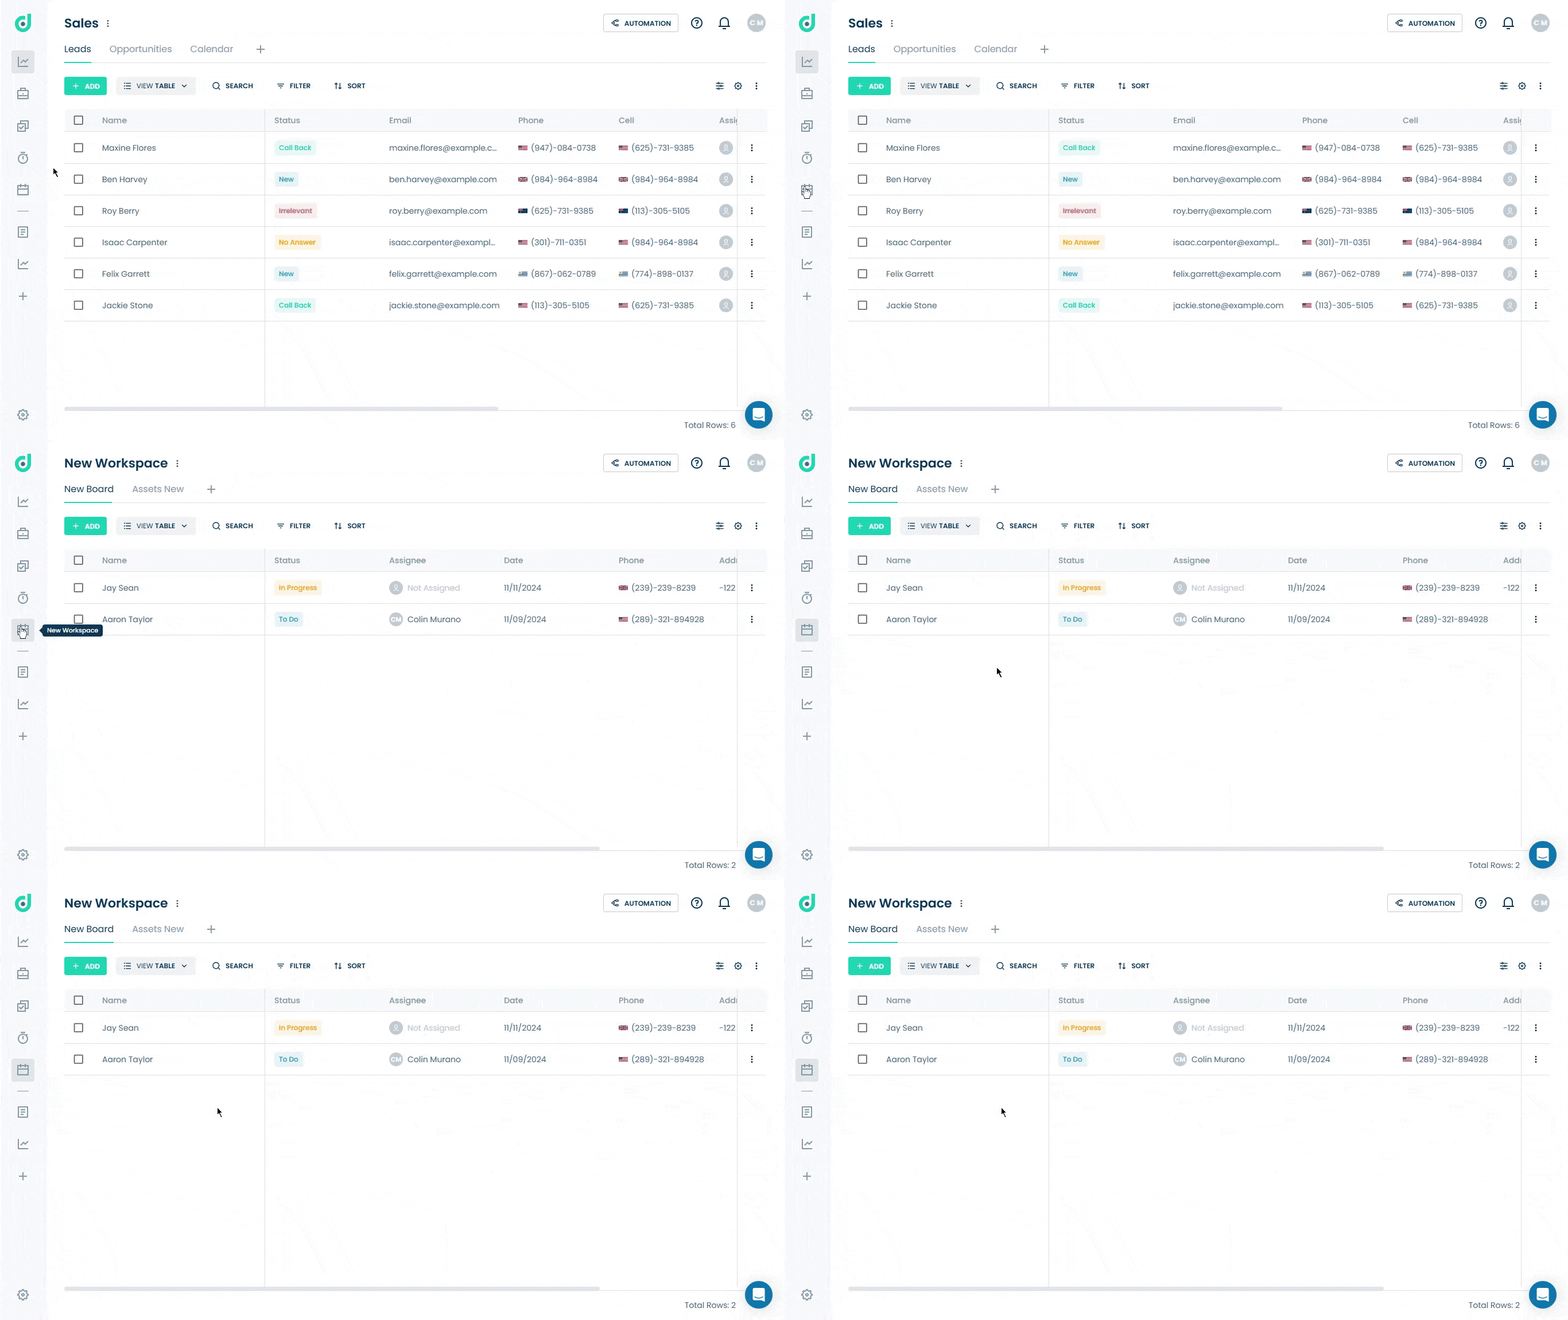
Step 1: Click on the Workspace button from the side navigation menu bar.
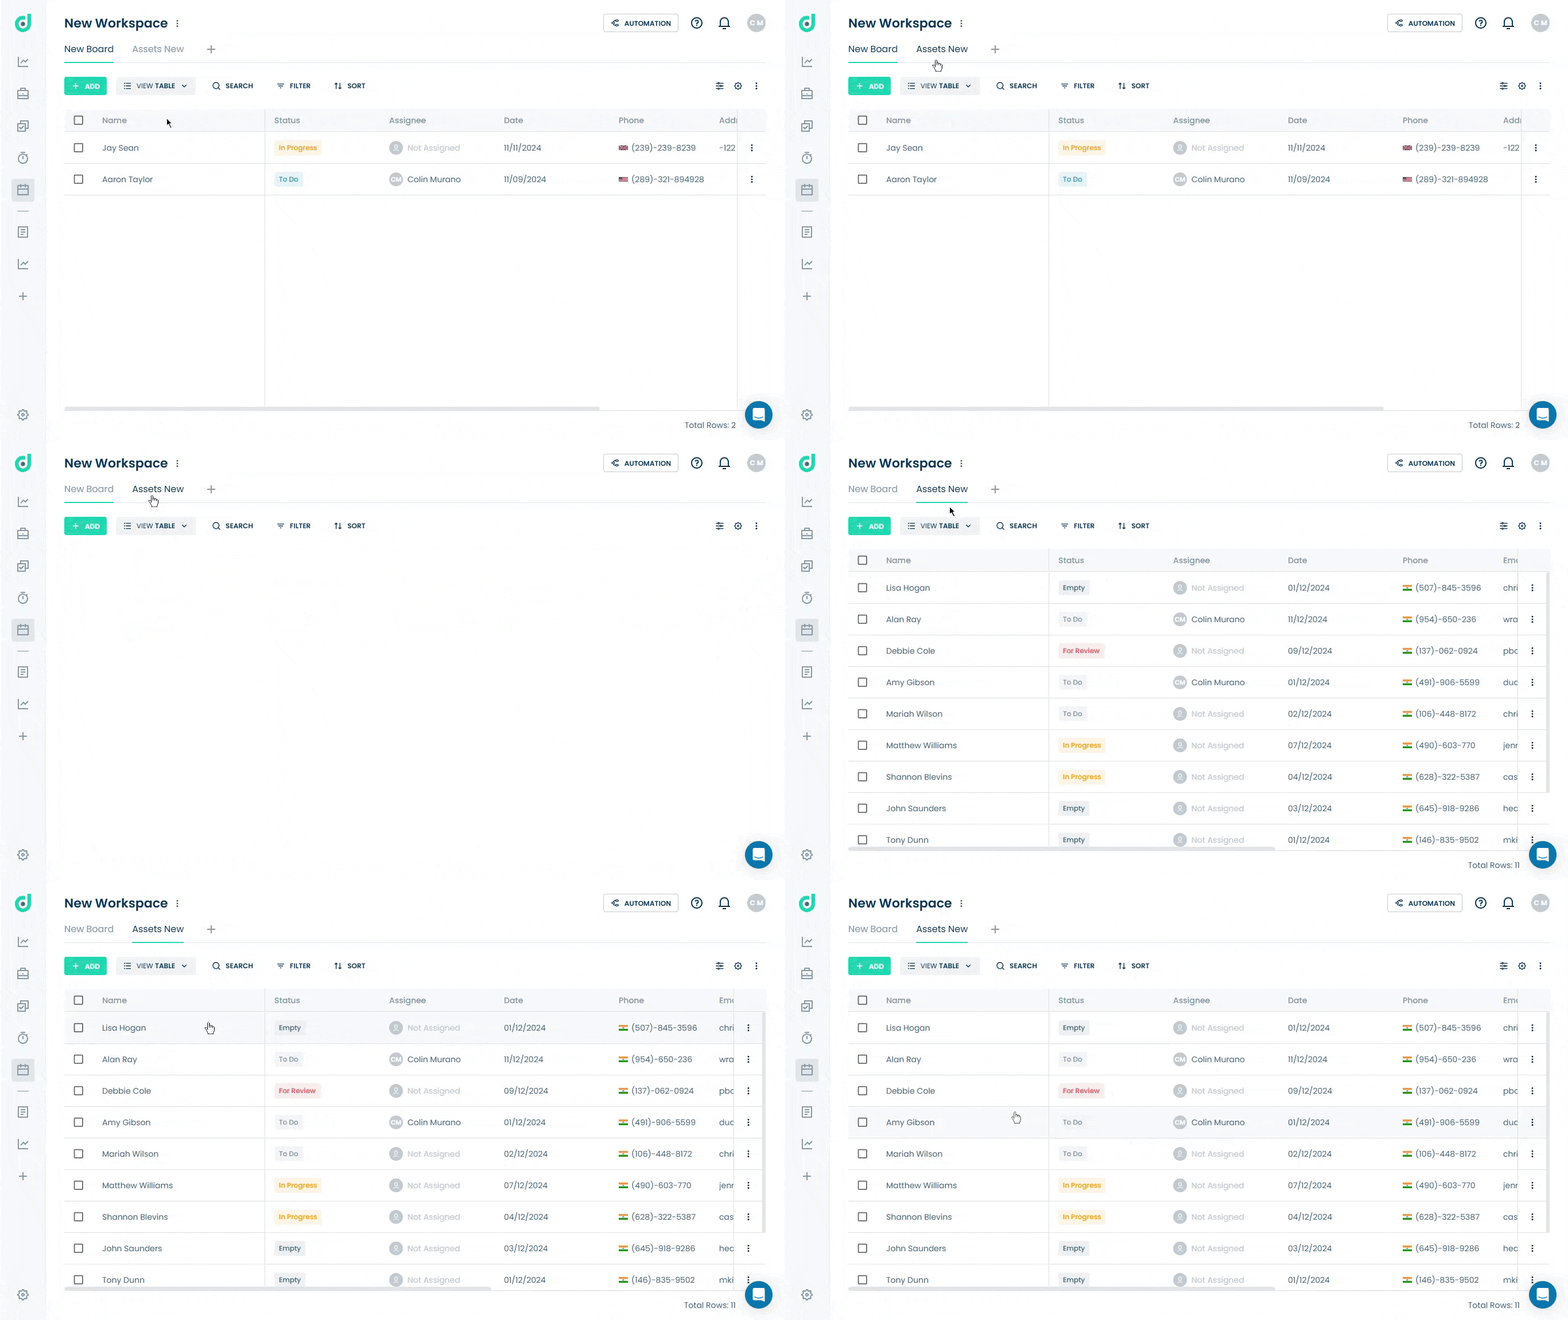
Step 2: Select the board where you want to sort and filter results.
Filter Results
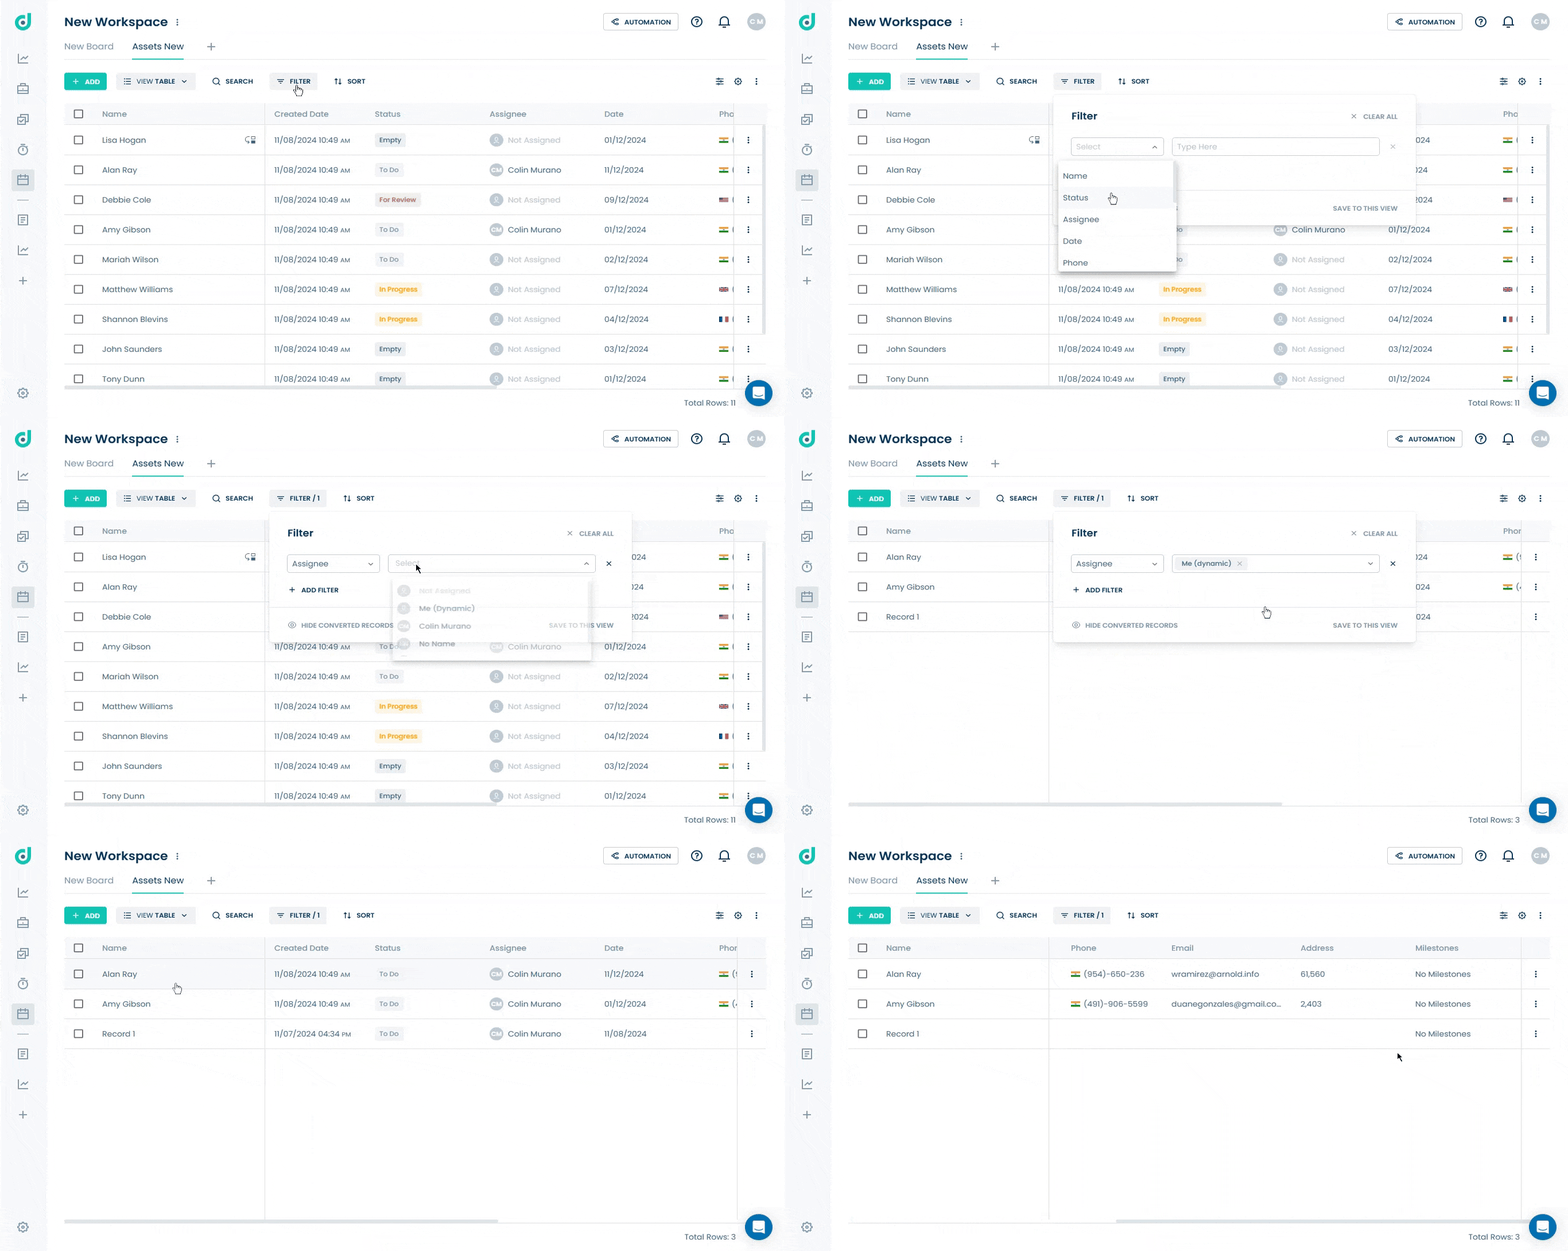
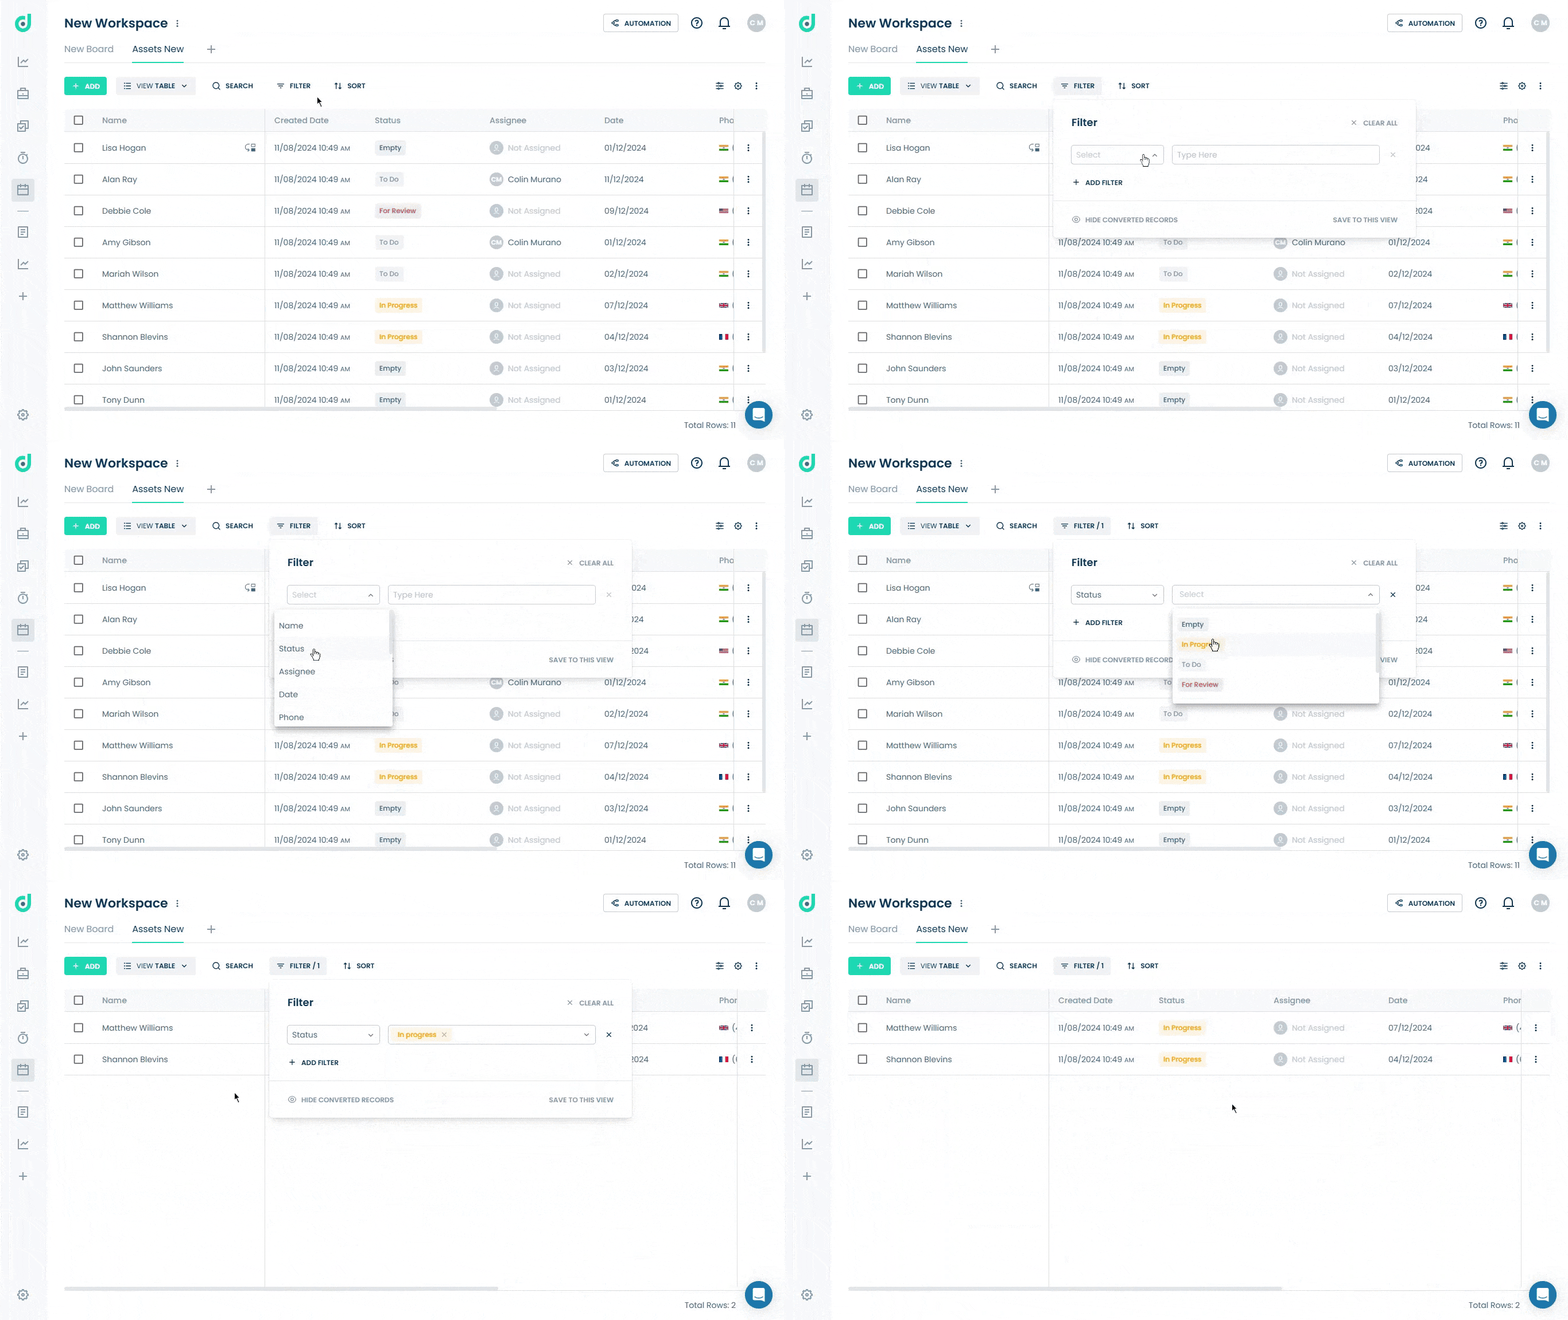
OneDeck’s filter option allows you to display only the records that match your specified criteria. For example, you can filter by a field like “Status” and select a status type such as “In Progress” or “To Do” to show only those records.
You can choose more than one option.
Sort Results
OneDeck also lets you sort the records in ascending or descending order based on selected fields such as name, date, status, or any other fields to enhance data visibility.
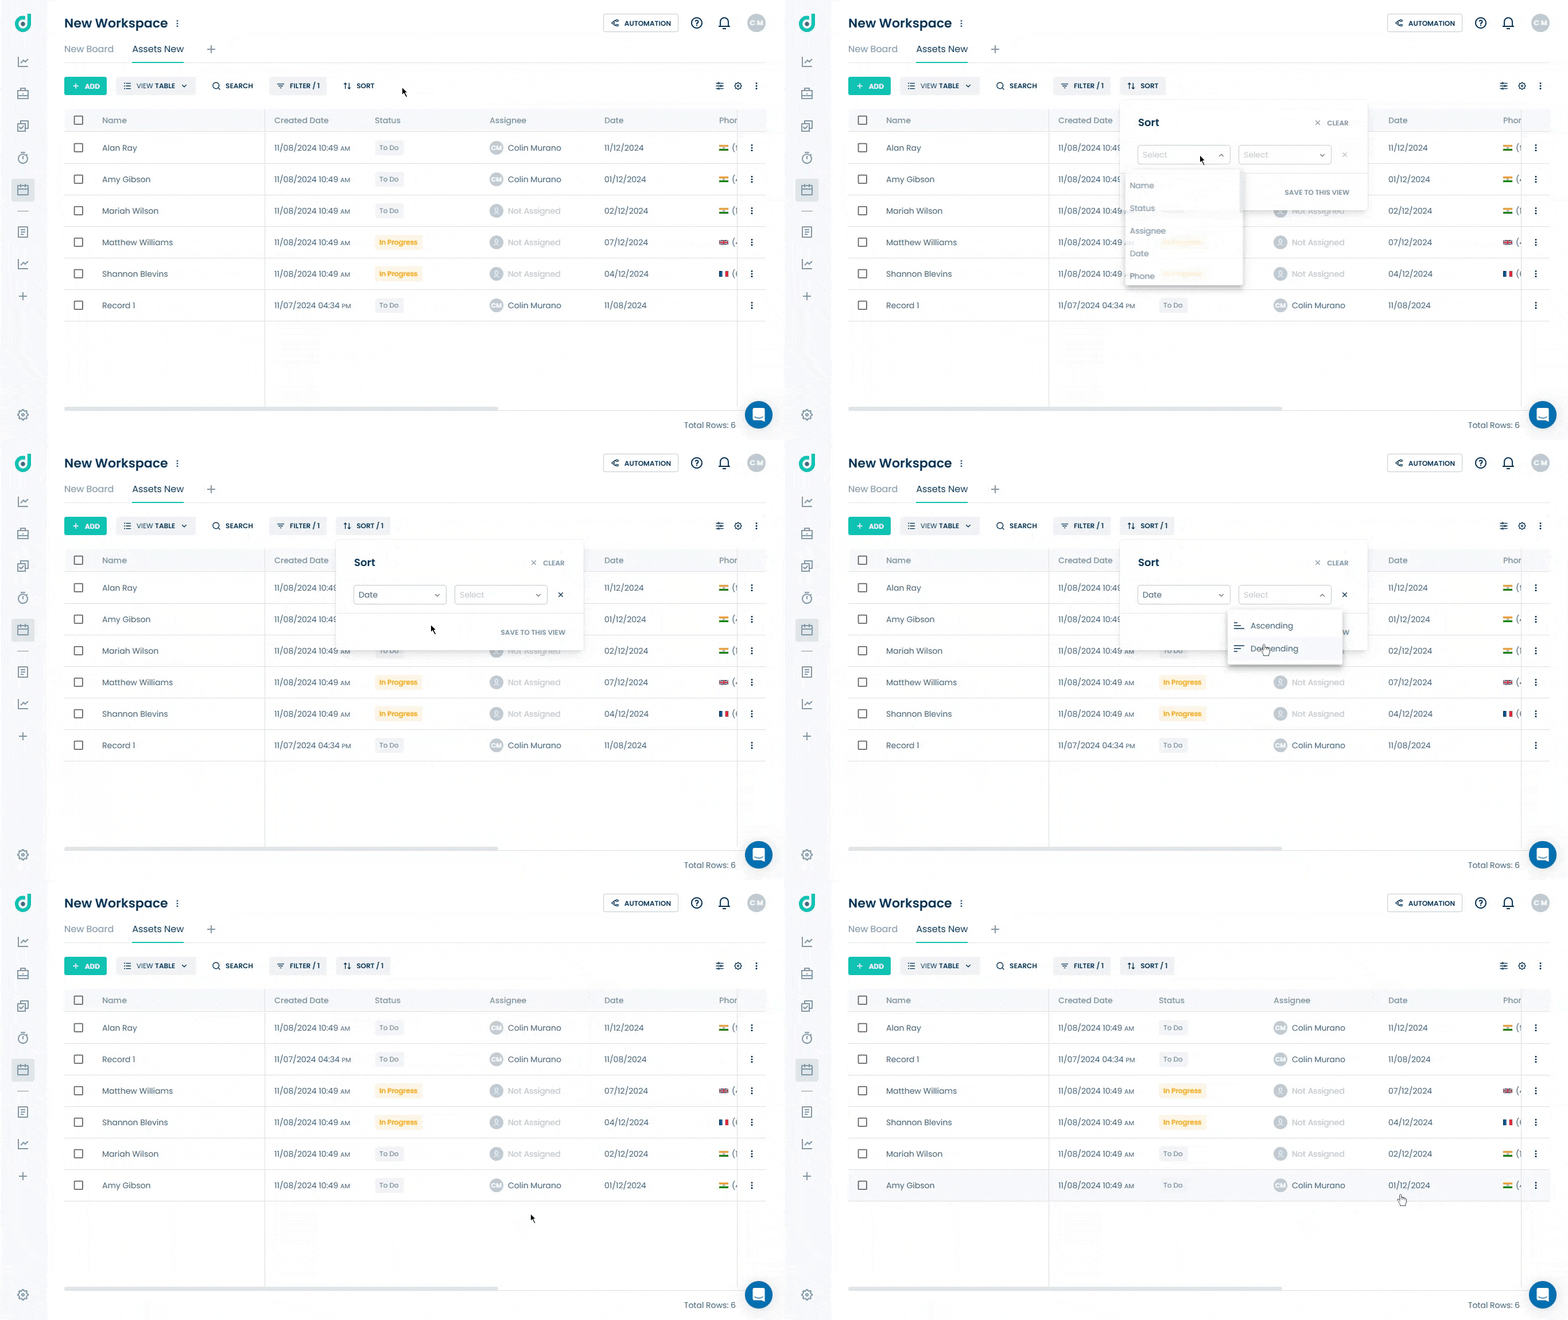
Note: Filters and sorting can be 'saved to this view.' For example, on the tasks board, you can save filters such as 'Status = To Do' and 'Deadline = Today'.
After applying filters and sorting, you can reset the changes to the original arrangement by clicking on the "Clear All" option.
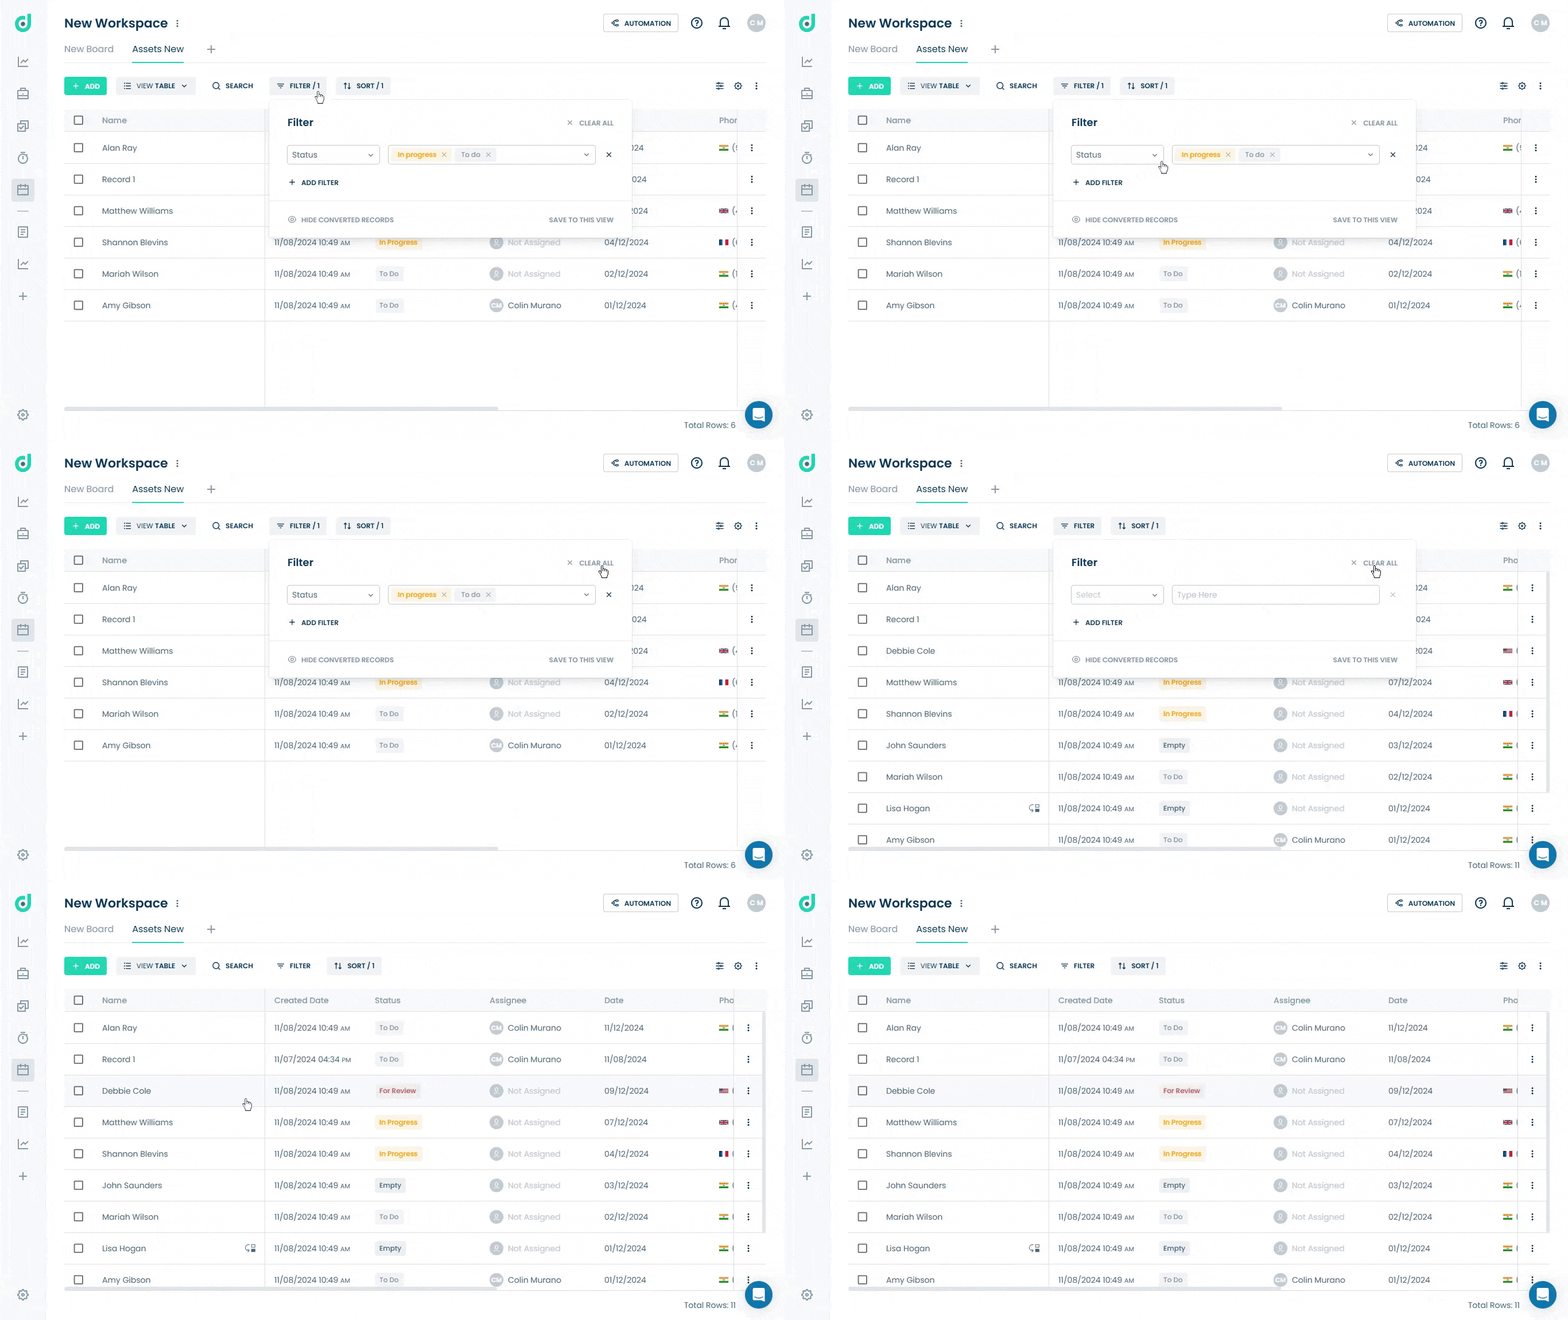
Note: The Assignee field is unique because you can filter records by it and select 'Me (dynamic)'. This way, each user will see only the records assigned to them.
