OneDeck Help Center
How to Customize the View
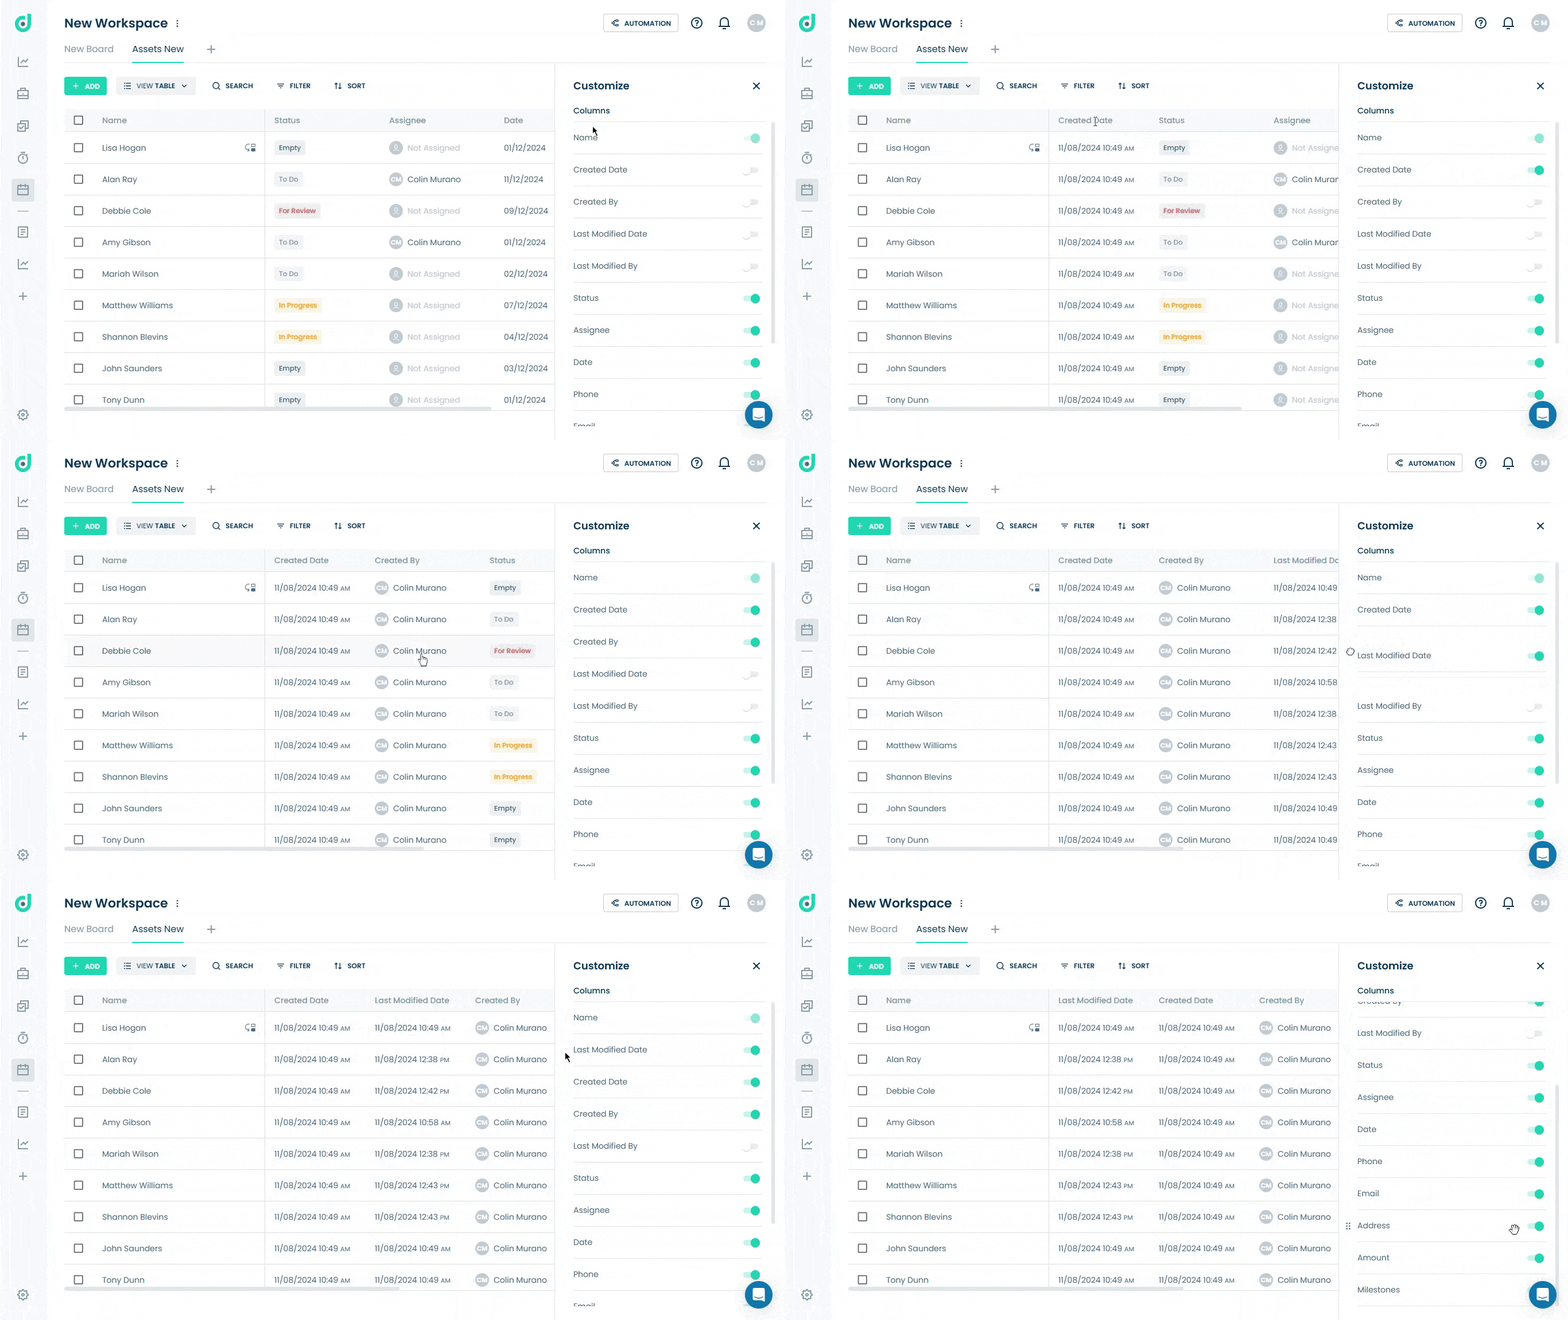
OneDeck lets you customize the appearance of fields by choosing which fields to display and arranging their order. This flexible setup adapts each board to suit various needs - enhancing clarity and organization.
In this documentation, we’ll walk you through the steps to customize the board view in OneDeck.
Let’s get started 🚀
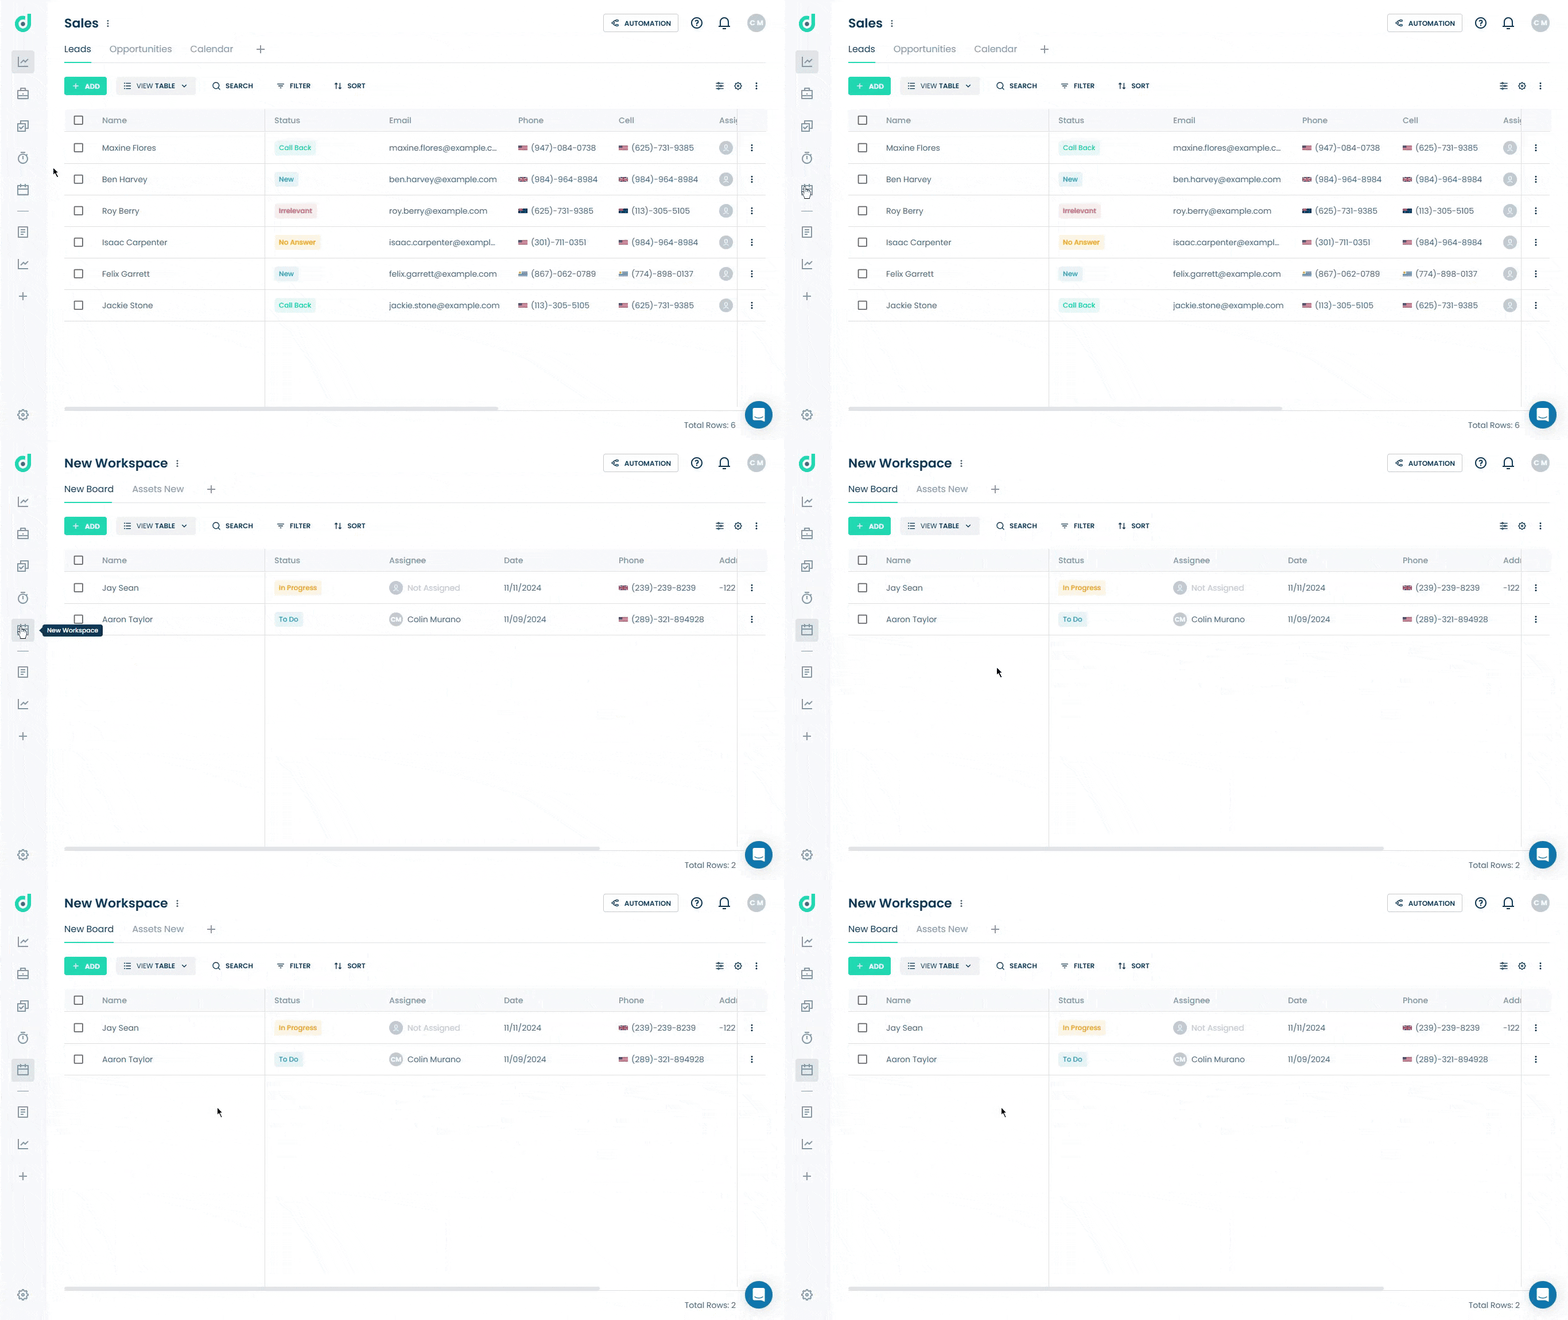
Step 1: Click on the Workspace button from the side navigation menu bar.

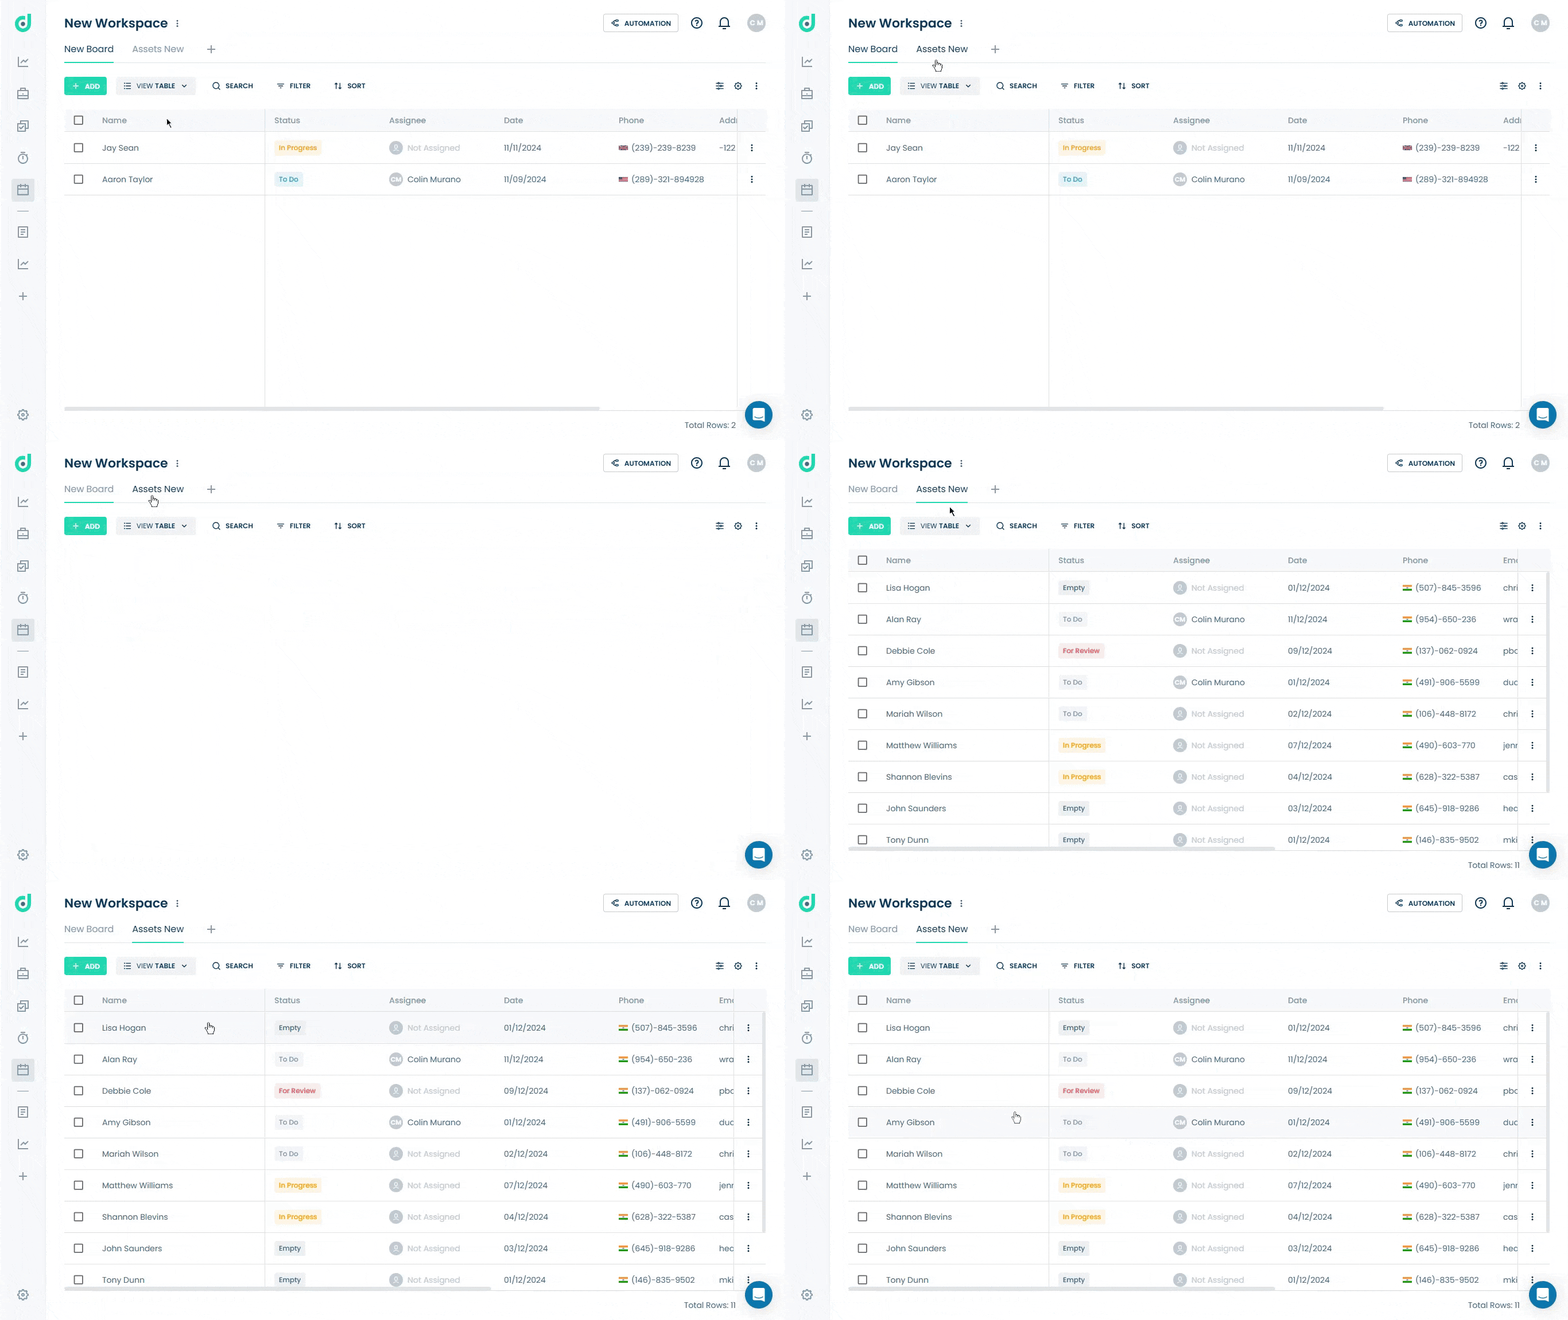
Step 2: Select the board where you want to customize the view.

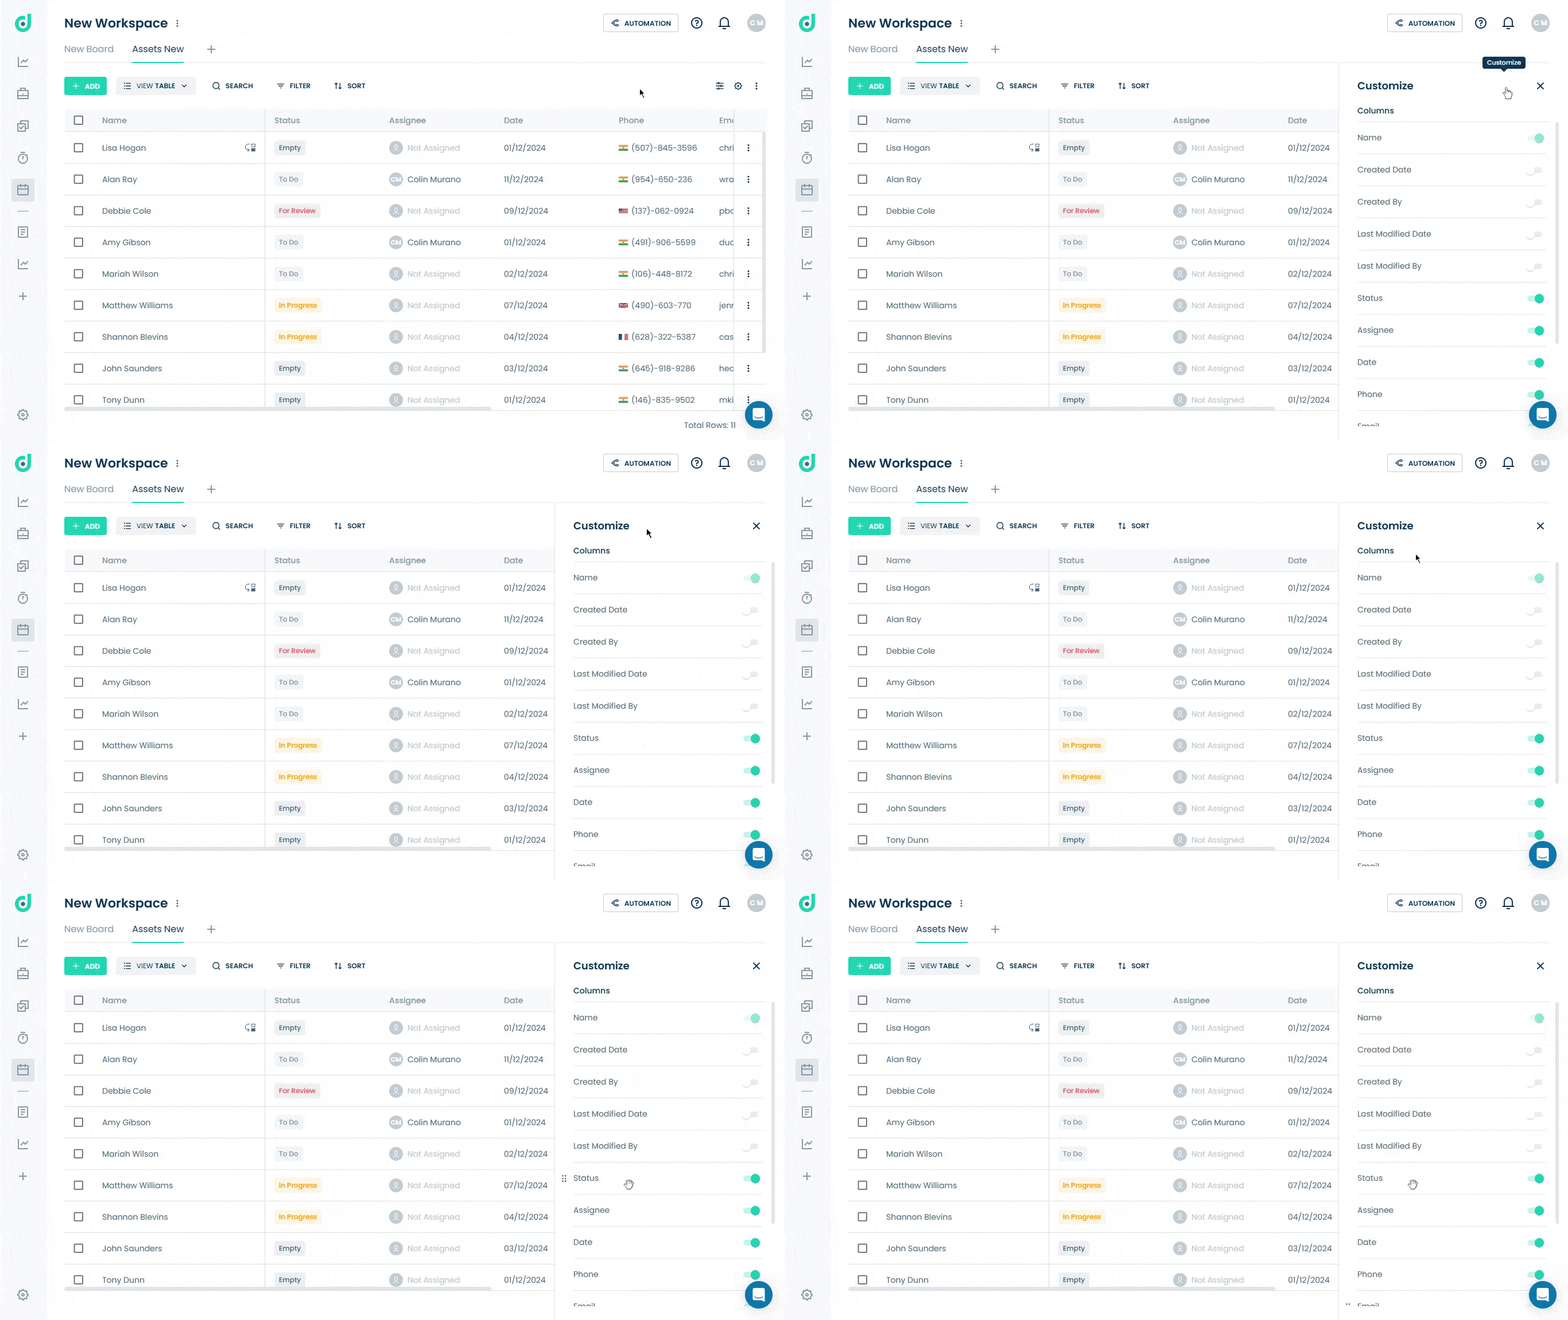
Step 3: Click on the Customize icon from the right side of the interface.

Here, you can customize your fields (columns) by choosing which ones to display and arranging their order according to the preferences.Note: The arrangement of record fields is saved only for the specific board view you customized; it will not apply to other board views. For more information on how to add new board view, refer to this document.

Note: The arrangement of record fields is saved only for the specific board view you customized; it will not apply to other board views. For more information on how to add new board view, refer to this document.


