OneDeck Help Center
How to Create New Role
OneDeck allows you to create and manage user roles by defining specific permissions and capabilities customized to individual responsibilities across Boards, Documents, and Reports. This flexibility ensures team members have access appropriate to their roles, aligns user access with organizational needs, and strengthens overall user management.
In this documentation, we’ll walk you through the steps on how to:
- Navigate
- Create New Role
Let’s get started 🚀
Navigate
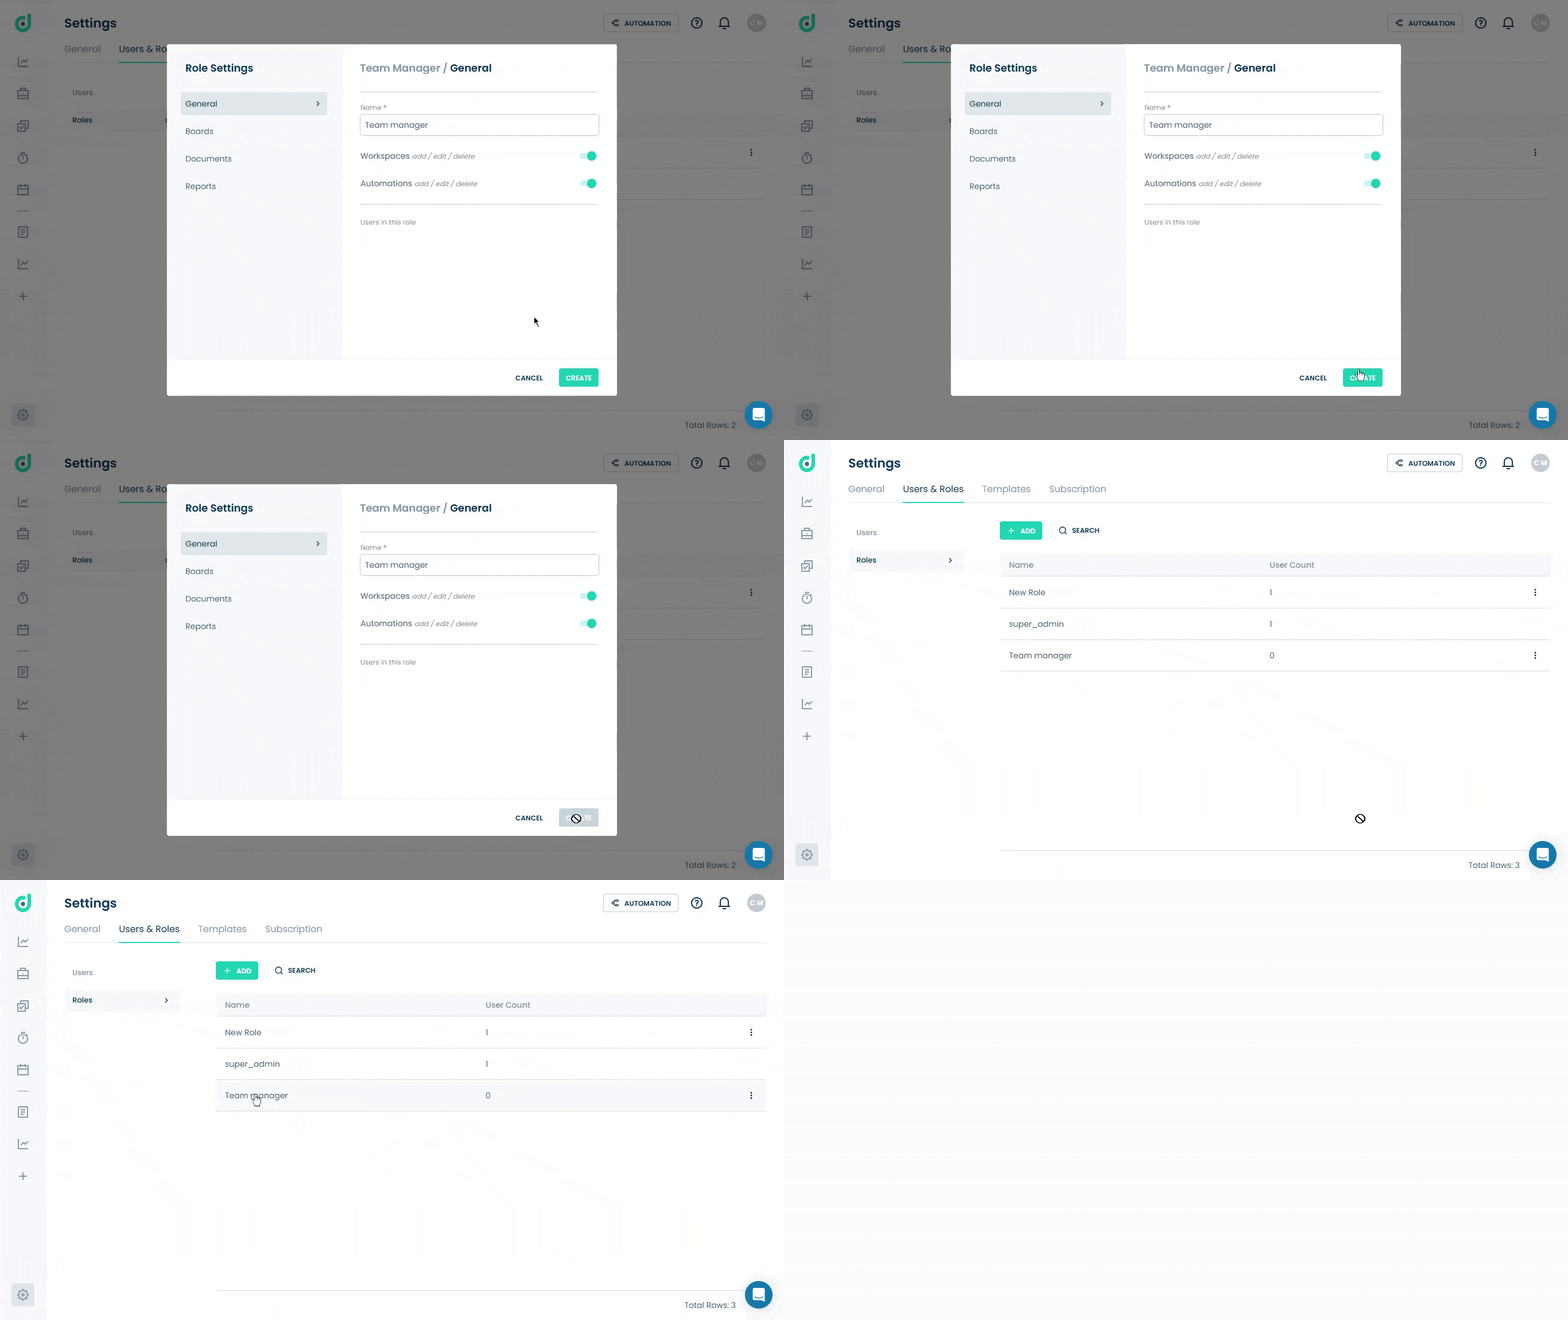
Step 1: In the side navigation panel, click on the Settings option from the bottom-left corner of the interface.
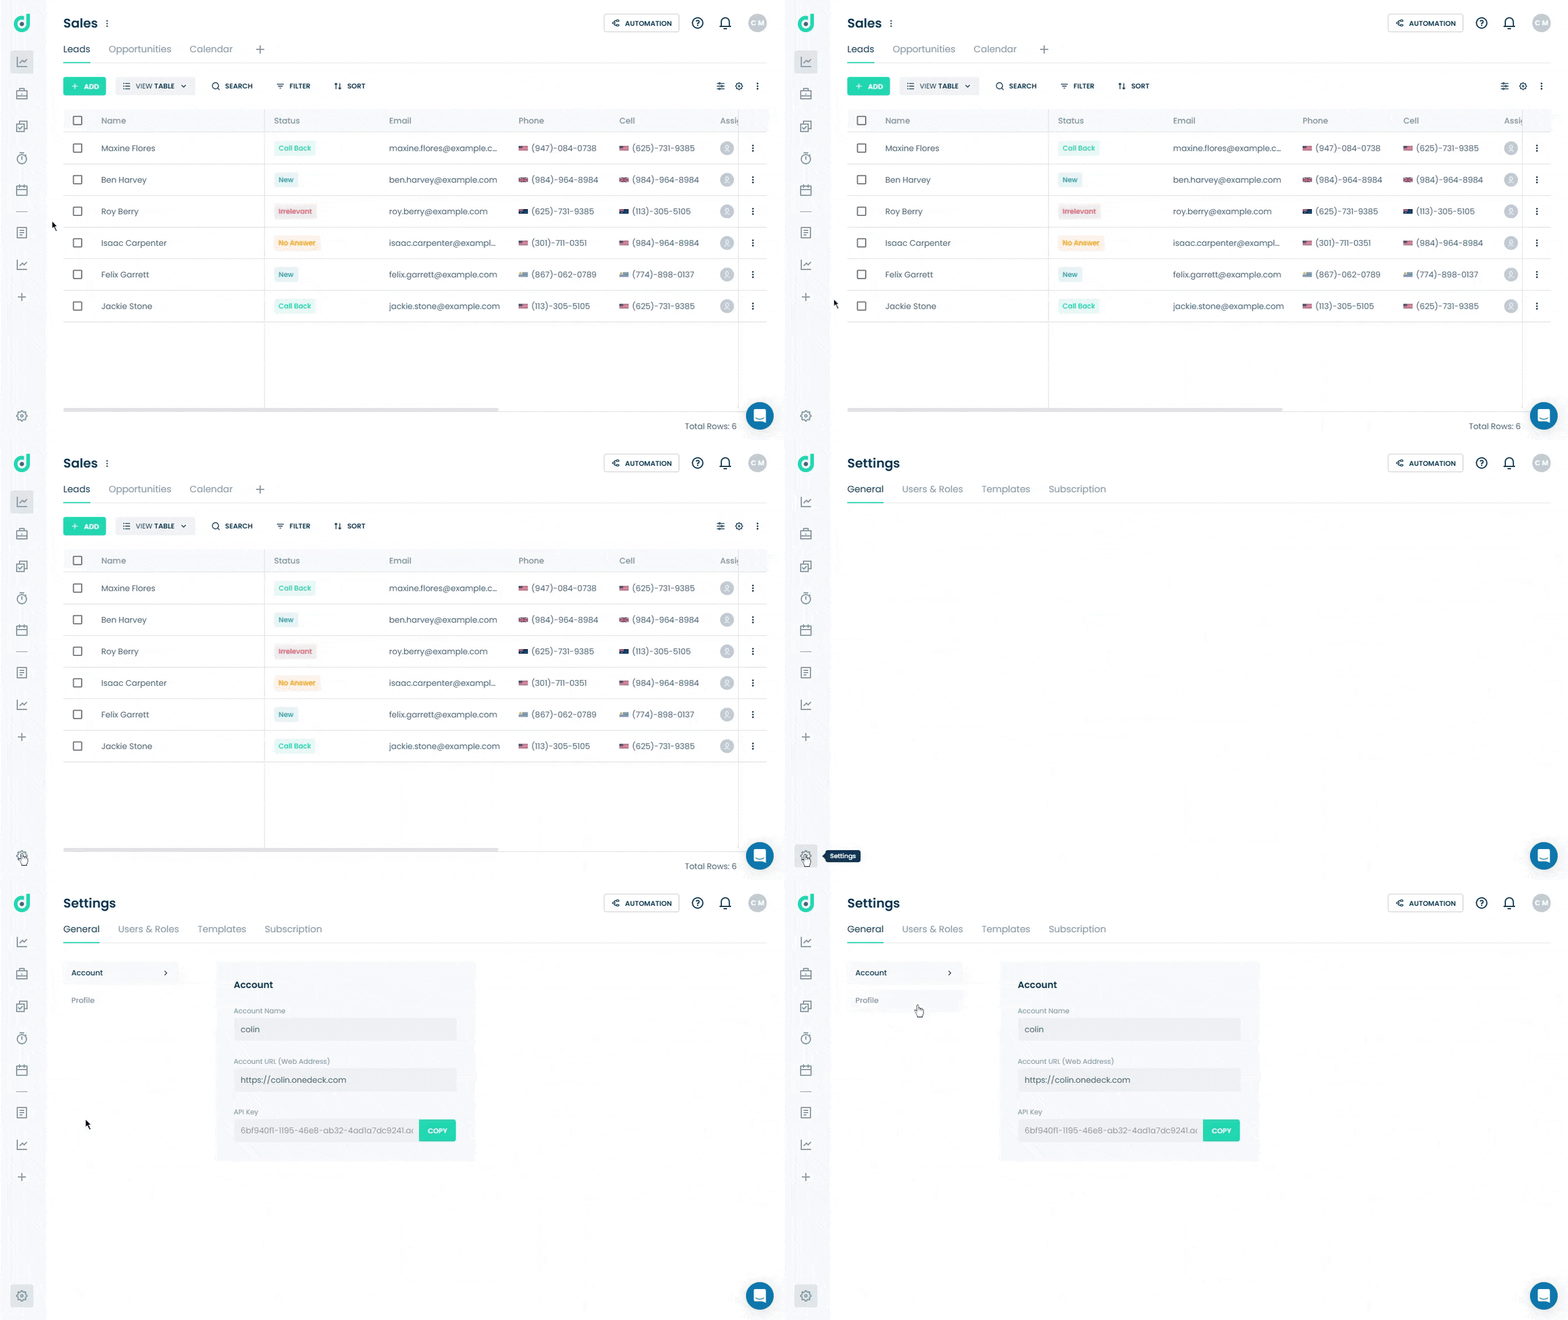
Step 2: Select the User & Roles tab from the settings menu.
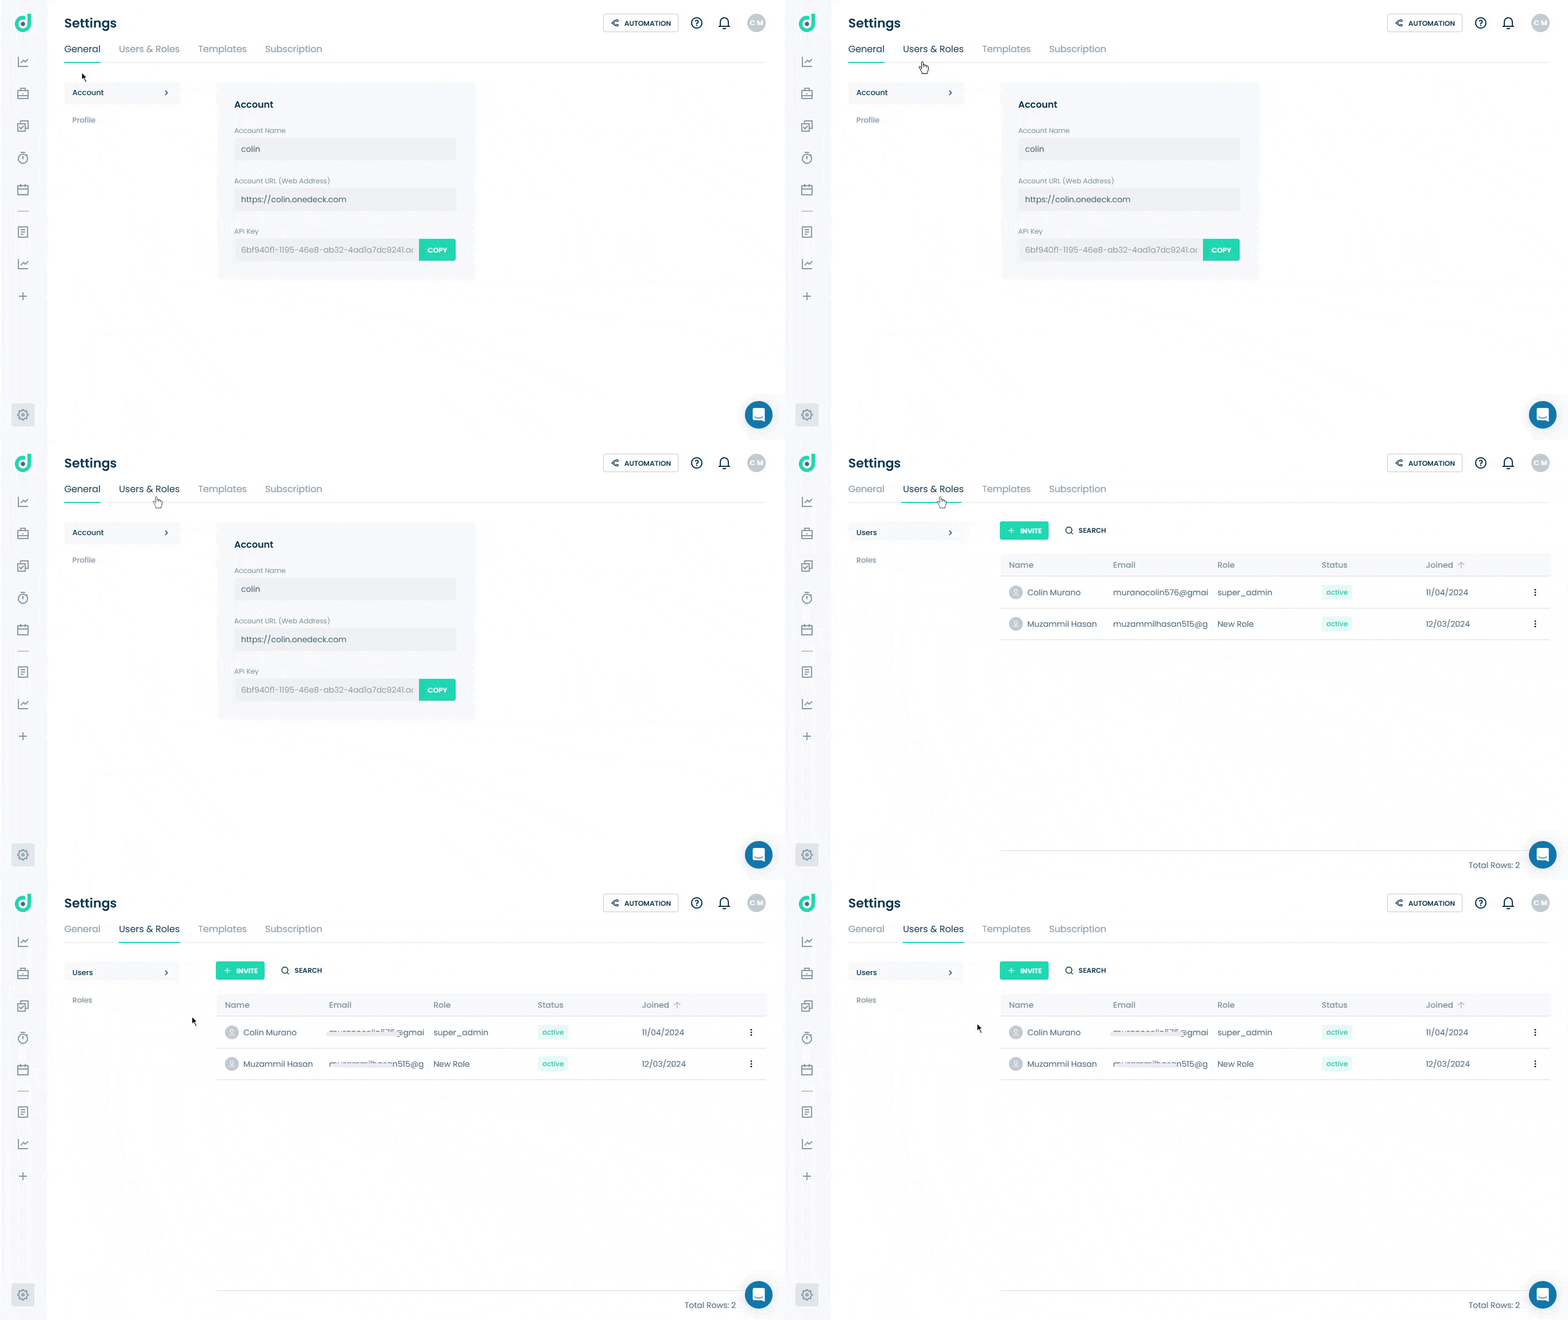
Step 3: Select the Roles option from the User & Roles menu.
Create New Role
Allows you to create user roles in OneDeck by defining permissions and capabilities, enabling tailored access levels based on individual responsibilities.
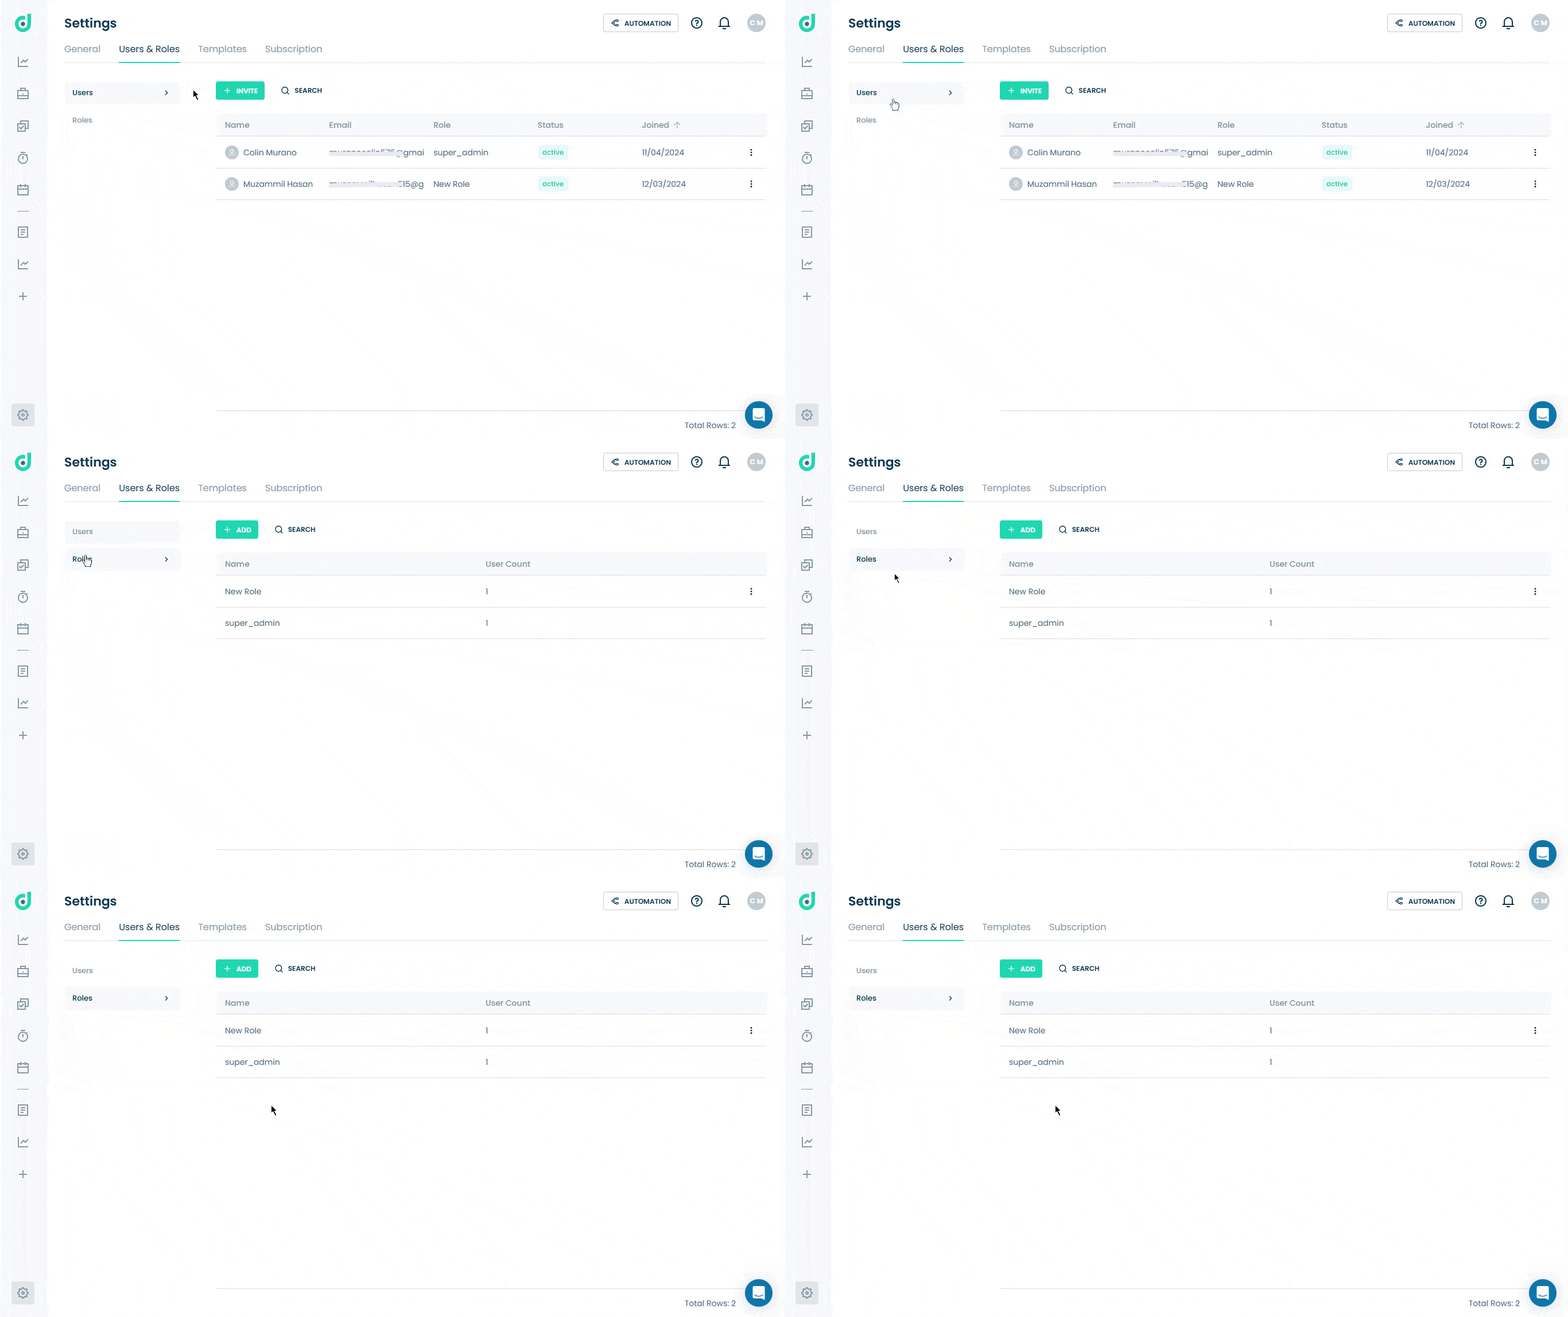
Step 1: Click on the + Add button.
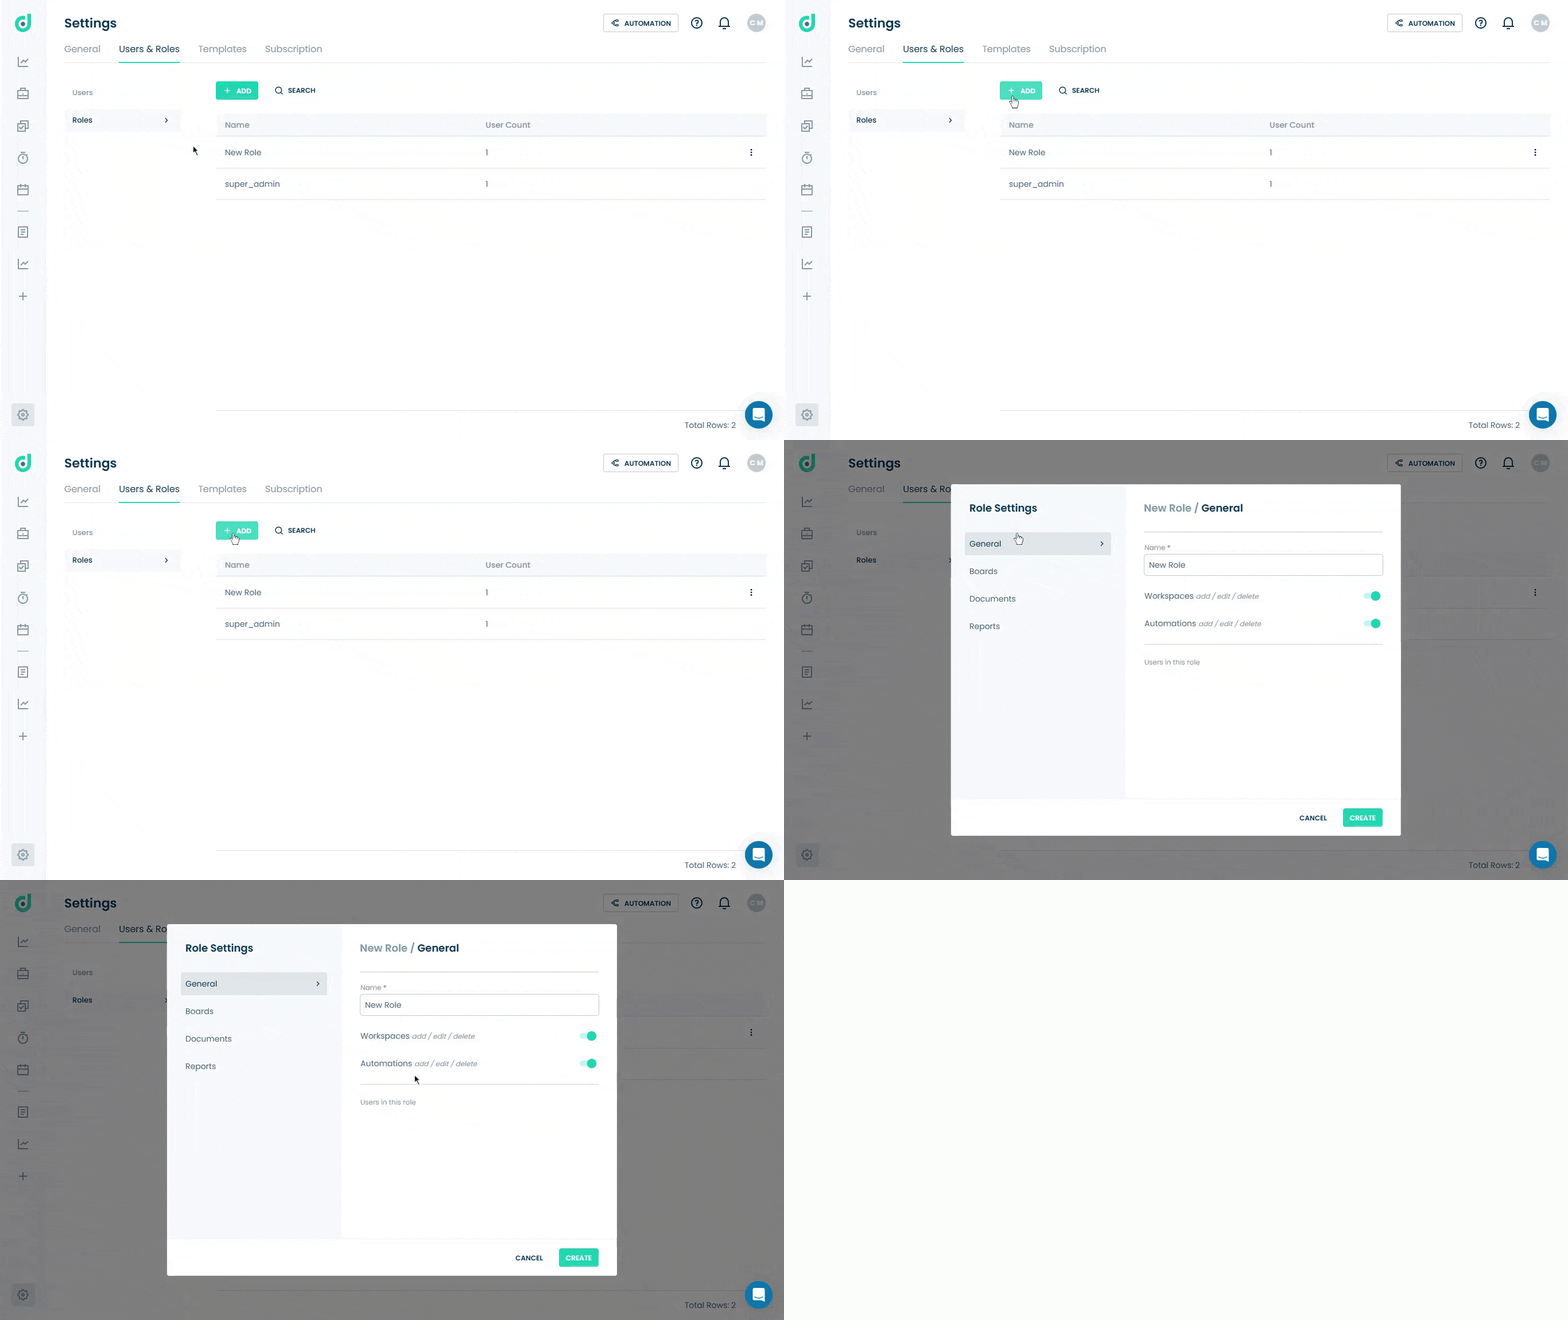
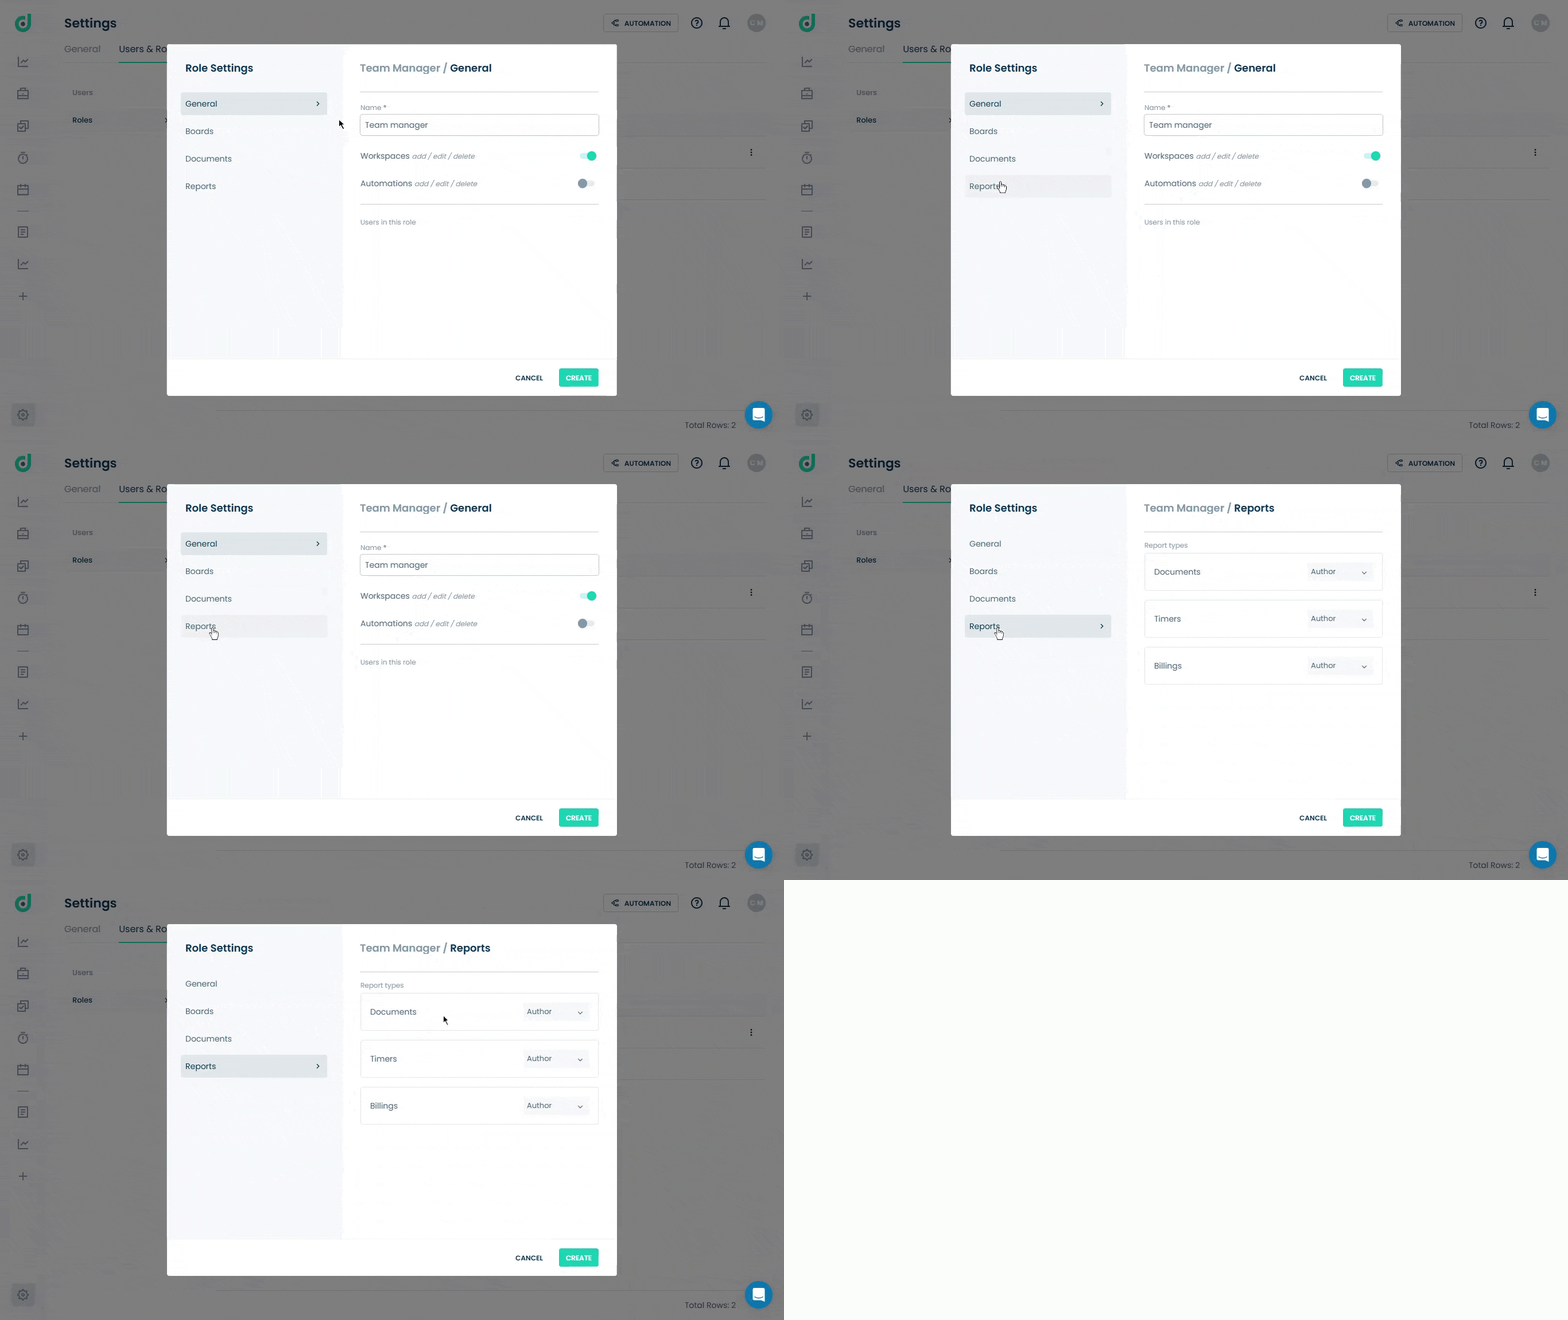
Step 2: A new Role Settings window under the General tab will appear. Enter the name of the new role and toggle on/off to grant or restrict the following permissions:
| Permissions | Description |
| Workspaces | Toggle to grant general permission for adding, editing, or deleting workspaces. |
| Automation | Toggle to grant general permission for adding, editing, or deleting automation scenarios. |
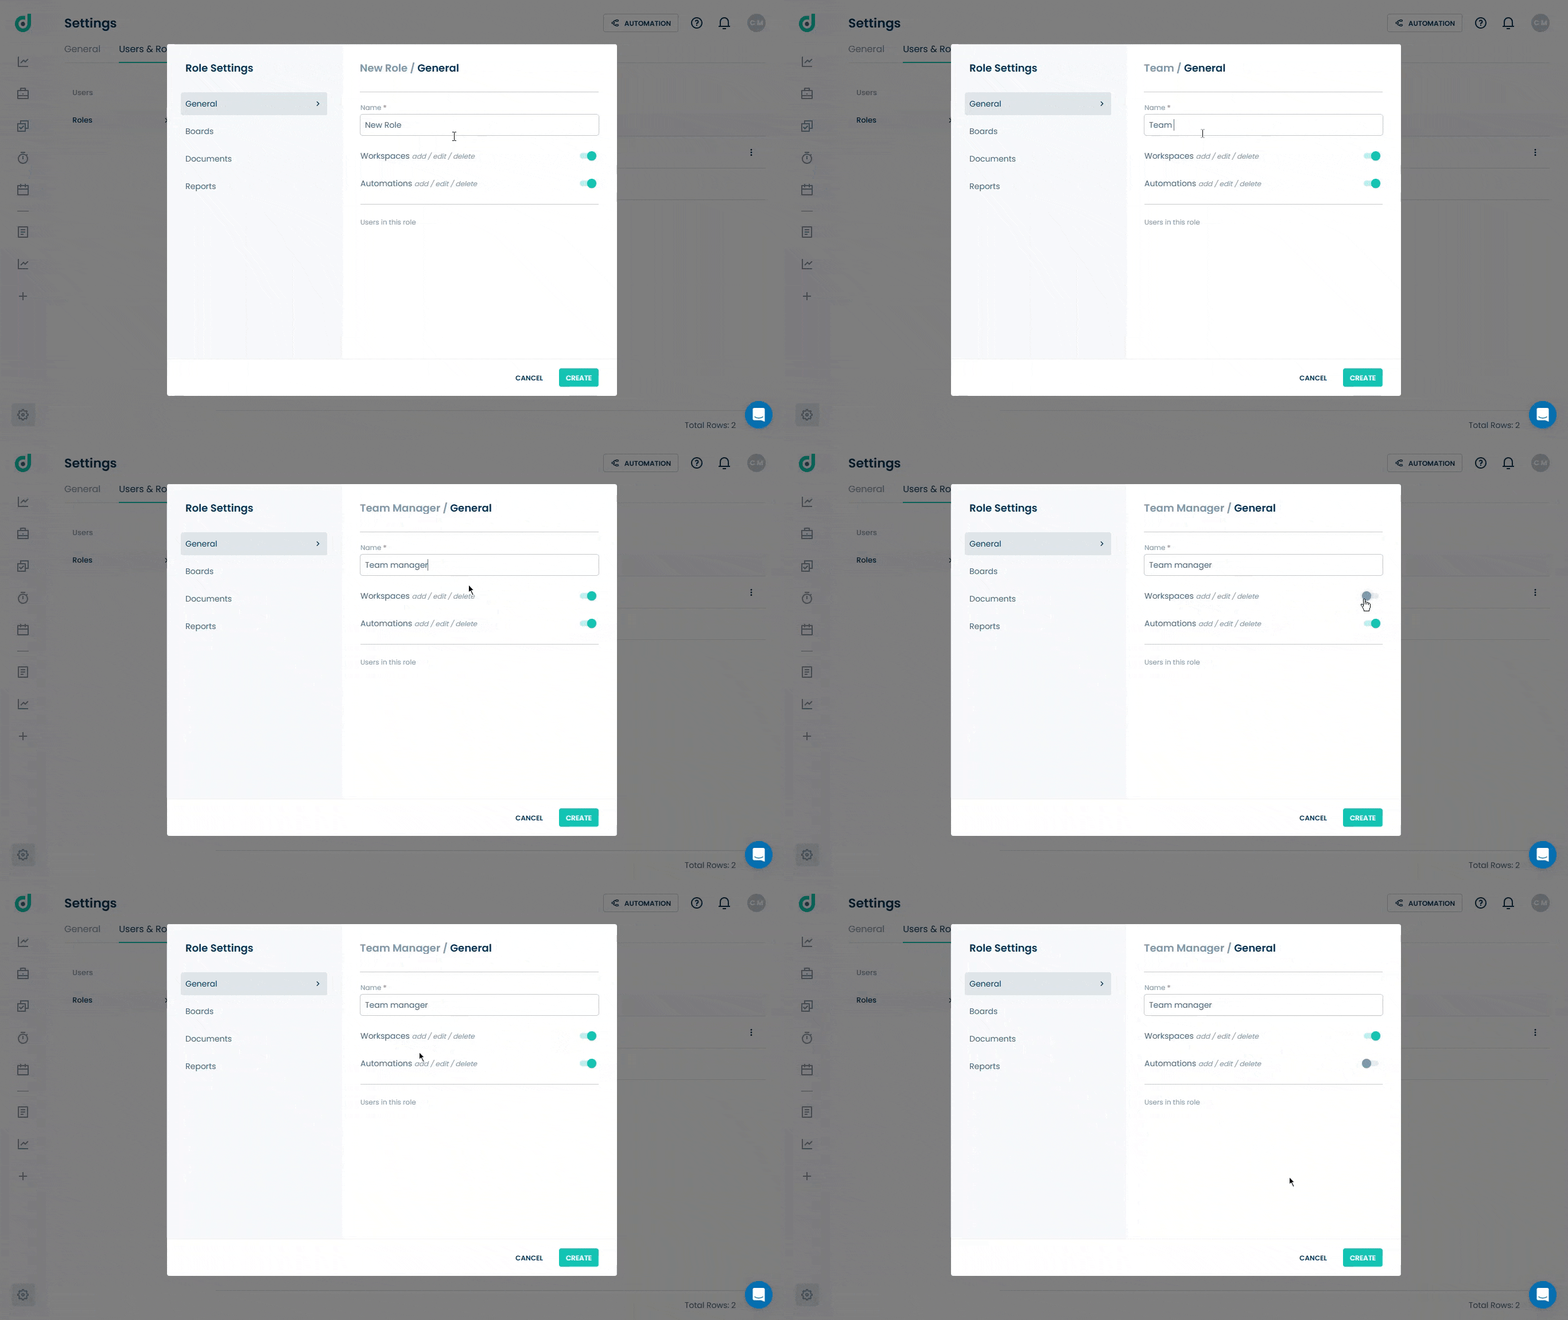
Once you have added a role name and configured the general options, you can customize permissions for three key areas:
- Boards
- Documents
- Reports
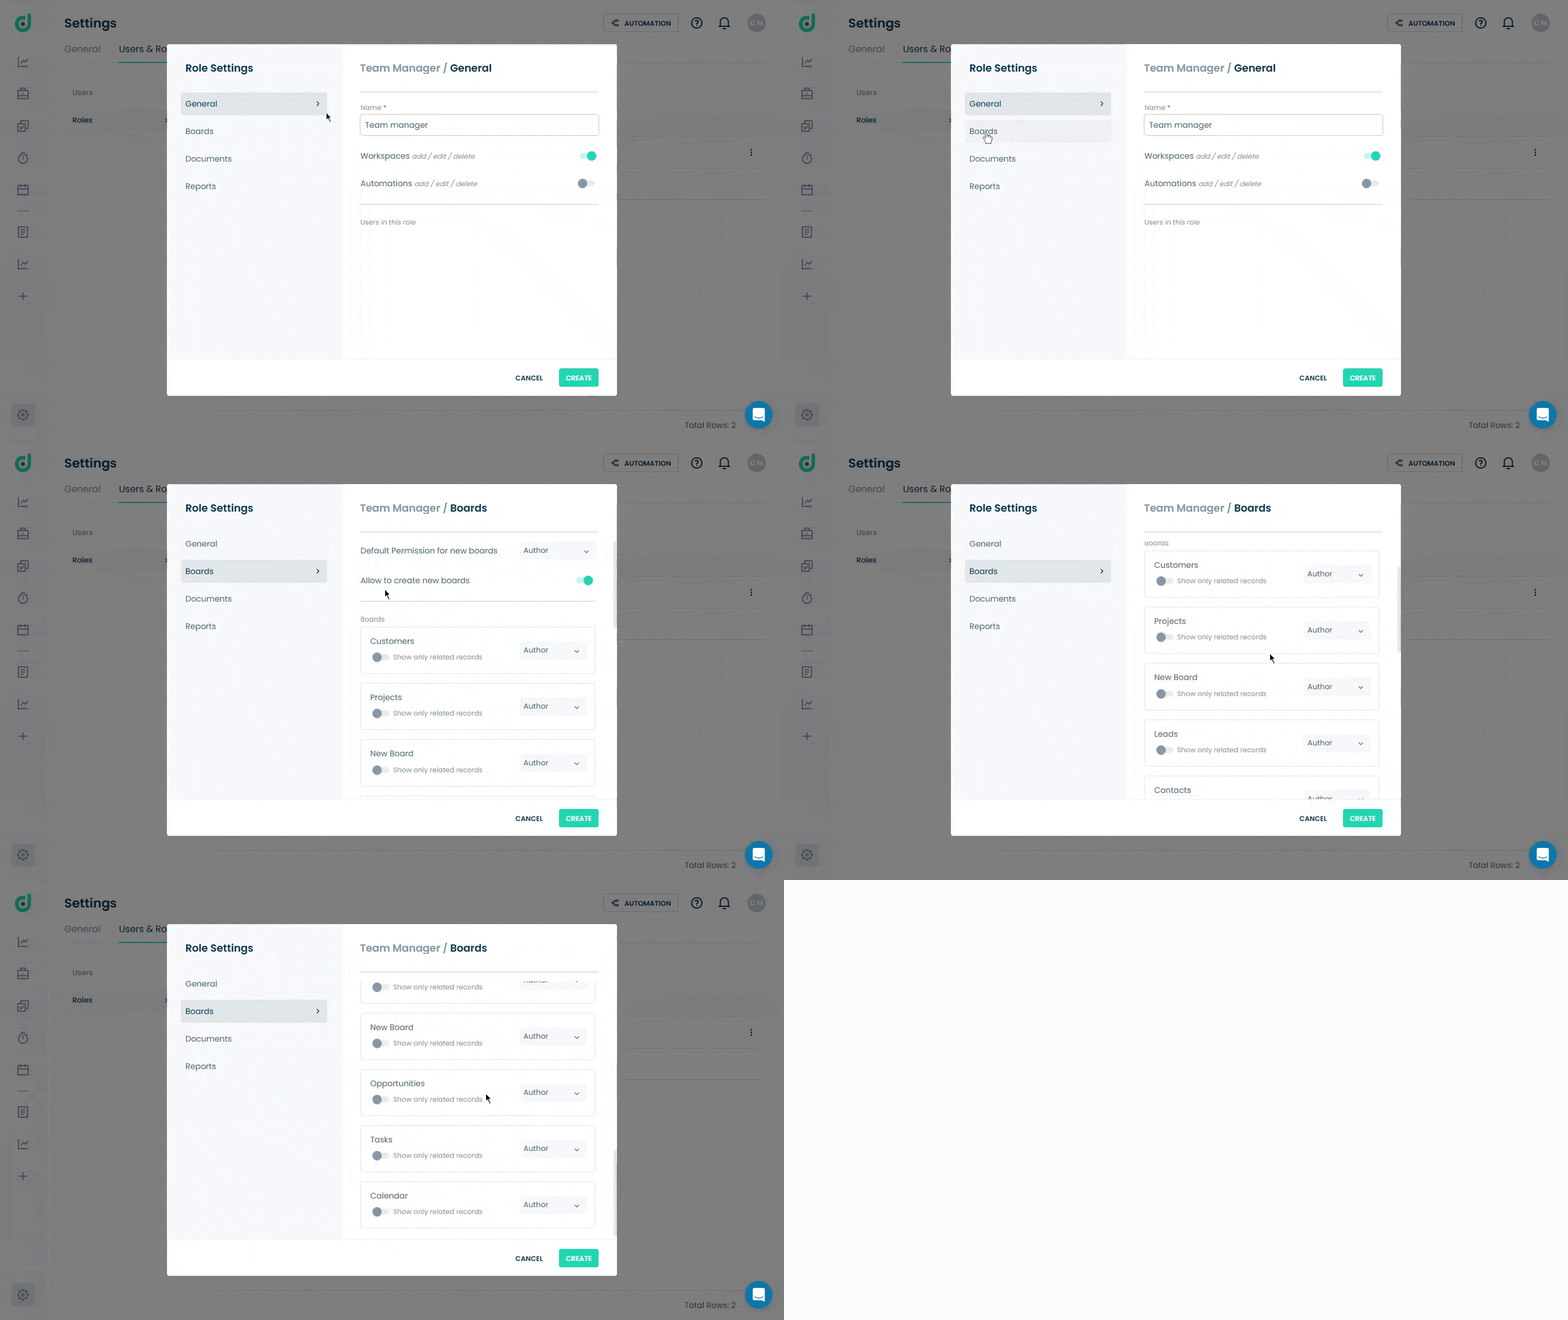
Boards
Permissions related to boards allow you to configure board access for the role, including default access for new boards, the ability to create boards, and specific permissions for existing ones. For more information, refer to the Set up the Boards Permissions document.
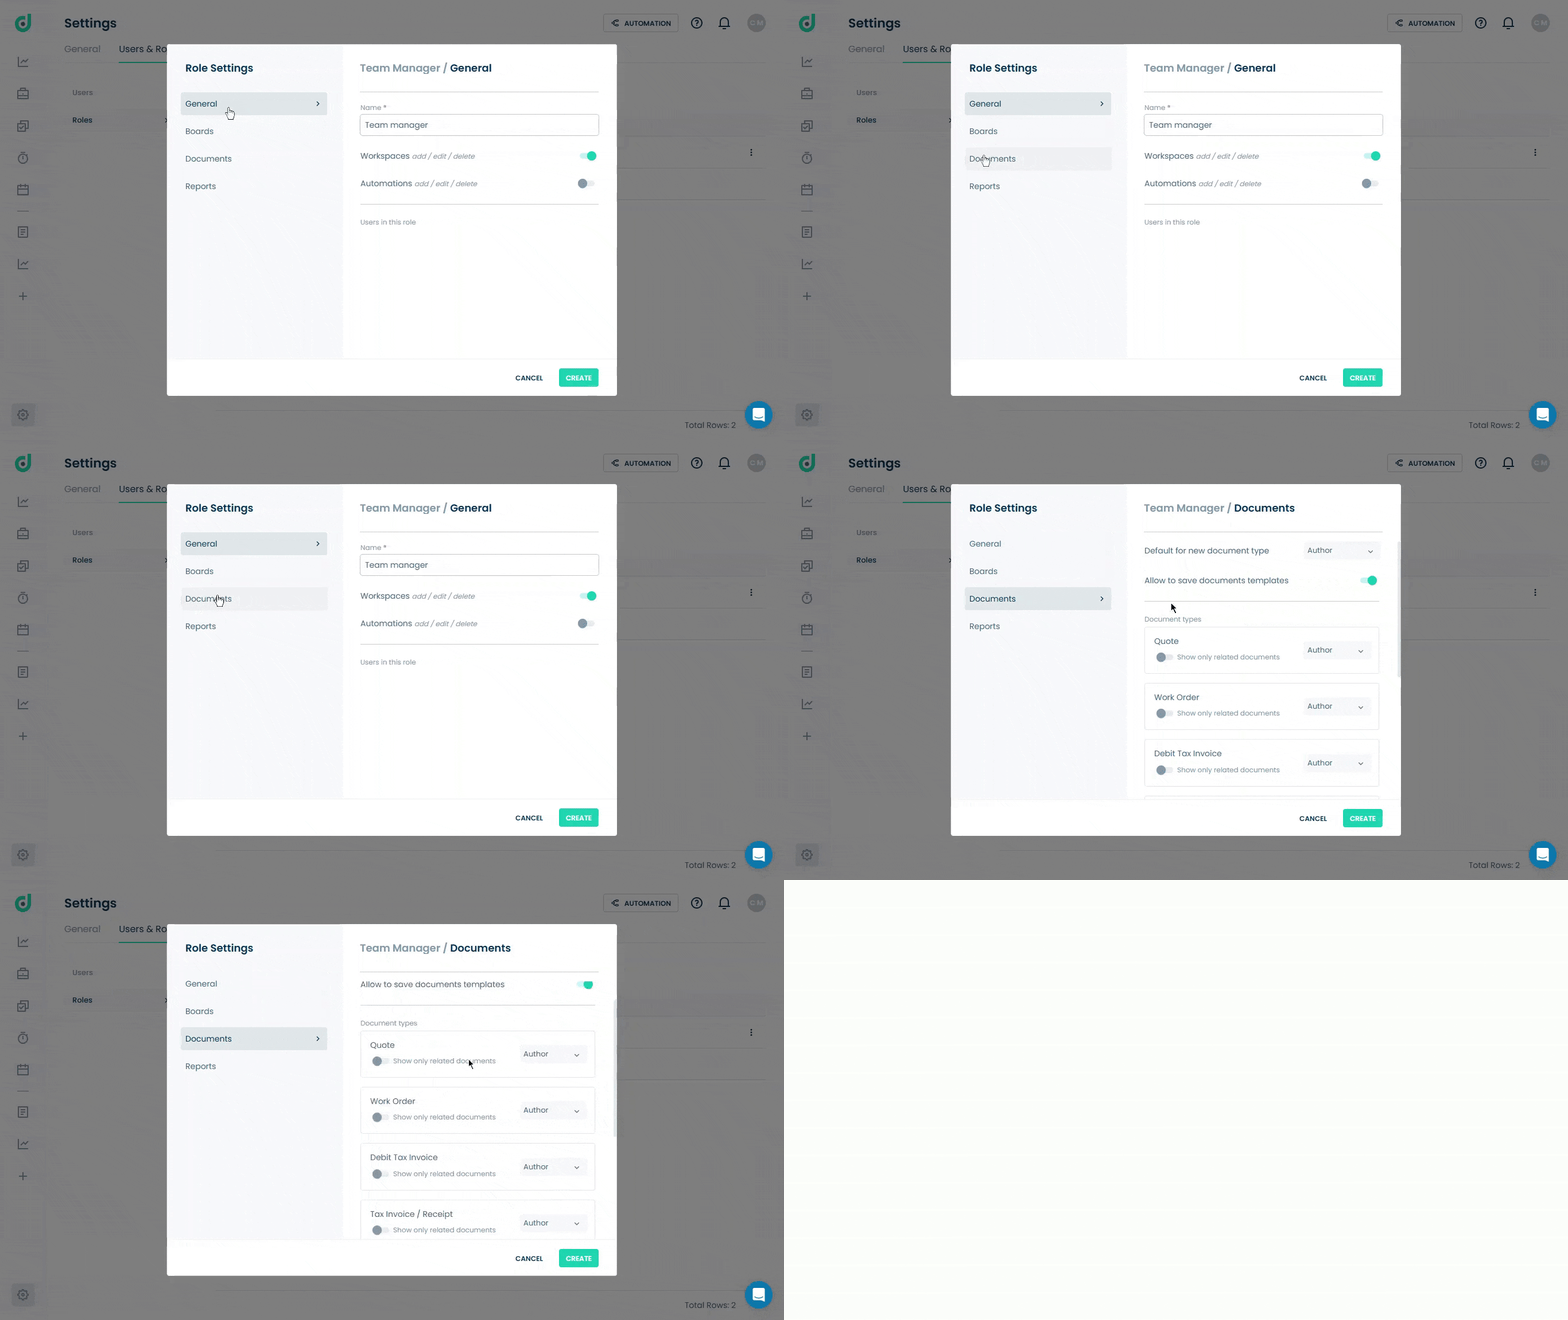
Documents
Permissions related to documents allow users to configure document type permissions (e.g., Author, Viewer) for the role, enable template saving, and set visibility and access levels for specific document types like Quotes, Work Orders, etc. For more information, refer to the Set up Documents Permissions document.
Reports
Permissions related to reports typically allow users to configure access levels (e.g., Author, Viewer) for report types such as Documents, Timers, and Billings. For more information, refer to the Set up the Report Permissions document.
Step 3: Once selected the preferred permissions for the new role, click on the Create button.
