OneDeck Help Center
How to use Signature
Once the document is added in OneDeck, you can authenticate it by incorporating signatures and essential details from both parties, namely the company and the customer. This ensures that all parties involved in the agreement acknowledge and consent to the terms laid out in the document.
In this documentation, we’ll walk you through the steps on how to:
- Add Signature
- Use Signature
Let’s get started 🚀
Add Signature
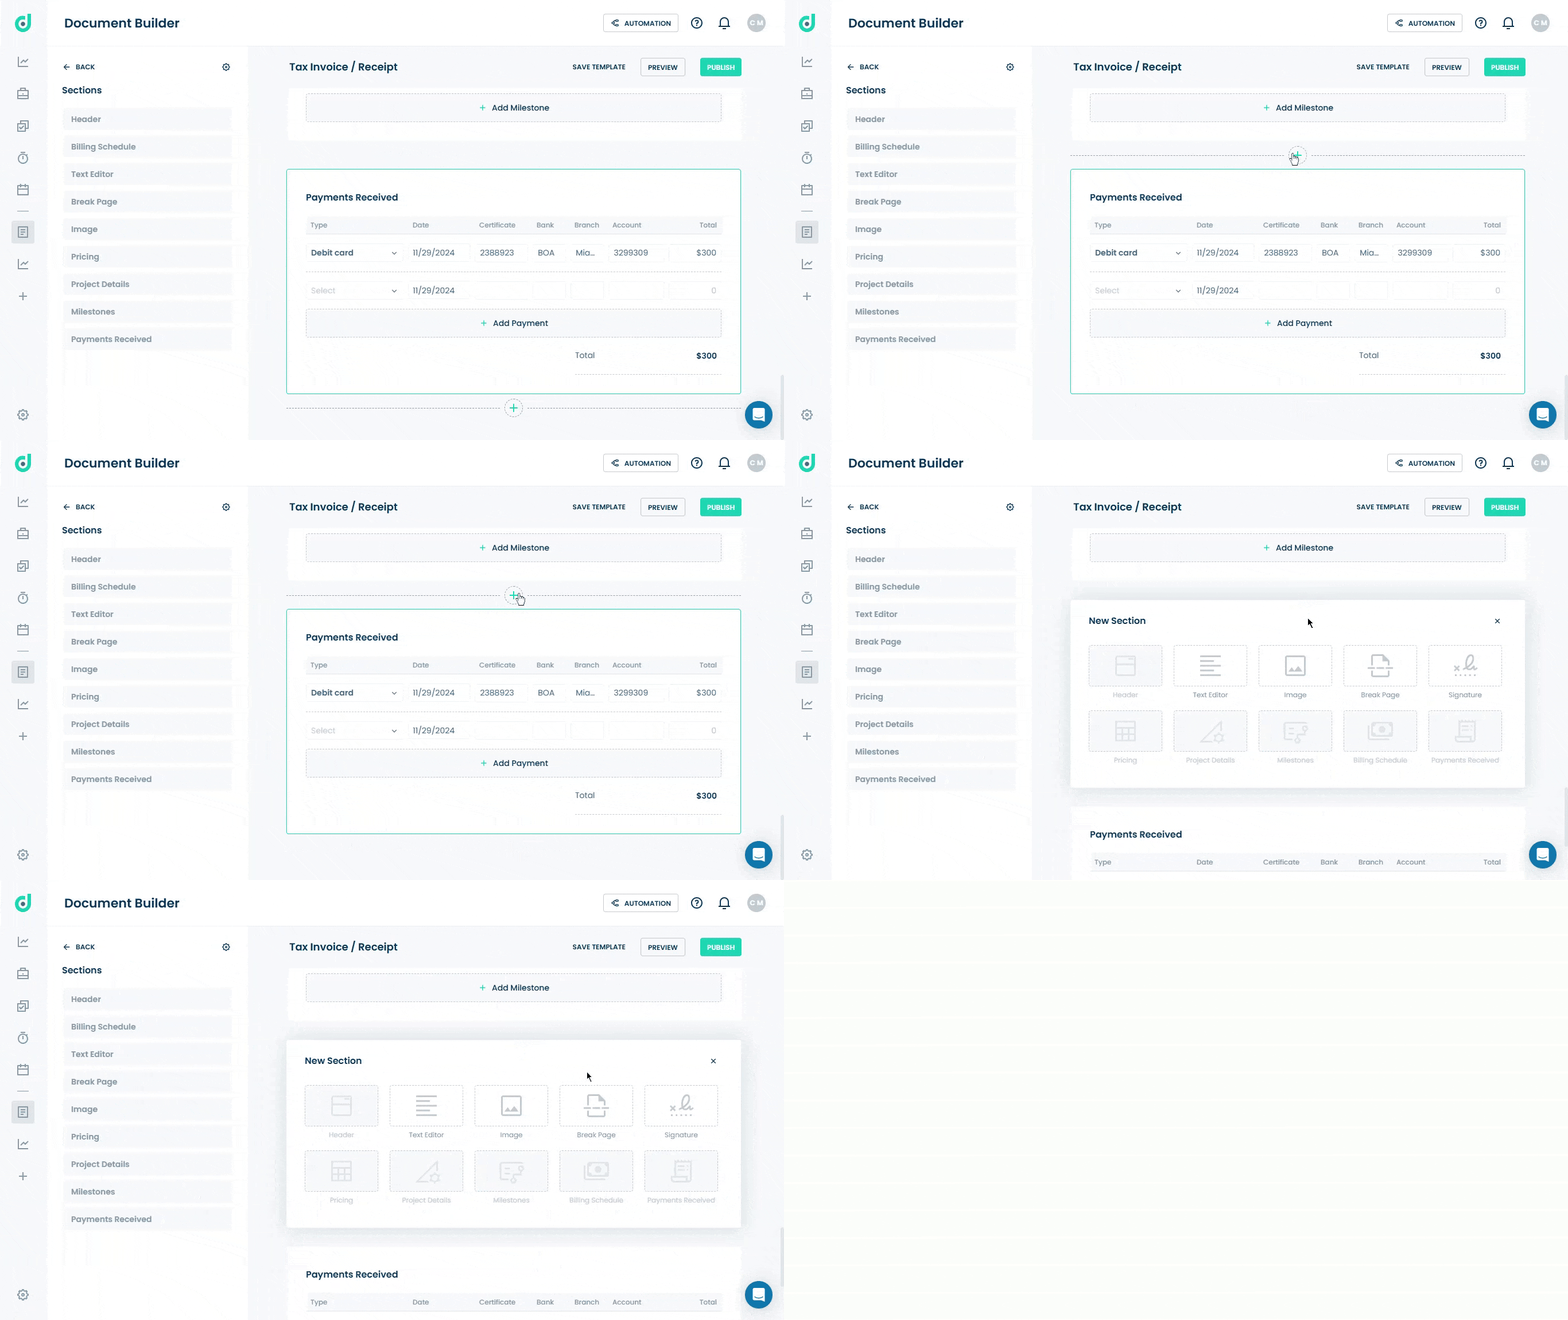
Step 1: In the document builder page, click on the “+” icon in the middle of the document to add a new section.

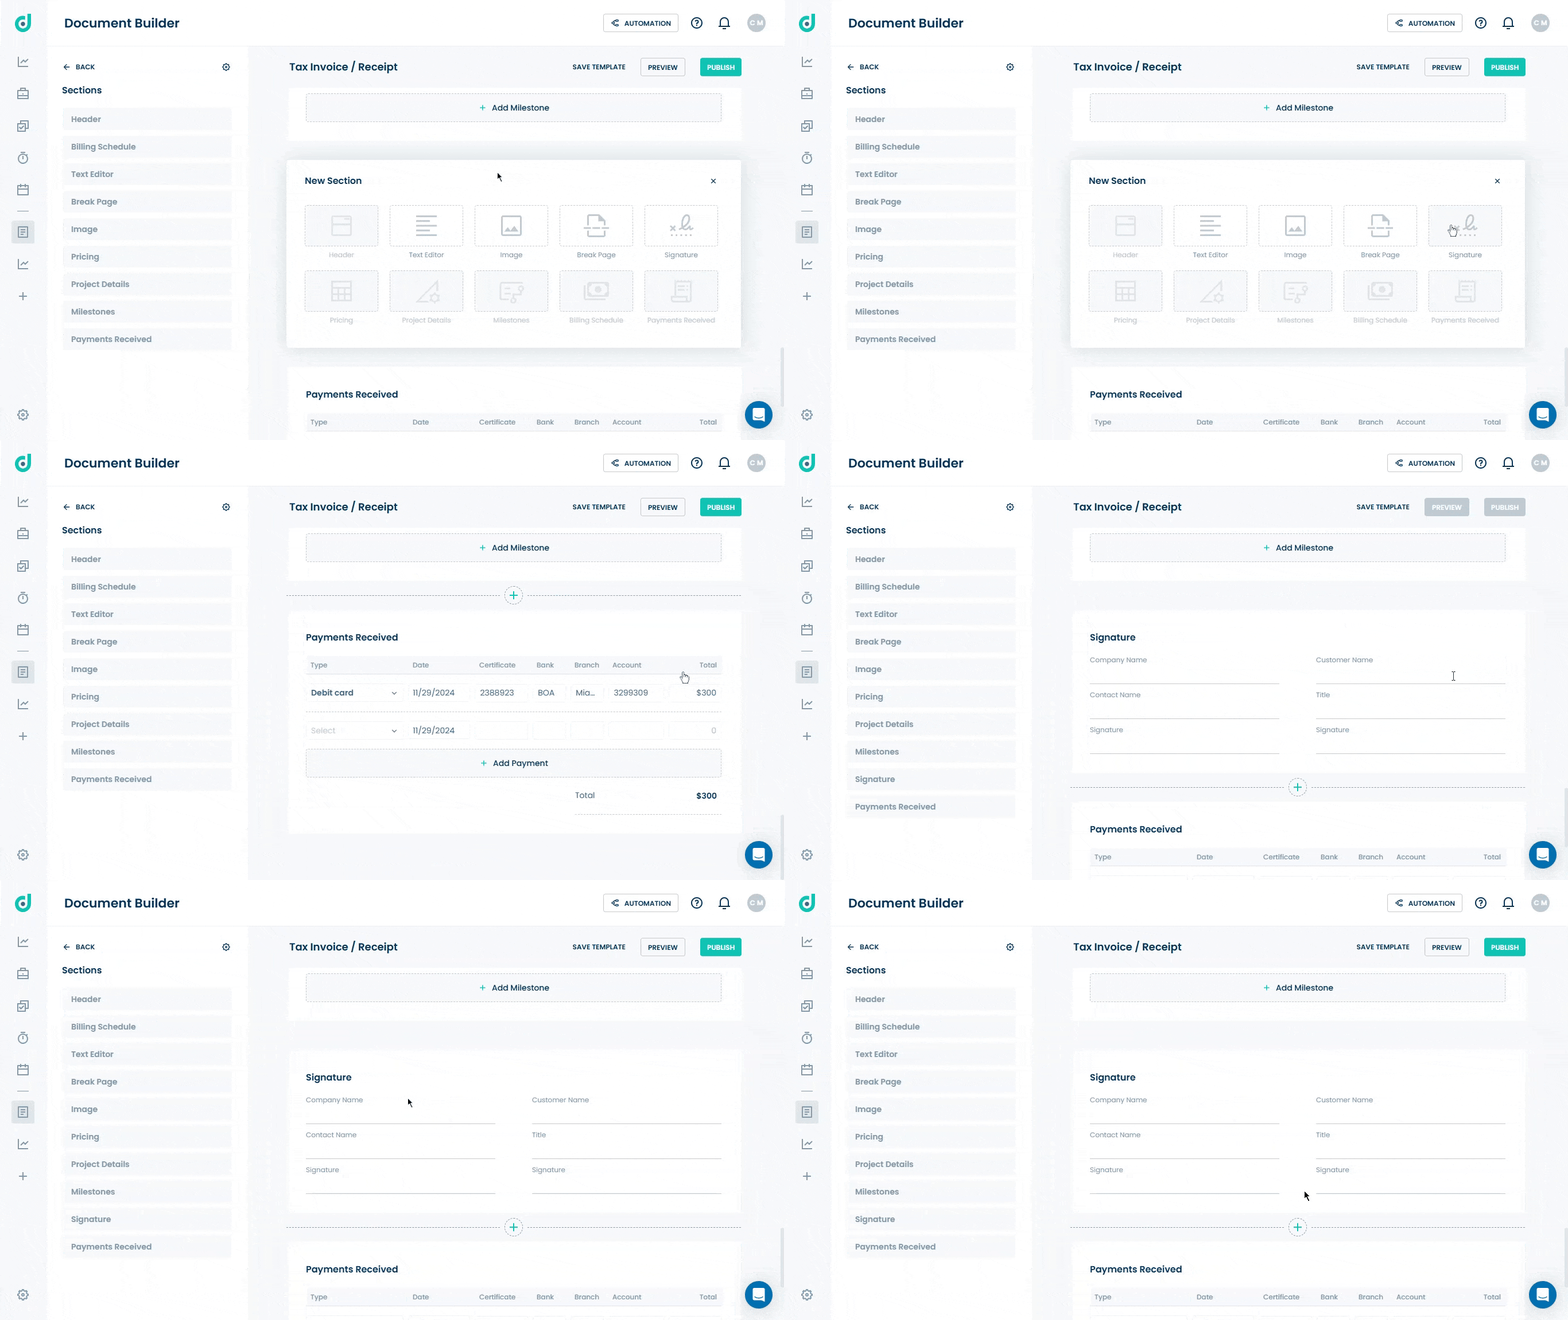
Step 2: Select the Signature option from the new sections.

Use Signature
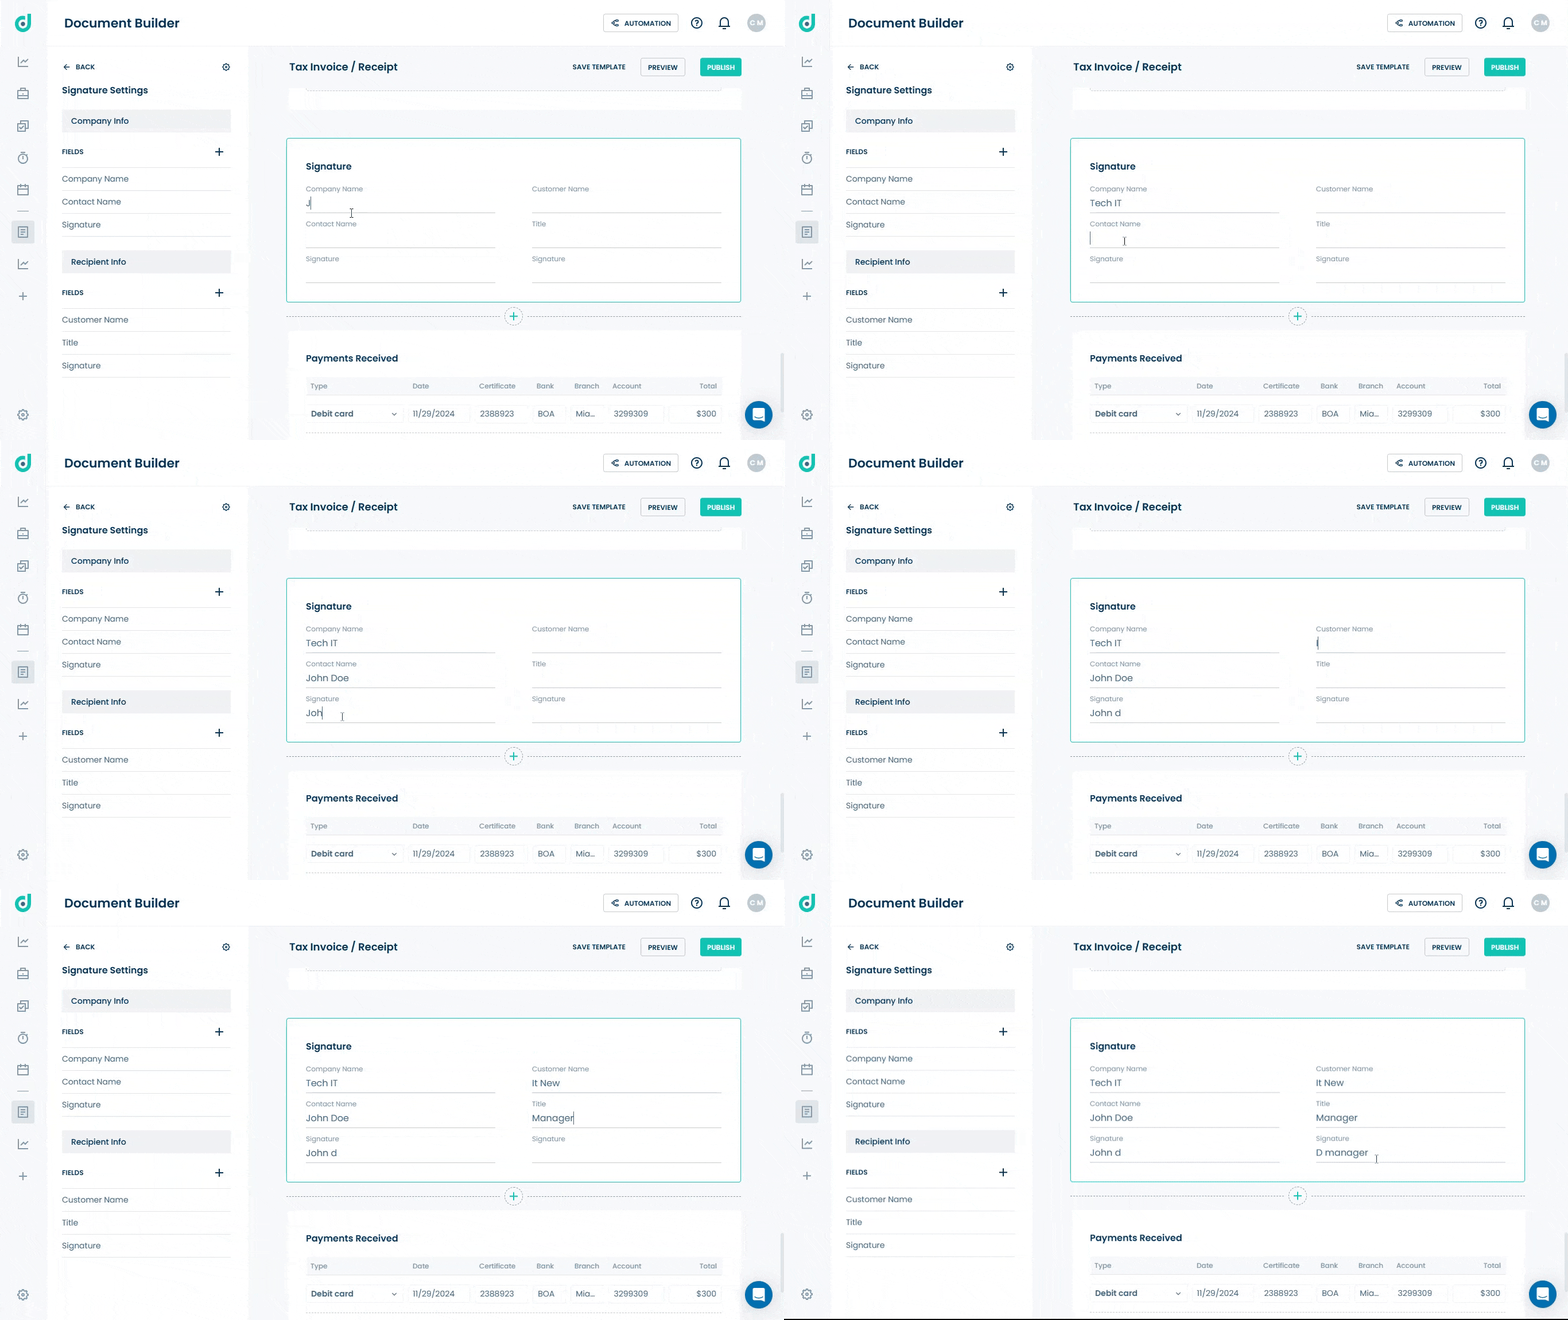
Allows you to authorize the document by including signatures and key details of both parties (the company & the customer).
| Categories | Fields | Description |
| Company Info. | Company name | Enter the name of the company issuing the document. |
| Contact name | Name of the person representing the company. | |
| Signature | Signature of the company representative. | |
| Recipient Info. | Customer name | Enter the name of the customer receiving the document. |
| Title | Designation or Role of the customer (e.g. Manager). | |
| Signature | Signature of the customer. |

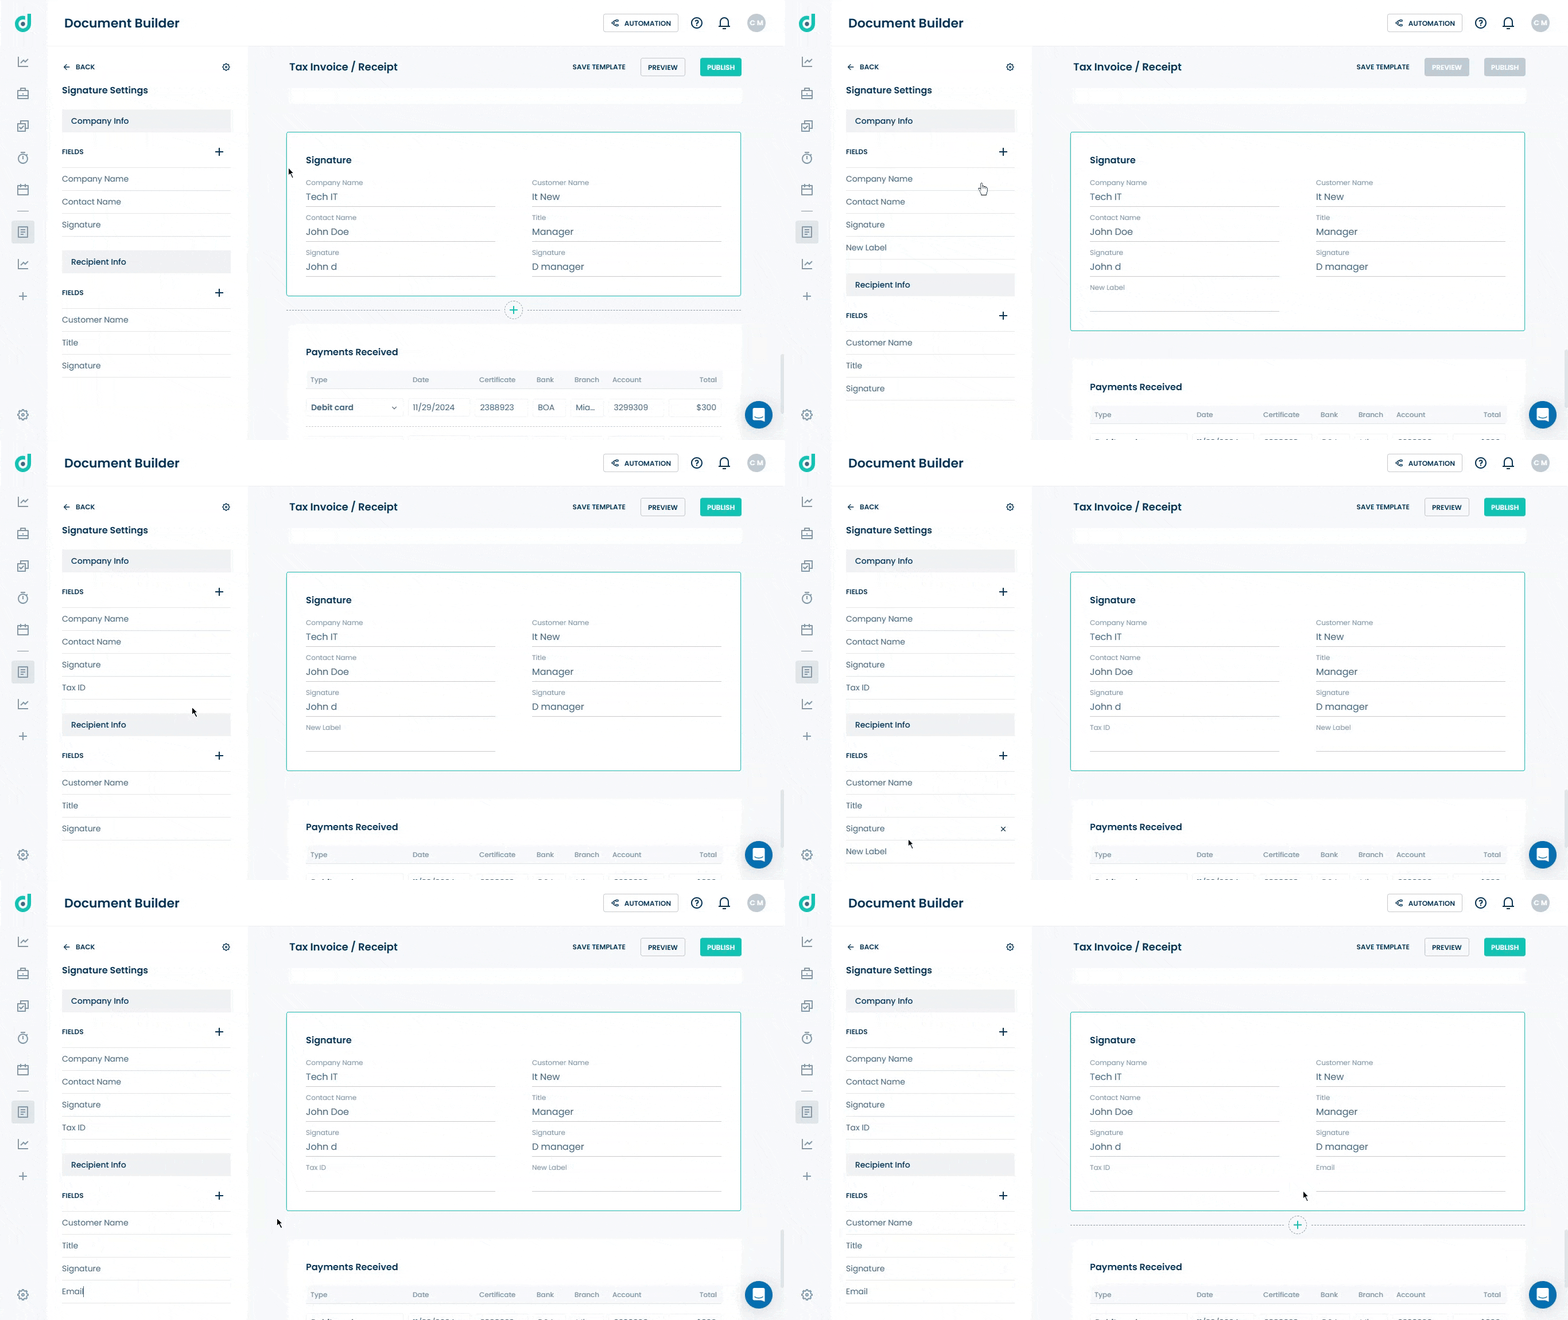
You can customize the signature settings by adding new fields or removing existing ones in both the Company Info and Recipient Info sections.


