OneDeck Help Center
How to Use Pricing
Once the document is added in OneDeck, the document builder simplifies managing and organizing budget details for your documents. You can add individual items or grouped packages, specify quantities, unit measurements, and prices, and let the system automatically calculate totals.
In this documentation, we’ll walk you through the steps for using pricing.
Let’s get started 🚀
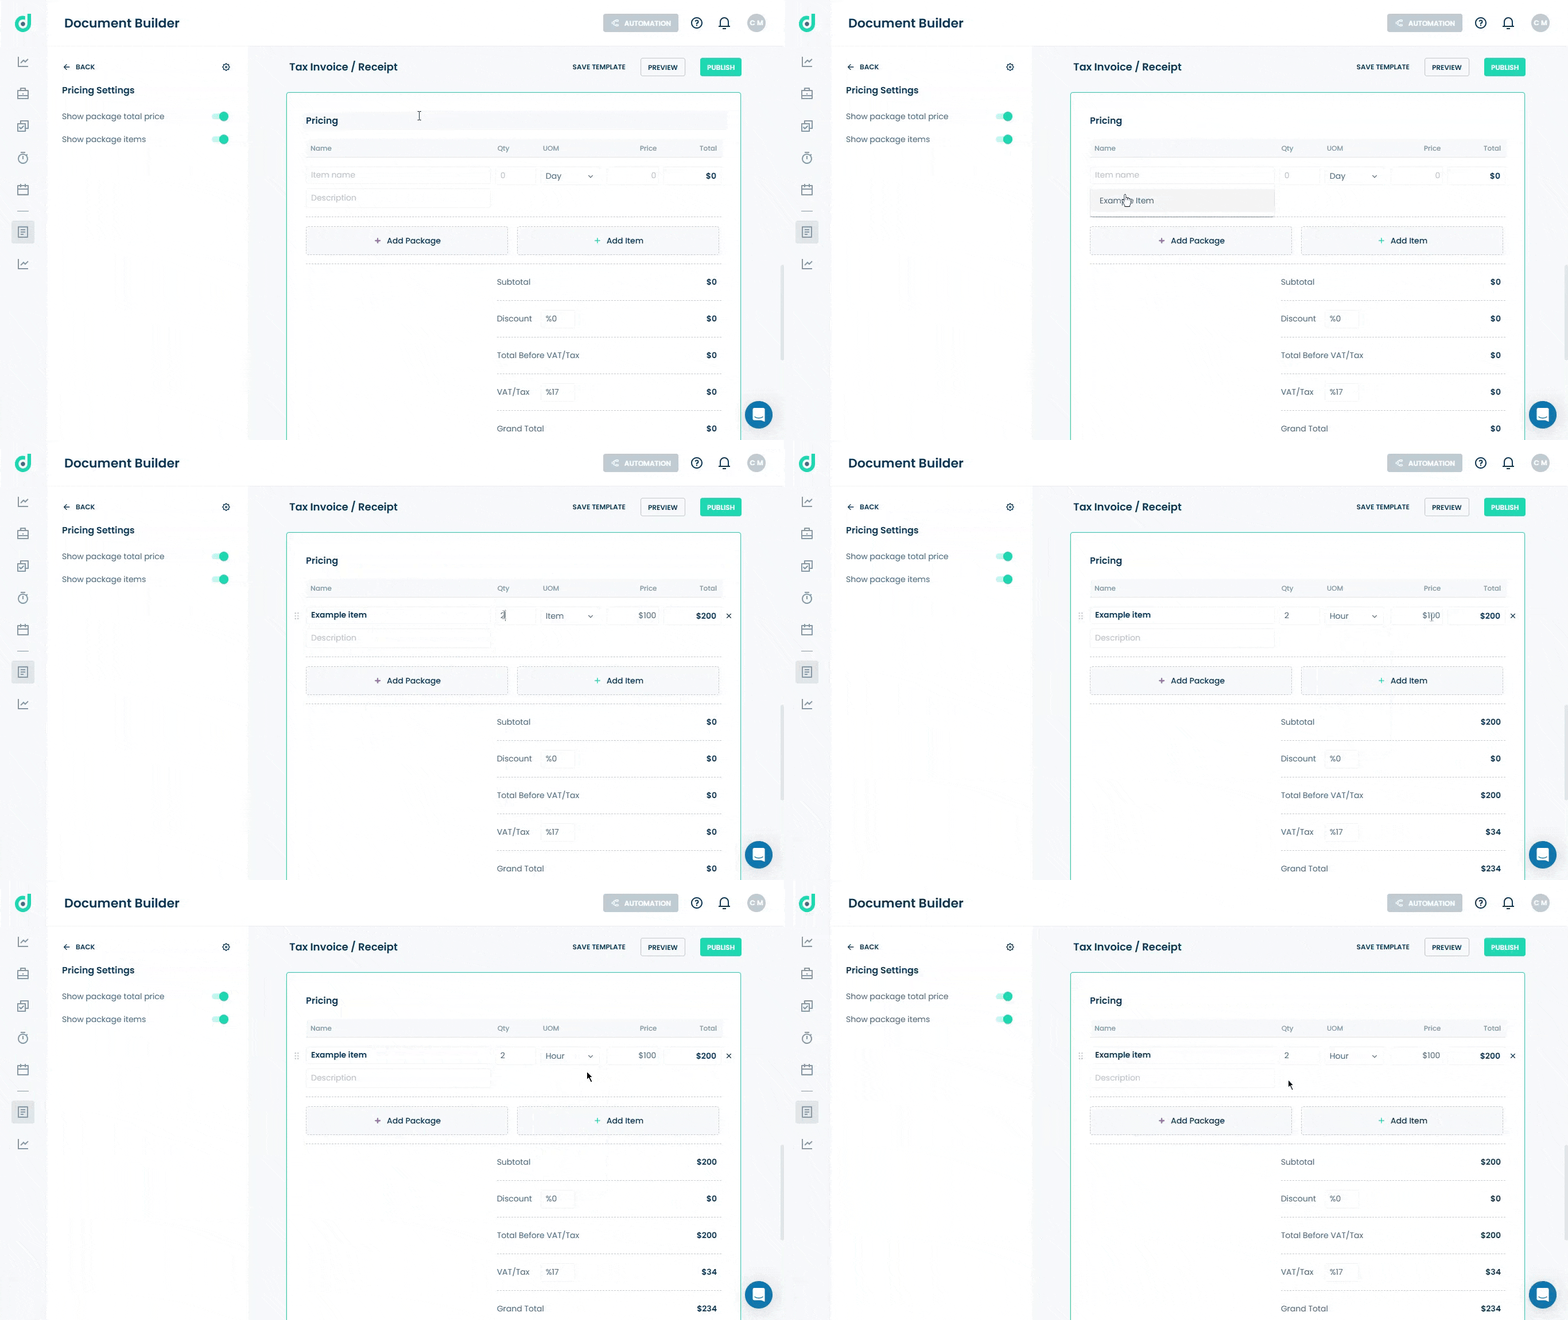
Step 1: Enter the following details for individual budget items.
| Fields | Description |
| Name | The name of the Item or select from the added budget item. |
| Qty | Quantity of the item being billed. |
| UOM | Unit of Measure, selectable from a dropdown (e.g., Hour, Day, Week). |
| Price | Price per Unit. |
| Total | Automatically calculated as (Qty x Price). |
| Description | Provide additional details or a description of the item. |

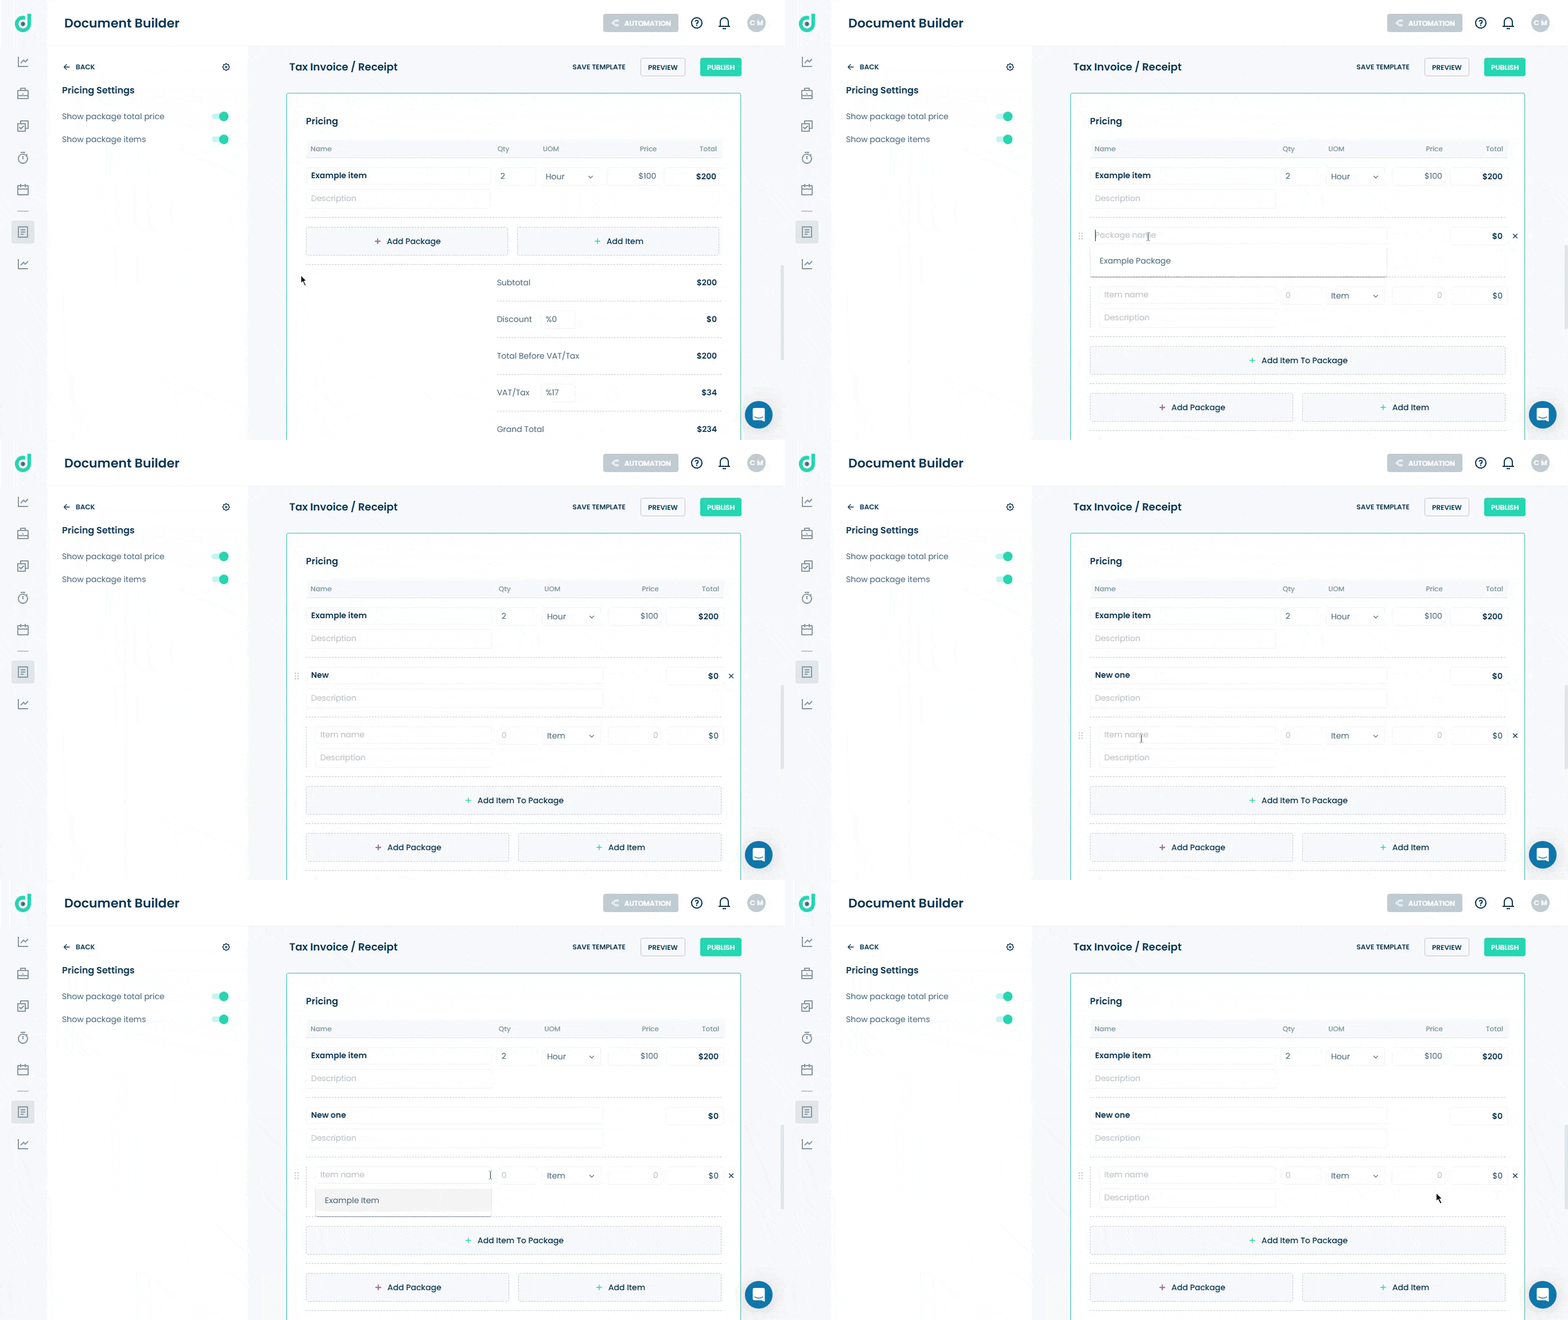
Step 2: Add a package with grouped items or add more individual items with details like name, quantity, unit of measure (UOM), price per unit, and total cost.

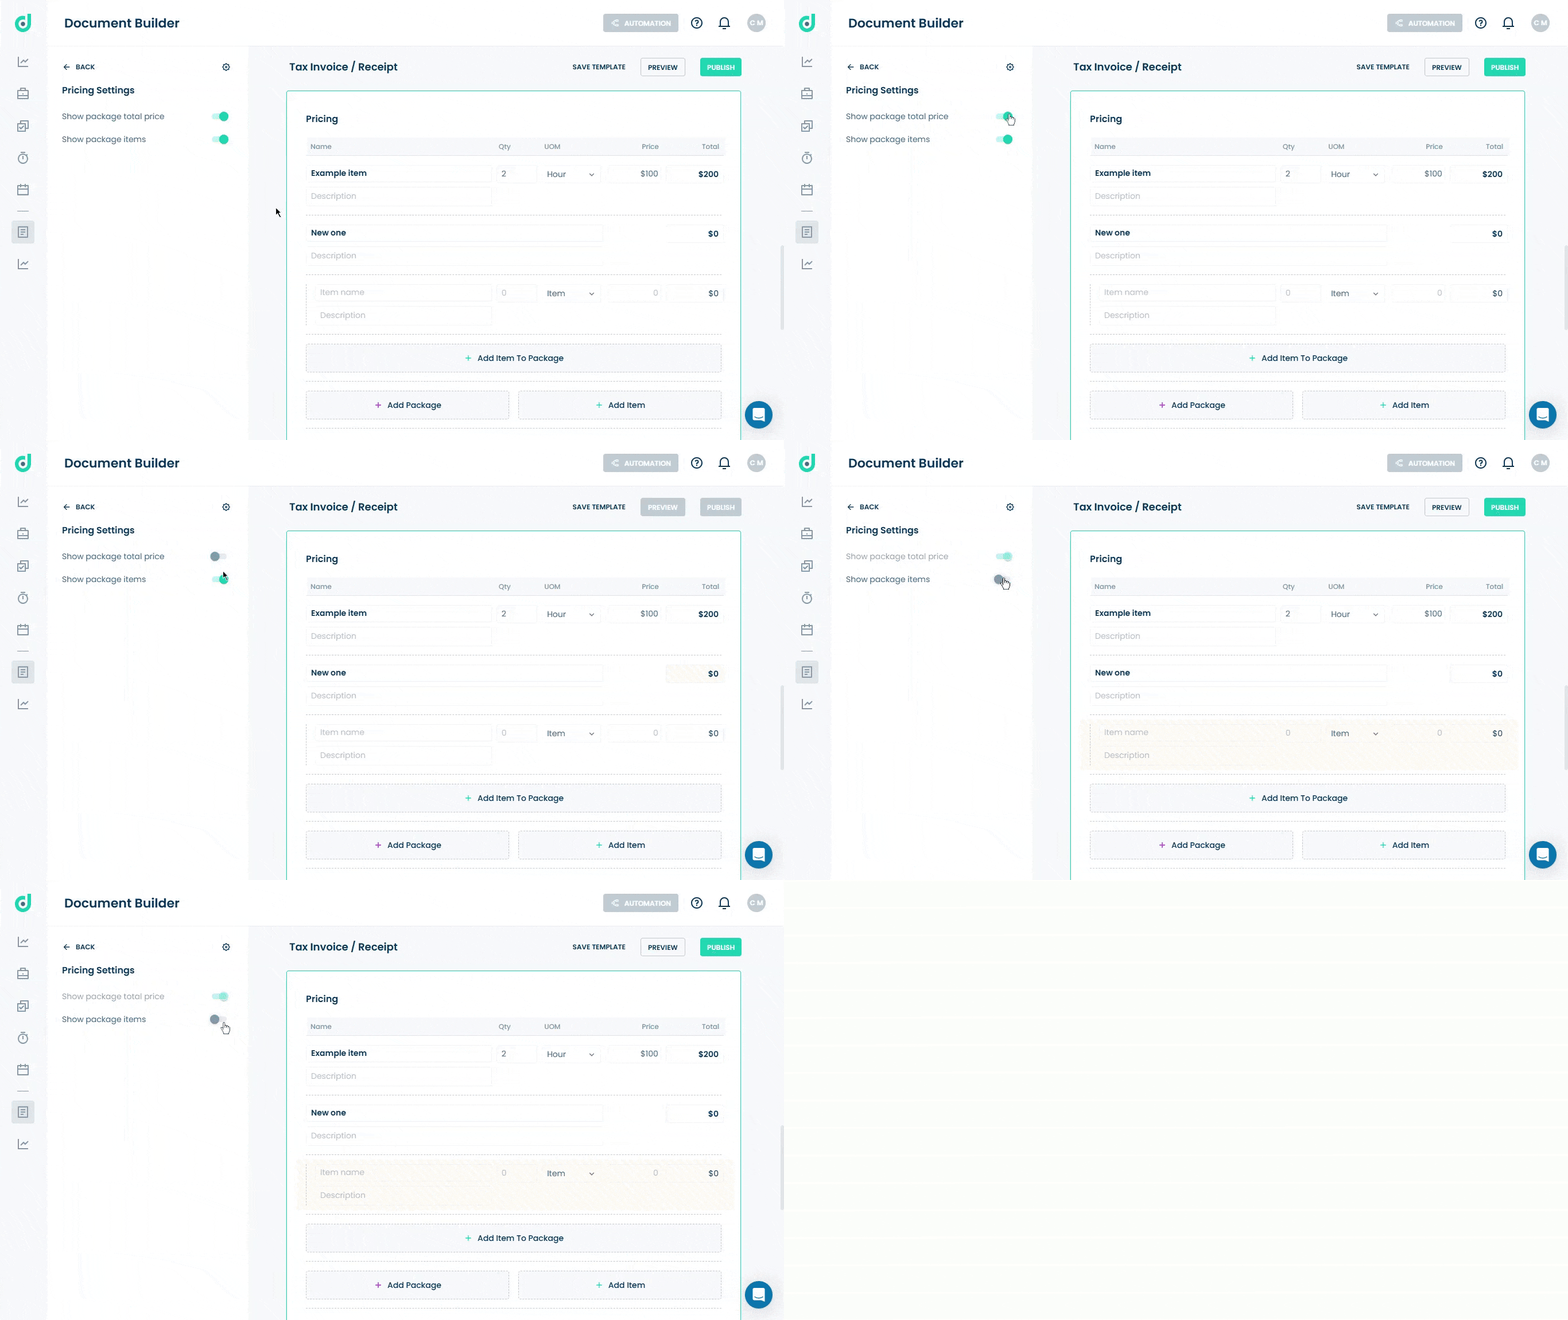
Toggles the visibility of the following pricing package settings:
| Pricing settings | Description |
| Show the package's total price | Total price for packages added to the document. |
| Show package items | Individual items within a package. |

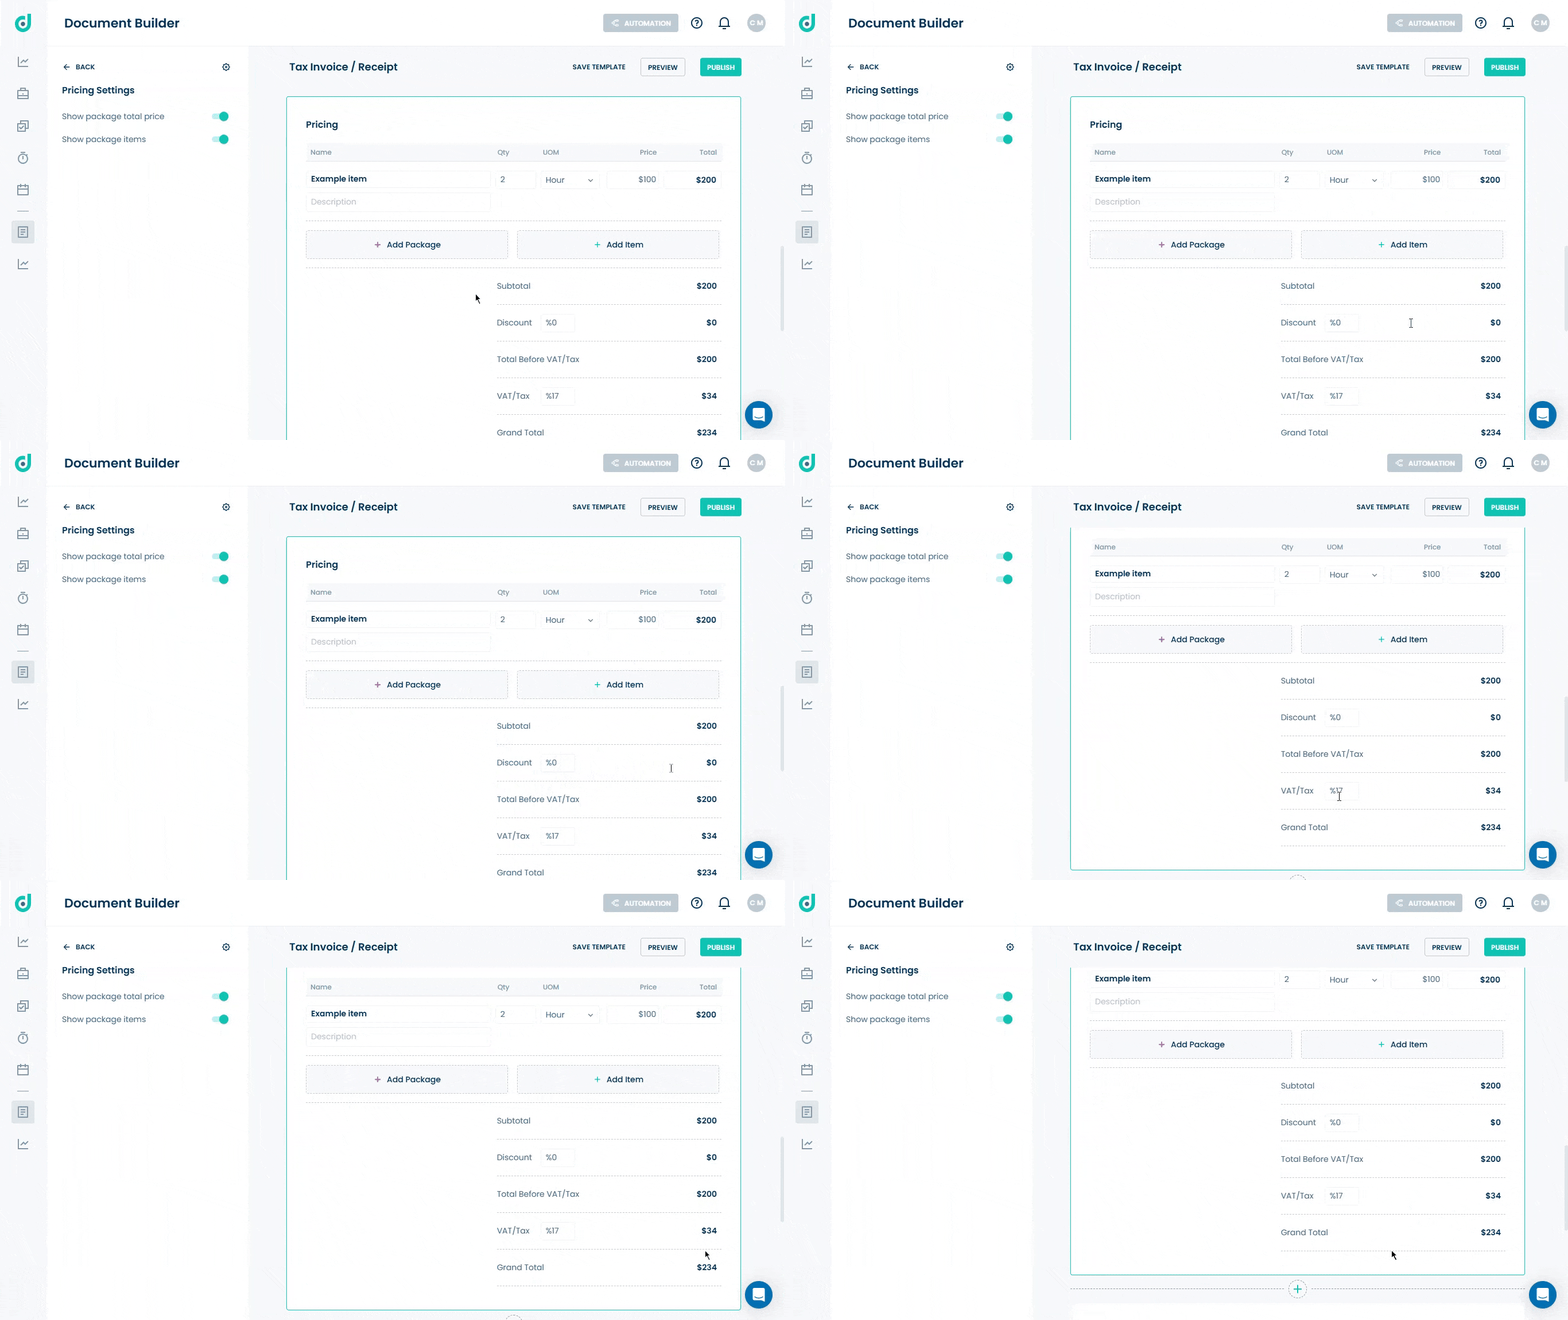
OneDeck simplifies billing calculations for the following fields:
| Fields | Description |
| Subtotal | A sum of all item or package totals before any discounts or taxes. |
| Discount | Allows entering a percentage-based discount to be deducted from the subtotal. |
| Total Before VAT/Tax | Displays the subtotal after applying any discounts. |
| VAT/TAX | It allows specifying a tax percentage (e.g., 17%). The amount is calculated automatically based on the percentage and added to the total. |
| Grand Total | The final payable amount after discounts and taxes. |


