OneDeck Help Center
How to use Payments Received
Once the document is added in OneDeck, you can efficiently record and manage details of client payments or transactions. This simplifies the tracking of client payments, ensuring transparency and accuracy in financial records.
In this documentation, we’ll walk you through the steps on how to:
- Add Payments Received
- Use Payments Received
Let’s get started 🚀
Add Payments Received
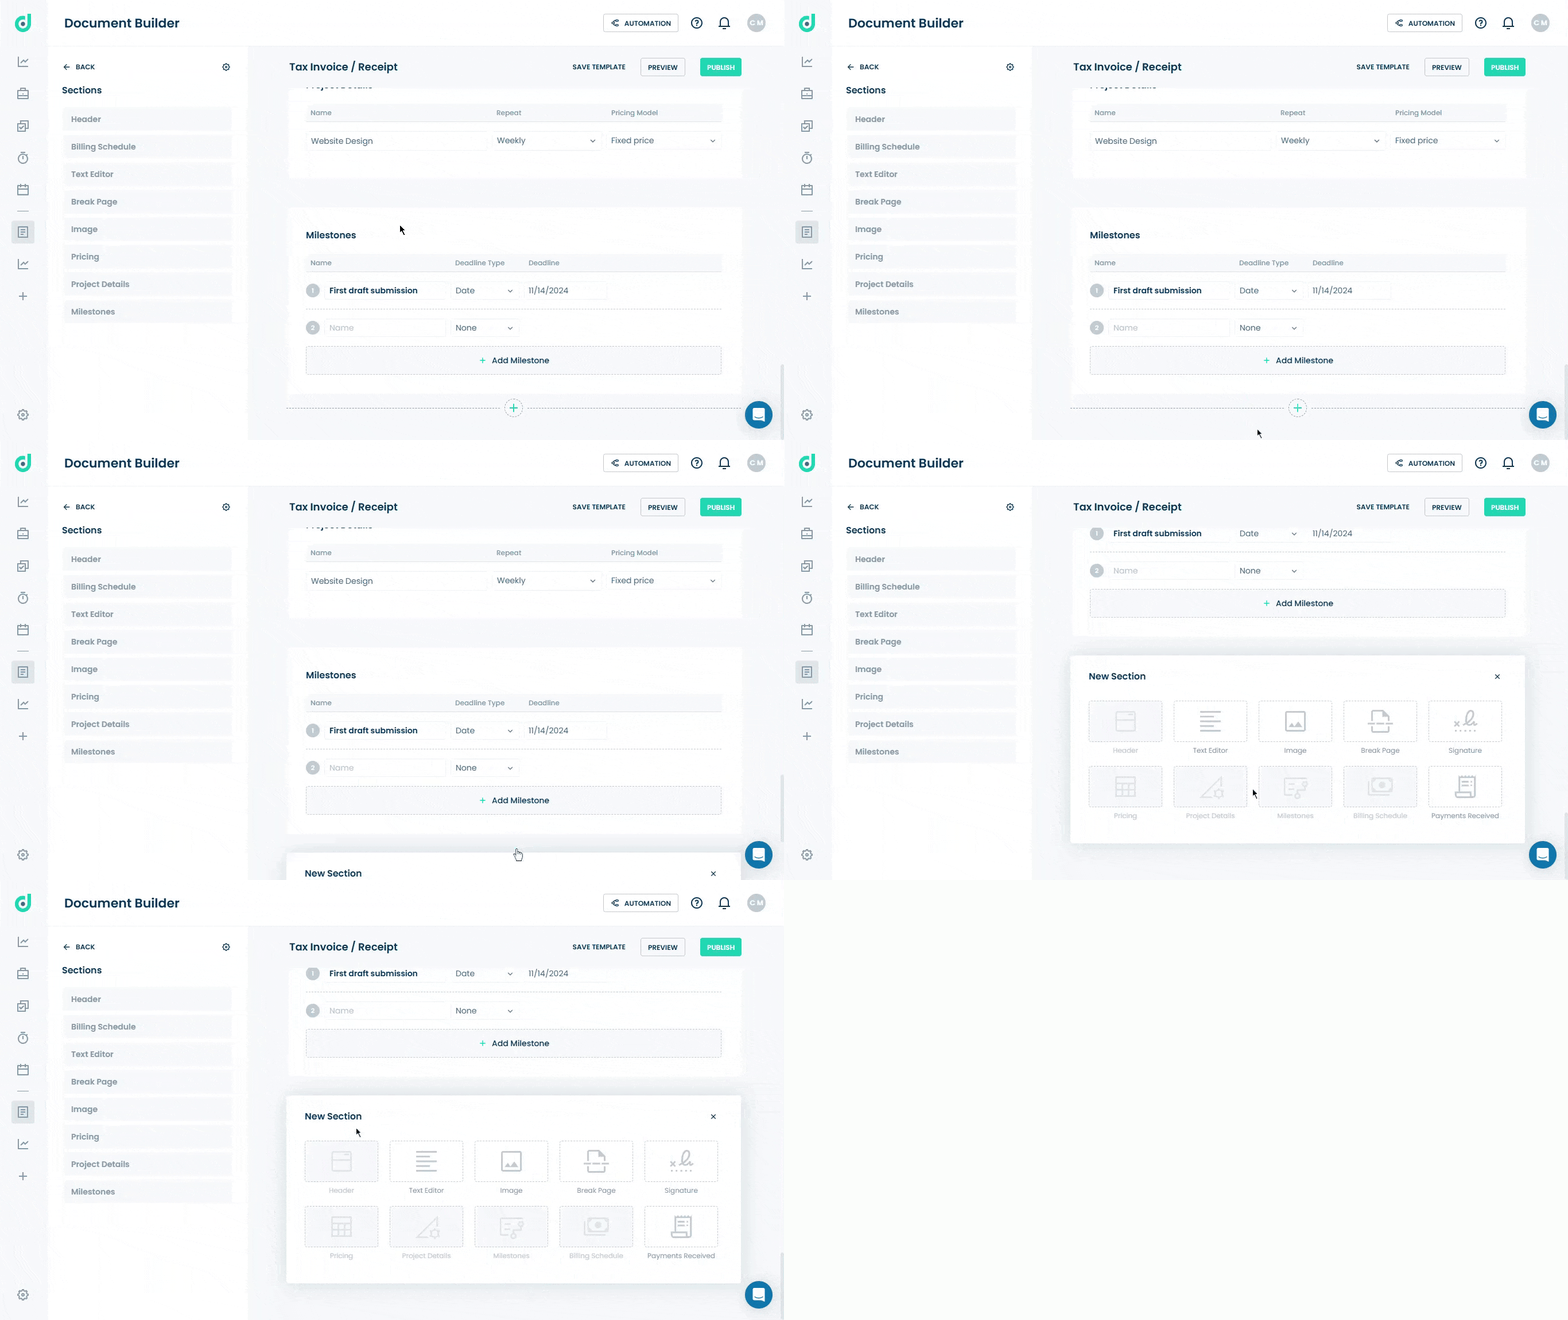
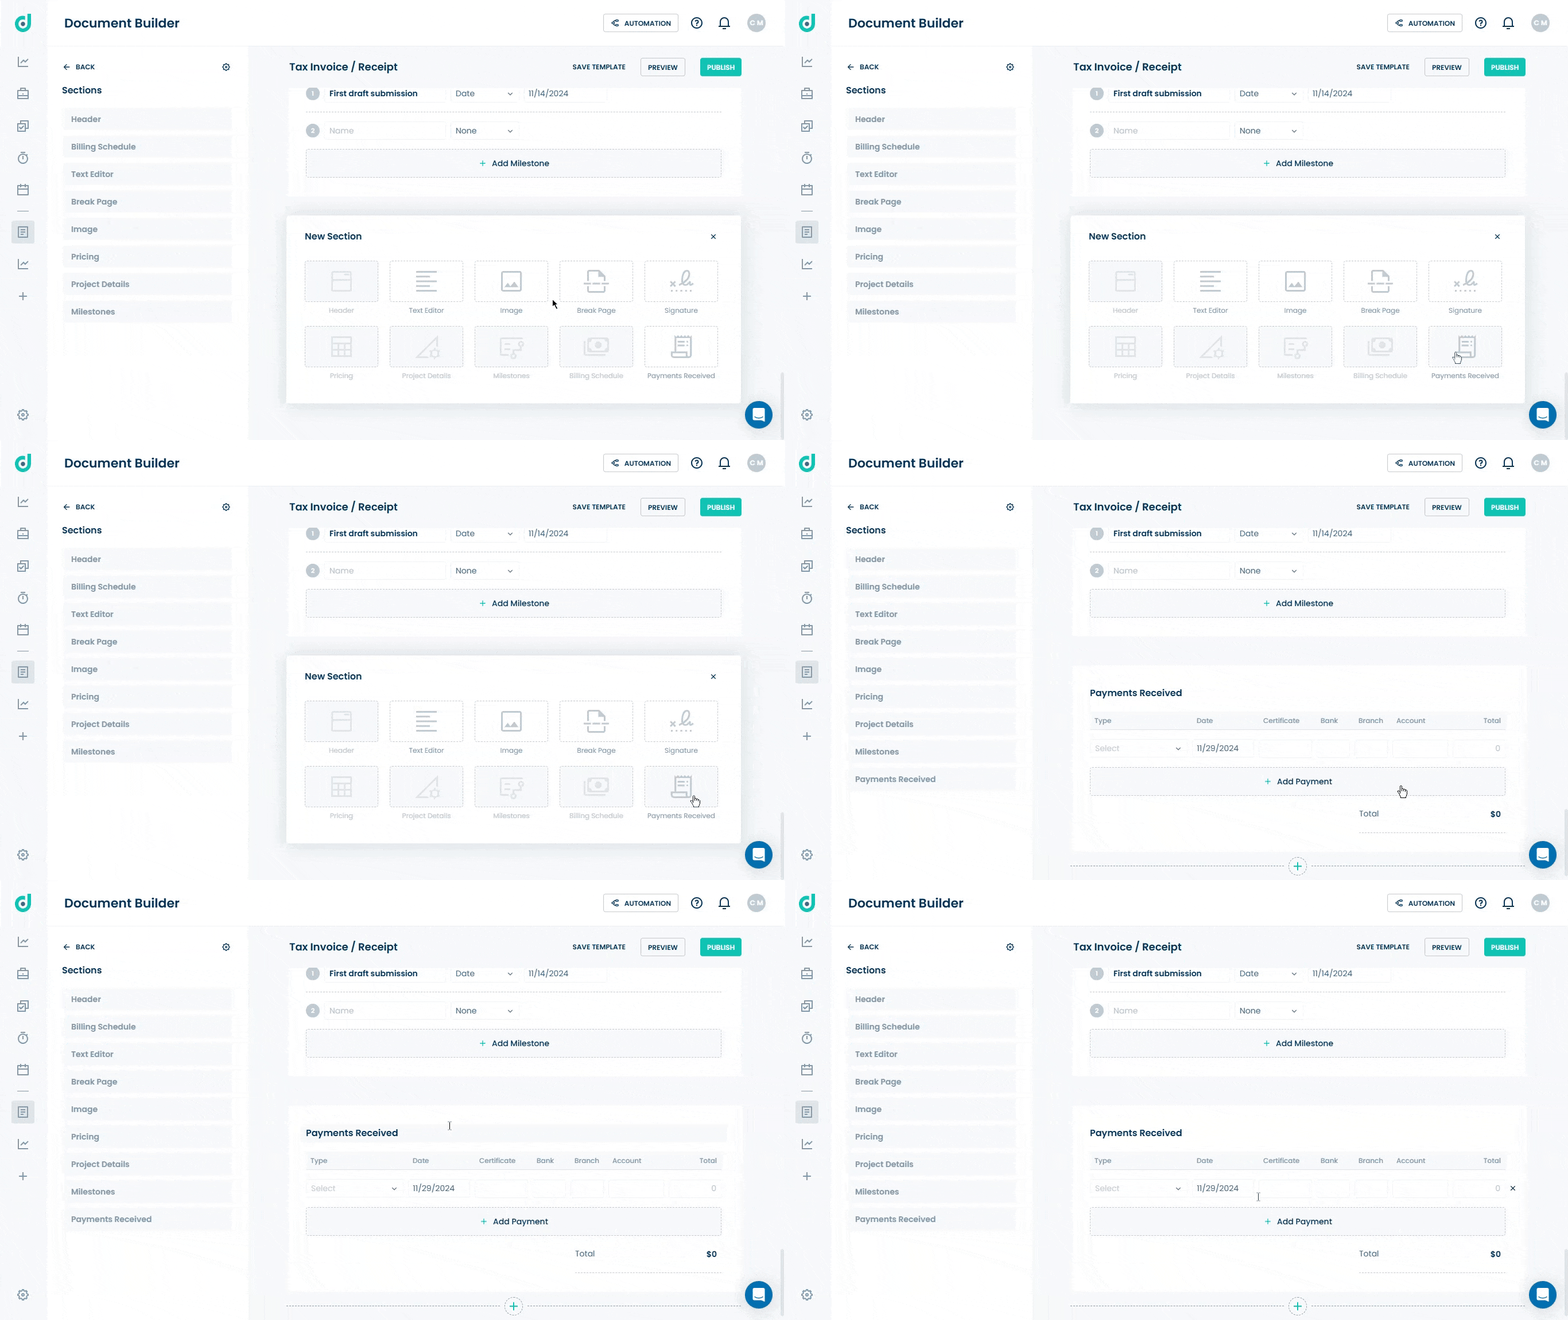
Step 1: In the Document Builder page, click on the “+” icon in the middle of the document to add a new section.

Step 2: Select the Payments Received option from the new sections.

Use Payments Received
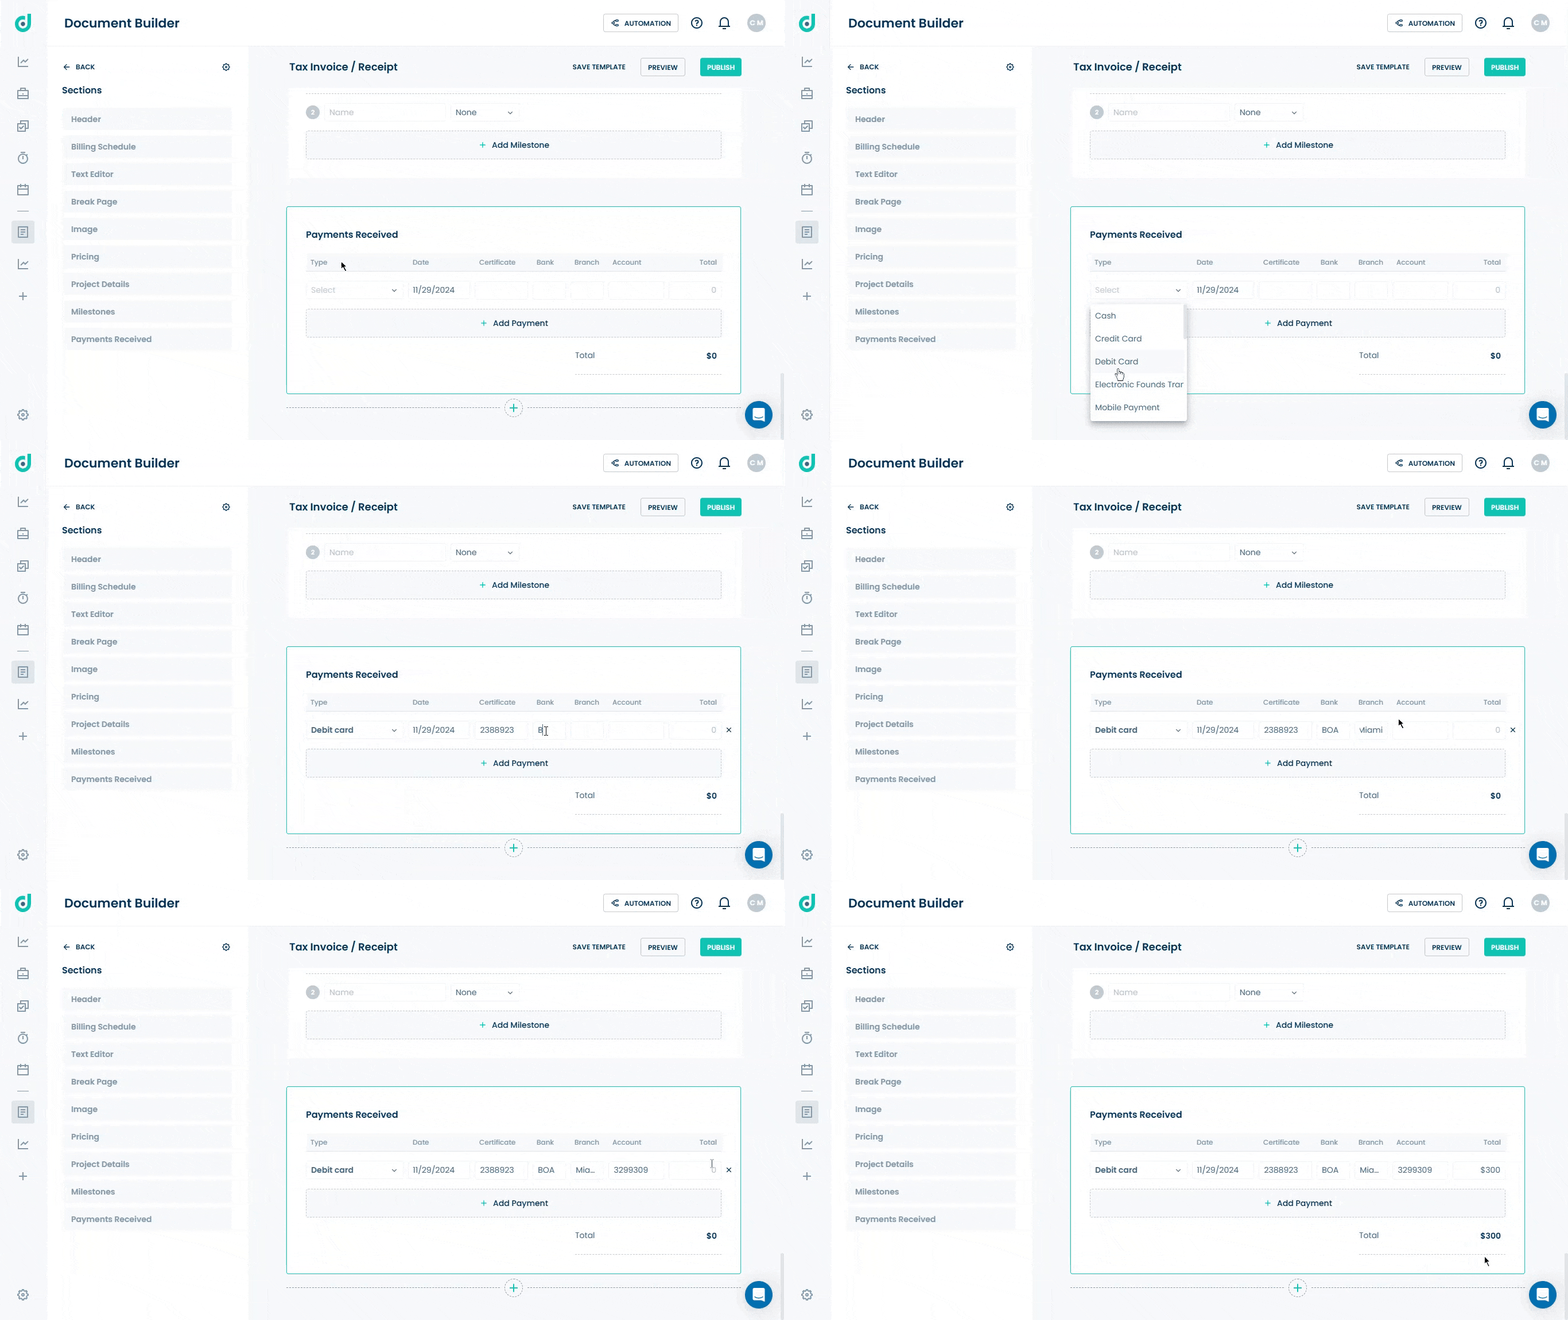
Allows you to enter the following fields that help you record-keeping of payments made by clients.
| Fields | Description |
| Type | Dropdown menu to select the payment type (e.g., Cash, Credit card, Debit card, Check, Digital wallet, etc). |
| Date | A data picker to specify the payment date. |
| Certificate | Input a reference number or certificate associated with the payment. |
| Bank | Specify the bank involved in the transaction. |
| Branch | Provide the branch details of the bank. |
| Account | Input the account number used for the transaction. |
| Total | Record the total amount received. |
| Add Payment | Add additional payment entries to the list. |


