OneDeck Help Center
How to use Billing Schedule
Once the document is added in OneDeck, you can schedule the document billing by adding and setting up a billing schedule. This helps organize and display payment schedules, making it easier to communicate expectations with clients.
In this documentation, we’ll walk you through the steps on how to:
- Add Billing Schedule
- Use Billing Schedule
Let’s get started 🚀
Add Billing Schedule
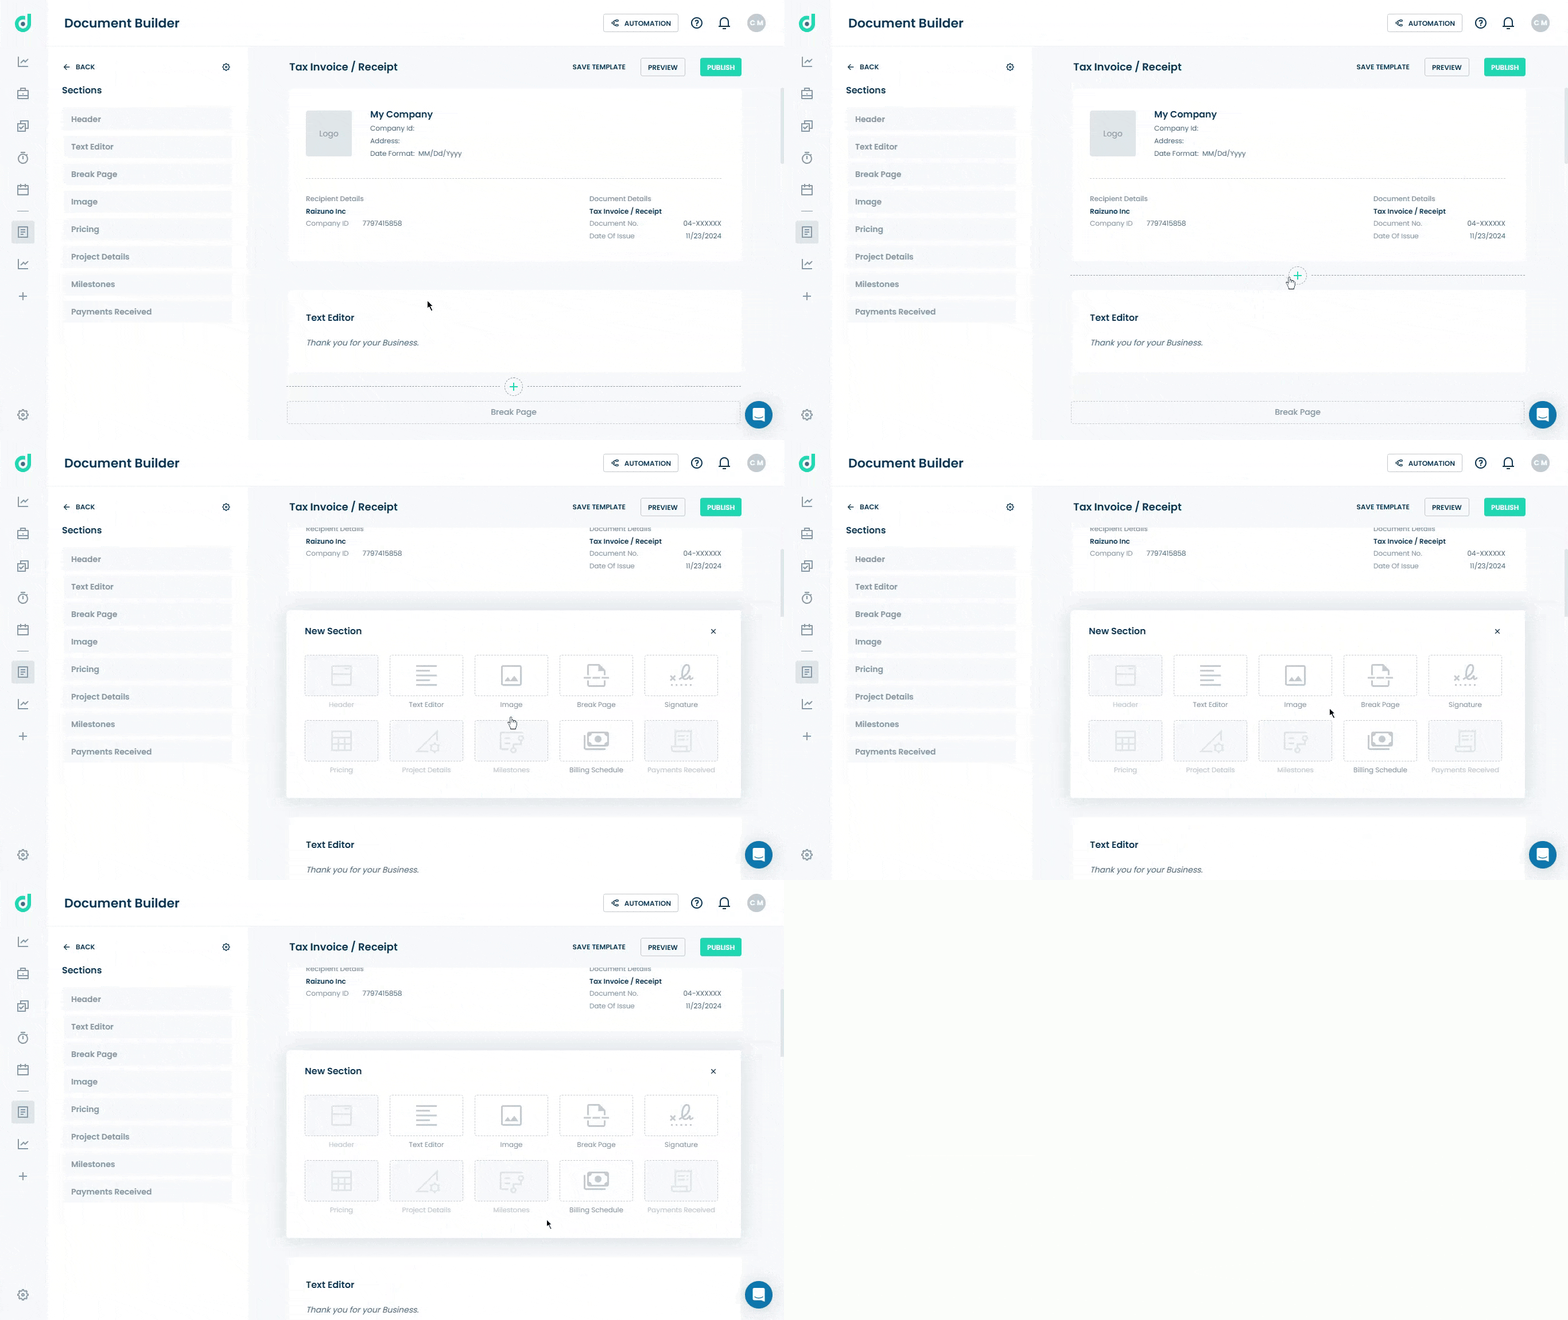
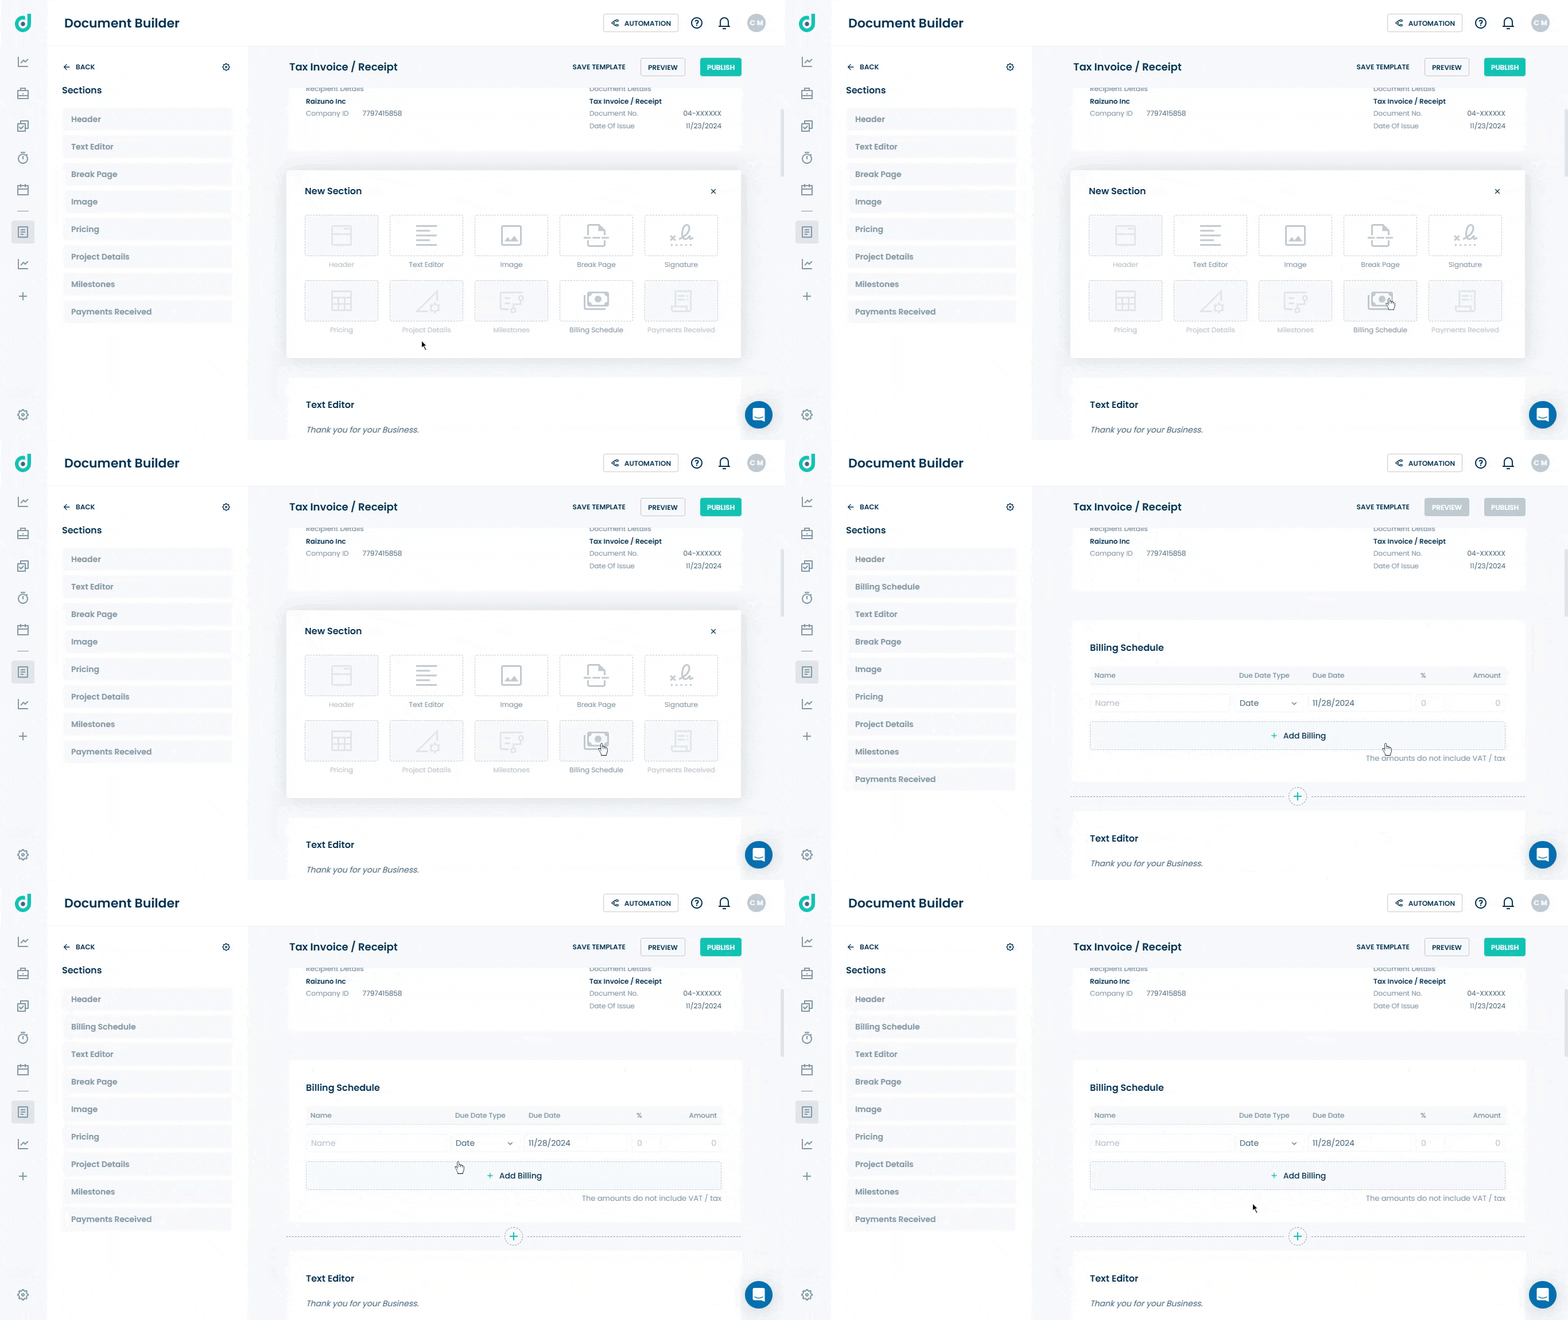
Step 1: In the Document Builder page, click on the “+” icon in the middle of the document to add a new section.

Step 2: Select the Billing Schedule option from the new sections.

Use Billing Schedule
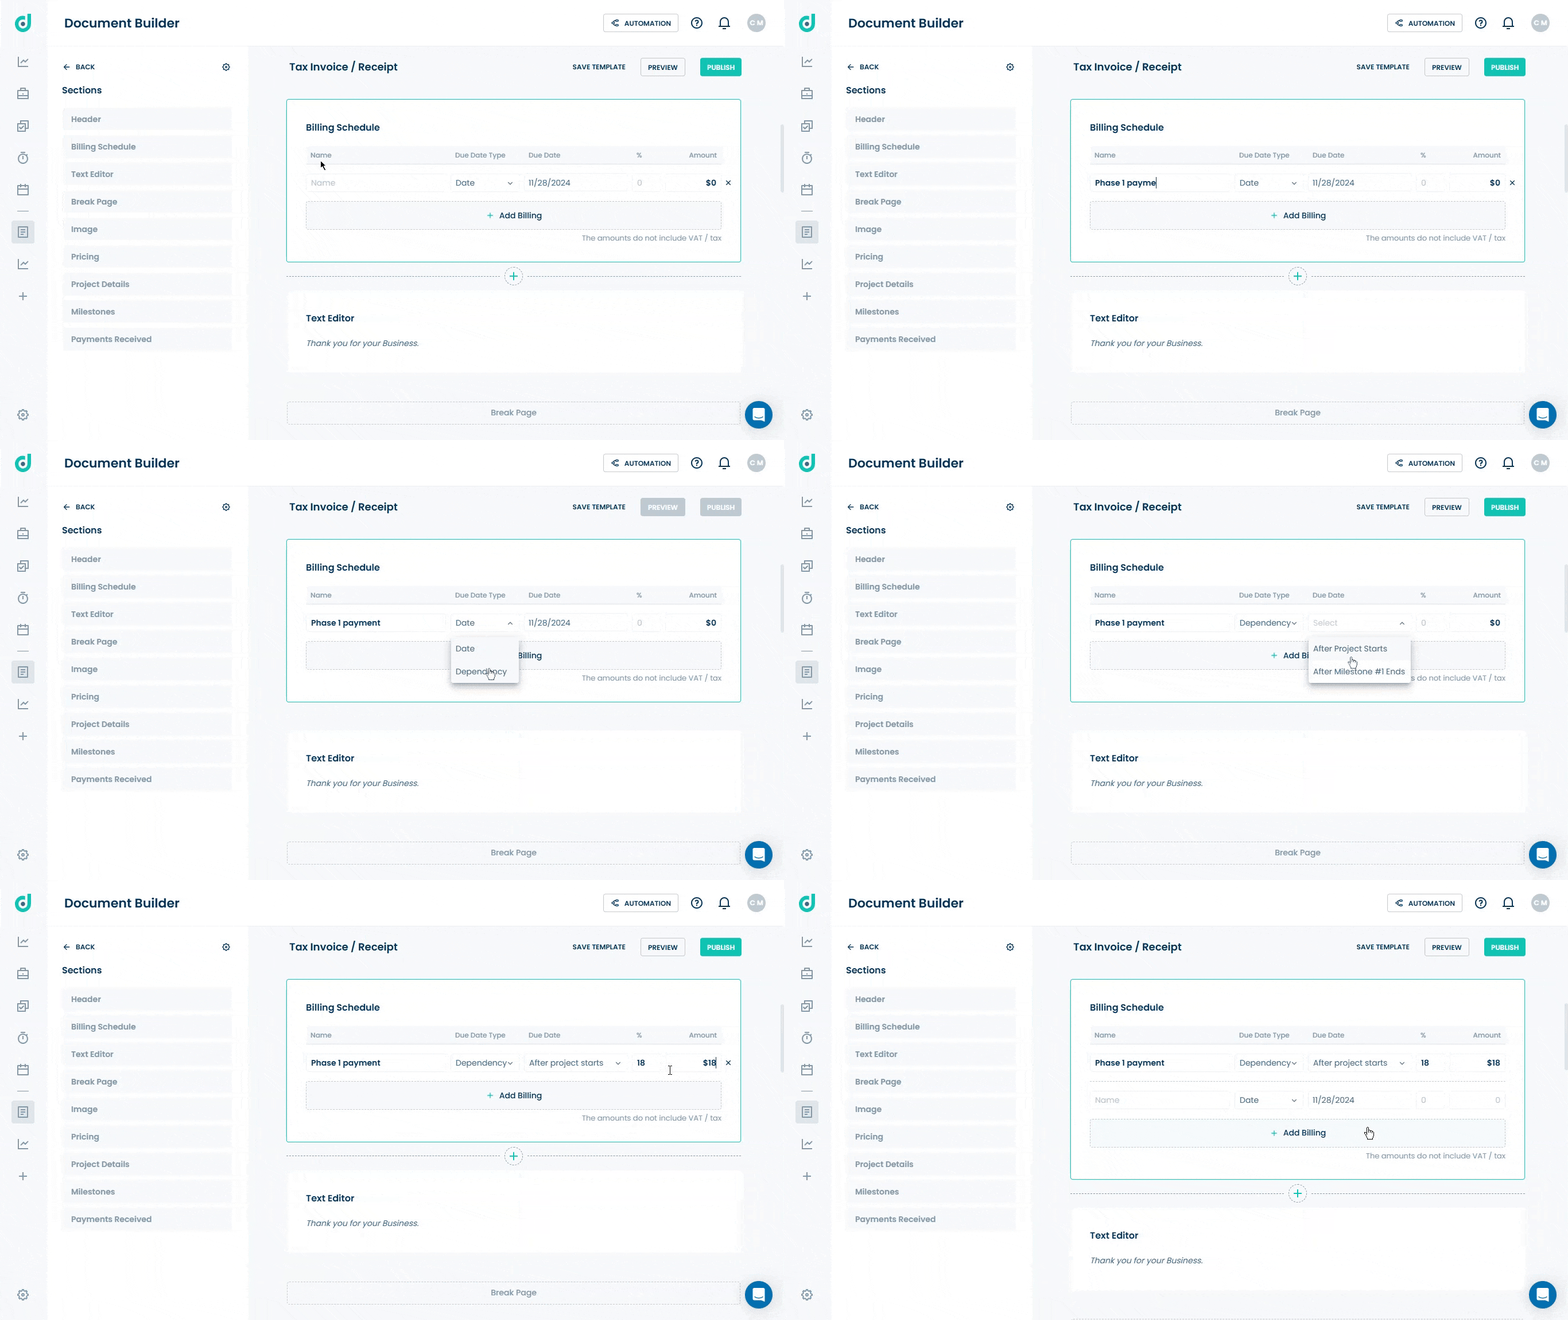
Allows you to set up and manage scheduled billing information within the document by providing values in the following fields:
| Fields | Description |
| Name | Specify the name or description of the billing item. |
| Due Date Type |
A drop-down menu to select the type of due date from:
|
| Due Date |
Provides a date picker to select the due date for the billing entry. If the data type chosen is “Dependency”, then you get options of “After Projects Start” or “After Milestone #X Ends” with all the milestones you’ve added to that document. |
| % (Percent) | Input the percentage of the total amount associated with this billing entry. |
| Amount | Specifies the monetary value for the billing item. |
| Add billing | Enables the addition of more billing entries to the schedule. |
Note: The amounts do not include VAT/tax.


