OneDeck Help Center
How to Manage Board Settings
OneDeck empowers you to manage board settings, enabling you to customize fields tailored to your specific needs. With flexible board settings, you can create boards that reflect your team’s workflows, track record progress, and ensure timely updates.
In this documentation, we’ll walk you through the steps to:
- Navigation
- Board Details
- Fields Customization
- Delete Board
Let’s get started 🚀
Navigation
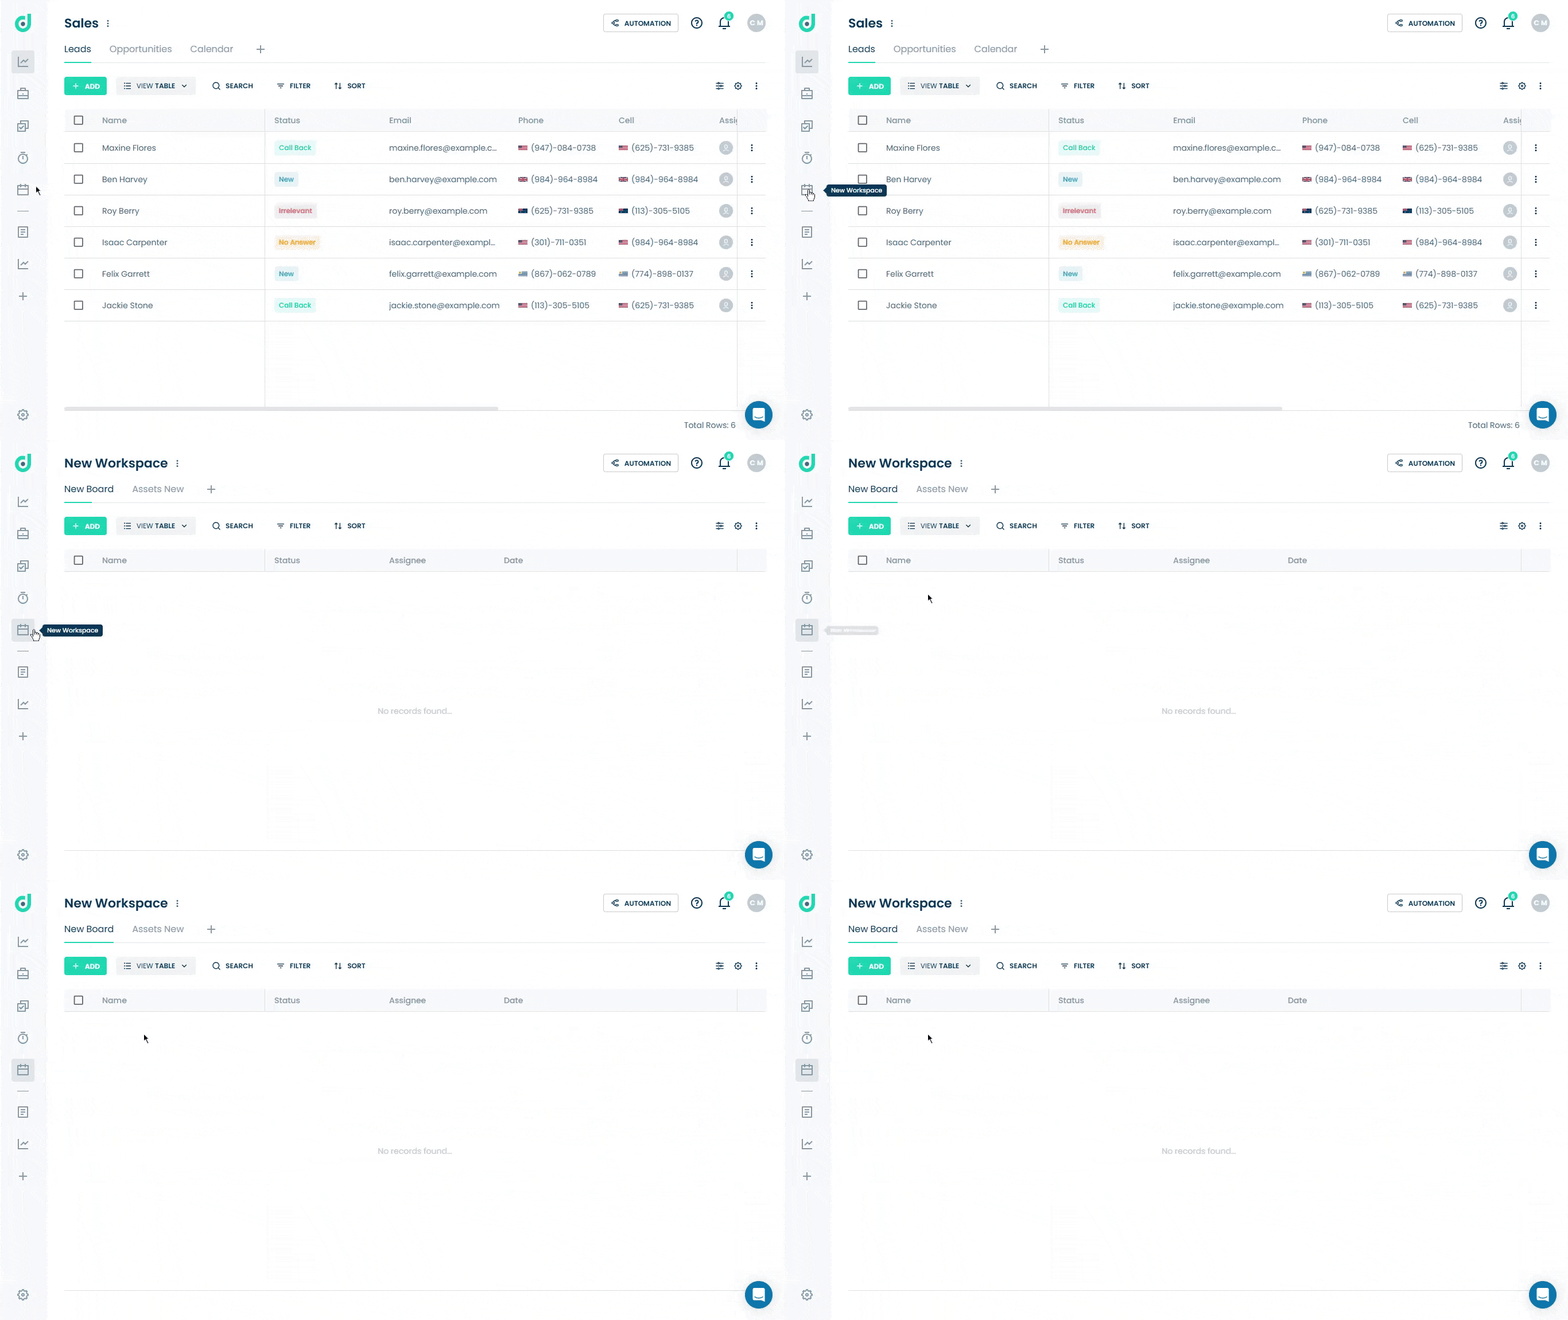
Step 1: Click on the Workspace button from the side navigation menu bar.
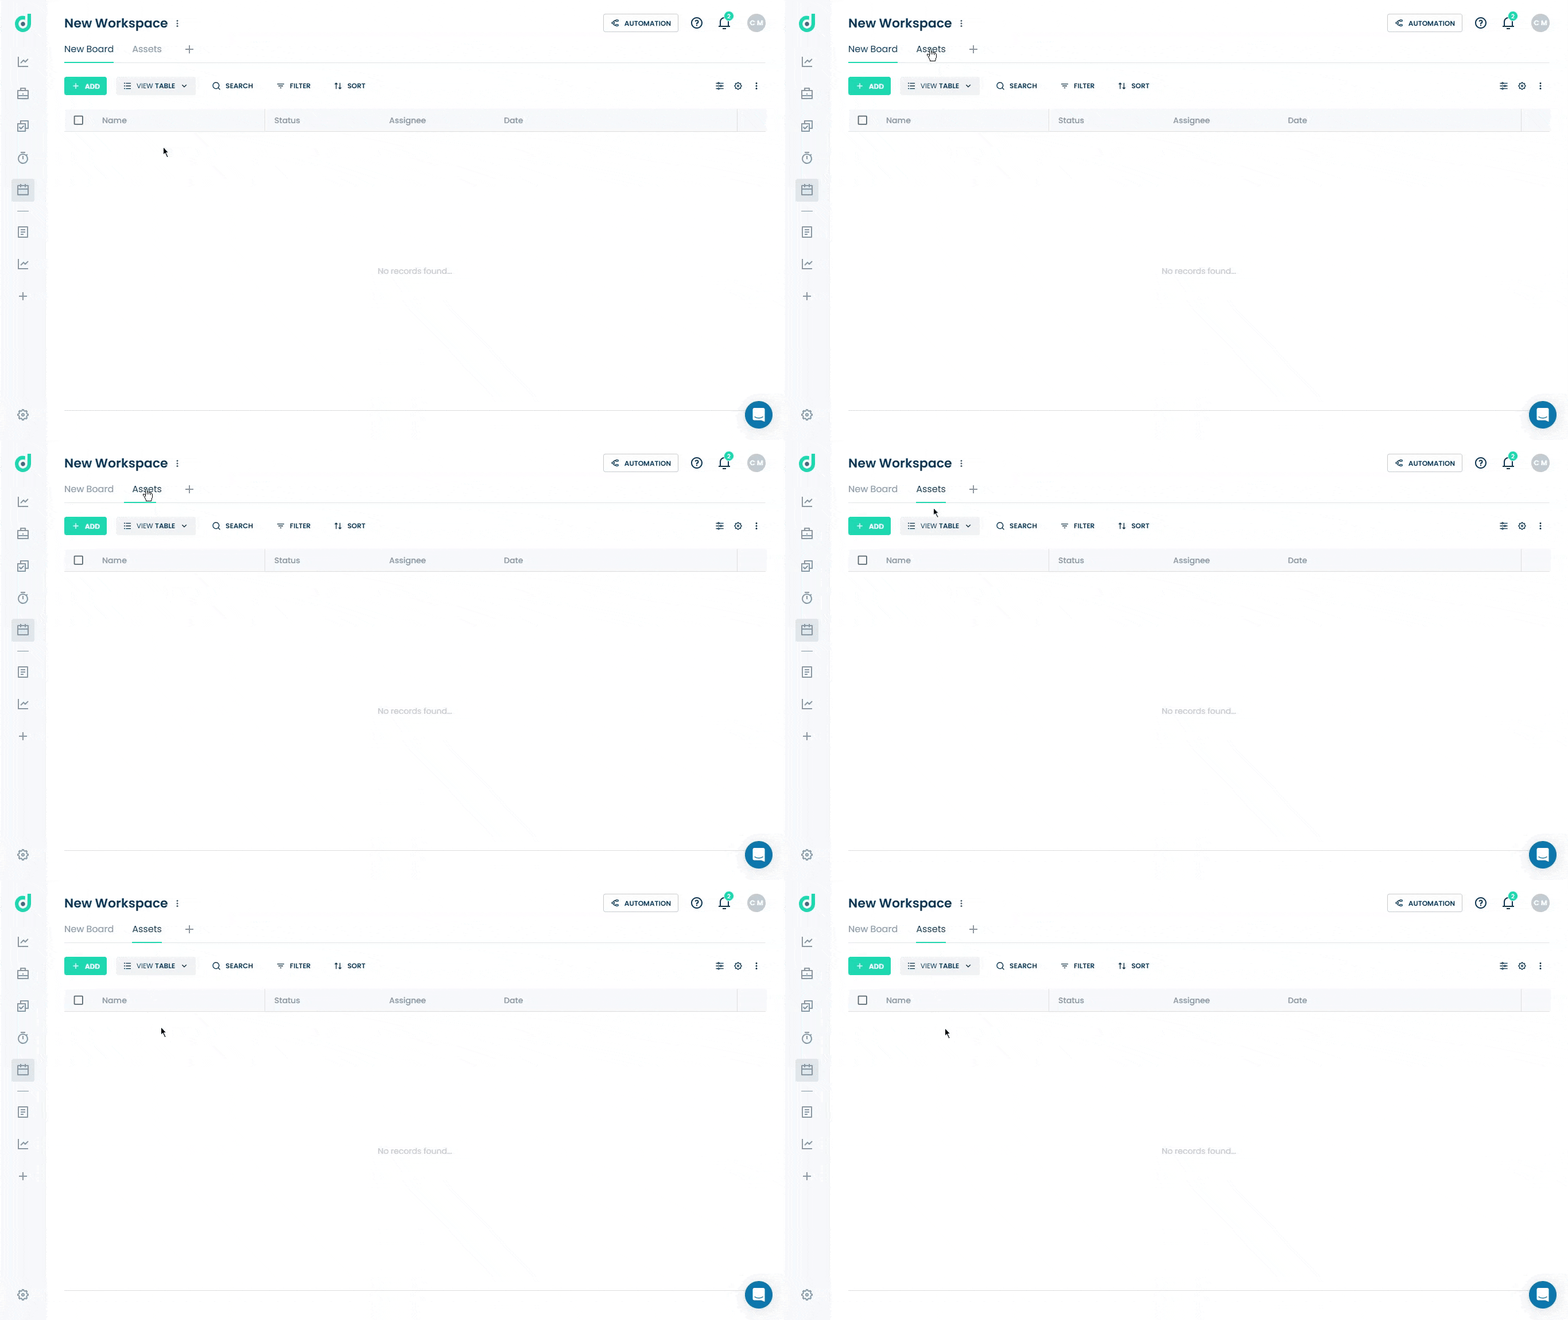
Step 2: Select the board where you want to edit board settings.
Step 3: Click on the Setting icon from the right side of the interface.
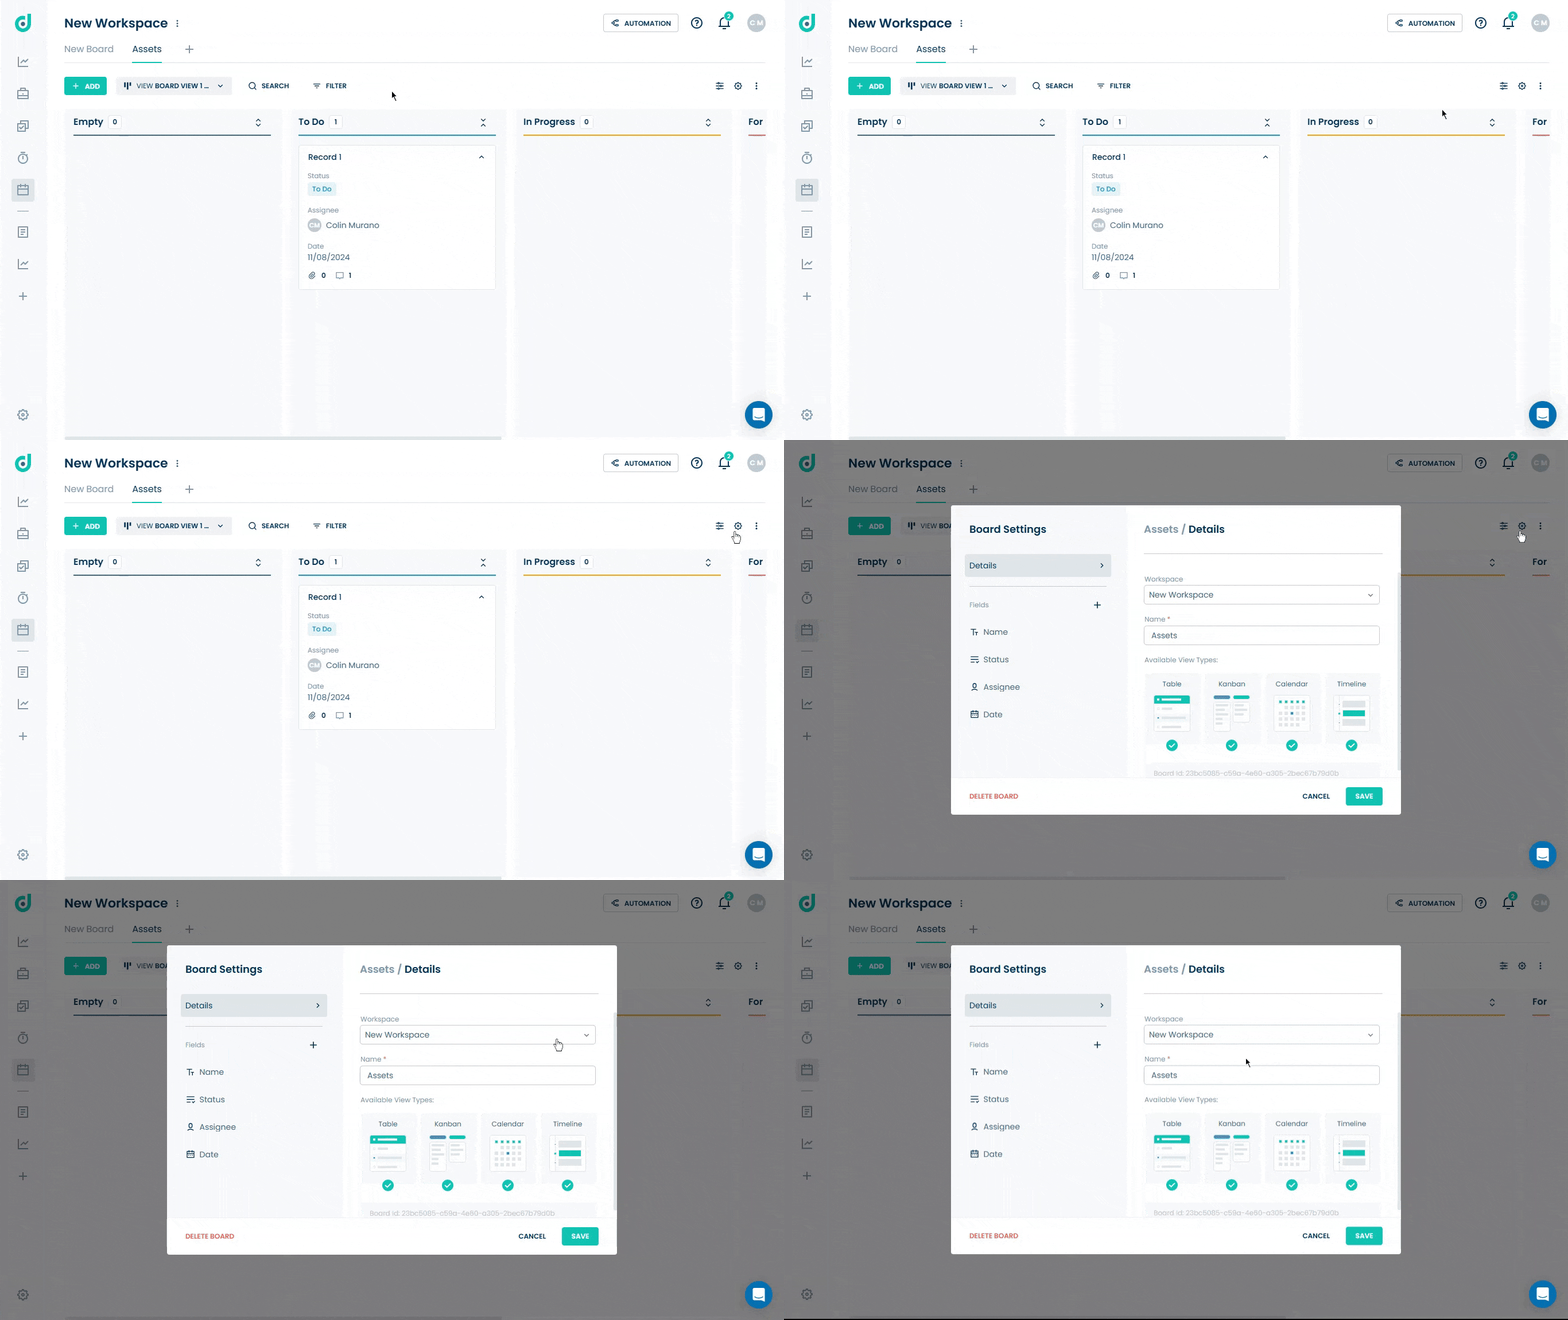
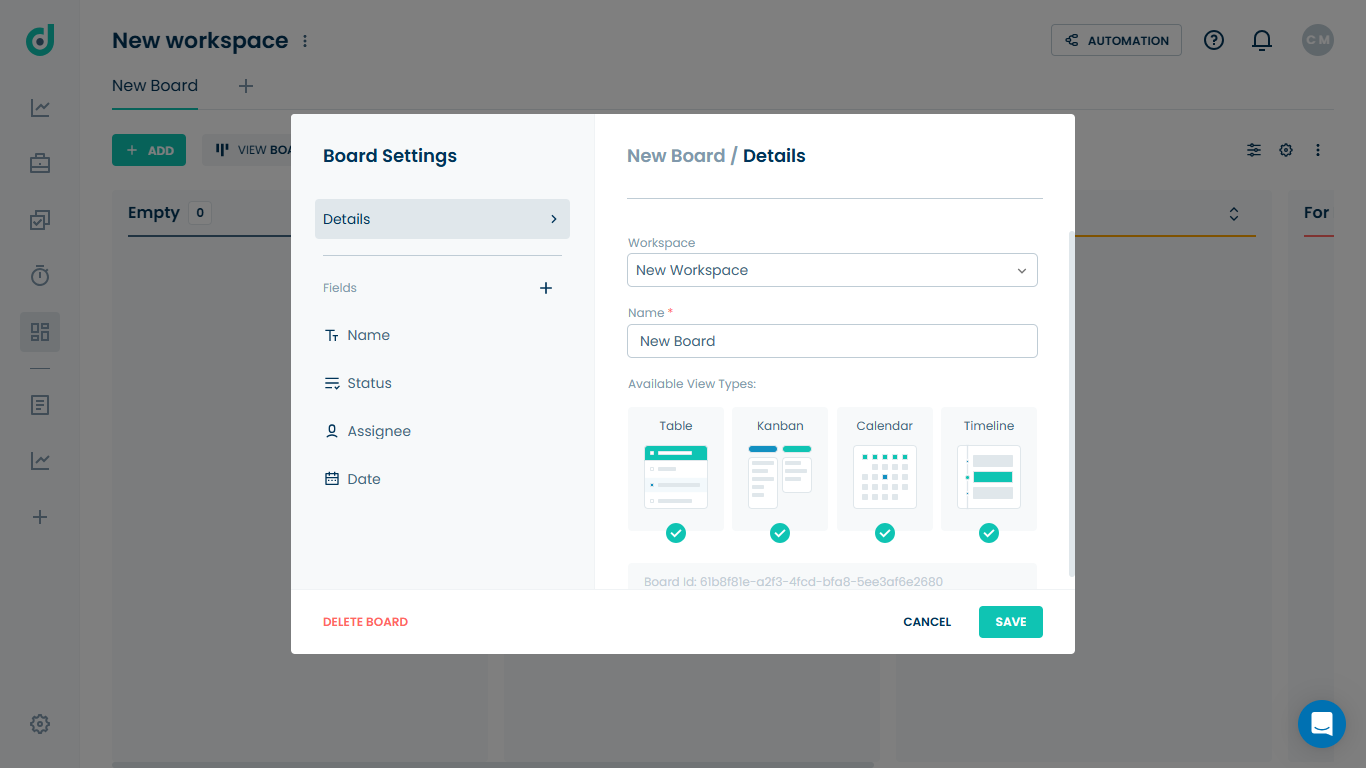
A pop-up window will appear, allowing you to edit your board settings.
Board Details
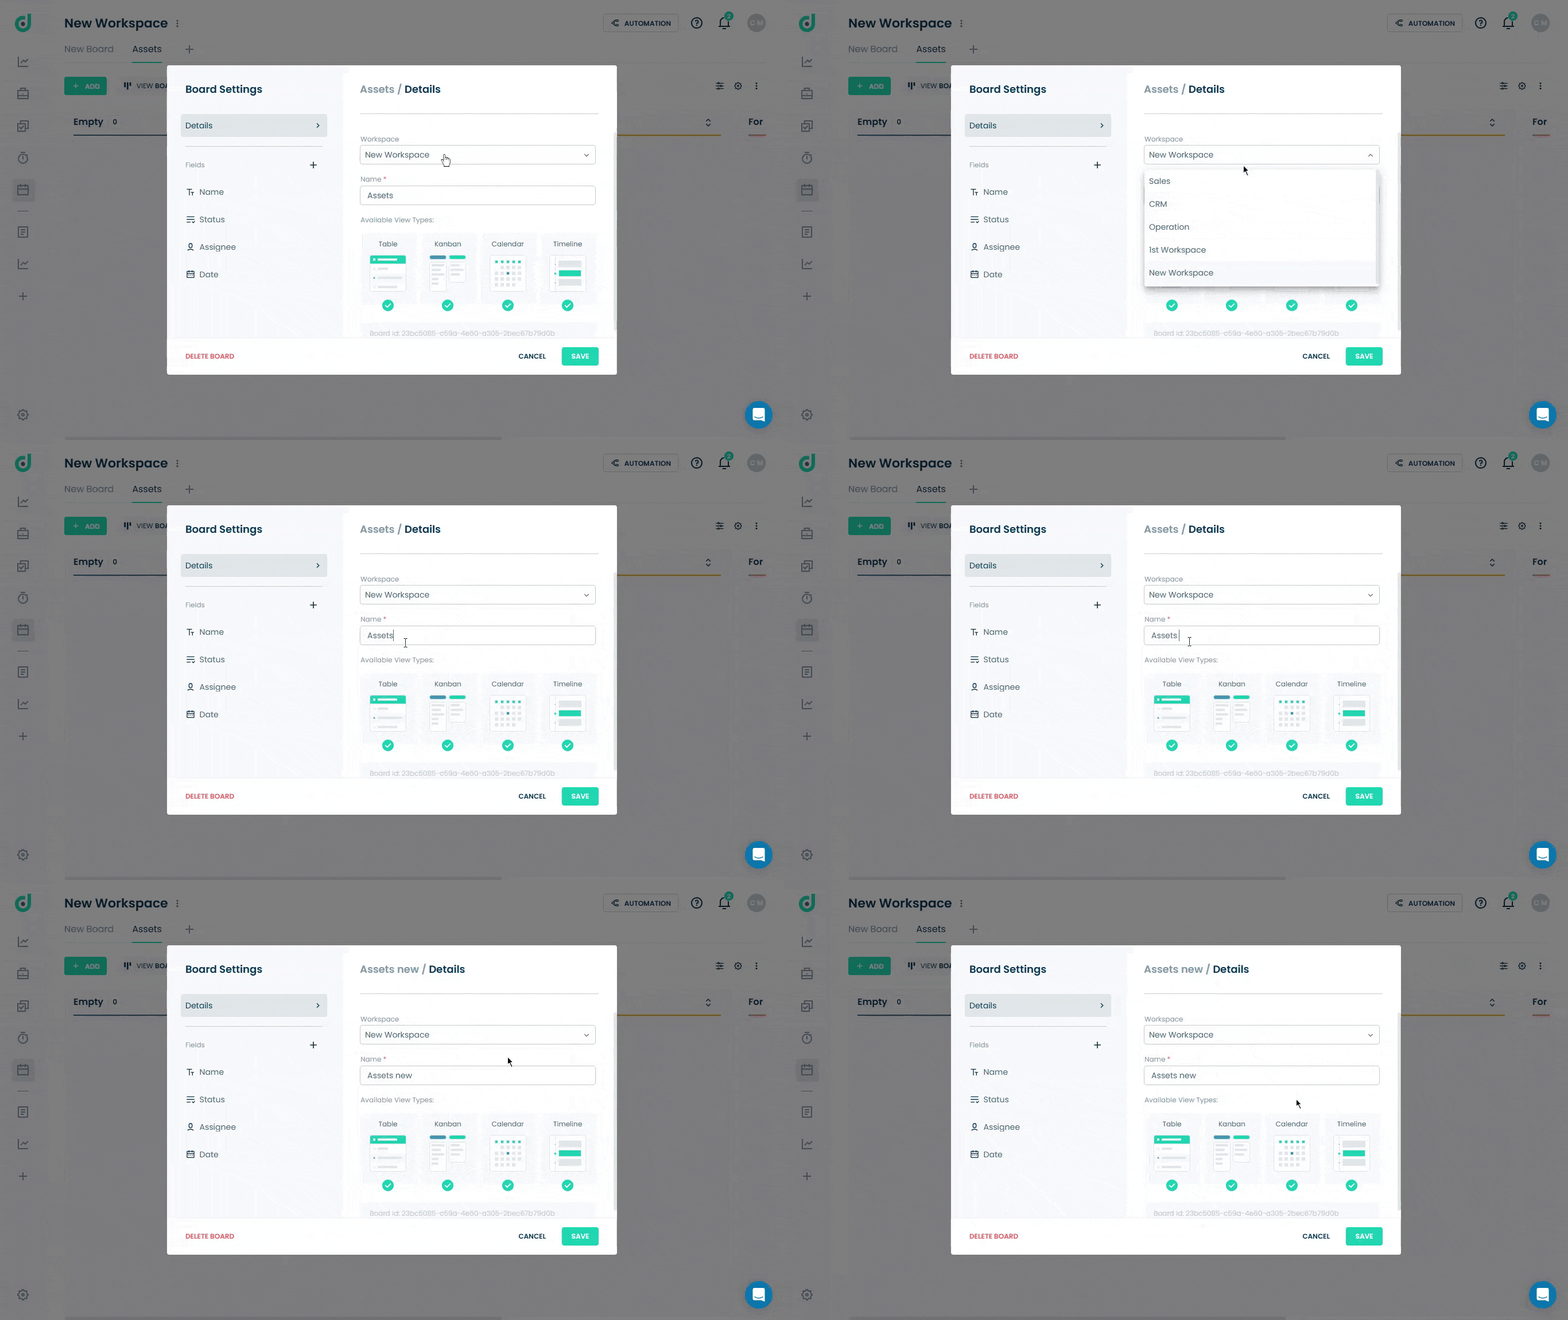
Here, you can edit the board settings details, such as selecting a different workspace if the user wants to work under that workspace or update the board name.
It also shows you what view types are available, depending on the fields you add to this board.
Fields Customization
Here, you can view and customize the fields associated with the board.
Default Fields
These are pre-defined fields created automatically by OneDeck:
- Name
- Status
- Assignee
- Date
Name
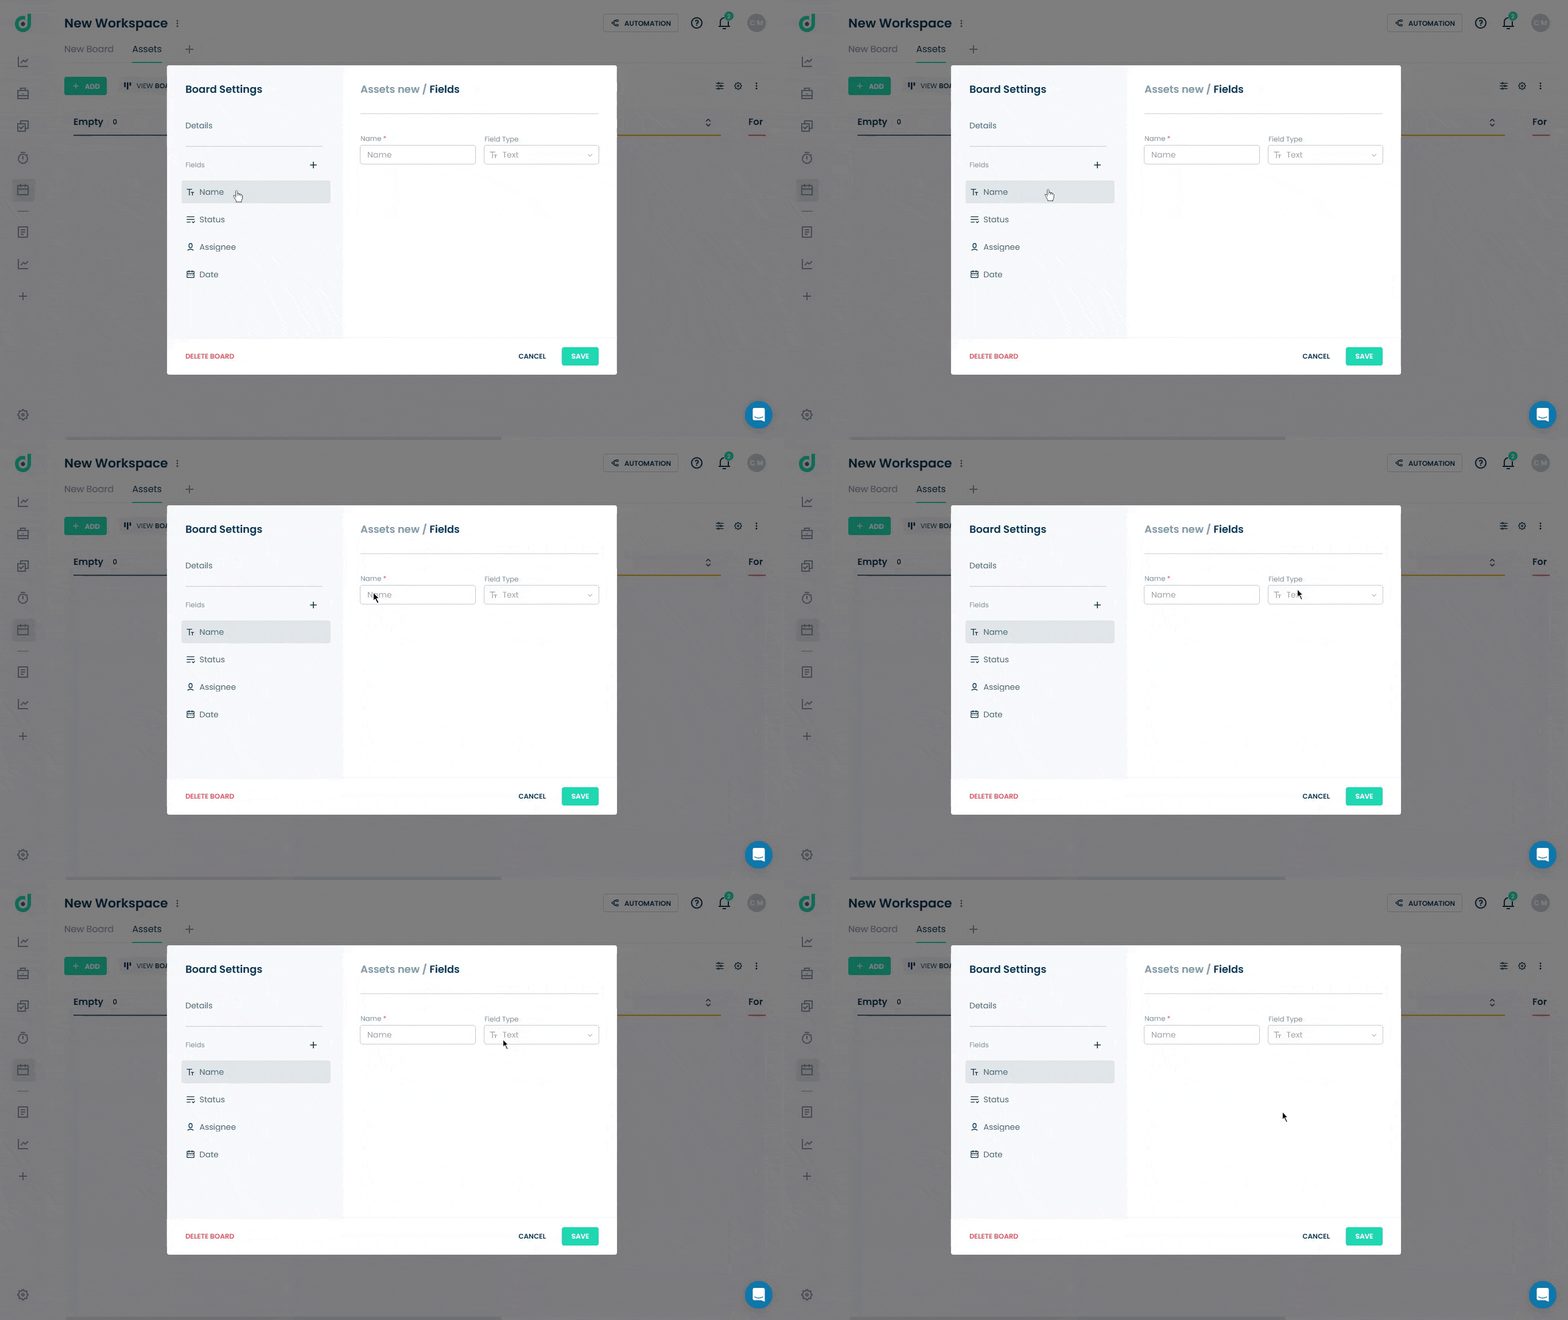
This field is not editable because it’s mandatory, which is pre-set by the system to ensure every record has a unique identifier.
Status
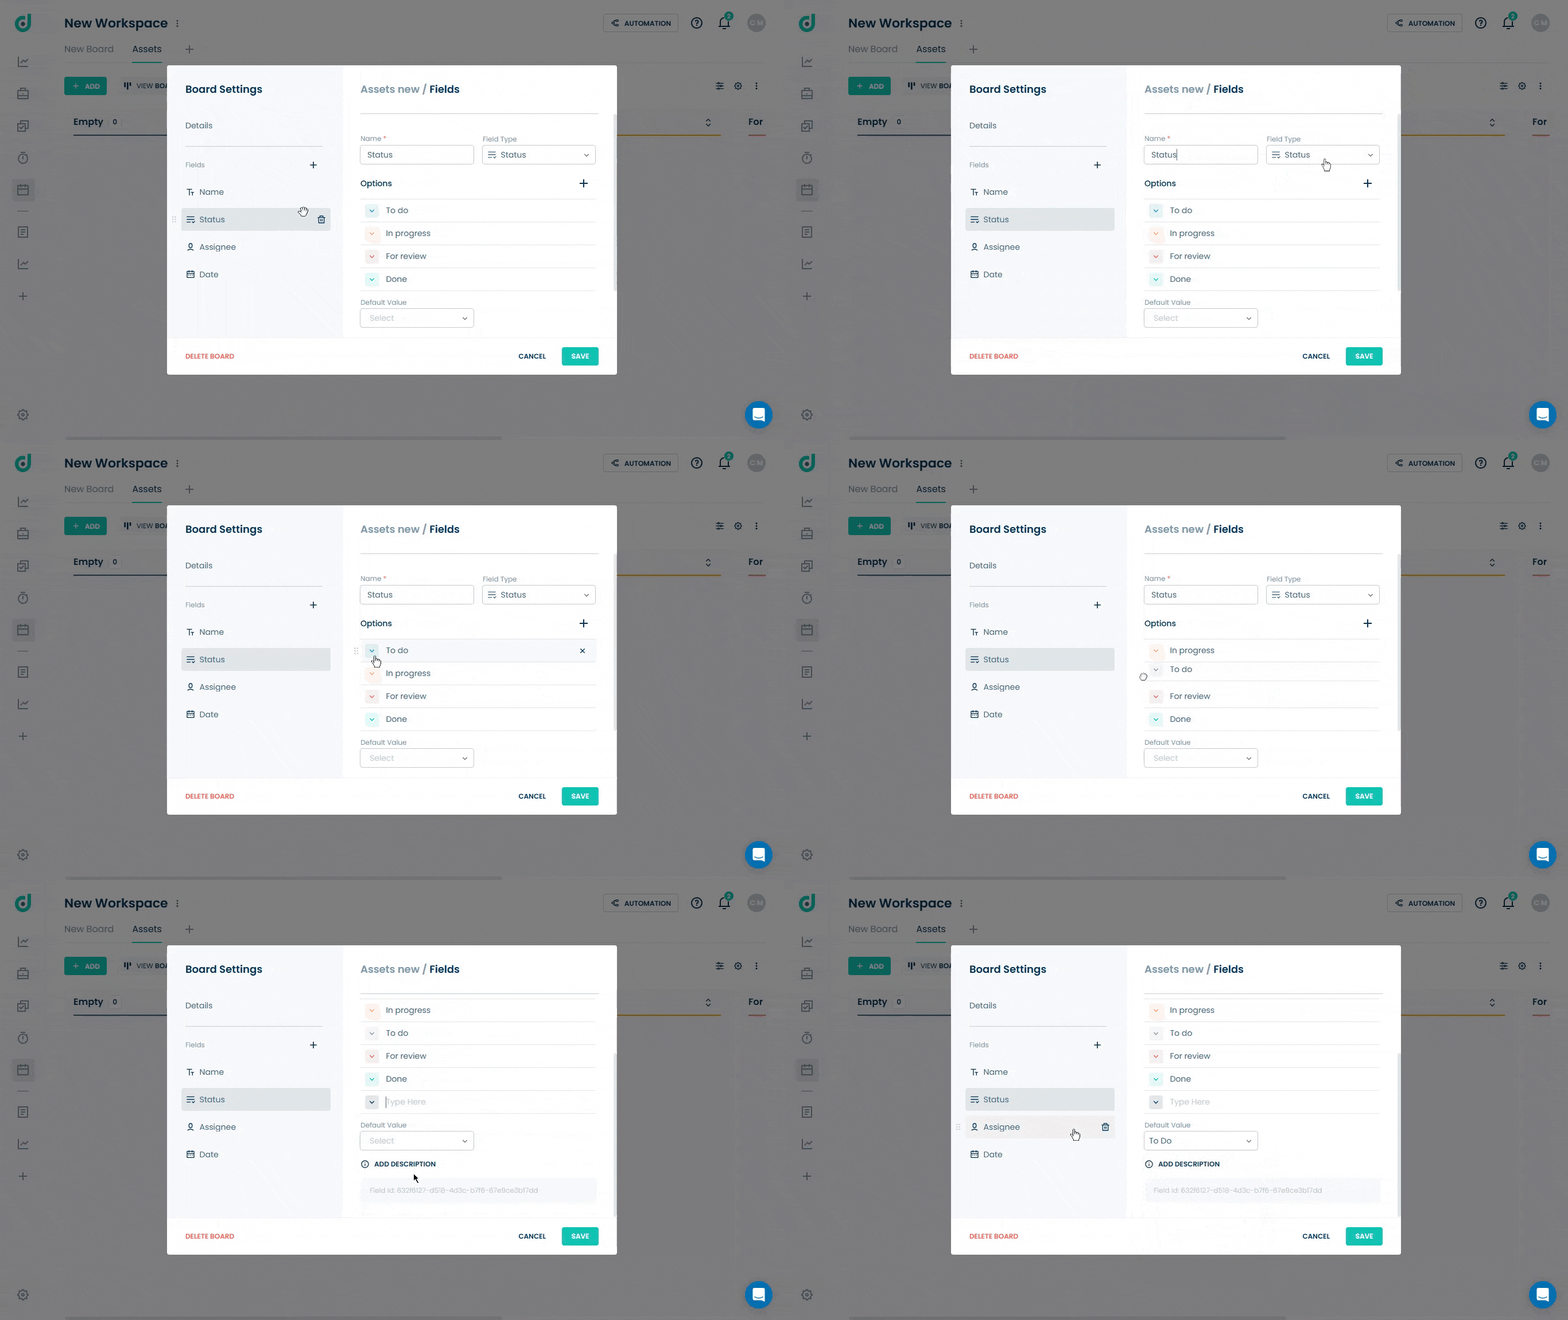
Users can update and customize this field according to the parameters explained in the table below:
| Ref | Parameters | Description |
| 1. | Name | The label for the field. Users can edit this to change how the field is displayed. |
| 2. | Color Indicators | Use color indicators to visually distinguish and customize each status. |
| 3. | Add New Status | Click the "+" button to add additional status options. |
| 4. | Default Value | Select a default status from the "Default Value" dropdown, as selected here will appear by default in the status field when creating a new record. |
| 5. | Reorder | You can reorder the options, which will update both the dropdown order and the Kanban column order. |
Note: The Status field creates the columns in the Kanban view. Without a Status field, the Kanban view won’t be available in the board. If multiple Status fields are added, a dropdown in the Customize menu on Kanban view lets you choose which Status field to use for grouping records.
Assignee
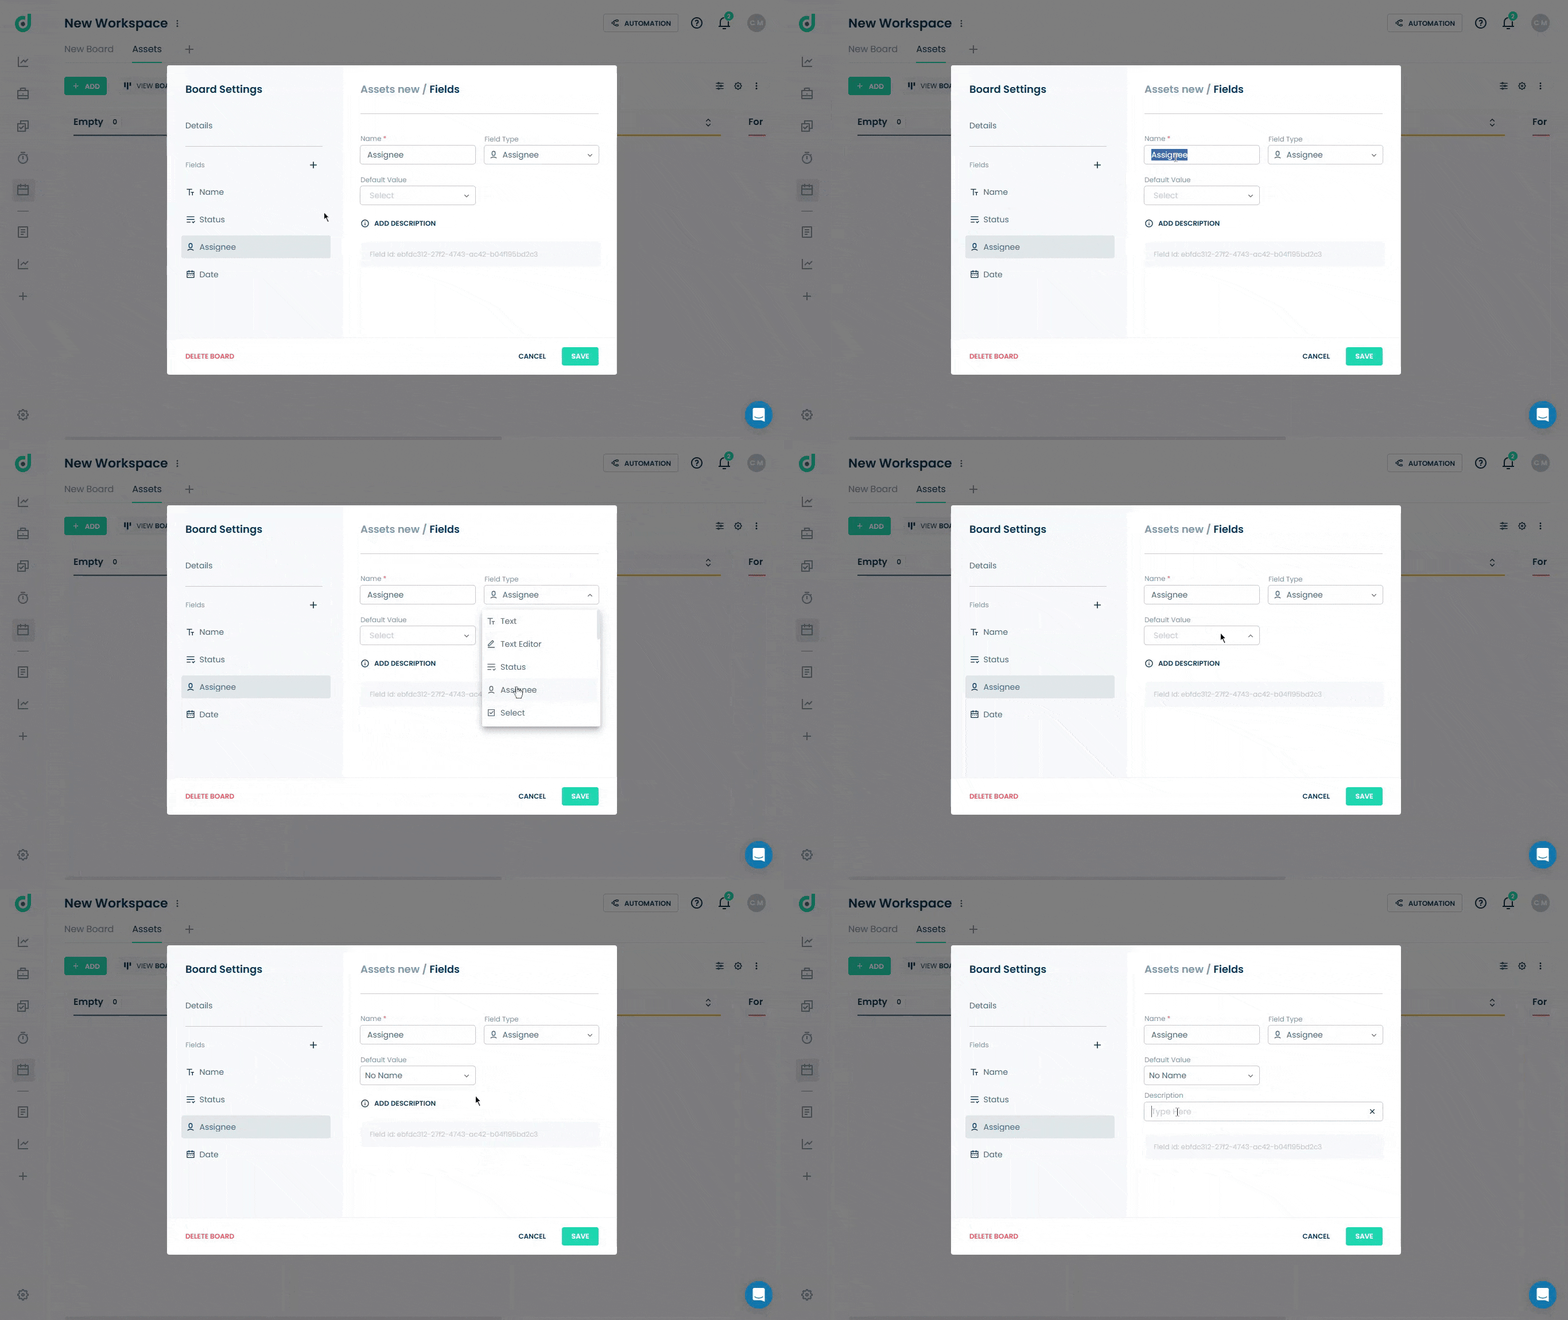
Users can update and customize the "Assignee" field according to the parameters explained in the table below:
| Ref | Parameters | Description |
| 1. | Name | The label for the field. Users can edit this to change how the field is displayed. |
| 2. | Default Value | Select a default assignee from the "Default Value" dropdown, as selected here will appear by default in the assignee field when creating a new record. |
| 3. | Description (Optional) | User can add a description to provide additional information about this field, helping users understand its purpose or usage. |
Date
Users can update and customize the "Date" field according to the parameters explained in the table below:
| Ref | Parameters | Description |
| 1. | Name | The label for the field. Users can edit this to change how the field is displayed. |
| 2. | Event Color | Use color pickers to apply color-coding to events, making dates visually distinct. |
| 3. | Include a Time Field | Toggle on to add a specific time option alongside the date field for more precise scheduling. |
| 4. | Description (Optional) | User can add a description to provide additional information about this field, helping users understand its purpose or usage. |
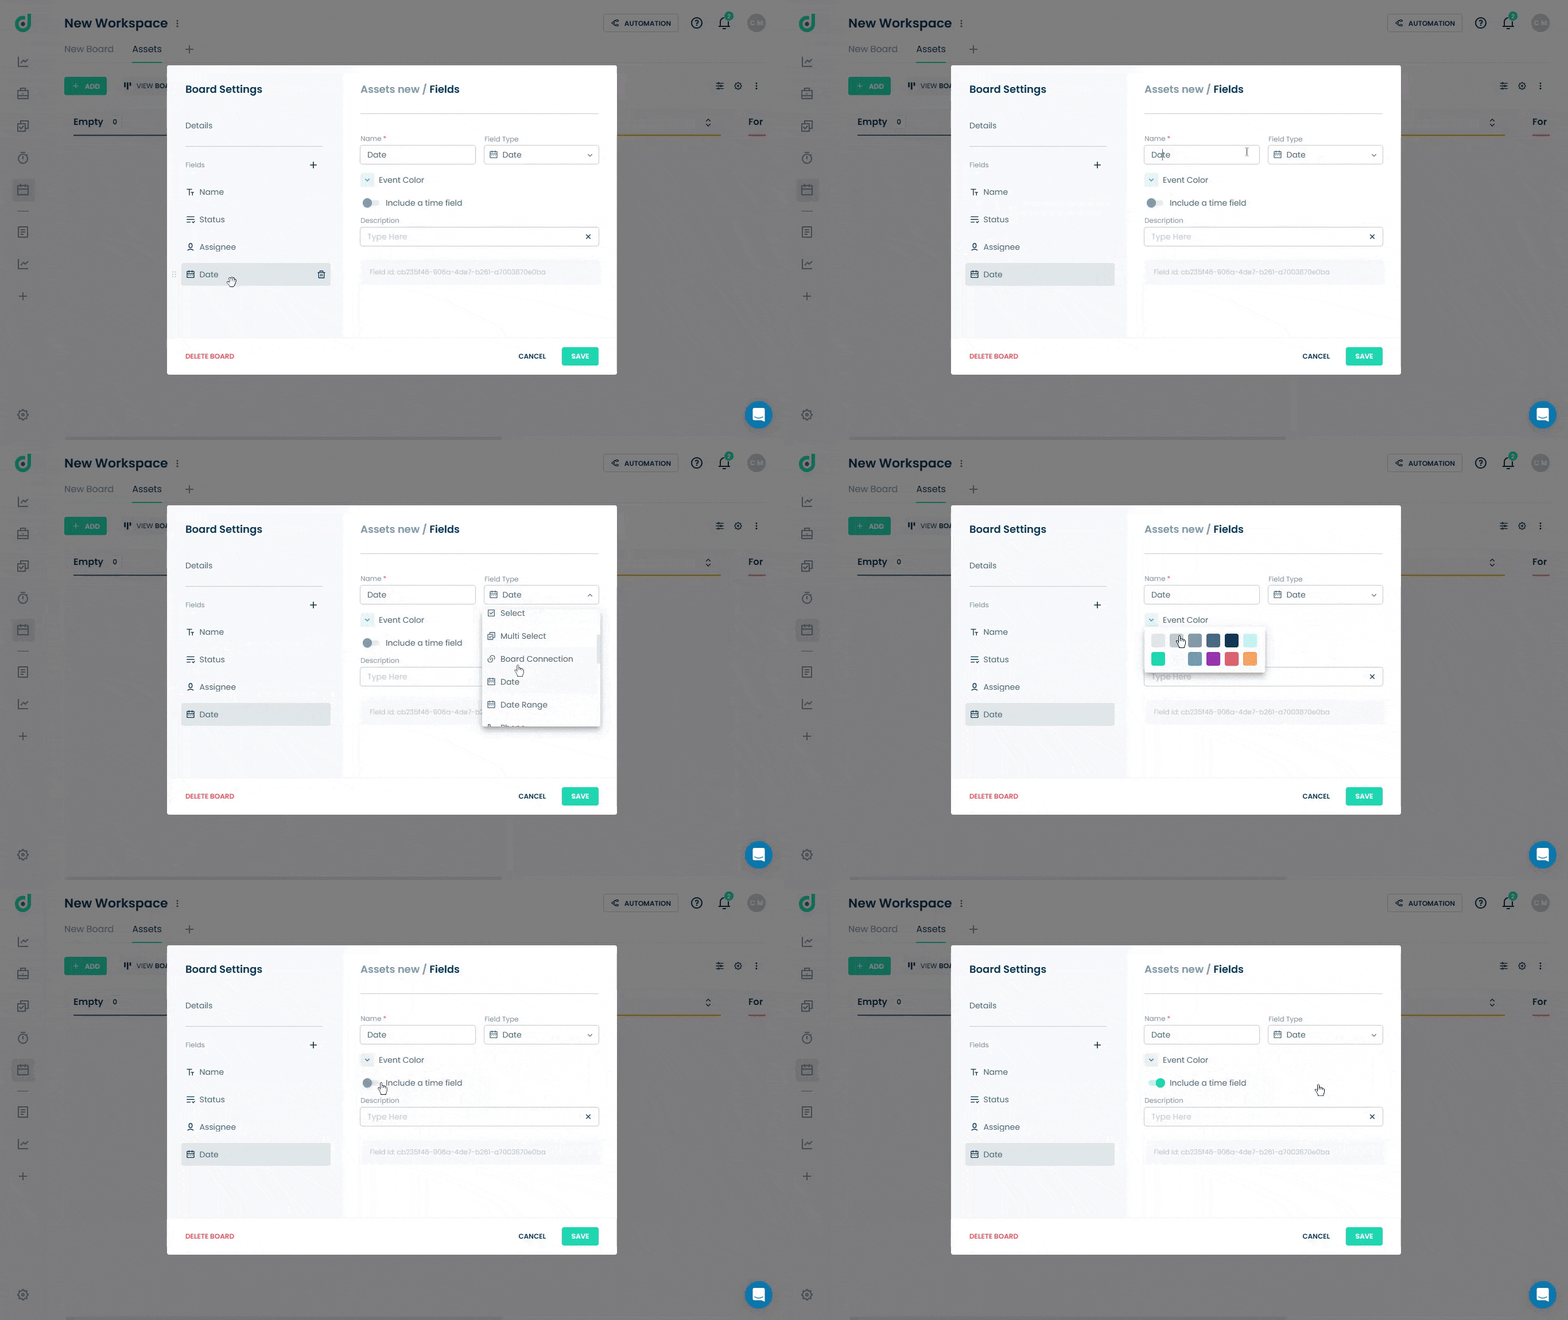
Additional Fields
OneDeck allows you to create custom fields by clicking on the “+” button.
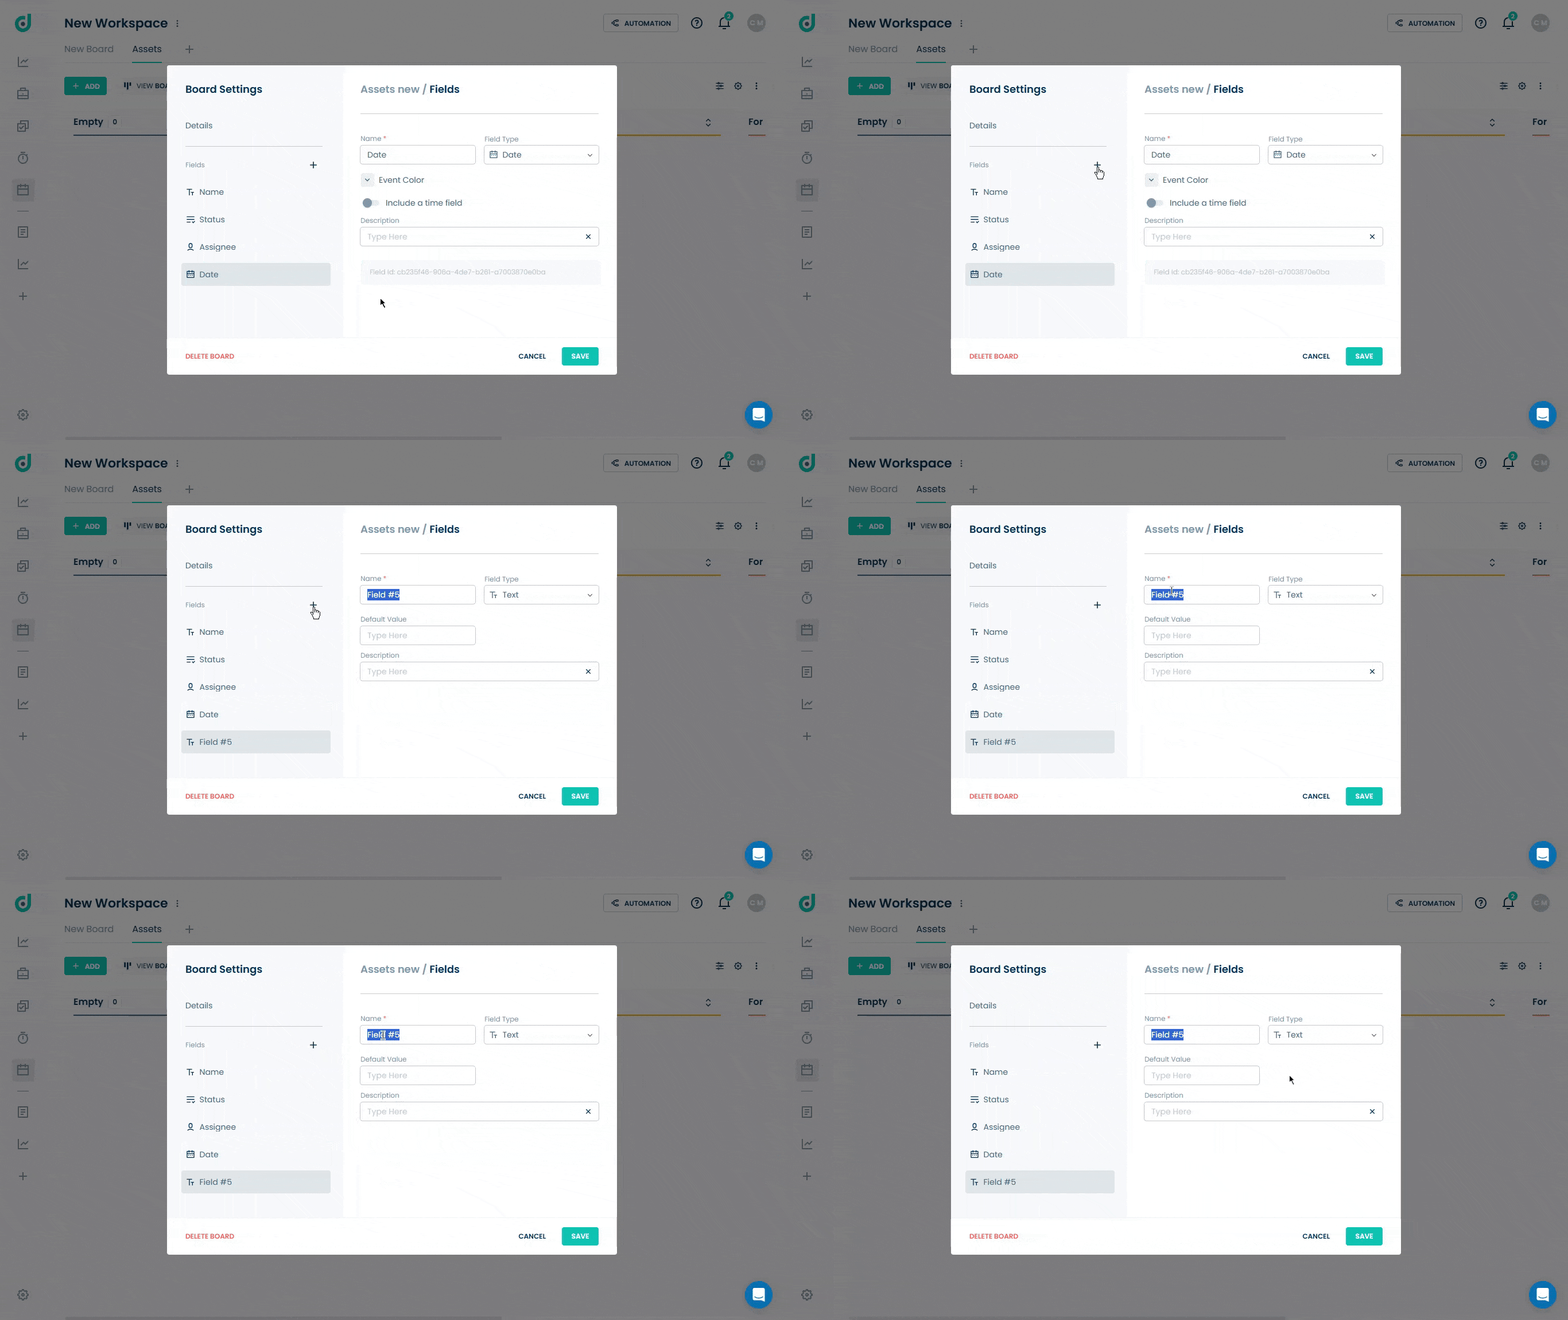
| Ref | Fields | Description |
| 1. | Name | Specify the name of the new field. |
| 2. | Field Type |
Select the data type for the field from a dropdown:
|
| 3. | Default value (Optional) | Set a default value for the field that will populate by default. |
| 4. | Description (Optional) | Add a description to clarify the purpose or content of the field. |
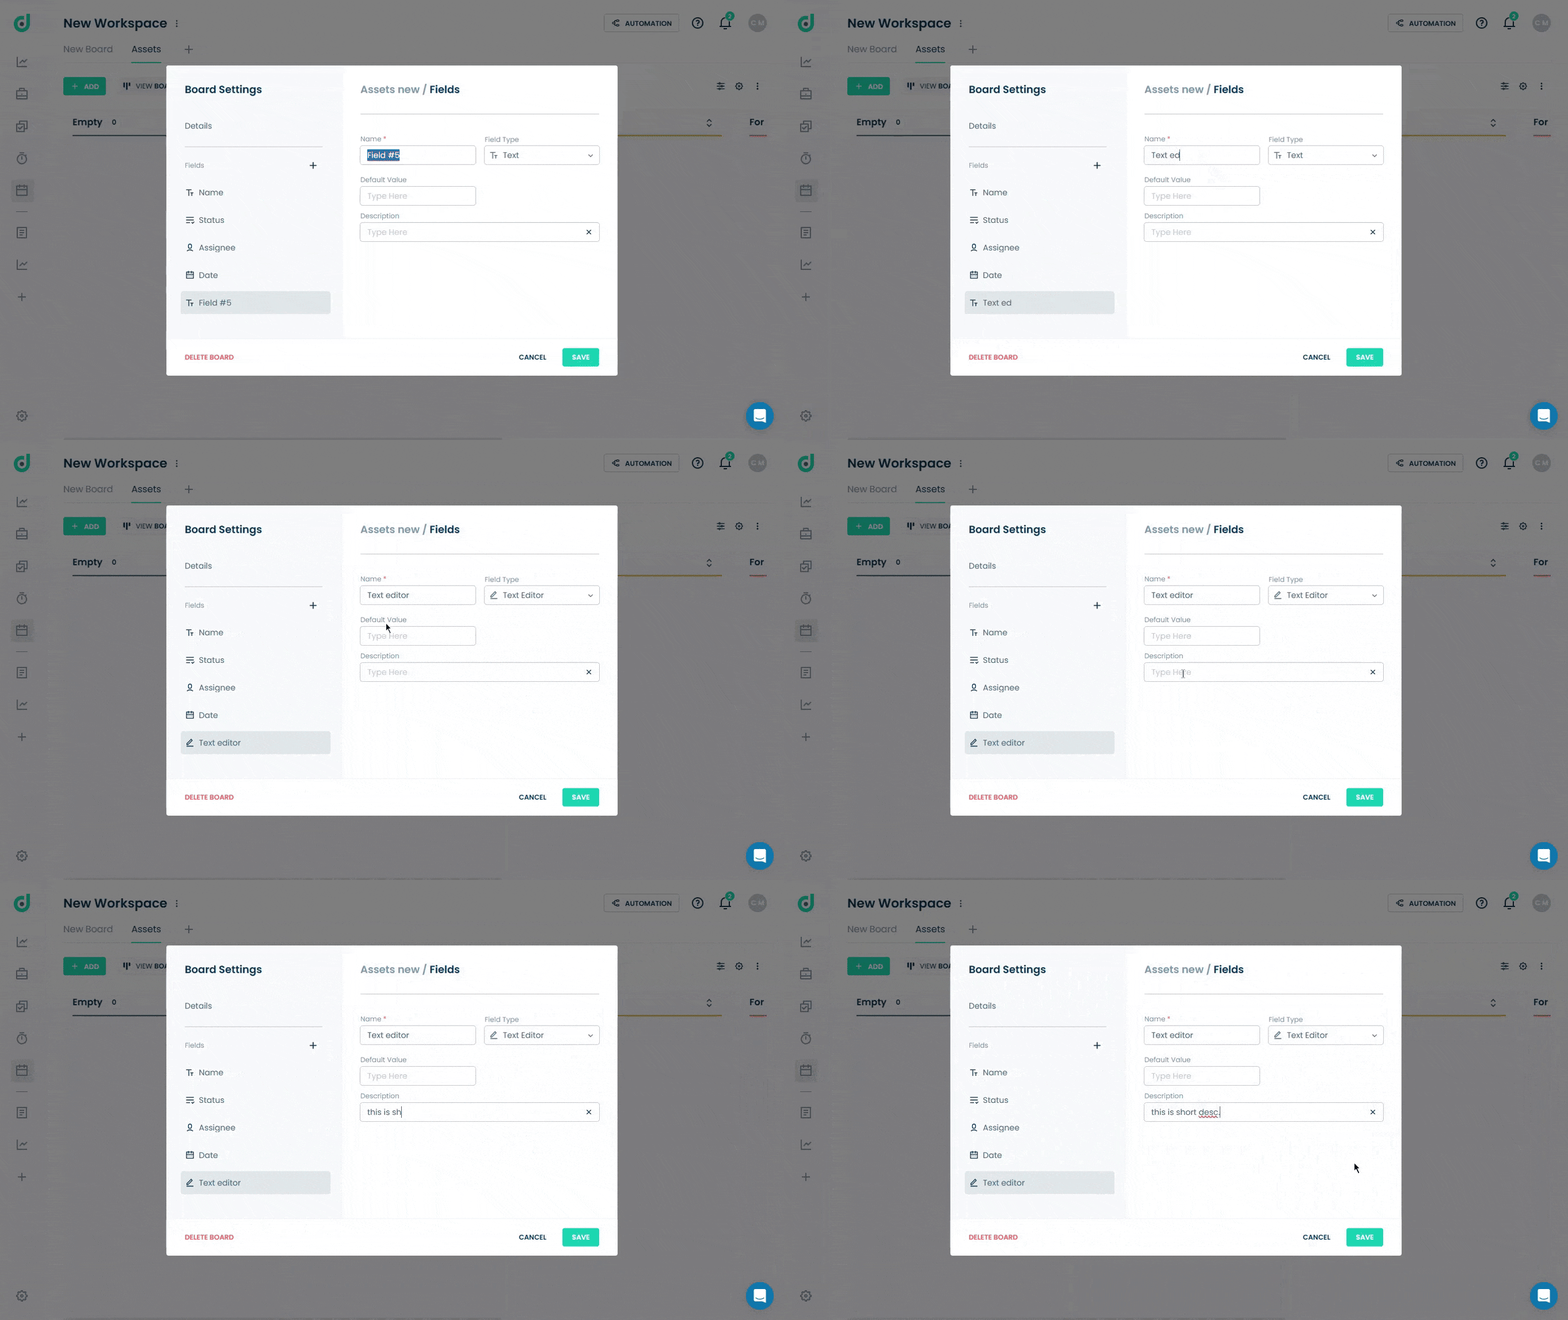
Once finished, click on the Save button to apply the changes to the board.
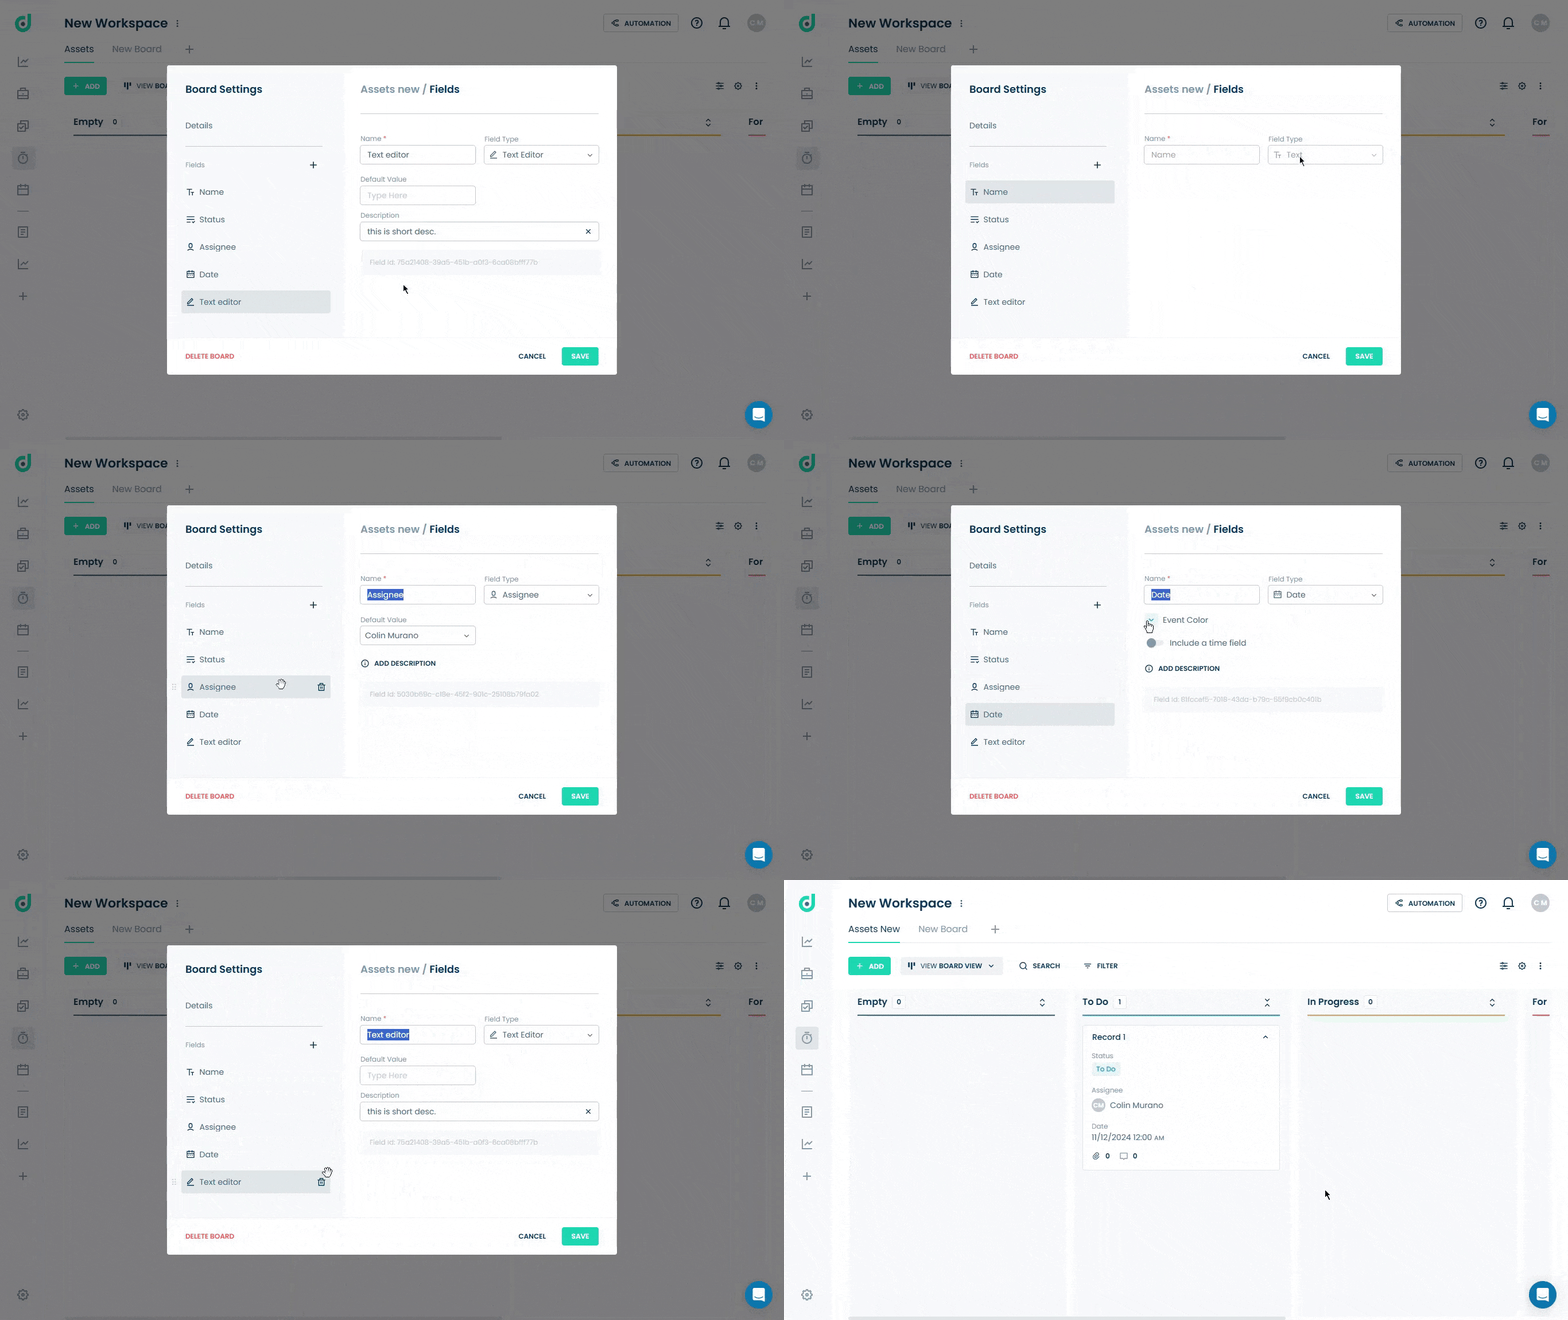
This will add the new fields alongside the existing fields on the board.
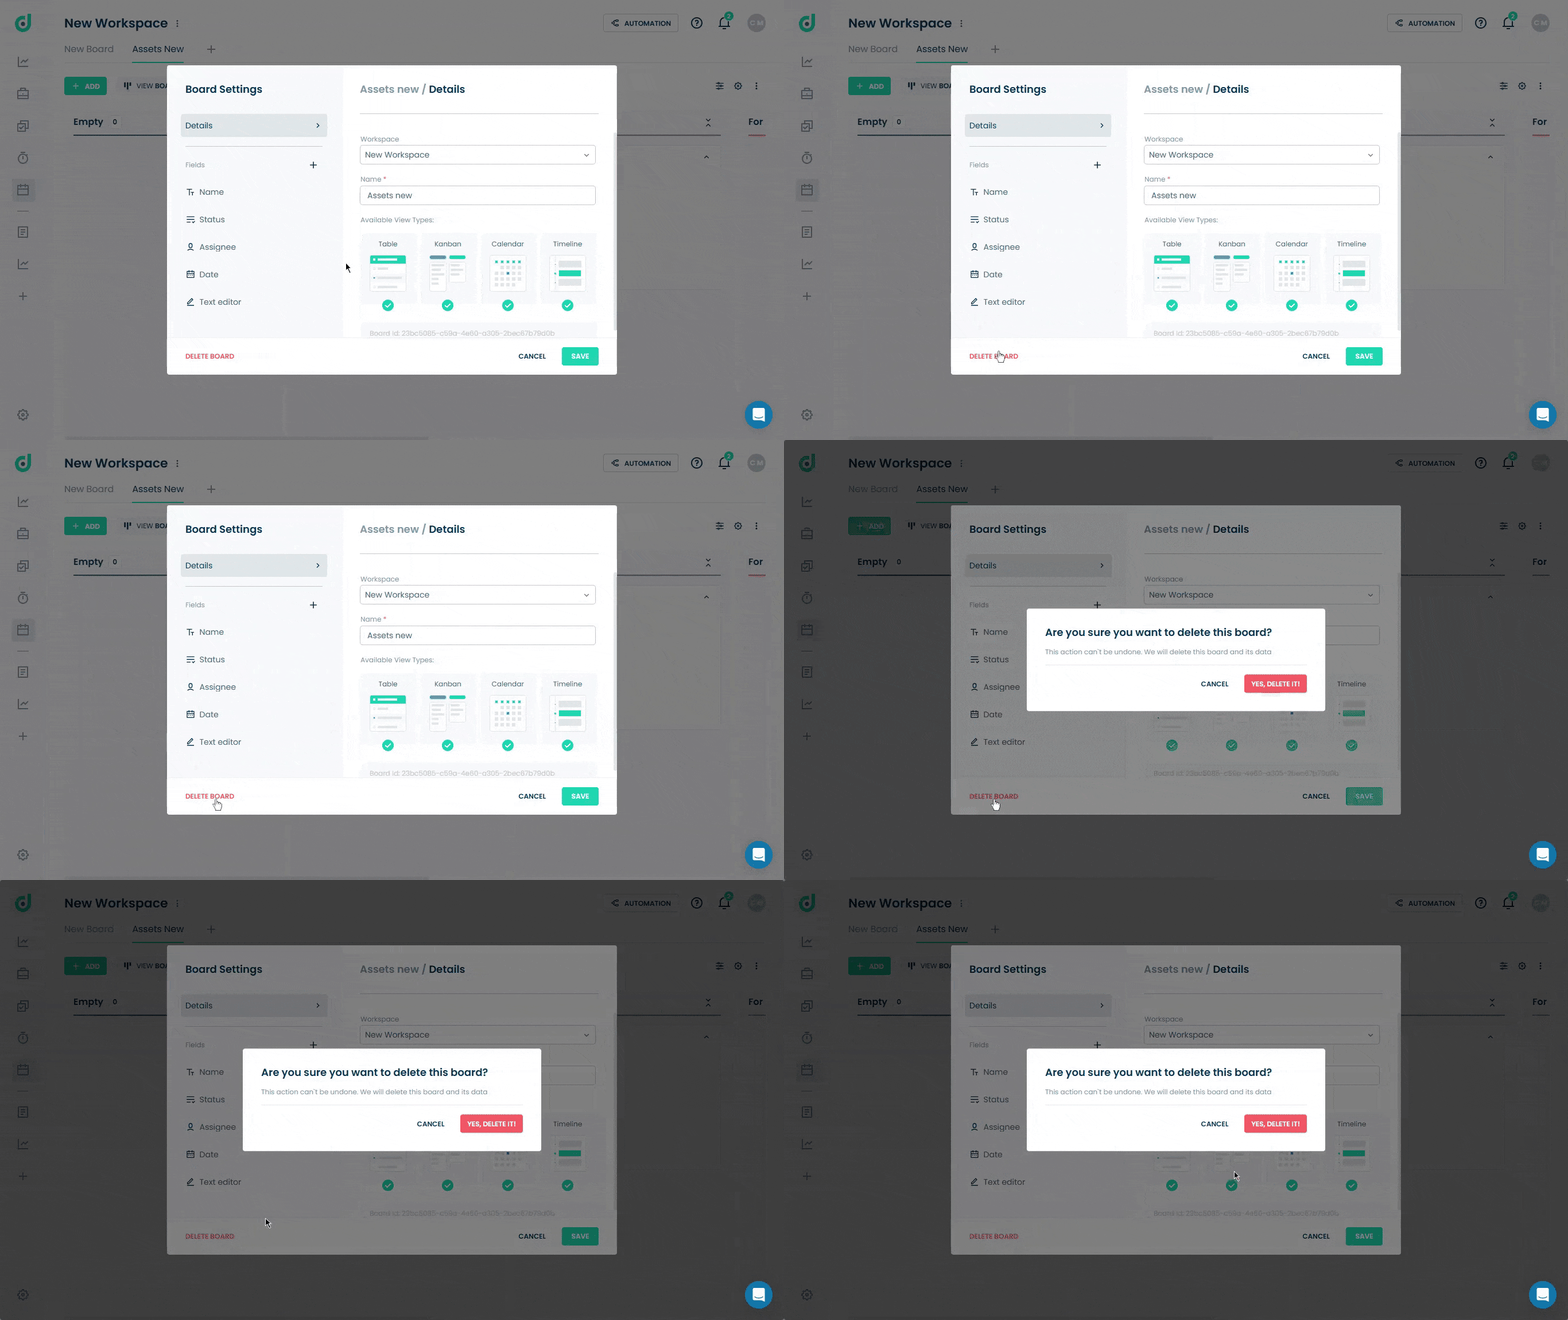
Delete Board
OneDeck allows you to delete board that is no longer in use.
Step 1: Click on the DELETE BOARD button.
Step 2: Click on the YES, DELETE IT button to confirm the action.
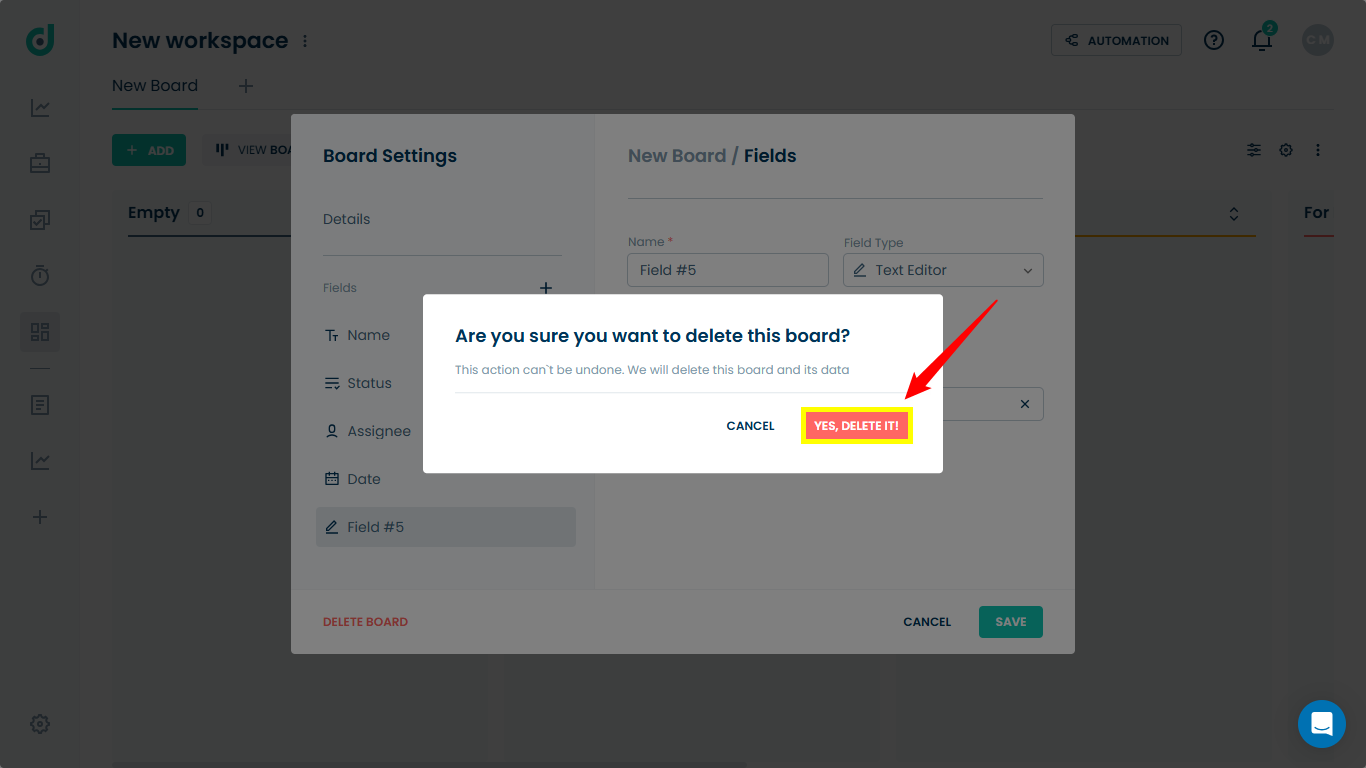
Note: The DELETE action can’t be undone. All data will be deleted.


