OneDeck Help Center
How to Create a New Workspace
With OneDeck, you can create dedicated workspaces to organize your boards, keeping related information grouped and accessible. Workspaces act as central folders, allowing you to separate boards by category—such as sales (leads, opportunities) and CRM (customers, contacts). This structure helps you manage records, track updates, and collaborate efficiently in an organized way.
In this documentation, we’ll go through the steps to create a new workspace in OneDeck.
Let’s get started 🚀
Step 1: Sign in to your OneDeck account.

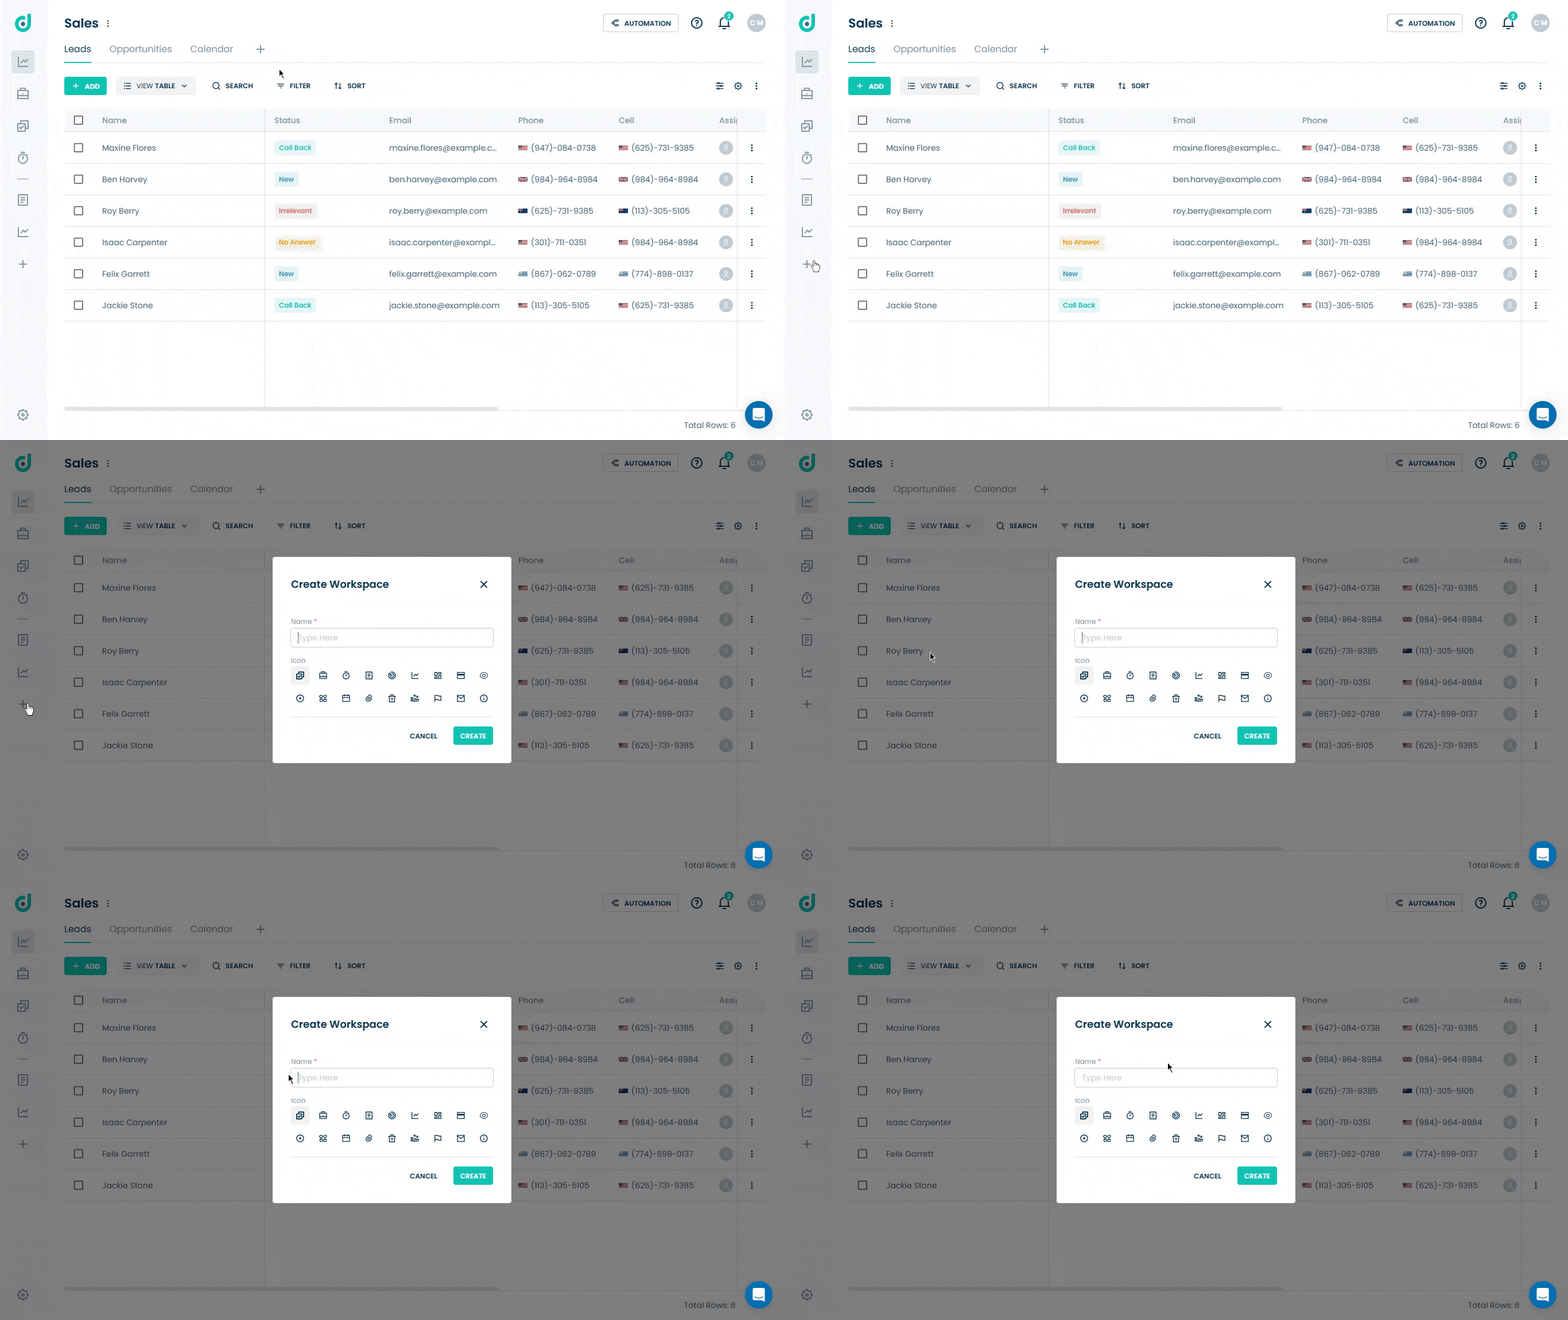
Step 2: Click on the “+” button from the side navigation menu bar to create a new workspace.

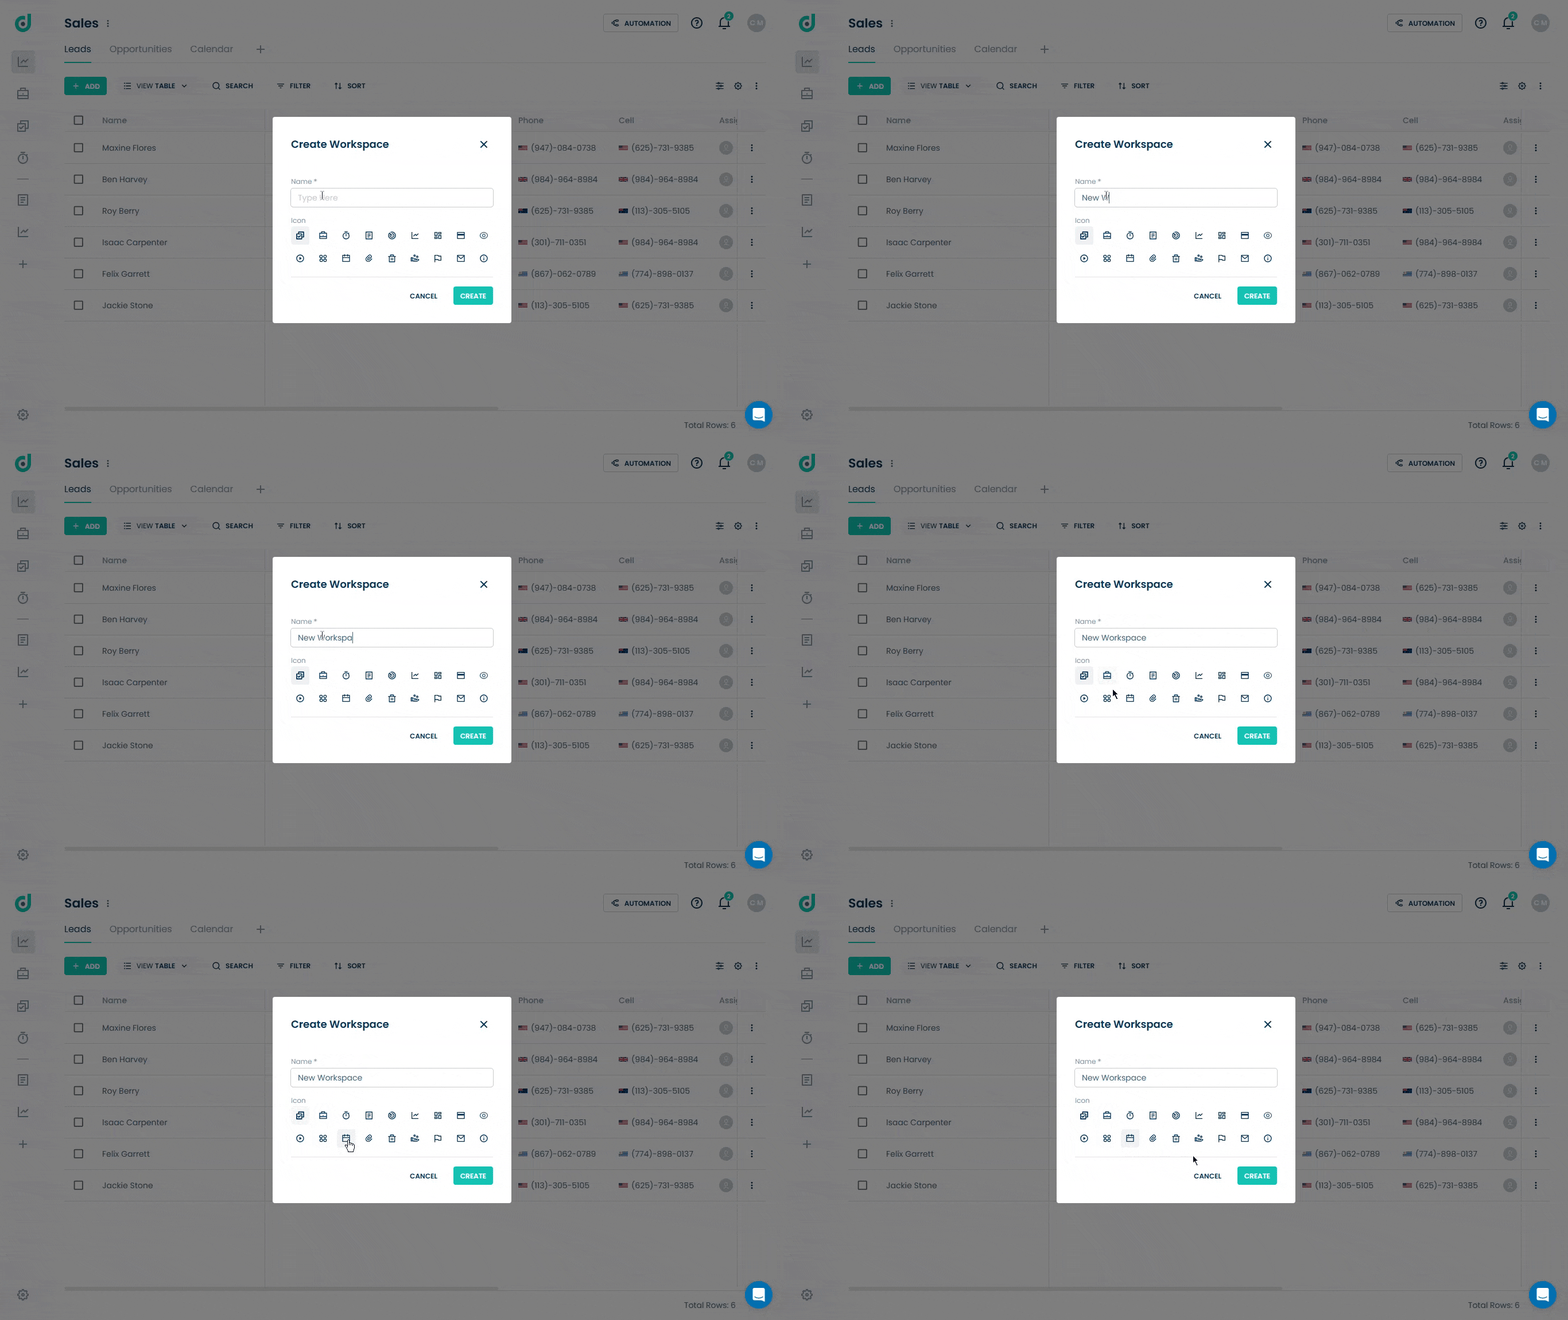
Step 3: A new modal window will appear, where you need to enter the workspace name and select an icon for it.

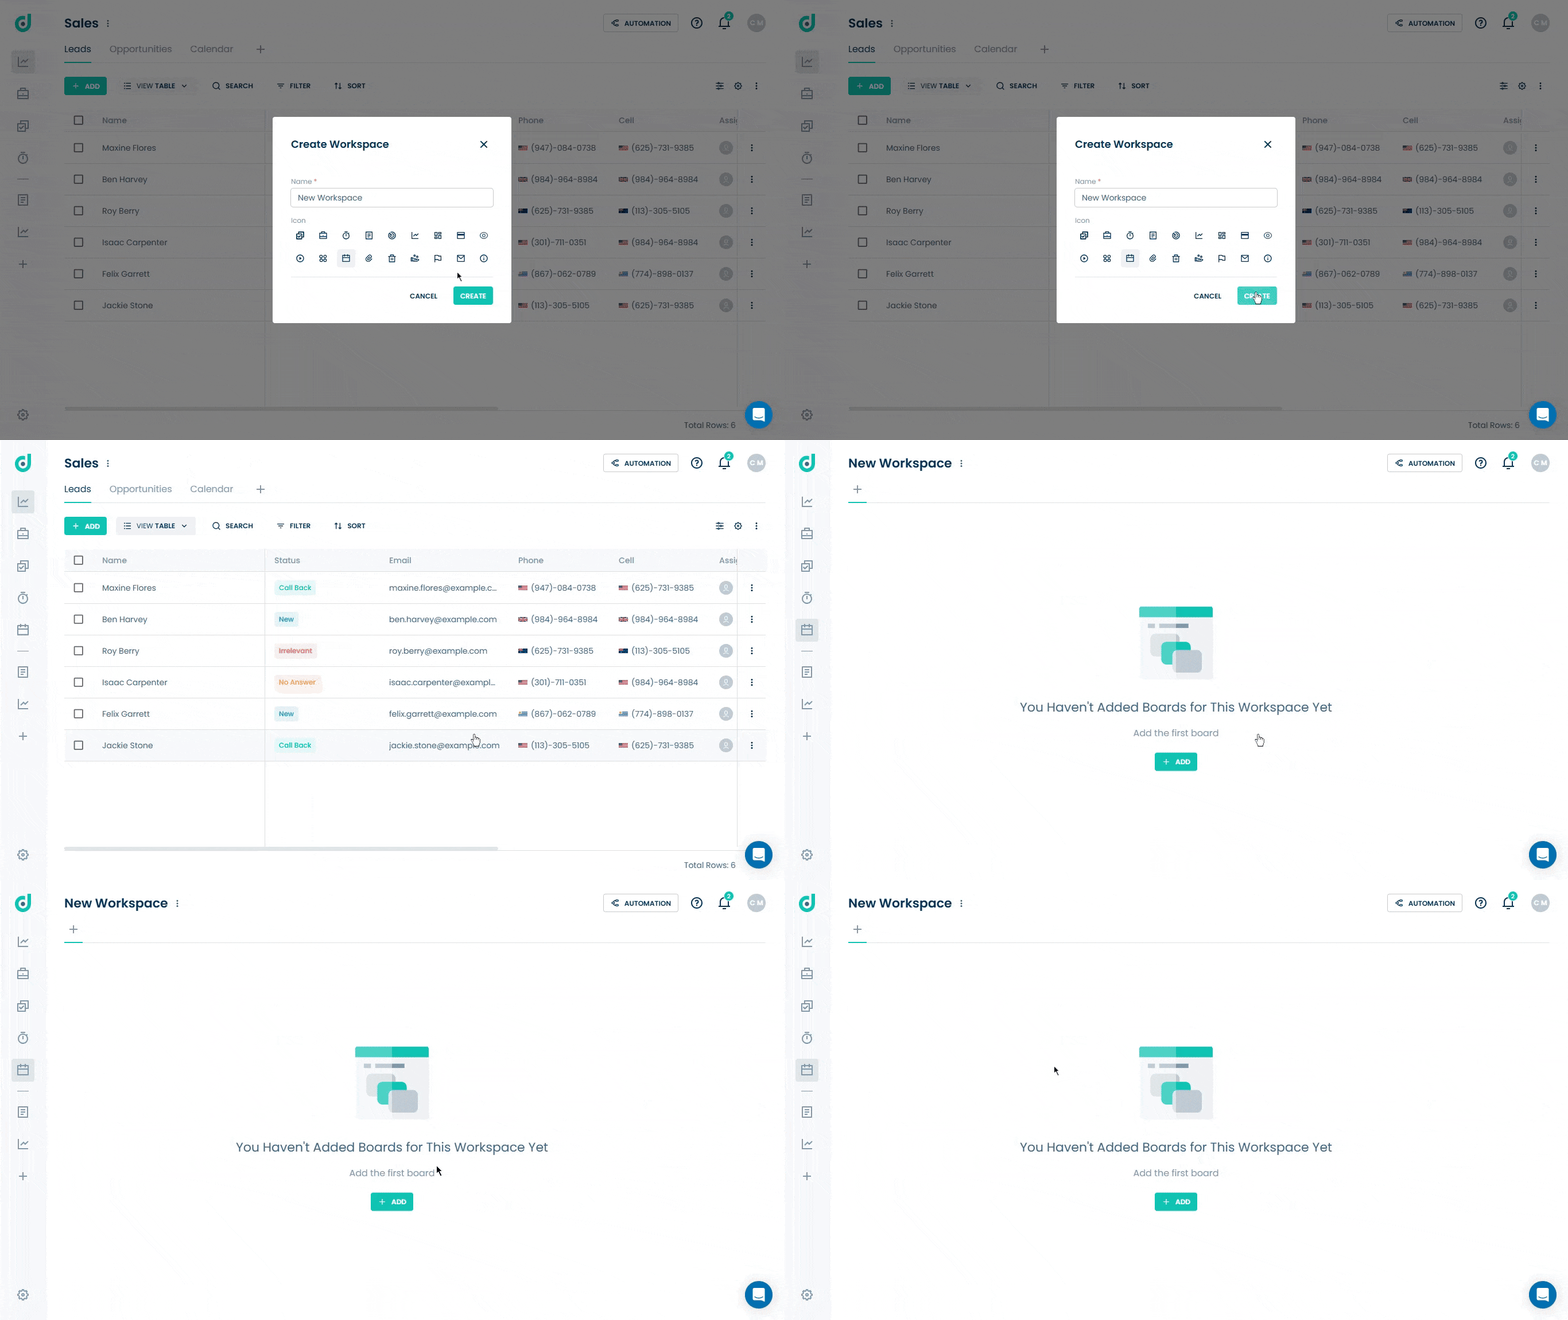
Step 4: Once done, click on the CREATE button.

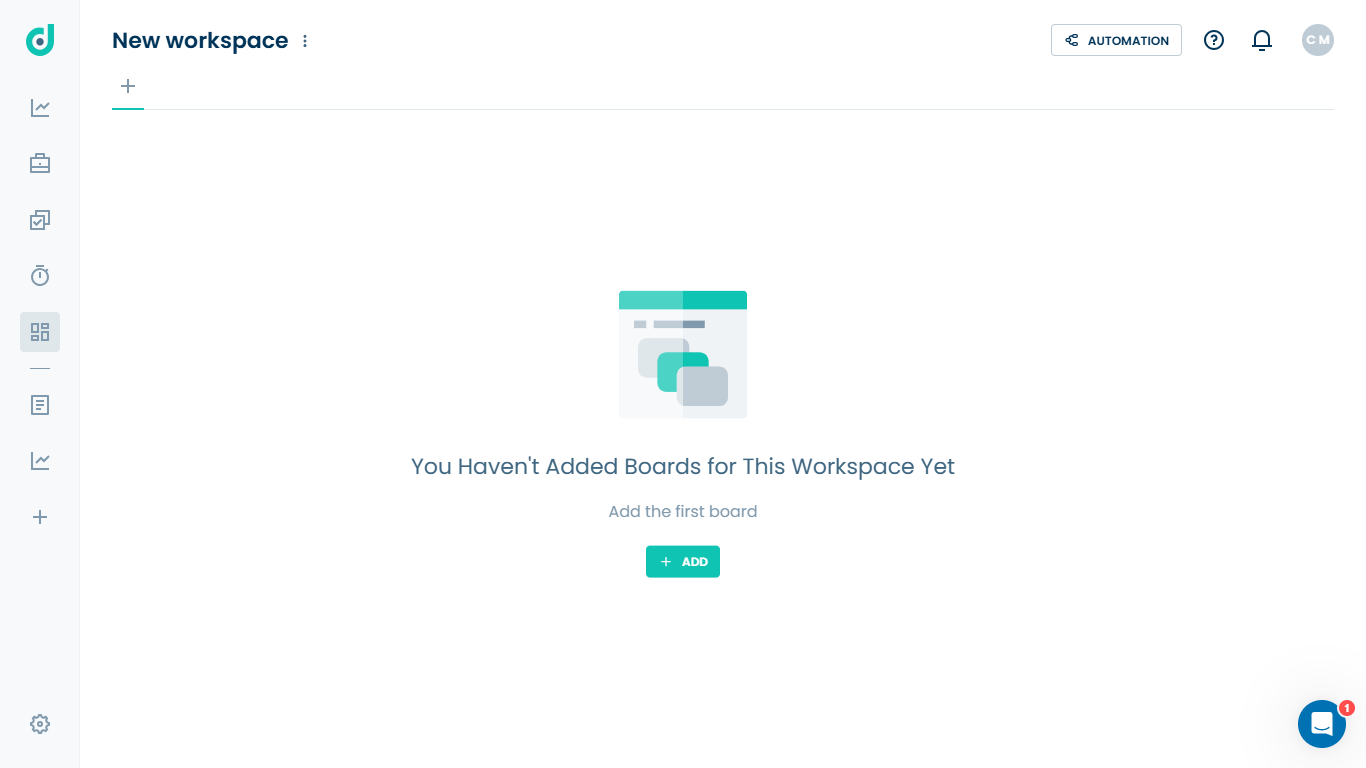
This will take you to your newly created workspace, where you can add a board with custom fields and multiple views.


