OneDeck Help Center
Selection Fields
OneDeck’s Status and Selection fields streamline organization and tracking. The Status field provides a clear view of flow progress with customizable options. The Select and Multi Select fields offer flexible categorization, letting you assign a single option or multiple choices from a dropdown list - ideal for priorities, tags, or departments.
Together, these fields make it easy to organize, categorize, and visualize data across your boards in OneDeck. In this documentation, we’ll walk you through the steps to add and use the following selection board fields:
- Status
- Select
- Multi-select
Let’s get started 🚀
Navigation
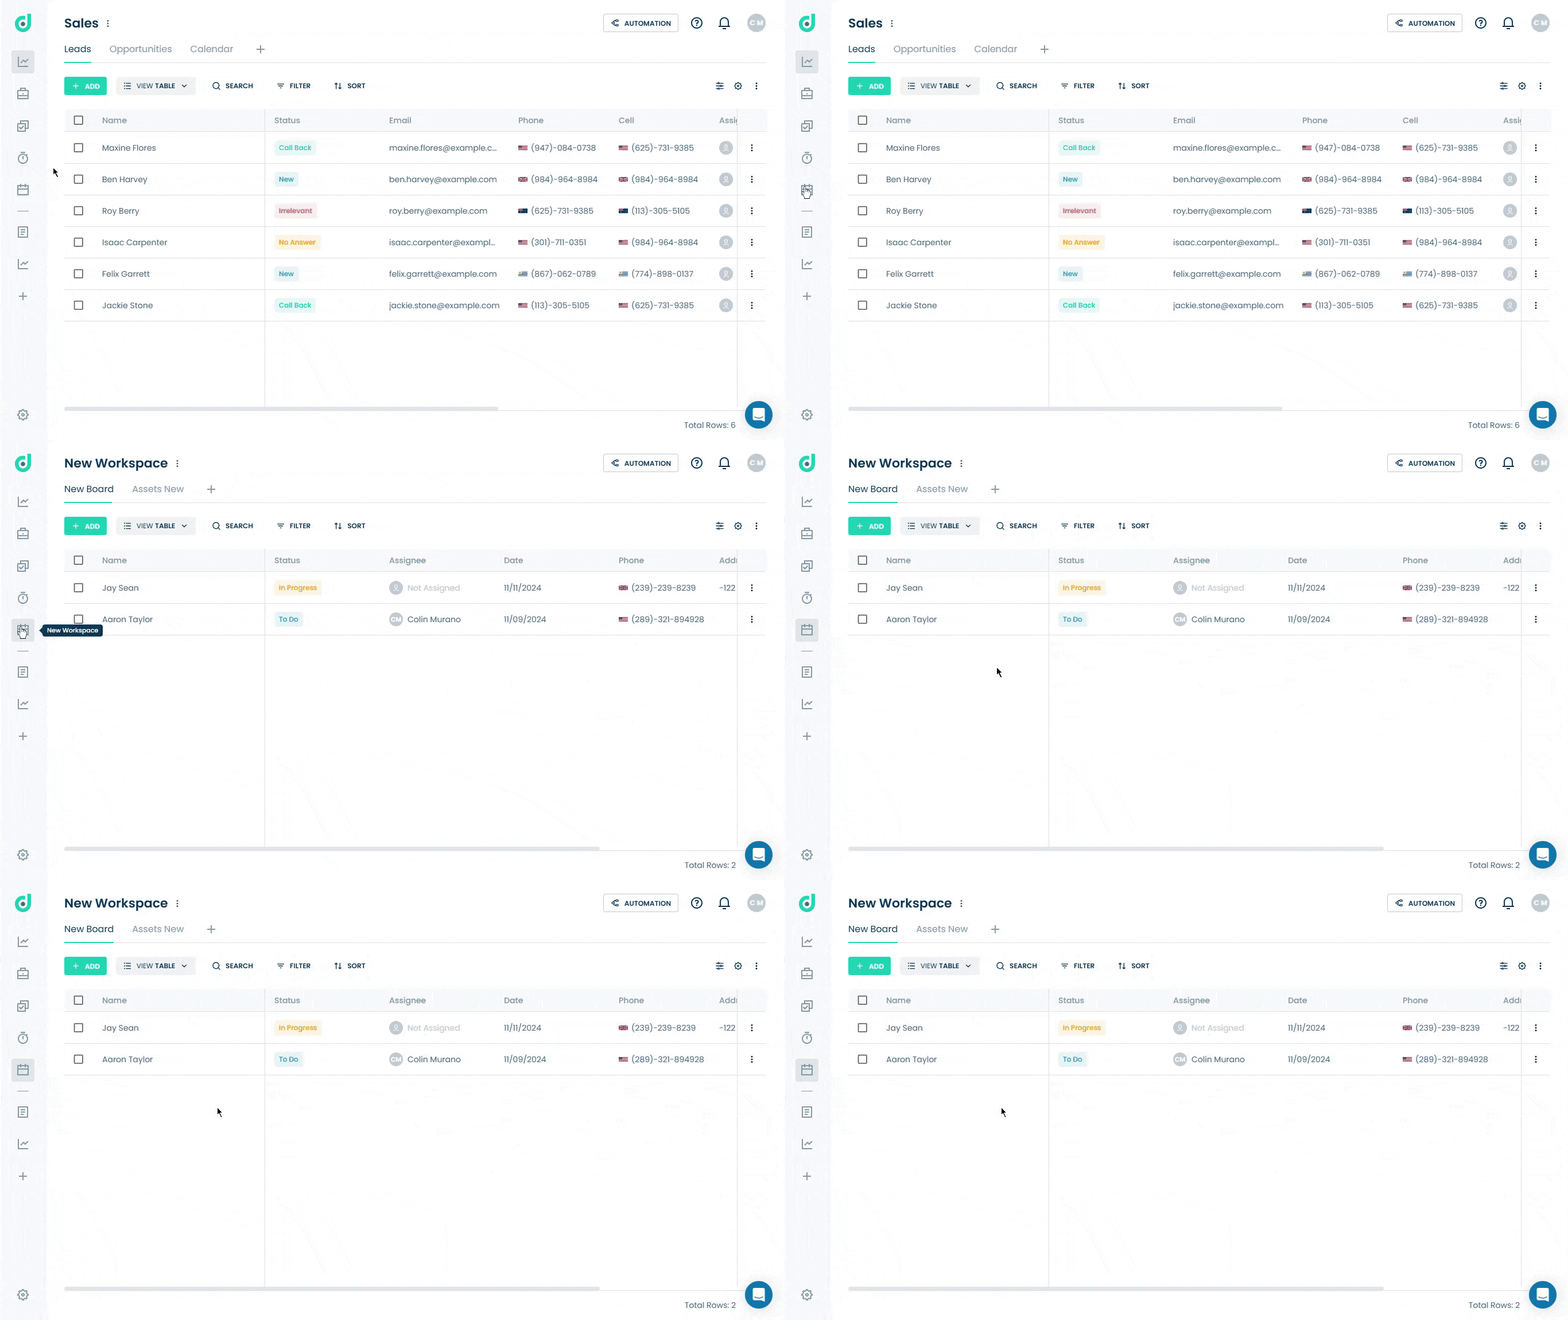
Step 1: Click on the Workspace button from the side navigation menu bar.
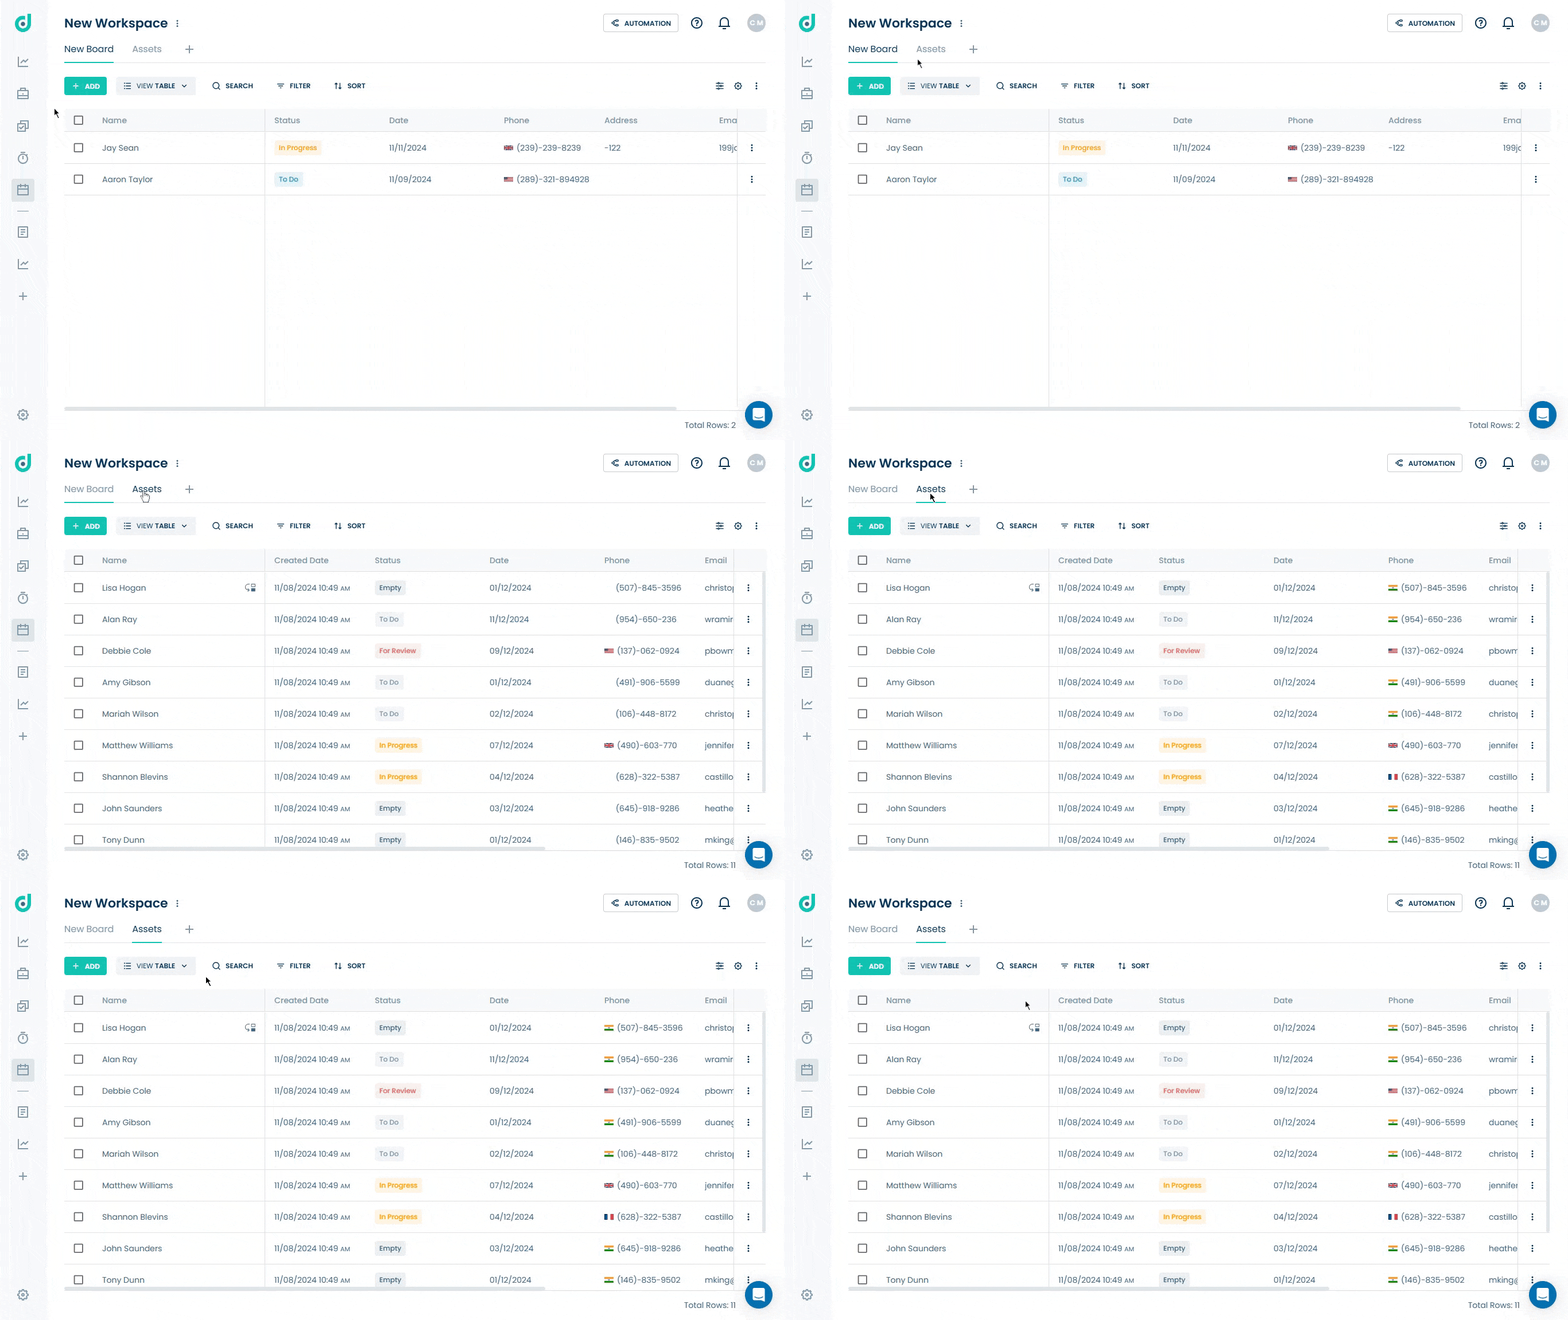
Step 2: Select the board where you want to add selection fields.
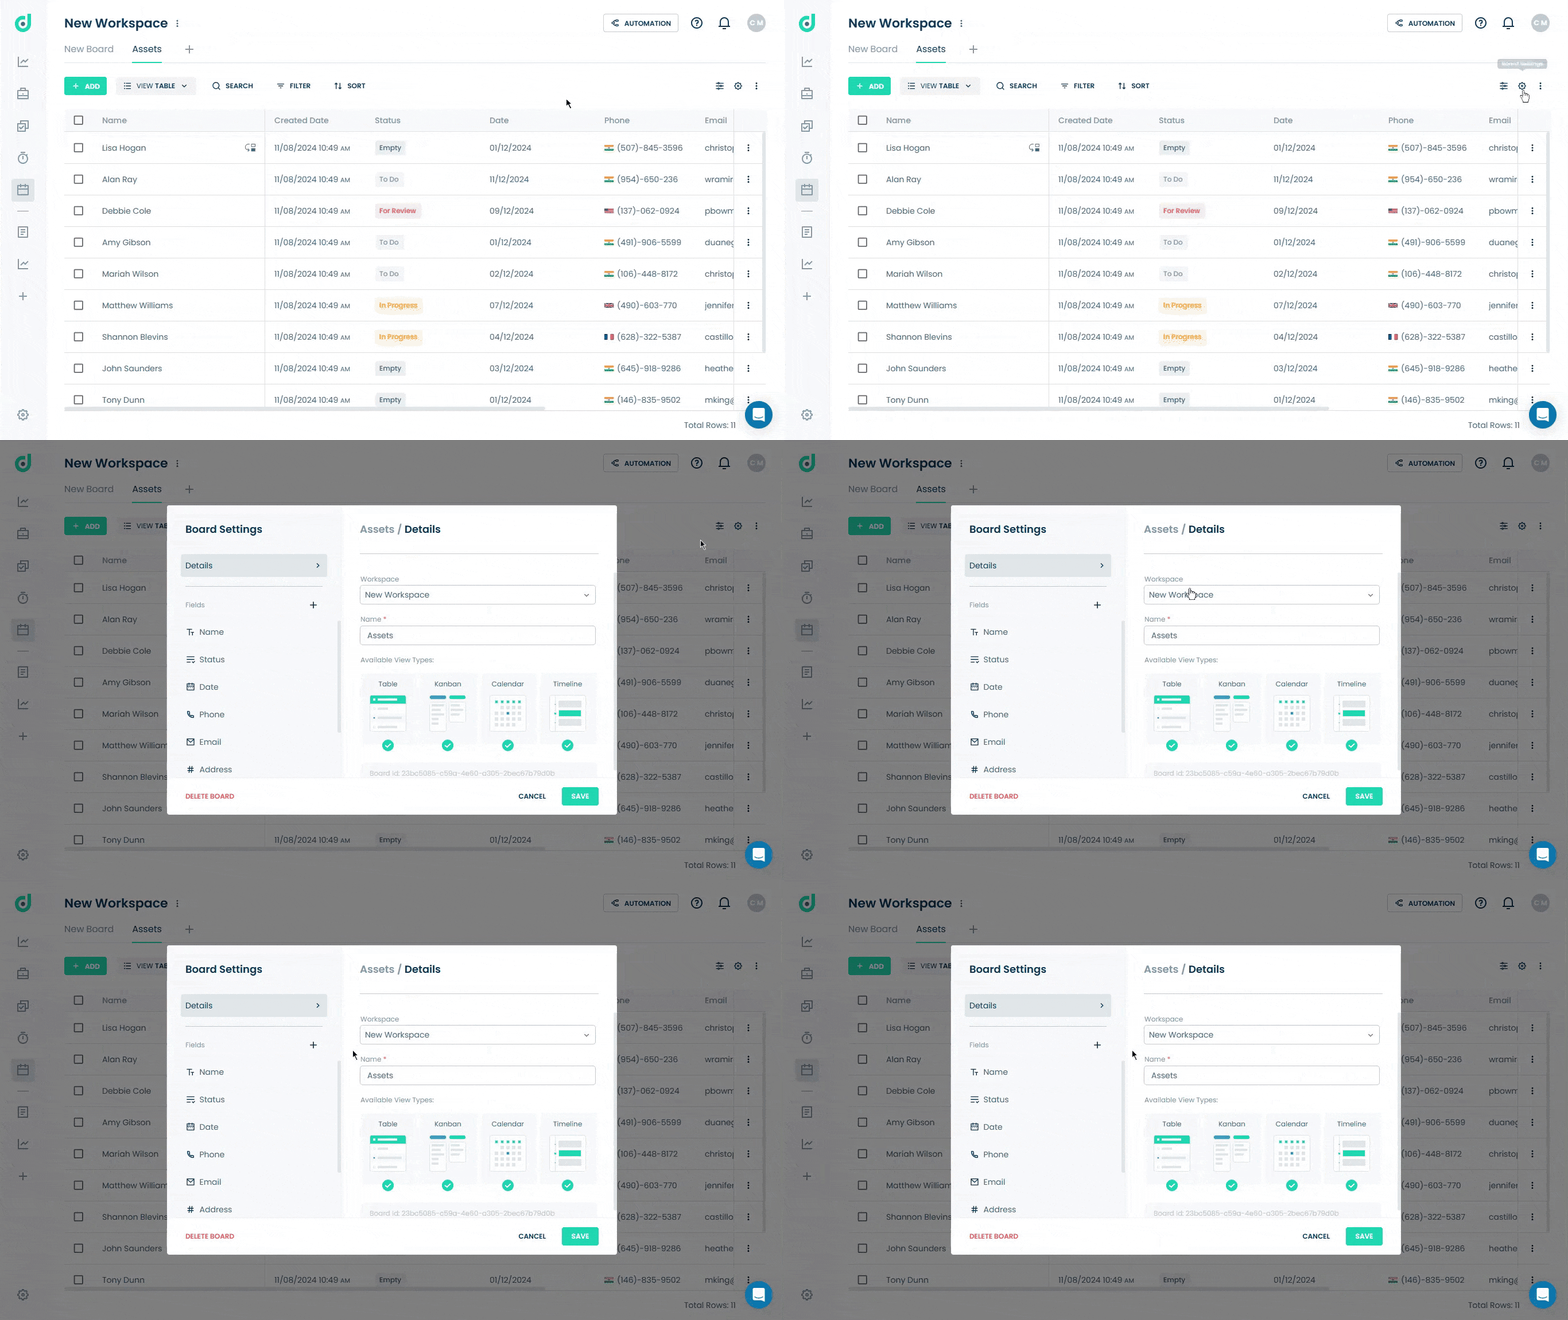
Step 3: Click on the Setting icon from the right side of the interface.
Status
The Status field in OneDeck allows you to visualize and track the progress of records, making it ideal for managing workflows. You can create custom status options, such as "In progress", "Waiting for review", or "Complete", providing a clear view of current status and any updates within your boards.
This field also enables the Kanban View, where you can drag and drop records between columns to update statuses, synced instantly with the table view for seamless workflow tracking.
Add Status Field
Step 1: Click on the “+” button from the field section.
Note: The user can also find the “Status” as default field type, listed on the board settings, if not seen, click on the new field to add new.
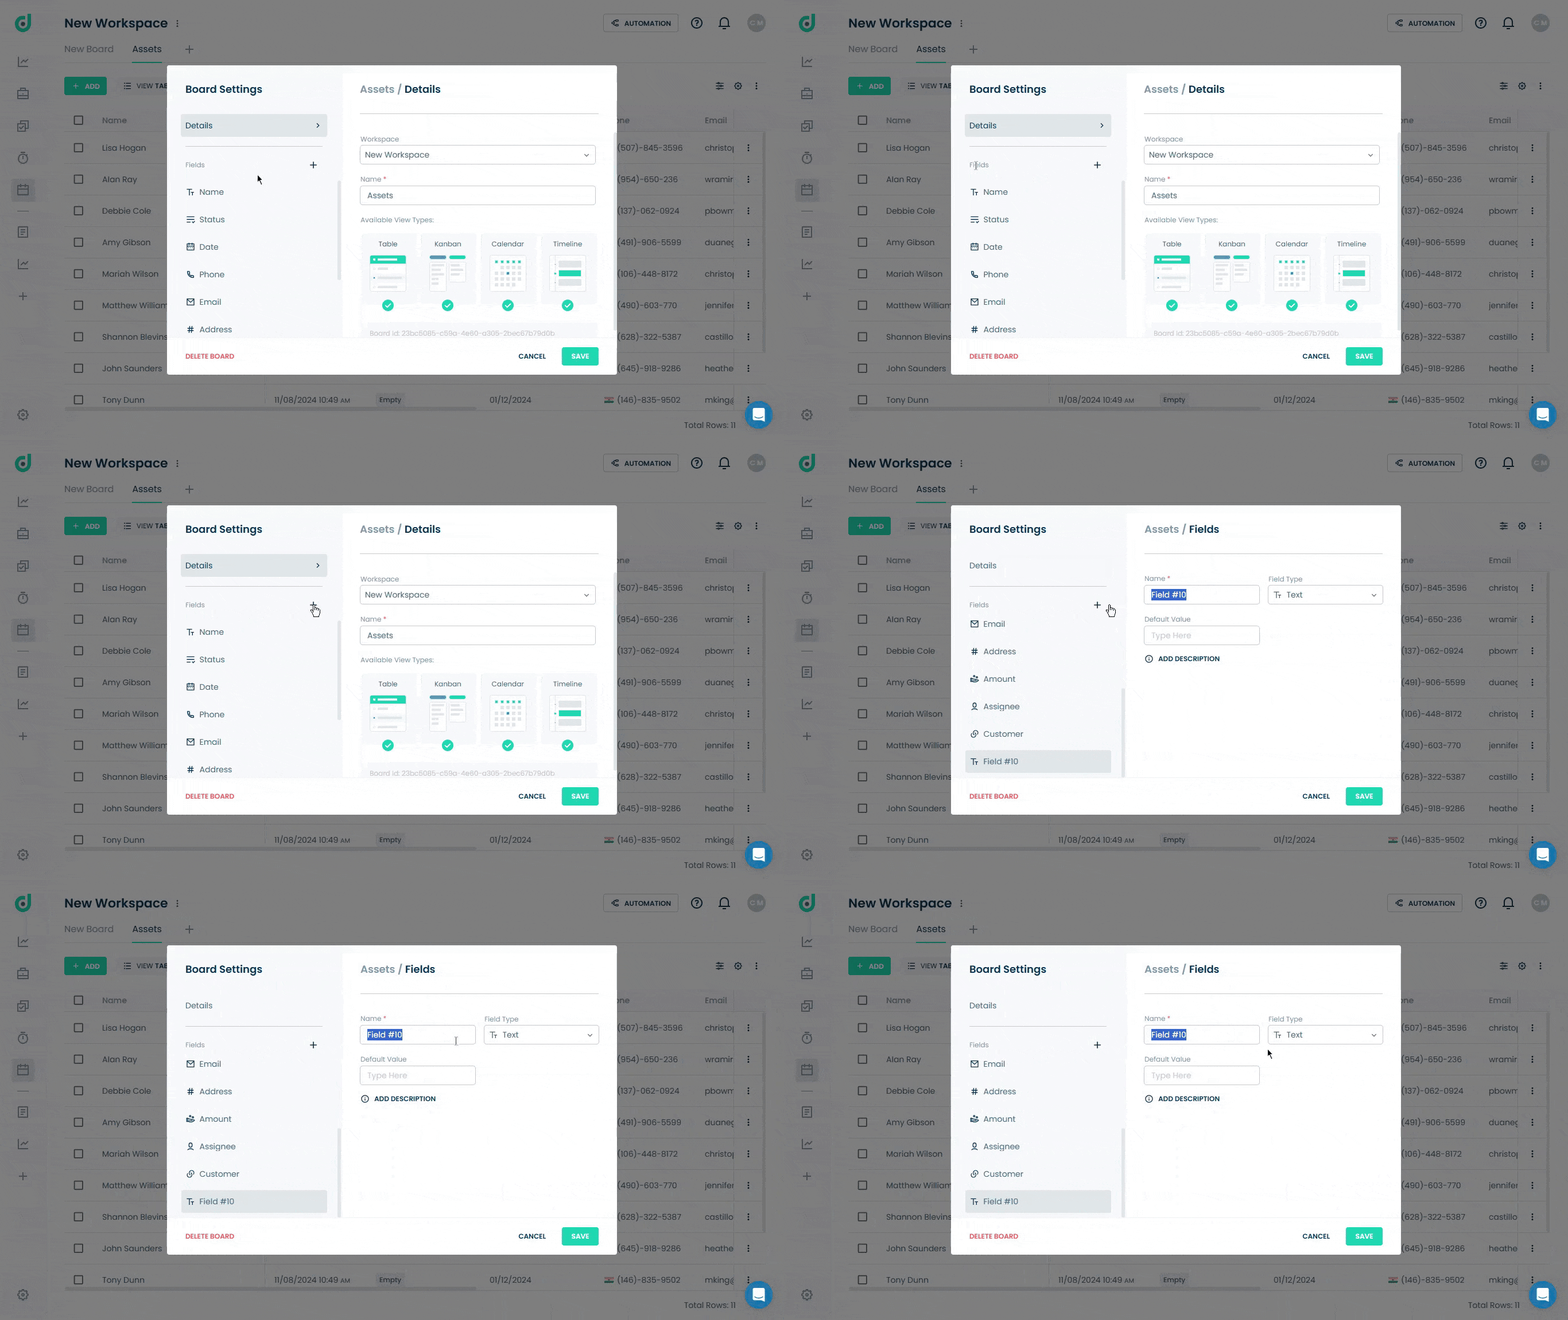
Step 2: Enter the field name and select “Status” as the field type.
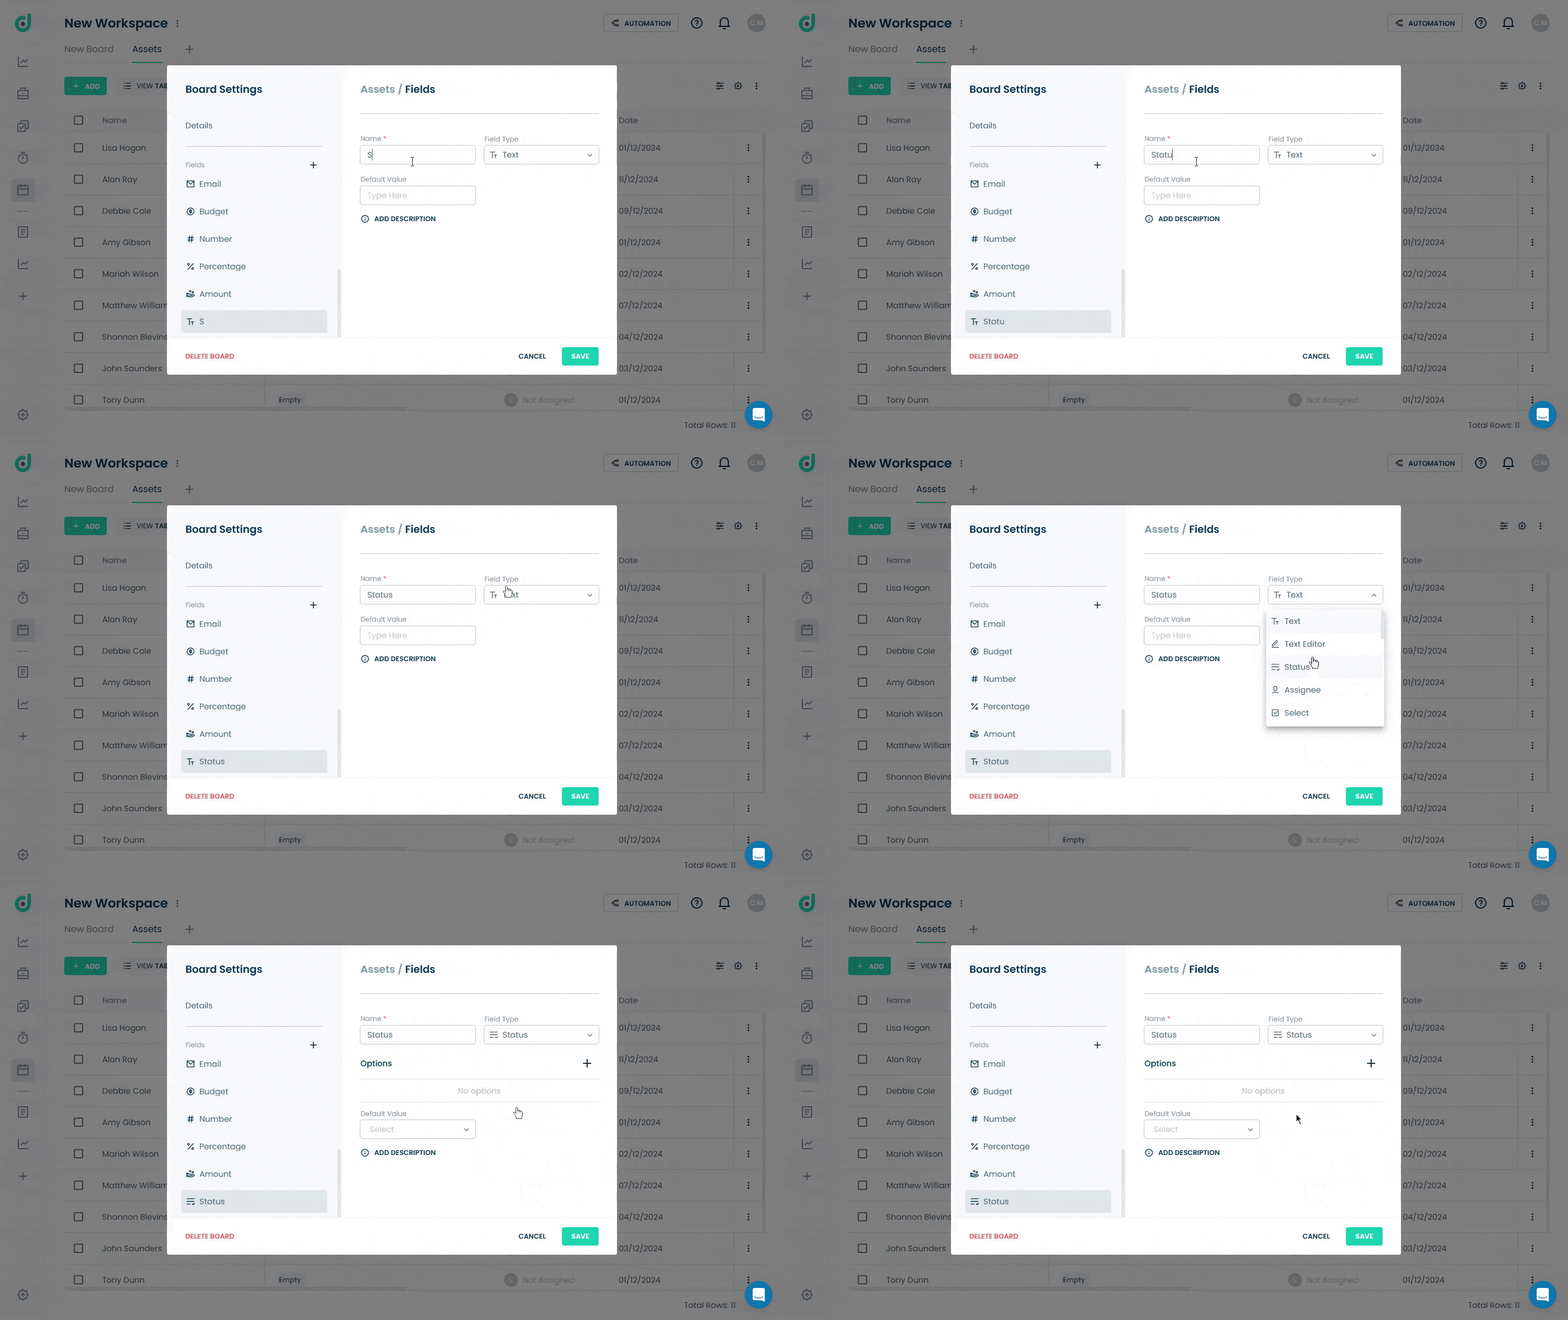
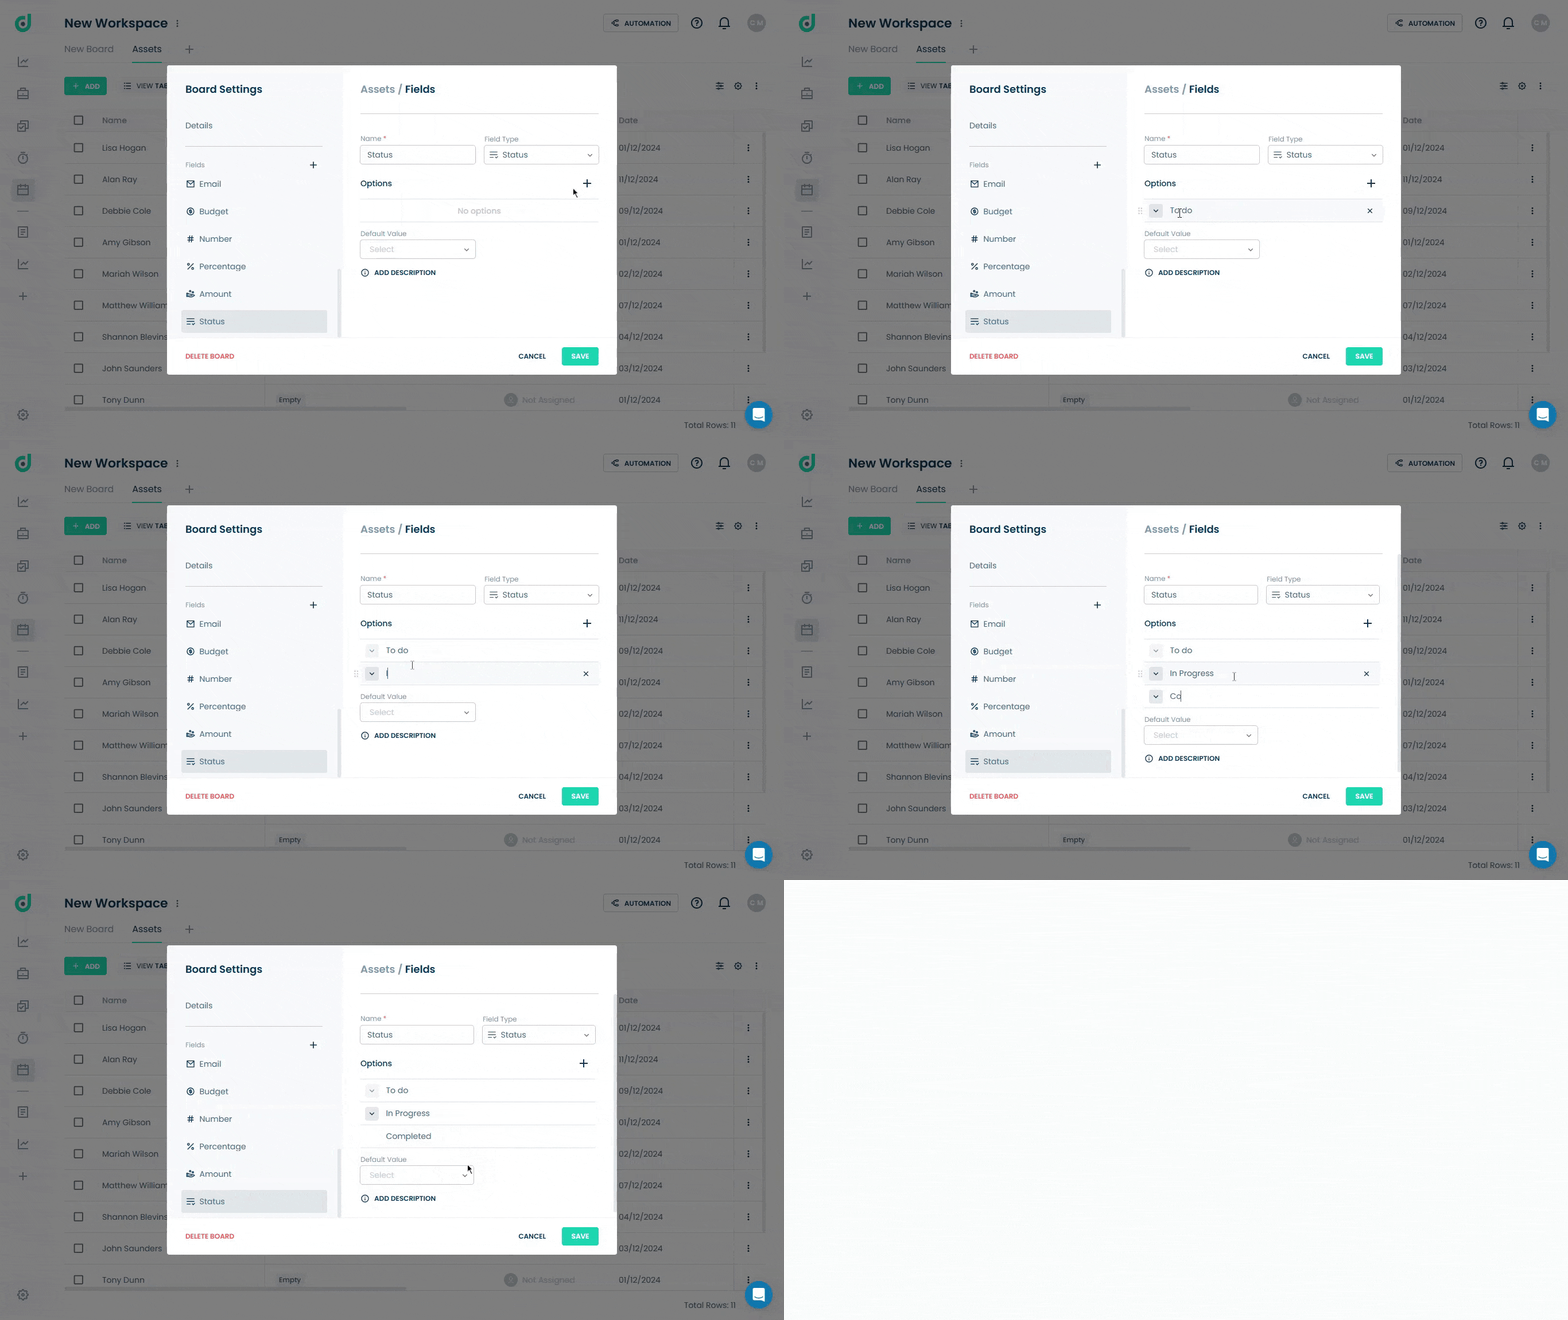
Step 3: Click on the “+” button to add statuses with color indicators. Optionally, select a default value as status and a description for additional context.
Step 4: Click on the SAVE button.
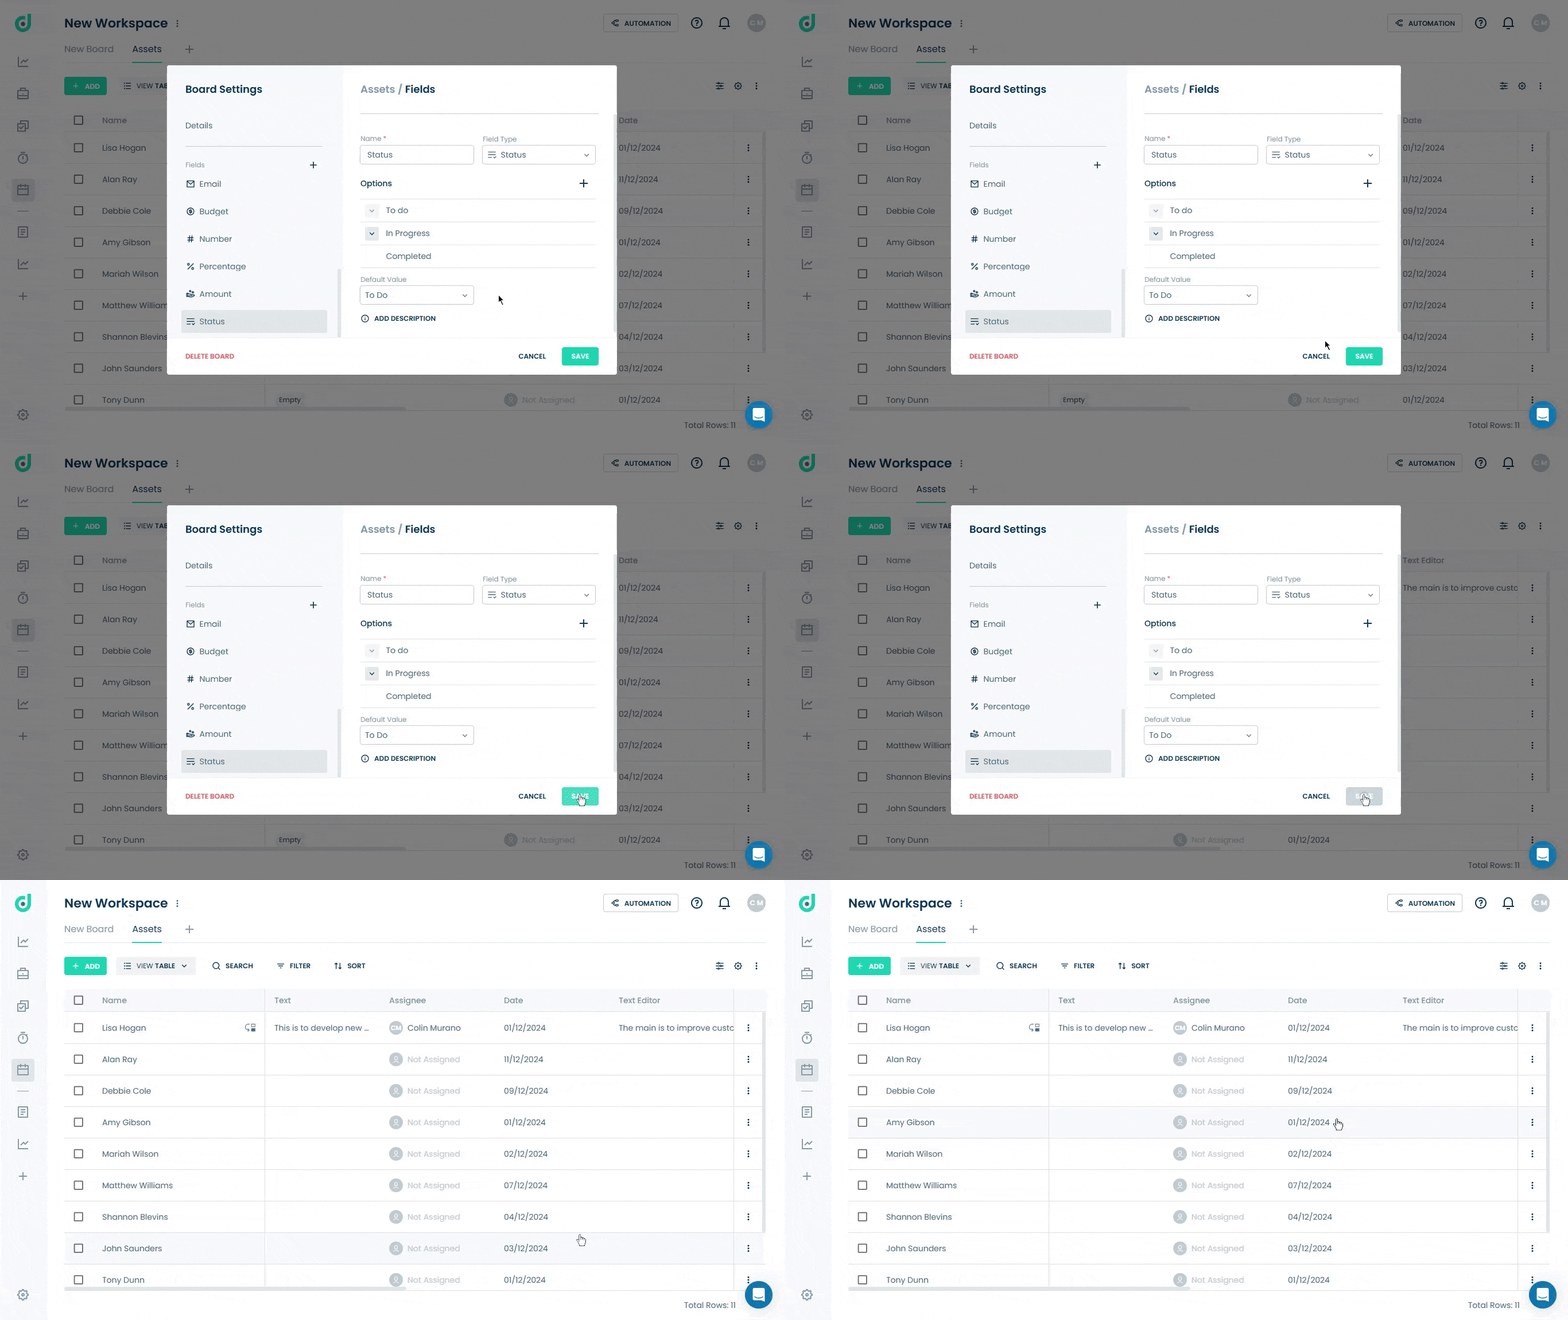
You can also view and change the statuses in the column (a.k.a Kanban View), where you can just drag and drop your records to change its status.
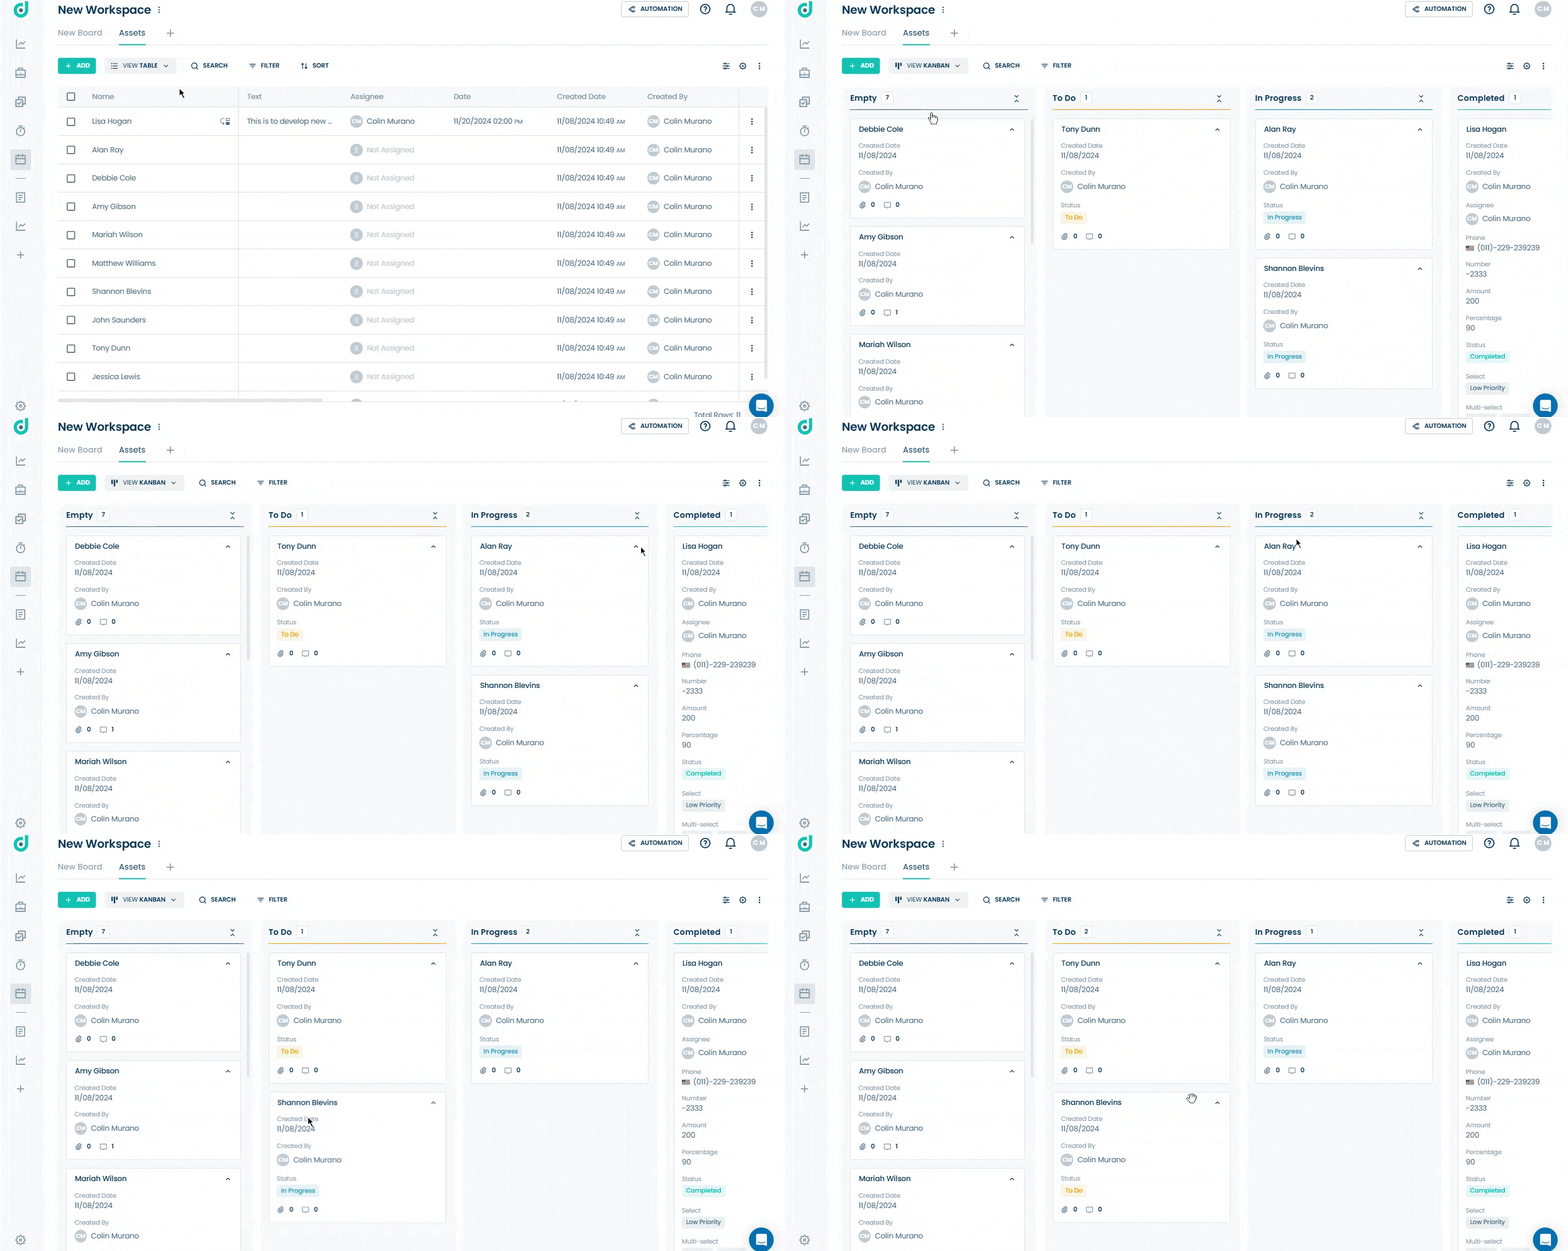
Use Status Field
Once you have added the Status field as a field type, you can assign and track custom status options, such as "In progress," "Waiting for review," or "Complete," for various records within your board.
Step 1: Click on the Record you want to add status options.
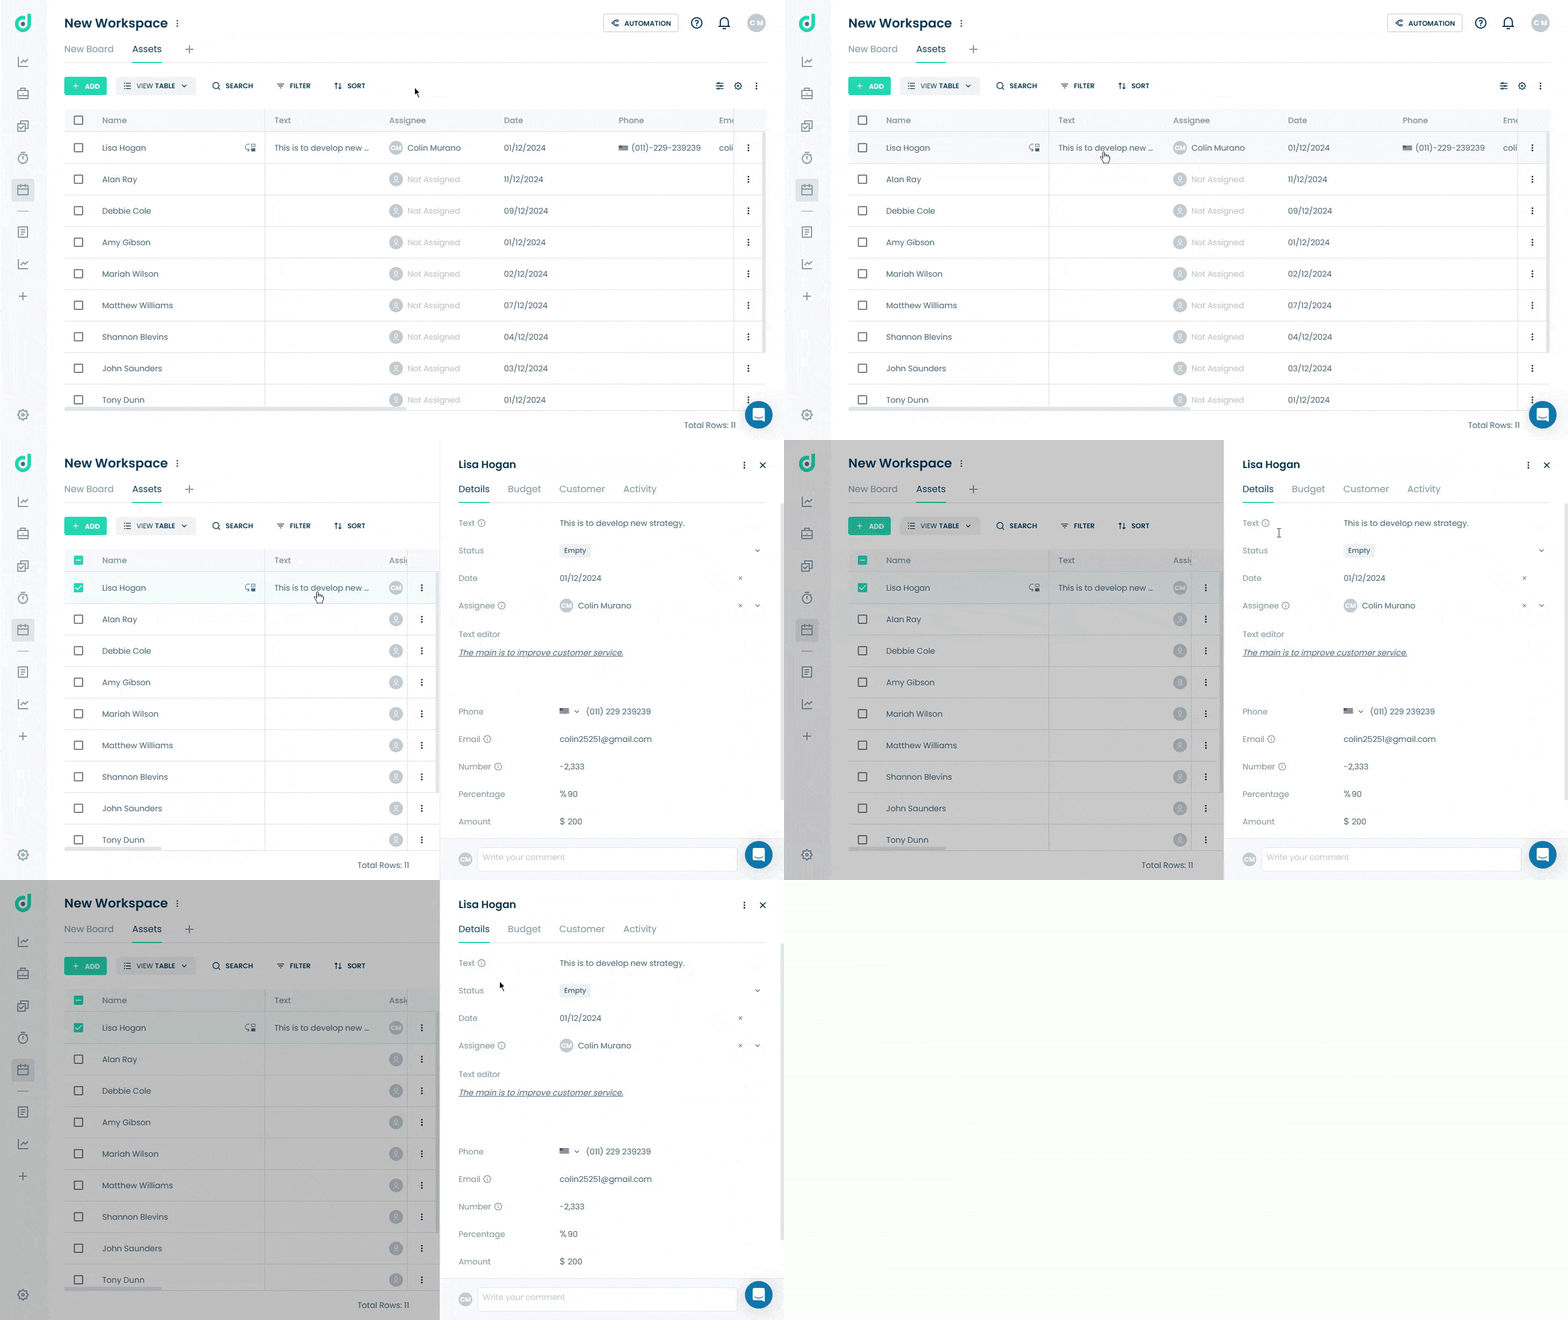
Step 2: In the record's details, locate the Status field and choose preferred status for the record.
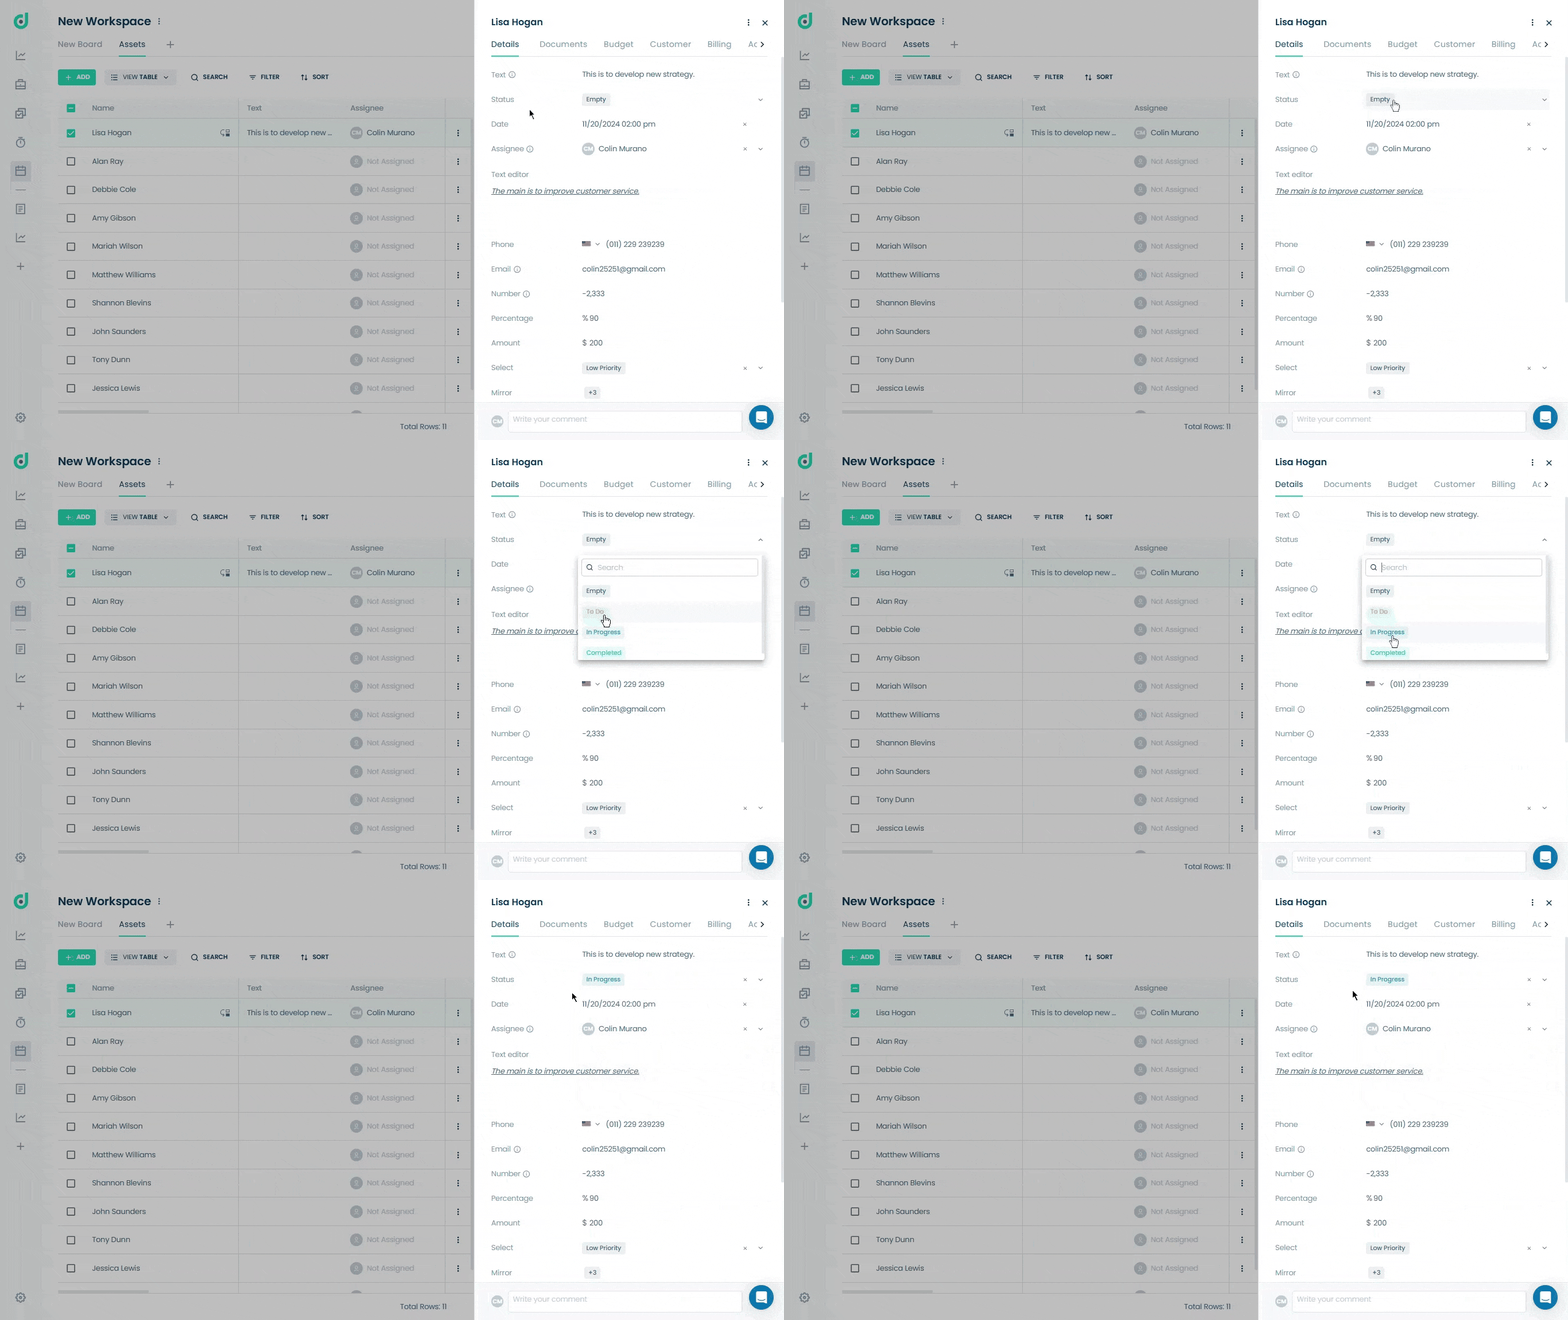
Select
The Select field in OneDeck enables easy categorization and grouping of records, making it highly versatile for organizing information. You can create custom options - such as "Priority" "Label" or "Department" - and assign them to records, tailoring categorization to meet your specific needs. Options can be updated as your business requirements change, ensuring flexibility and adaptability within your boards.
Add Select Field
Step 1: Click on the “+” button from the field section.
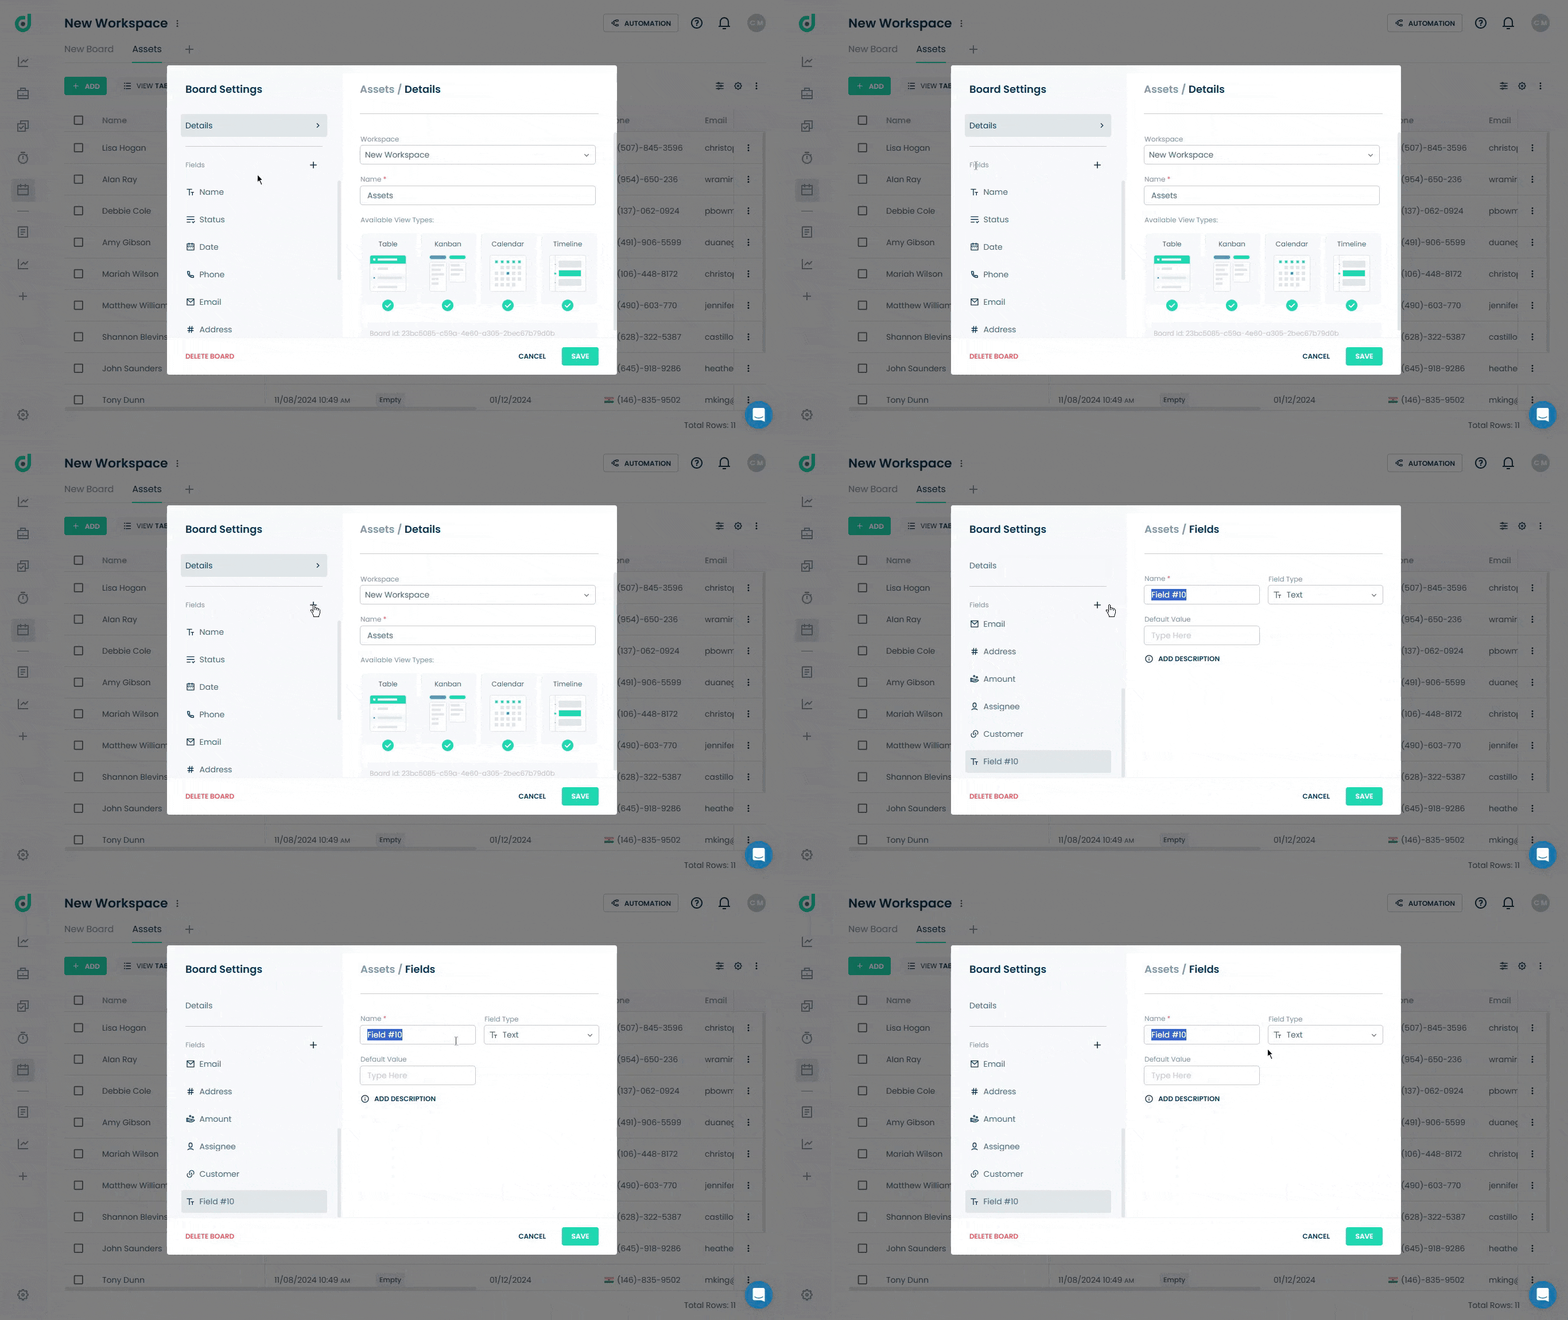
Step 2: Enter the field name and select “Select” as the field type.
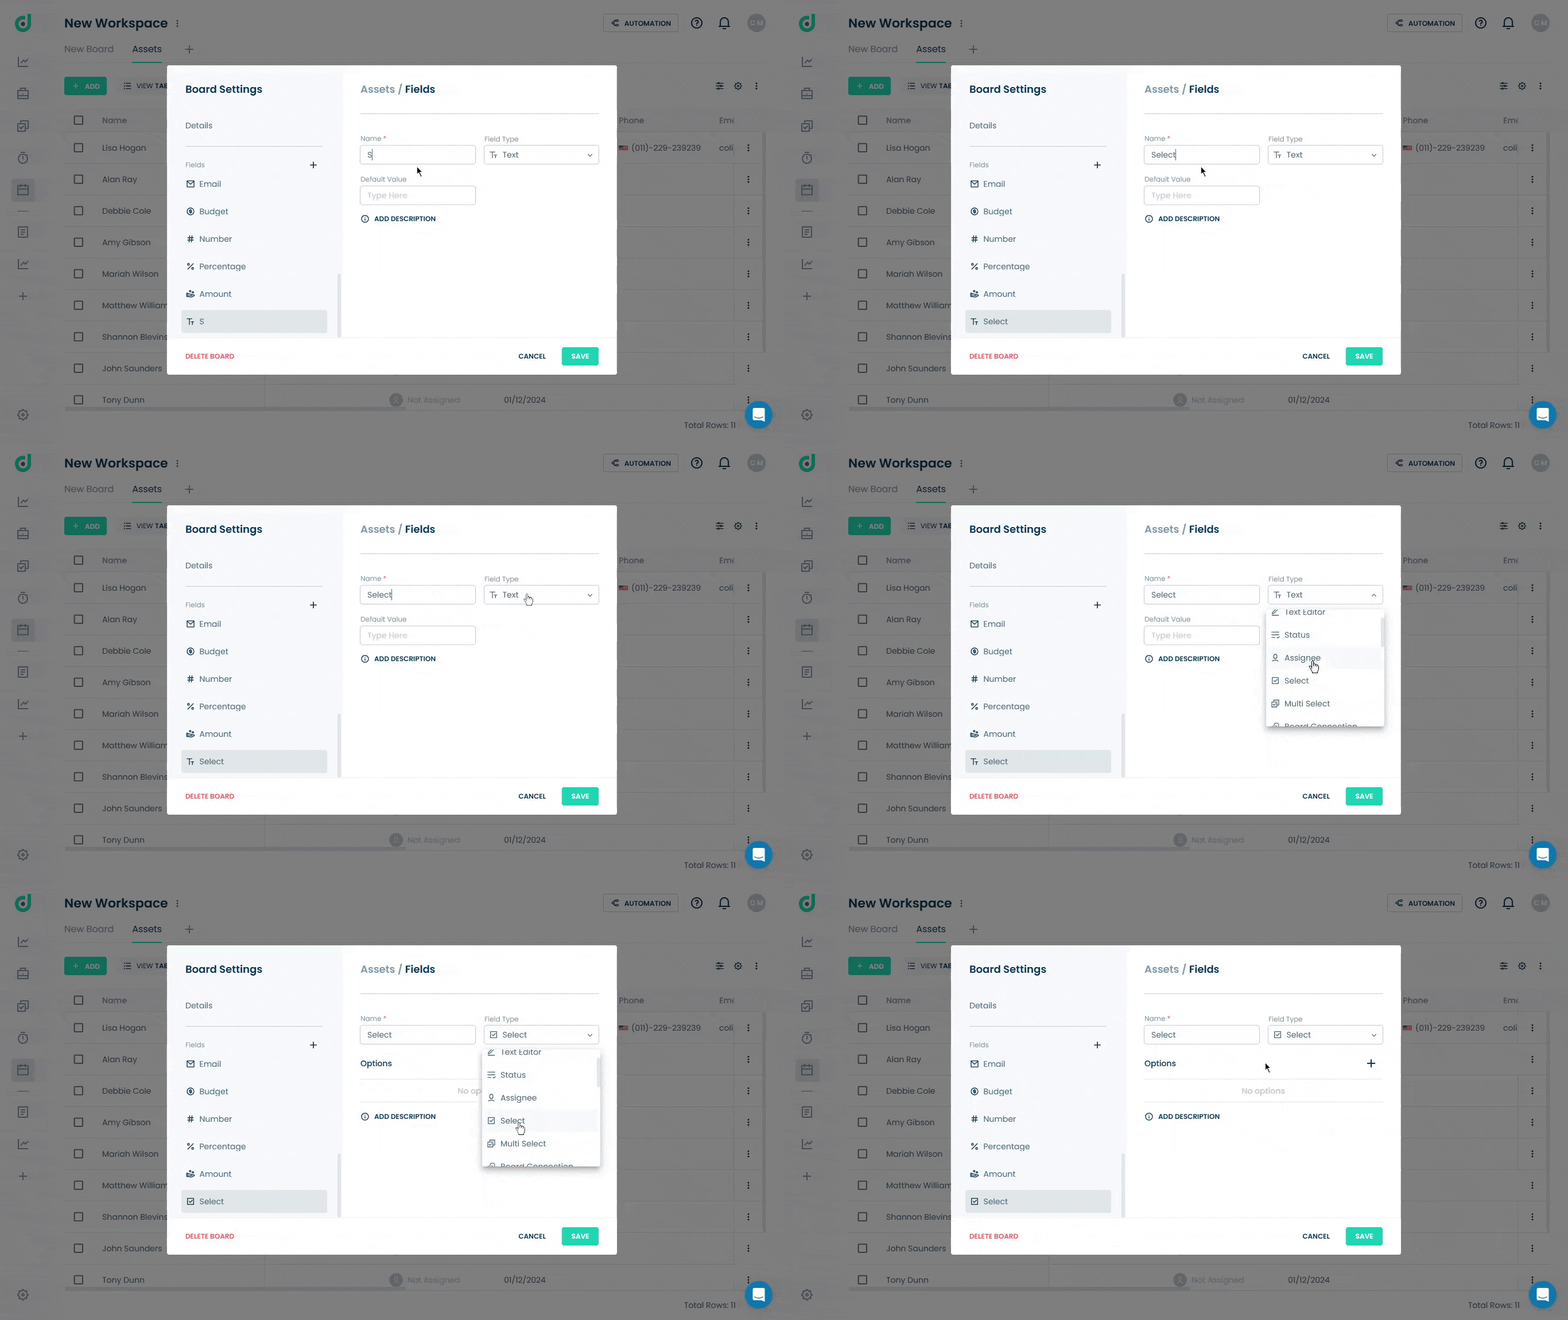
Step 3: Click on the “+” button to add the preferred options. Optionally, select a default value as status and a description for additional context.
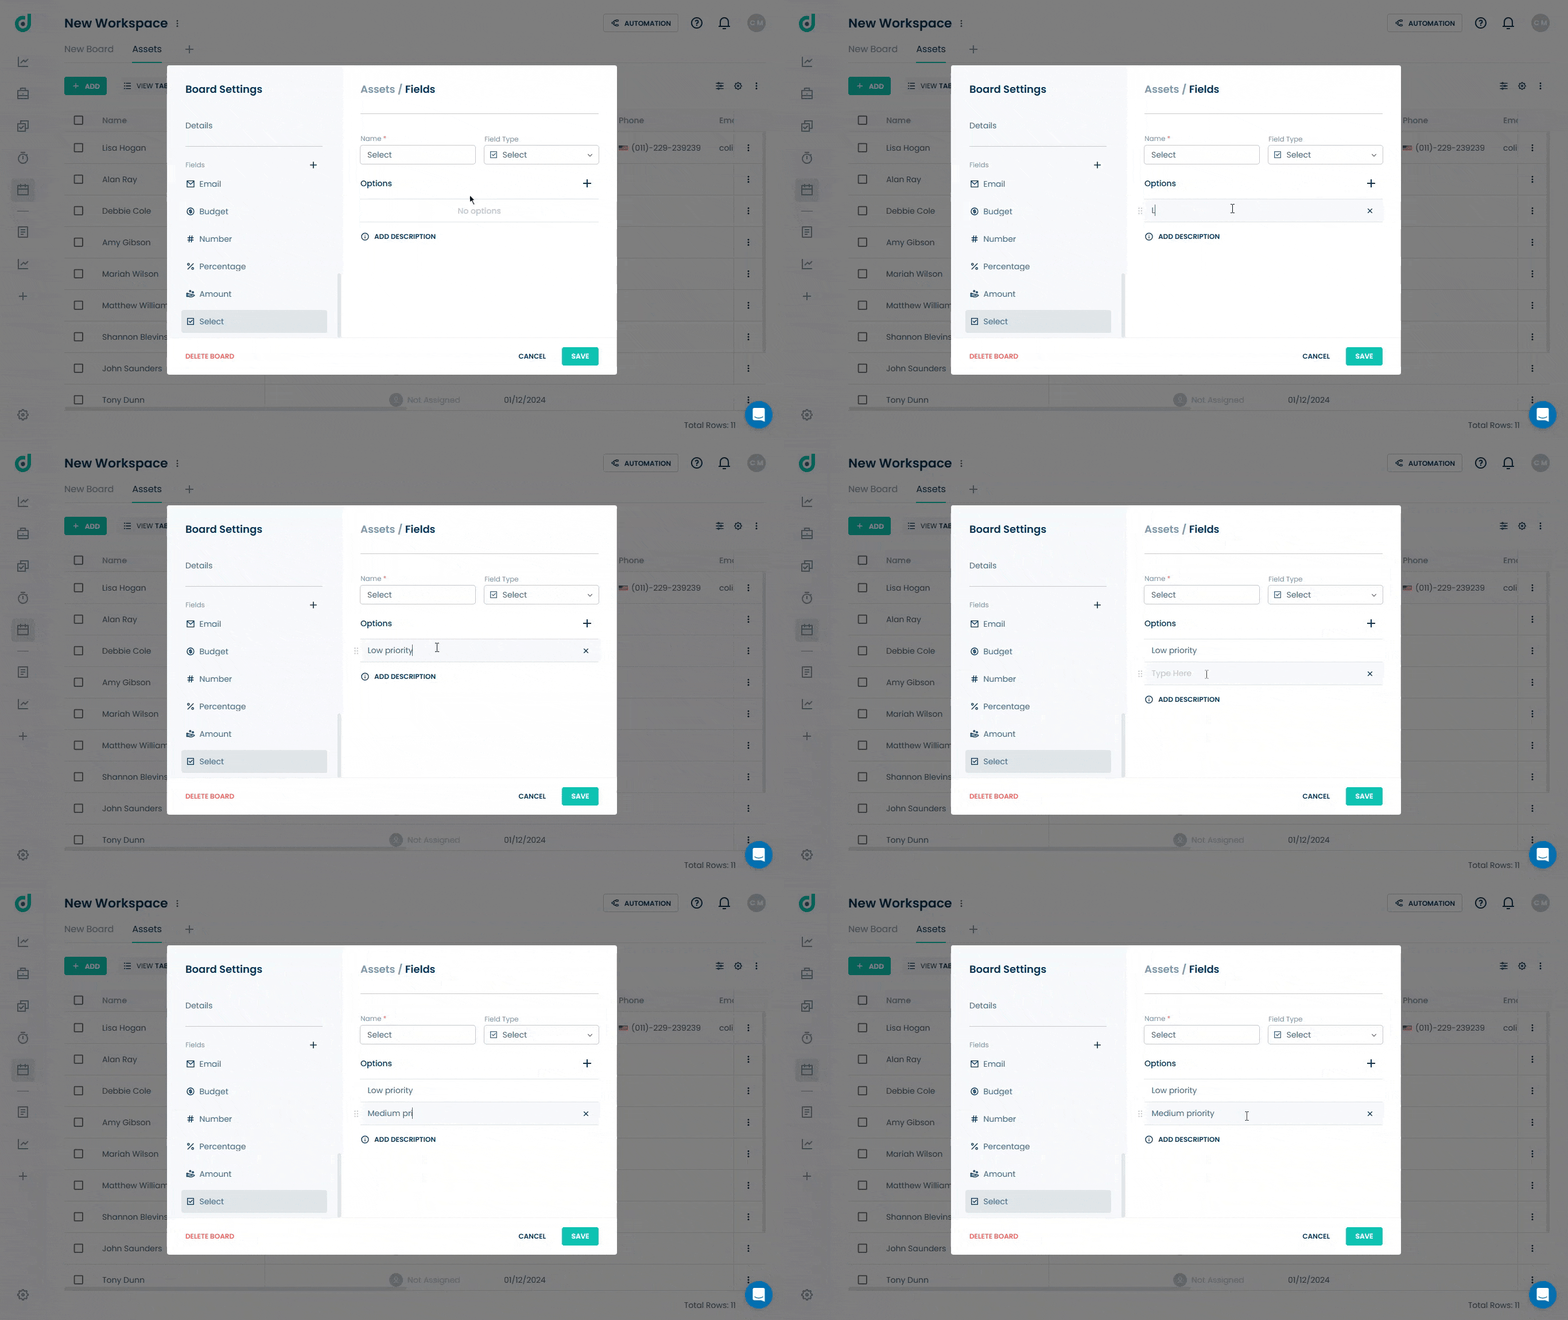
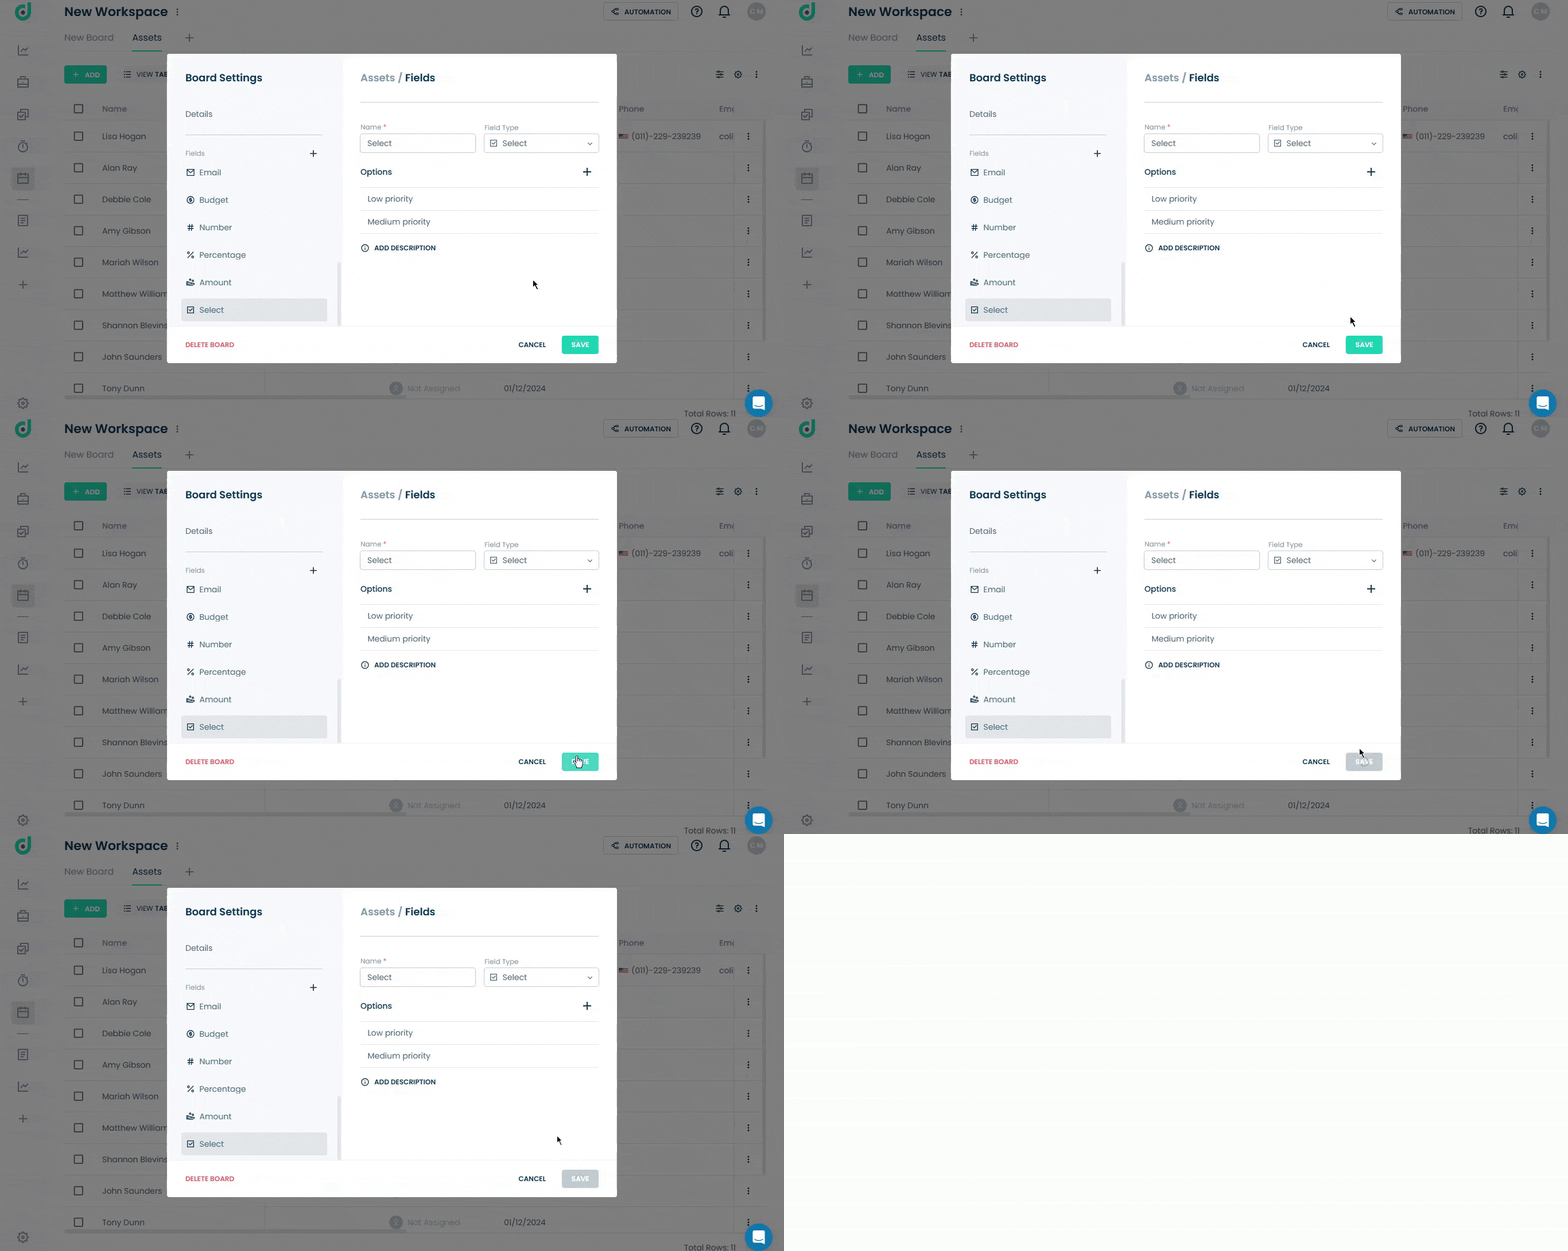
Step 4: Click on the SAVE button.
Use Select Field
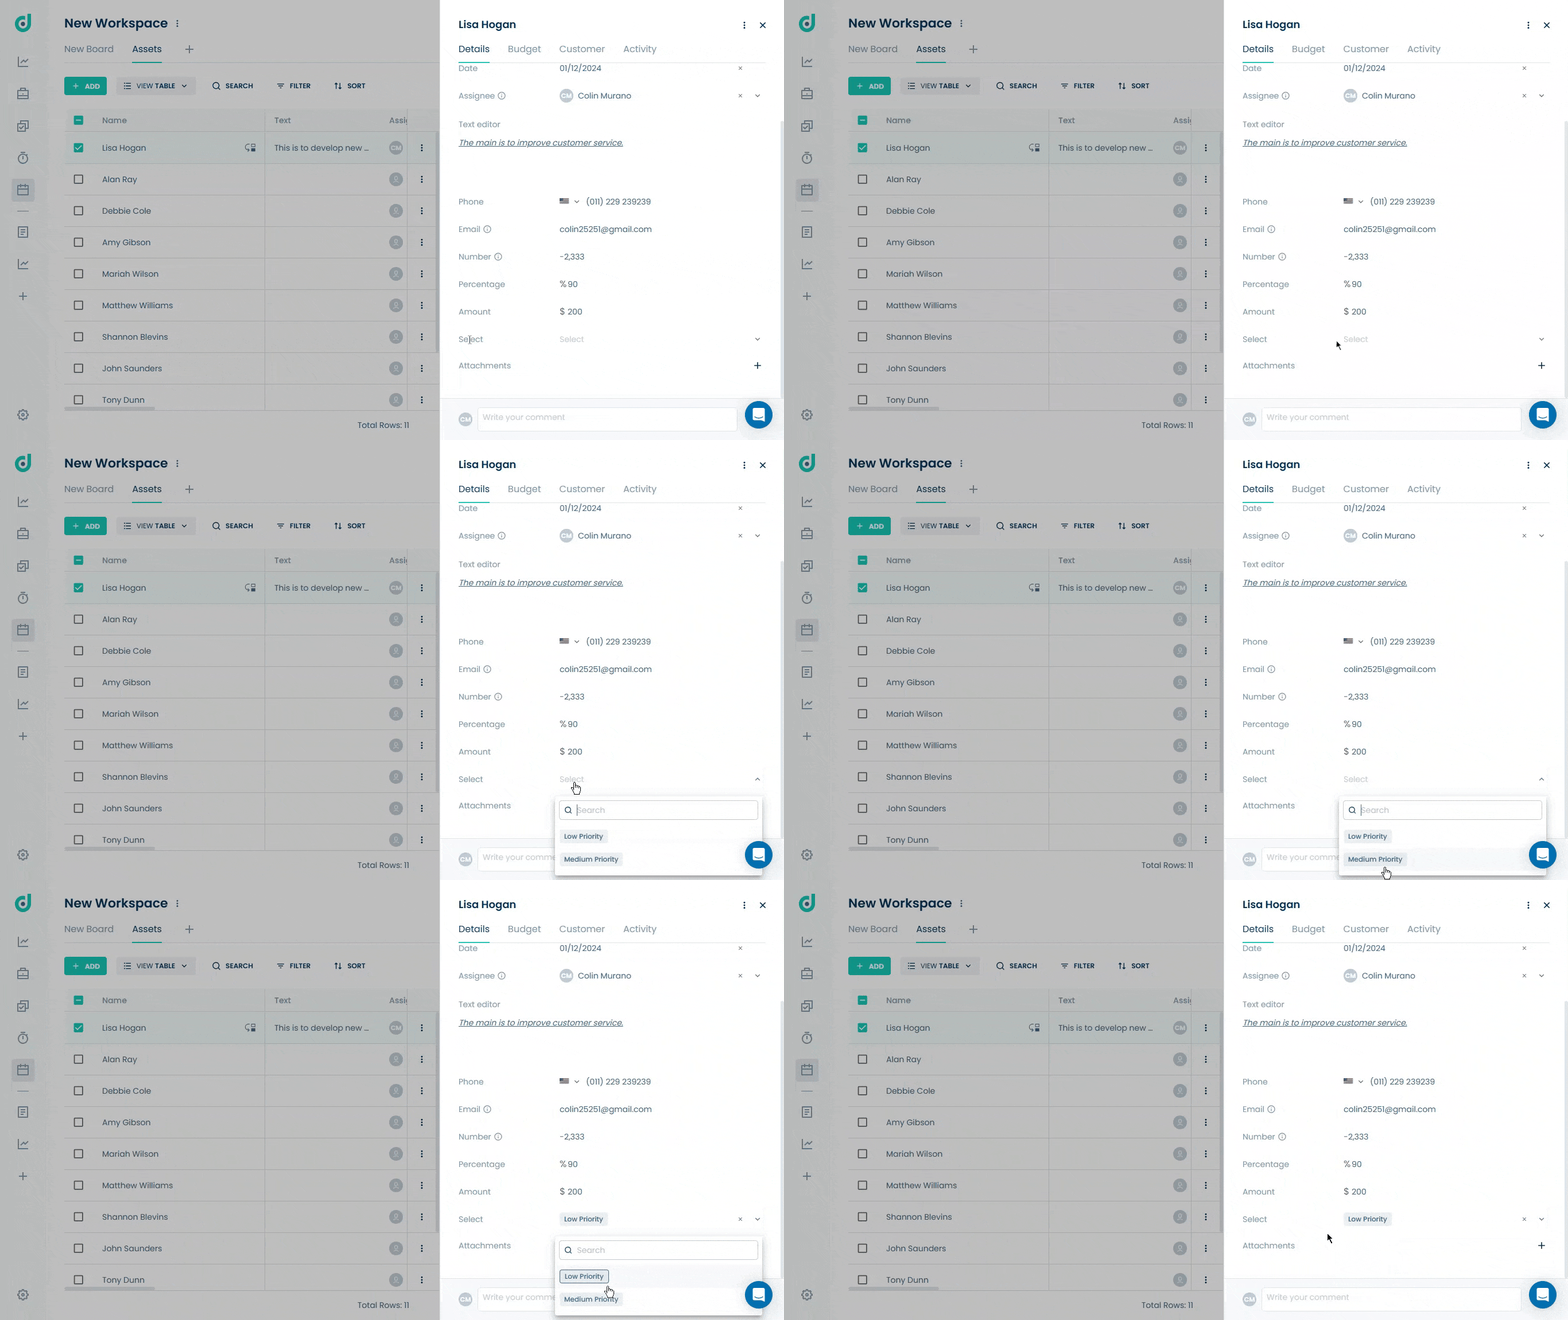
Once you have added the Select field as a field type, you can assign and track custom options for various records within your board, allowing for easy categorization and organization.
Step 1: Click on the Record you want to choose a selection option.
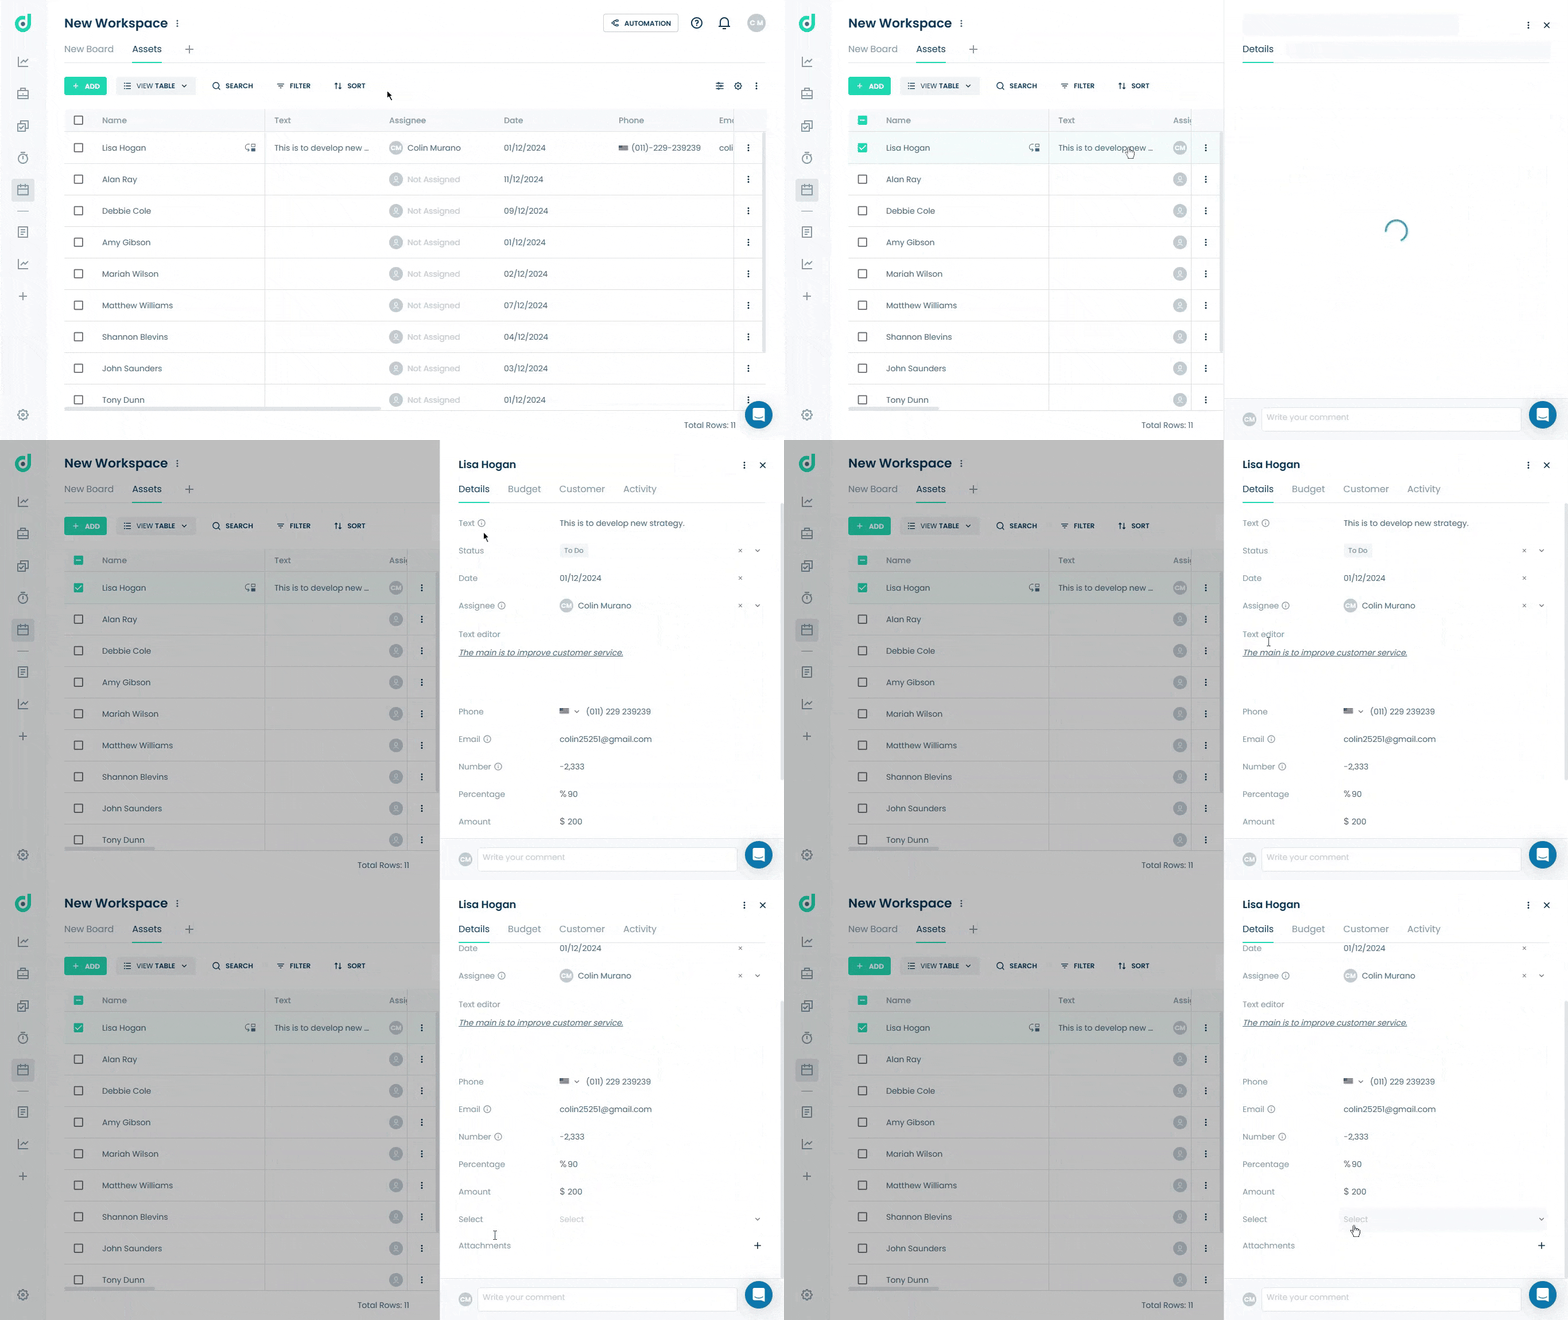
Step 2: In the record's details, locate the Select field and choose the preferred option for the record.
Multi-select
The Multi Select field in OneDeck provides a flexible way to categorize and organize records by allowing multiple options to be selected from a dropdown list. Perfect for fields like "Tags" or "Categories," this field type supports simultaneous selection of multiple options, enabling more dynamic data segmentation. You can easily add or remove options to keep your lists current and aligned with your evolving needs, ensuring that your records remain organized and relevant within your boards.
Add Multi-select Field
Step 1: Click on the “+” button from the field section.
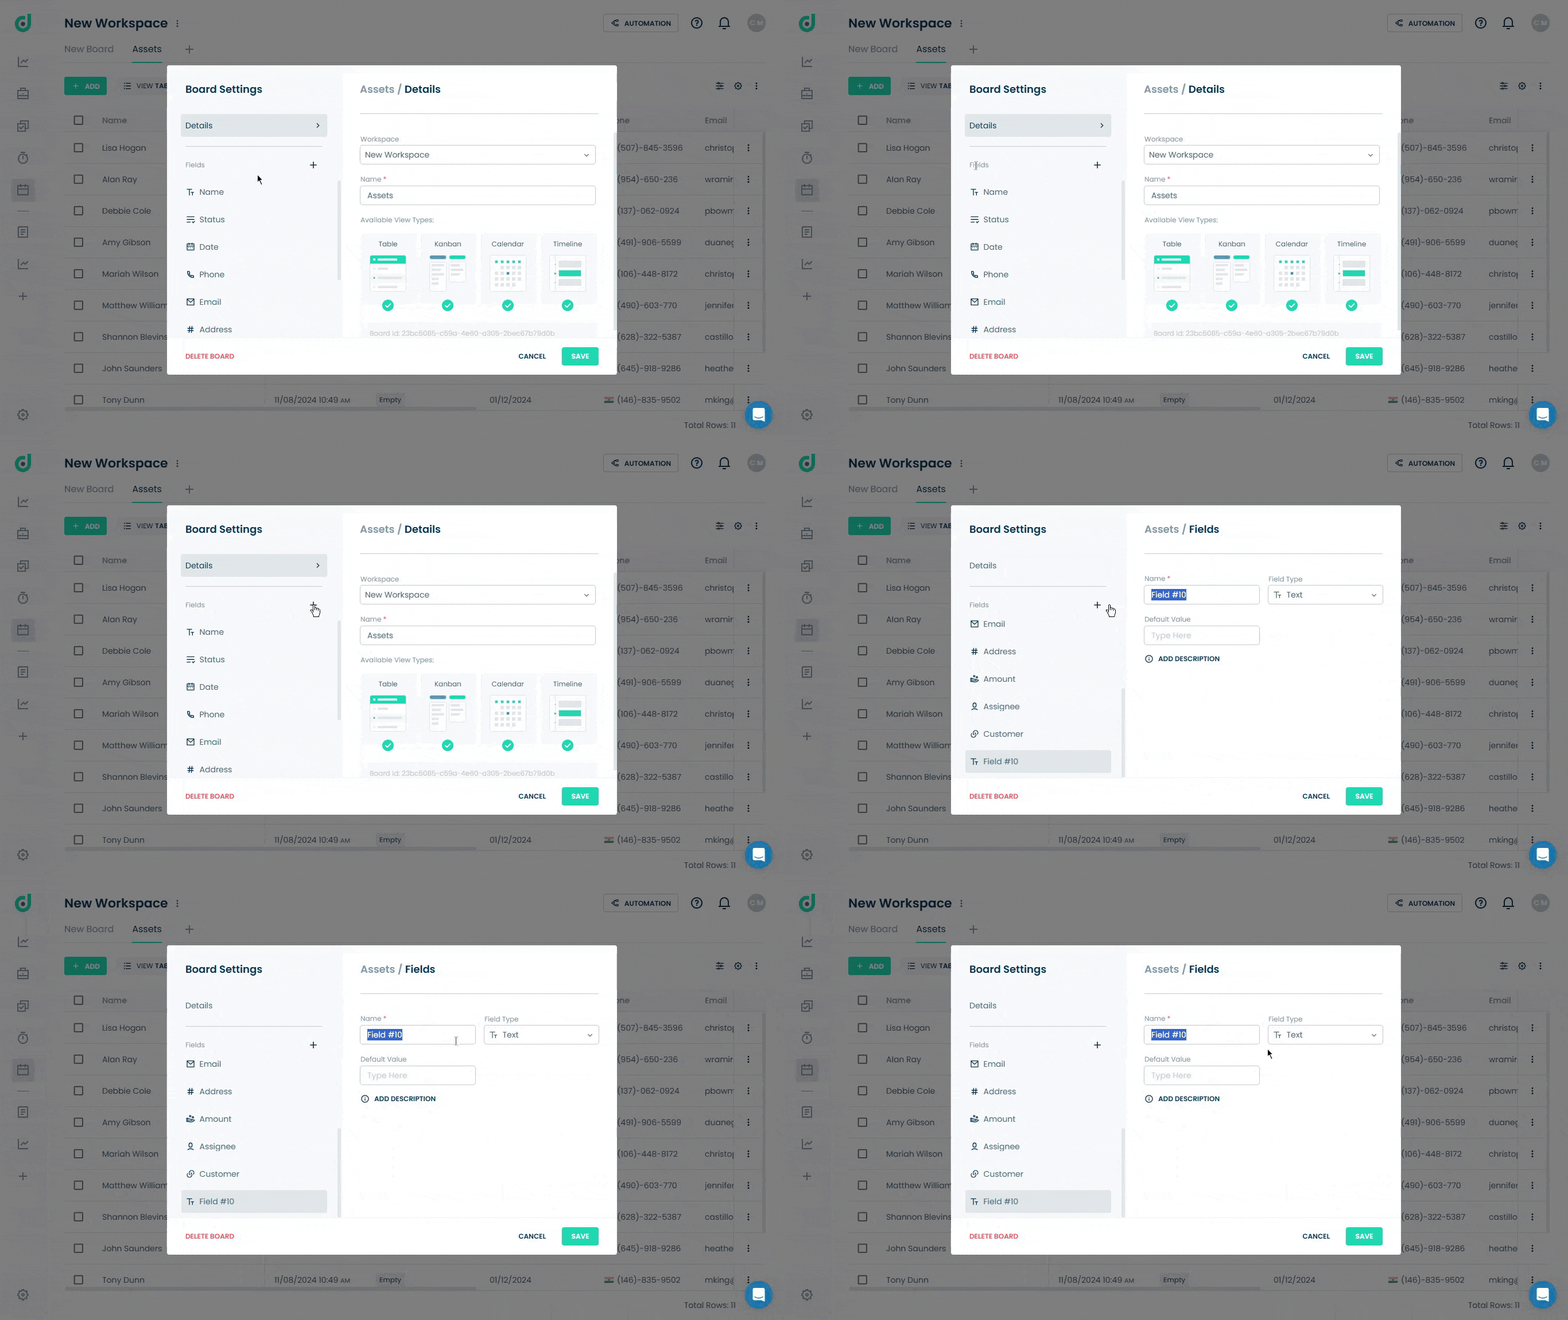
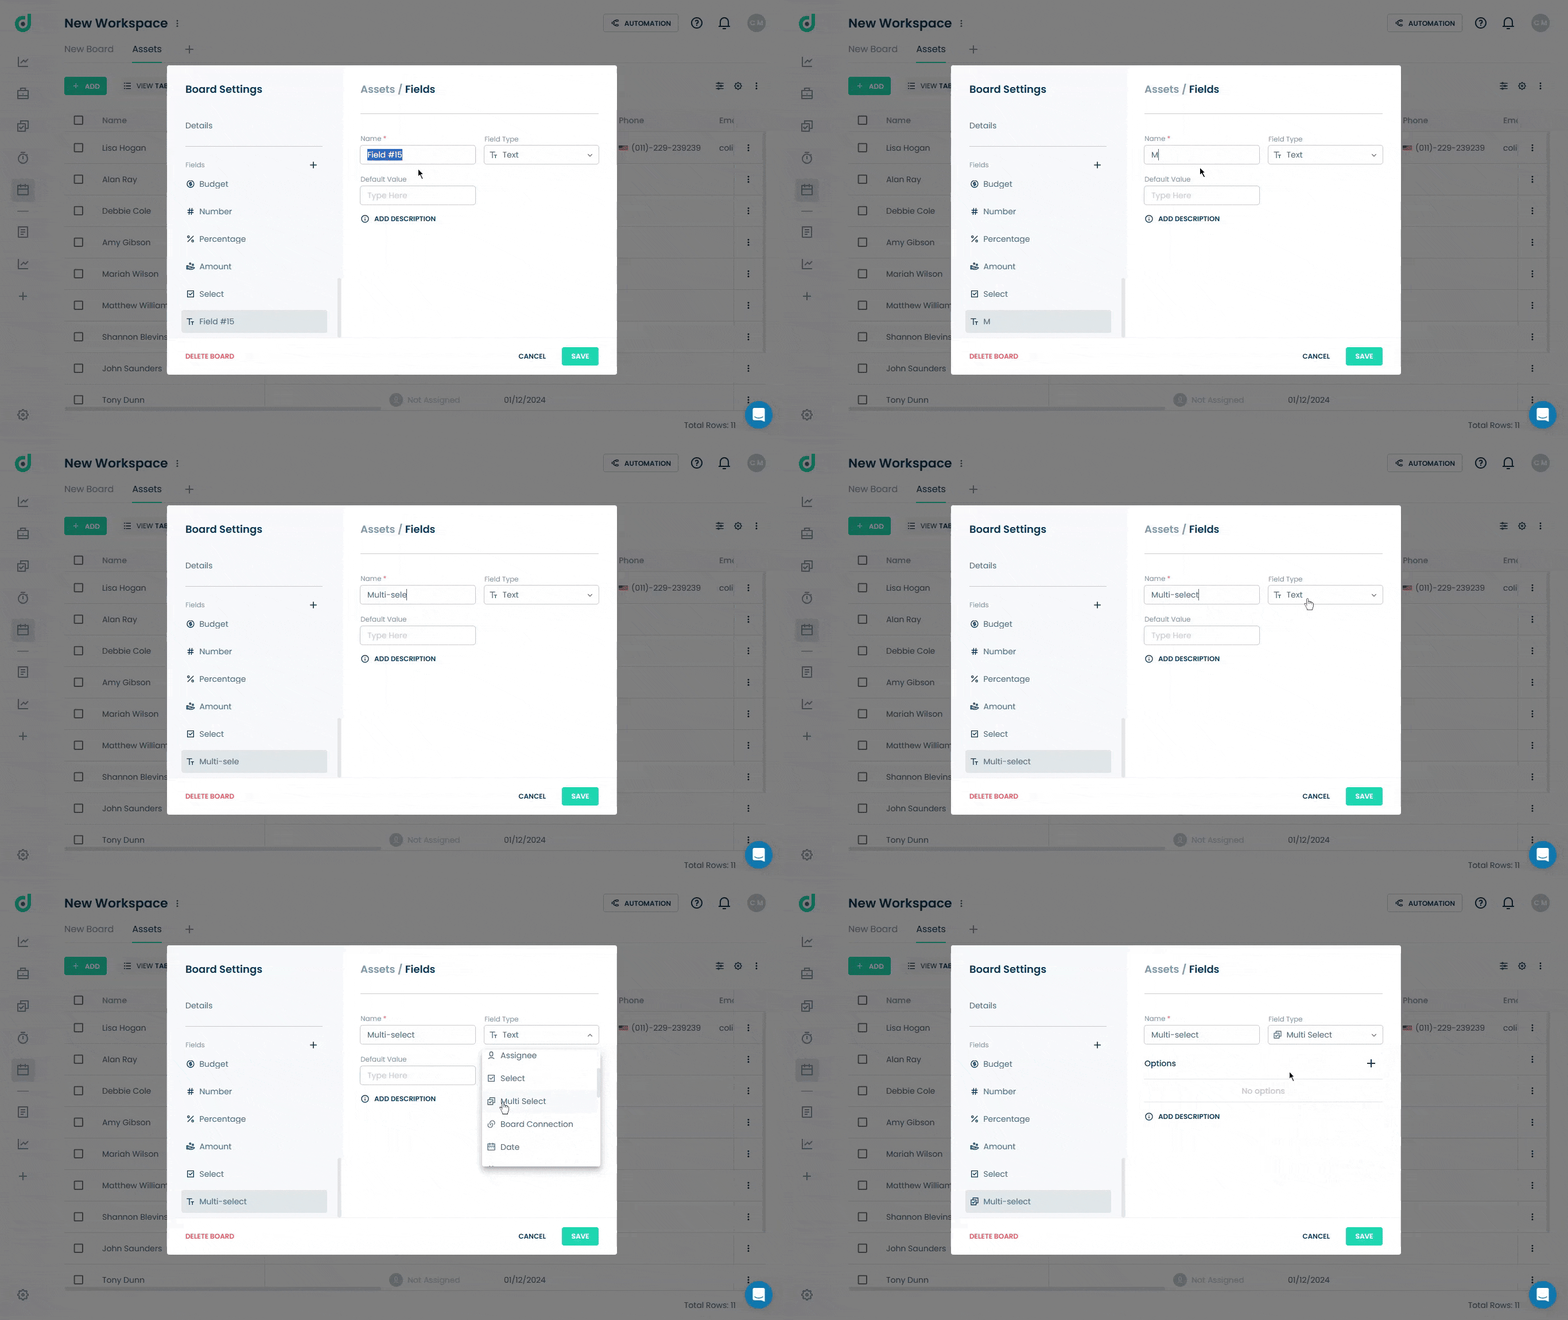
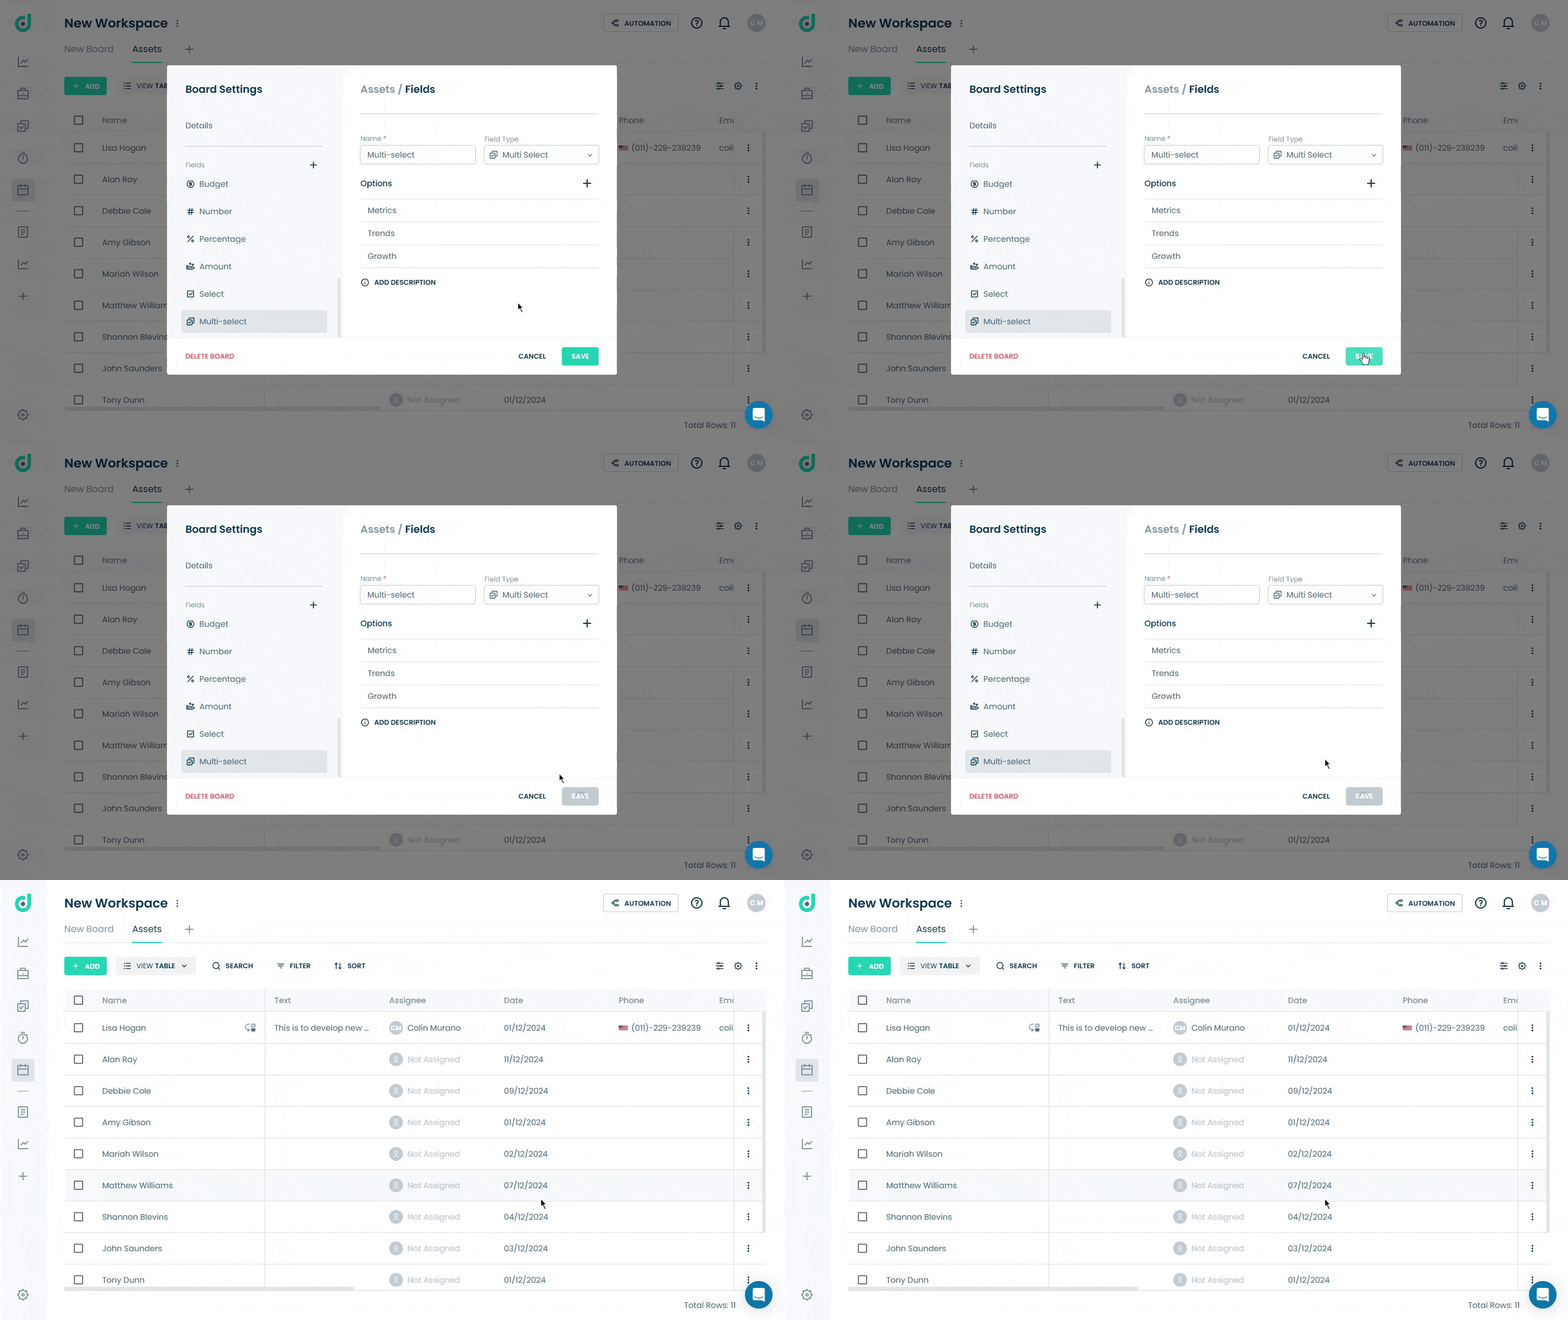
Step 2: Enter the field name and select “Multi-select” as the field type.
Step 3: Click on the “+” button to add the preferred options. Optionally, select a default value as status and a description for additional context.
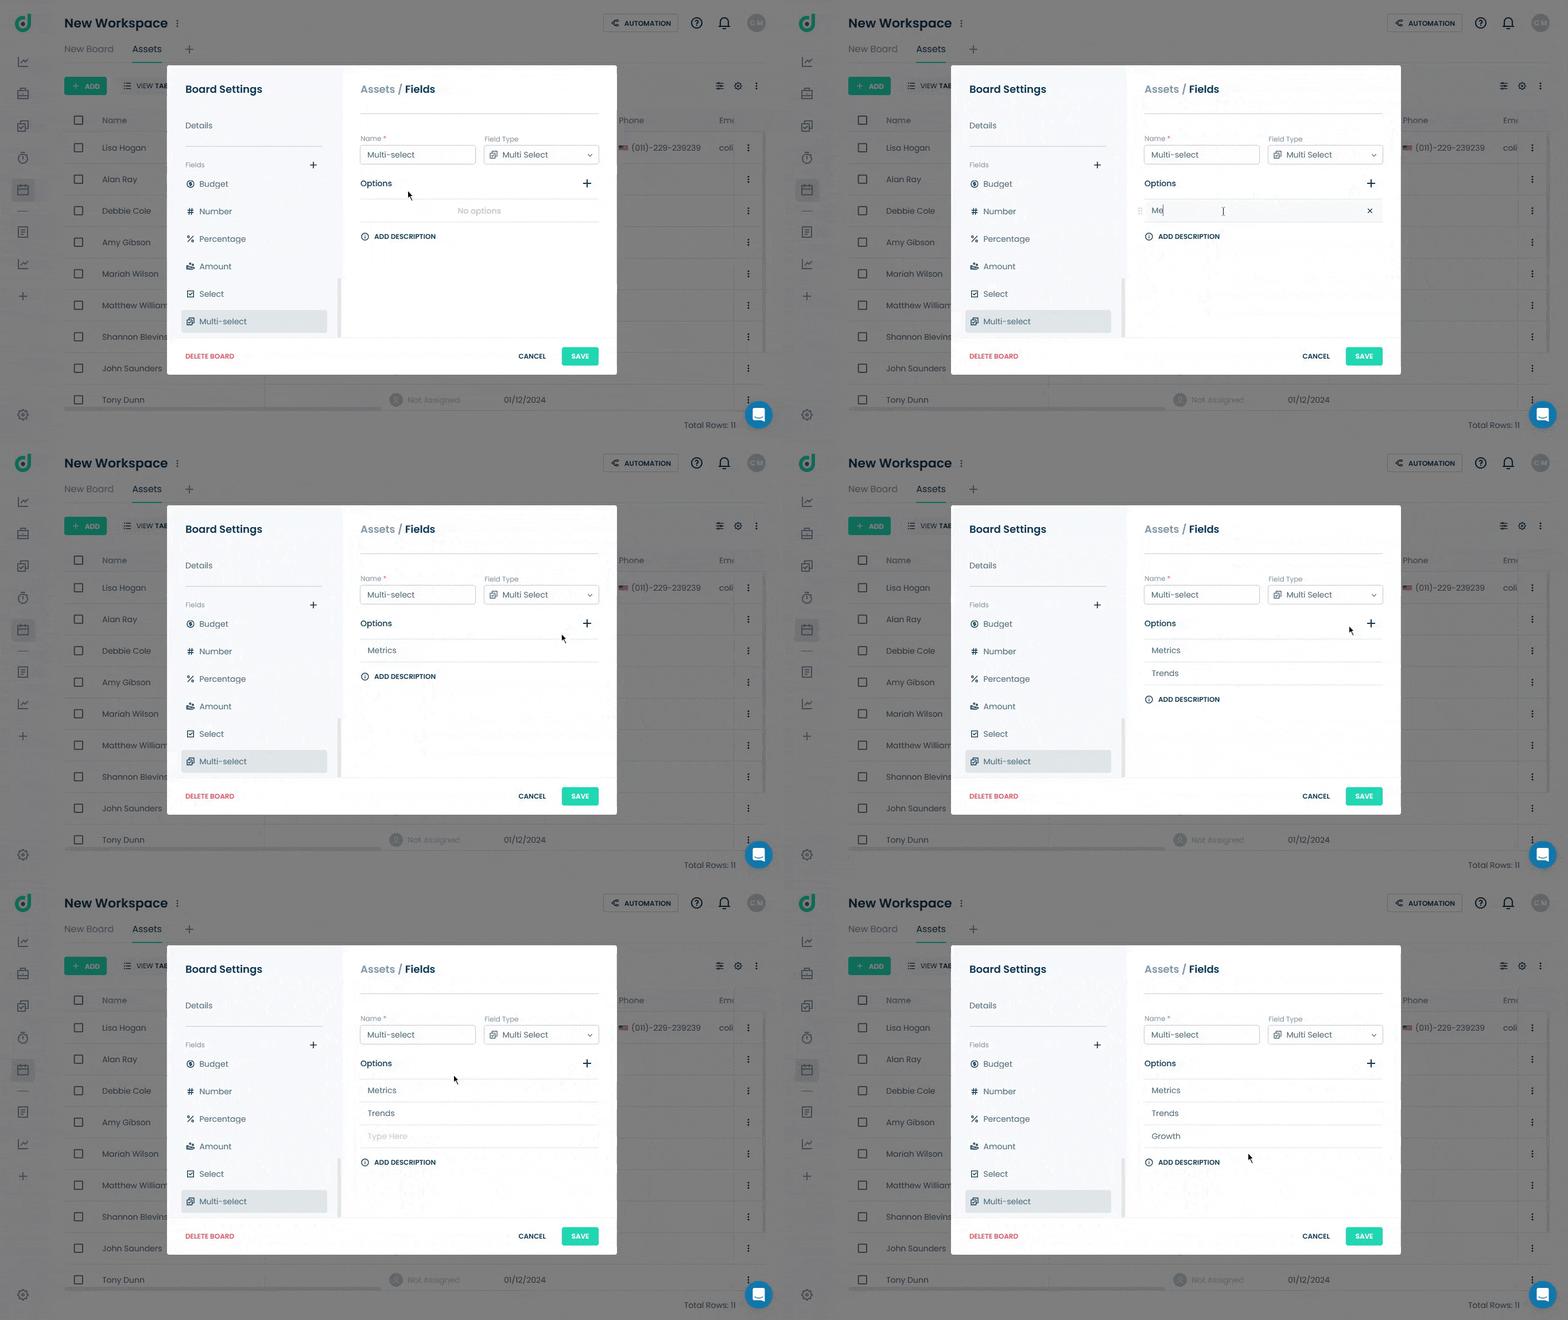
Step 4: Click on the SAVE button.
Use Multi-select Field
Once you add the Multi Select field type, you can assign multiple options to records within your board, allowing for flexible categorization and organization.
Step 1: Click on the Record you want to choose the options.
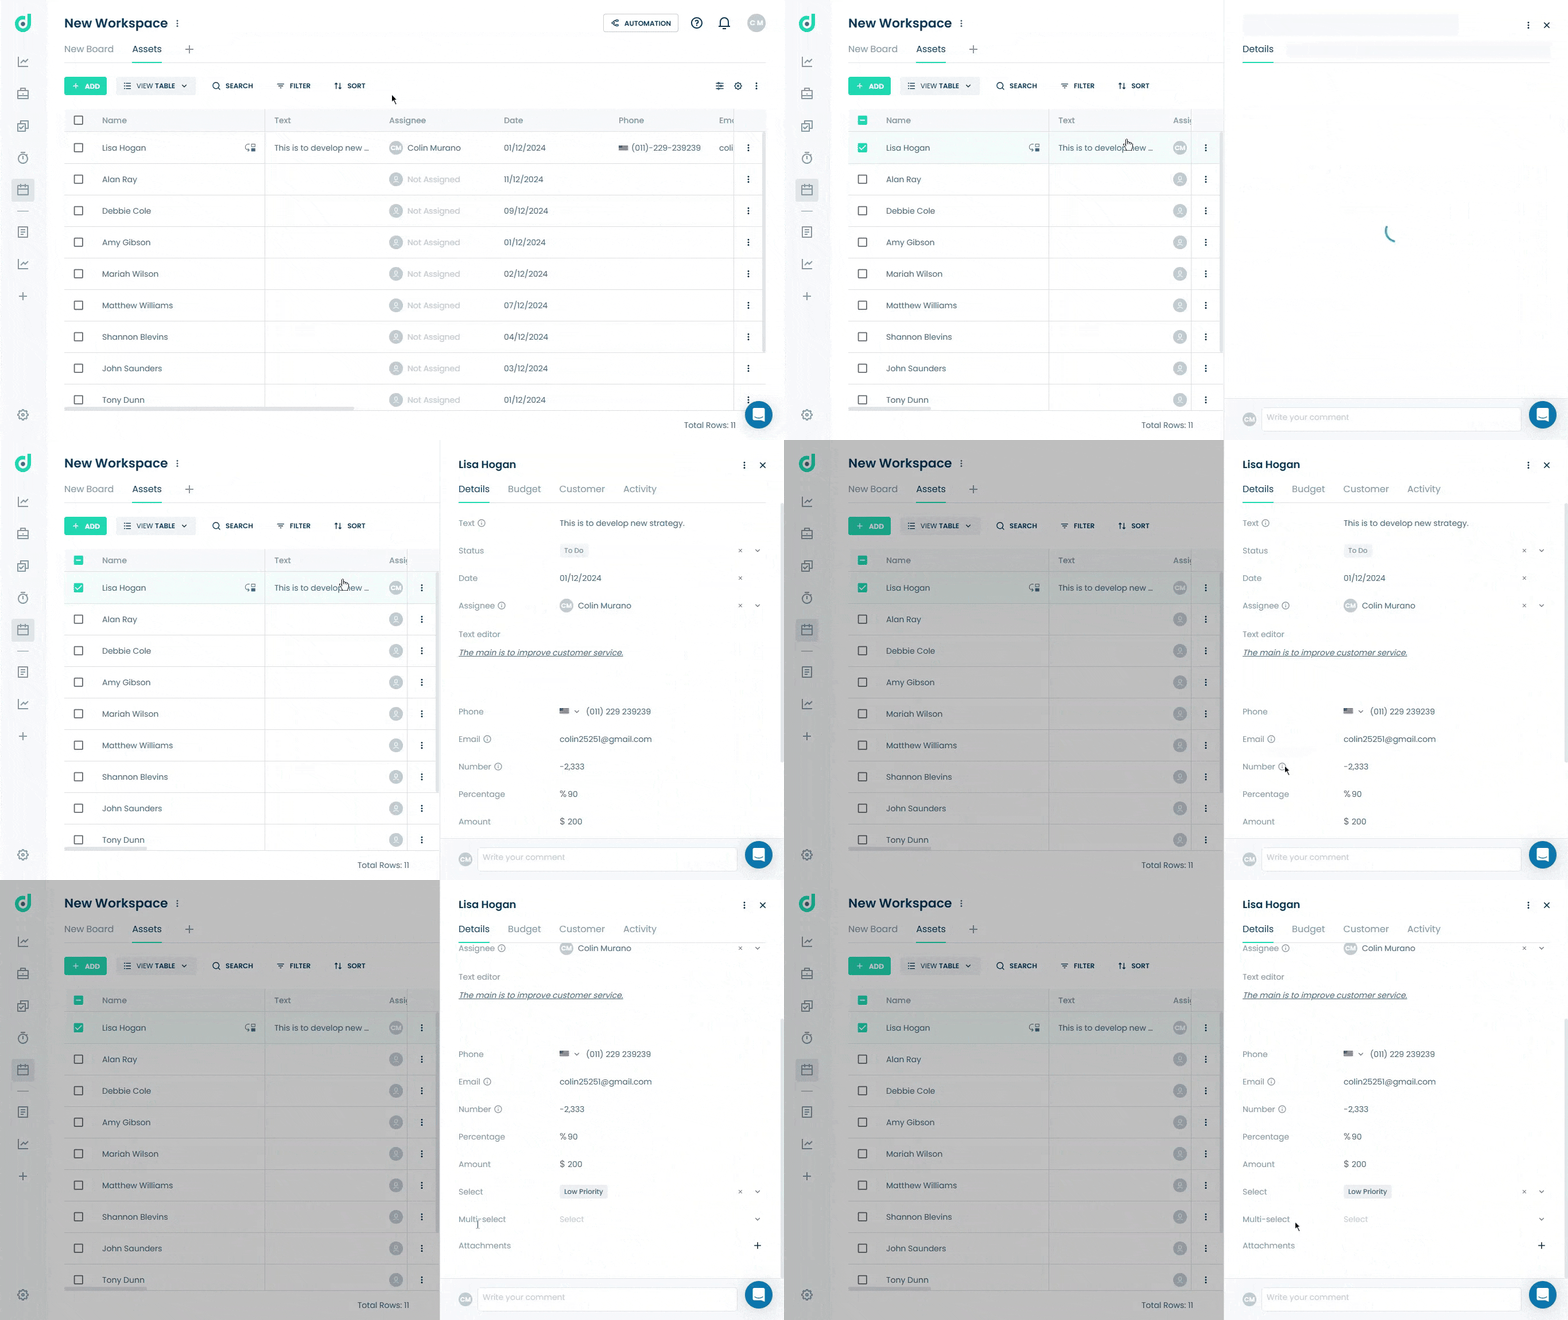
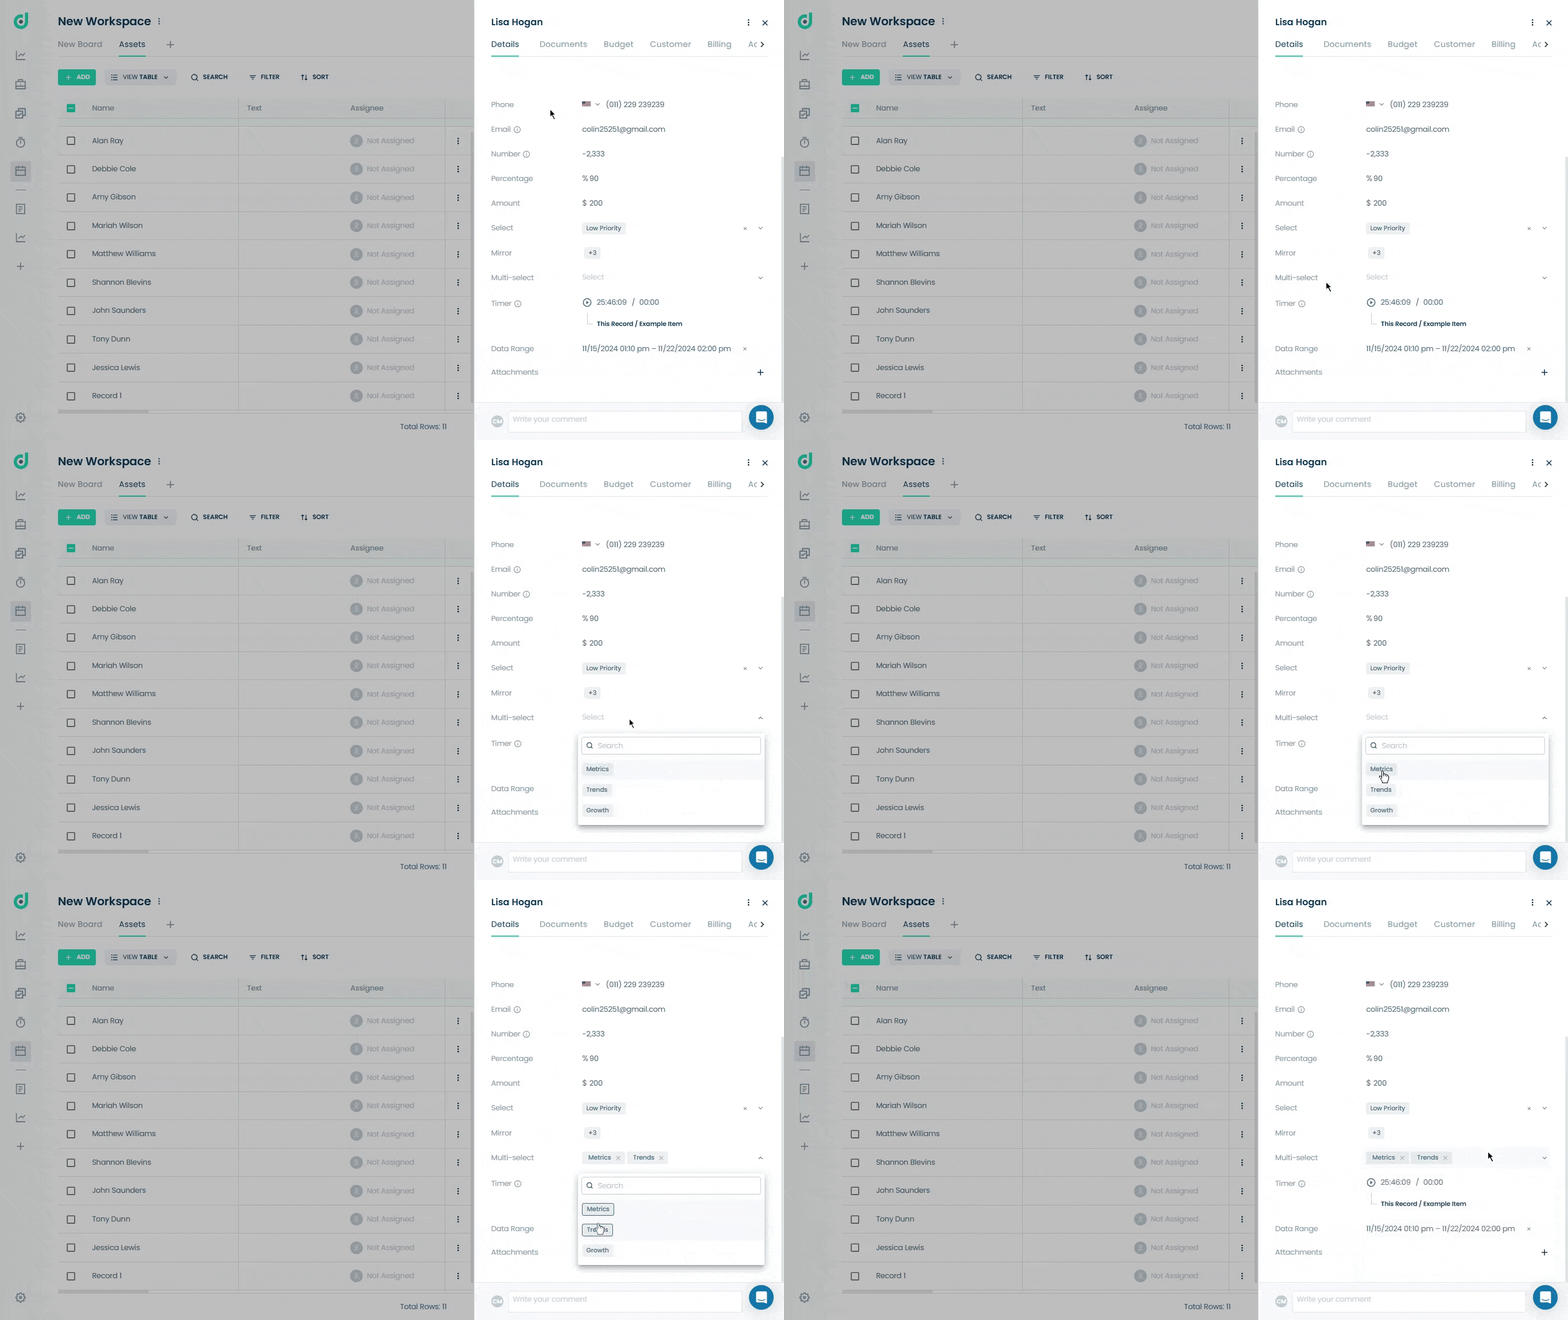
Step 2: In the record's details, locate the Multi-select field and choose the preferred option for the record.
