OneDeck Help Center
Date & Time Fields
OneDeck’s Date fields make it easy to manage and track important timelines across your boards. Use the Date field to mark key dates or deadlines for records, ideal for coordinating with team members across different time zones or managing multiple records with specific due dates.
For extended timelines, the Date Range field lets you set a start and end date, helping you visualize the duration of records within your boards. This is especially useful for tracking deadlines, timelines, and other time-sensitive details.
In this guide, we’ll walk you through the steps to add and use the following data entry board fields:
- Date
- Date Range
Let’s get started 🚀
Navigation
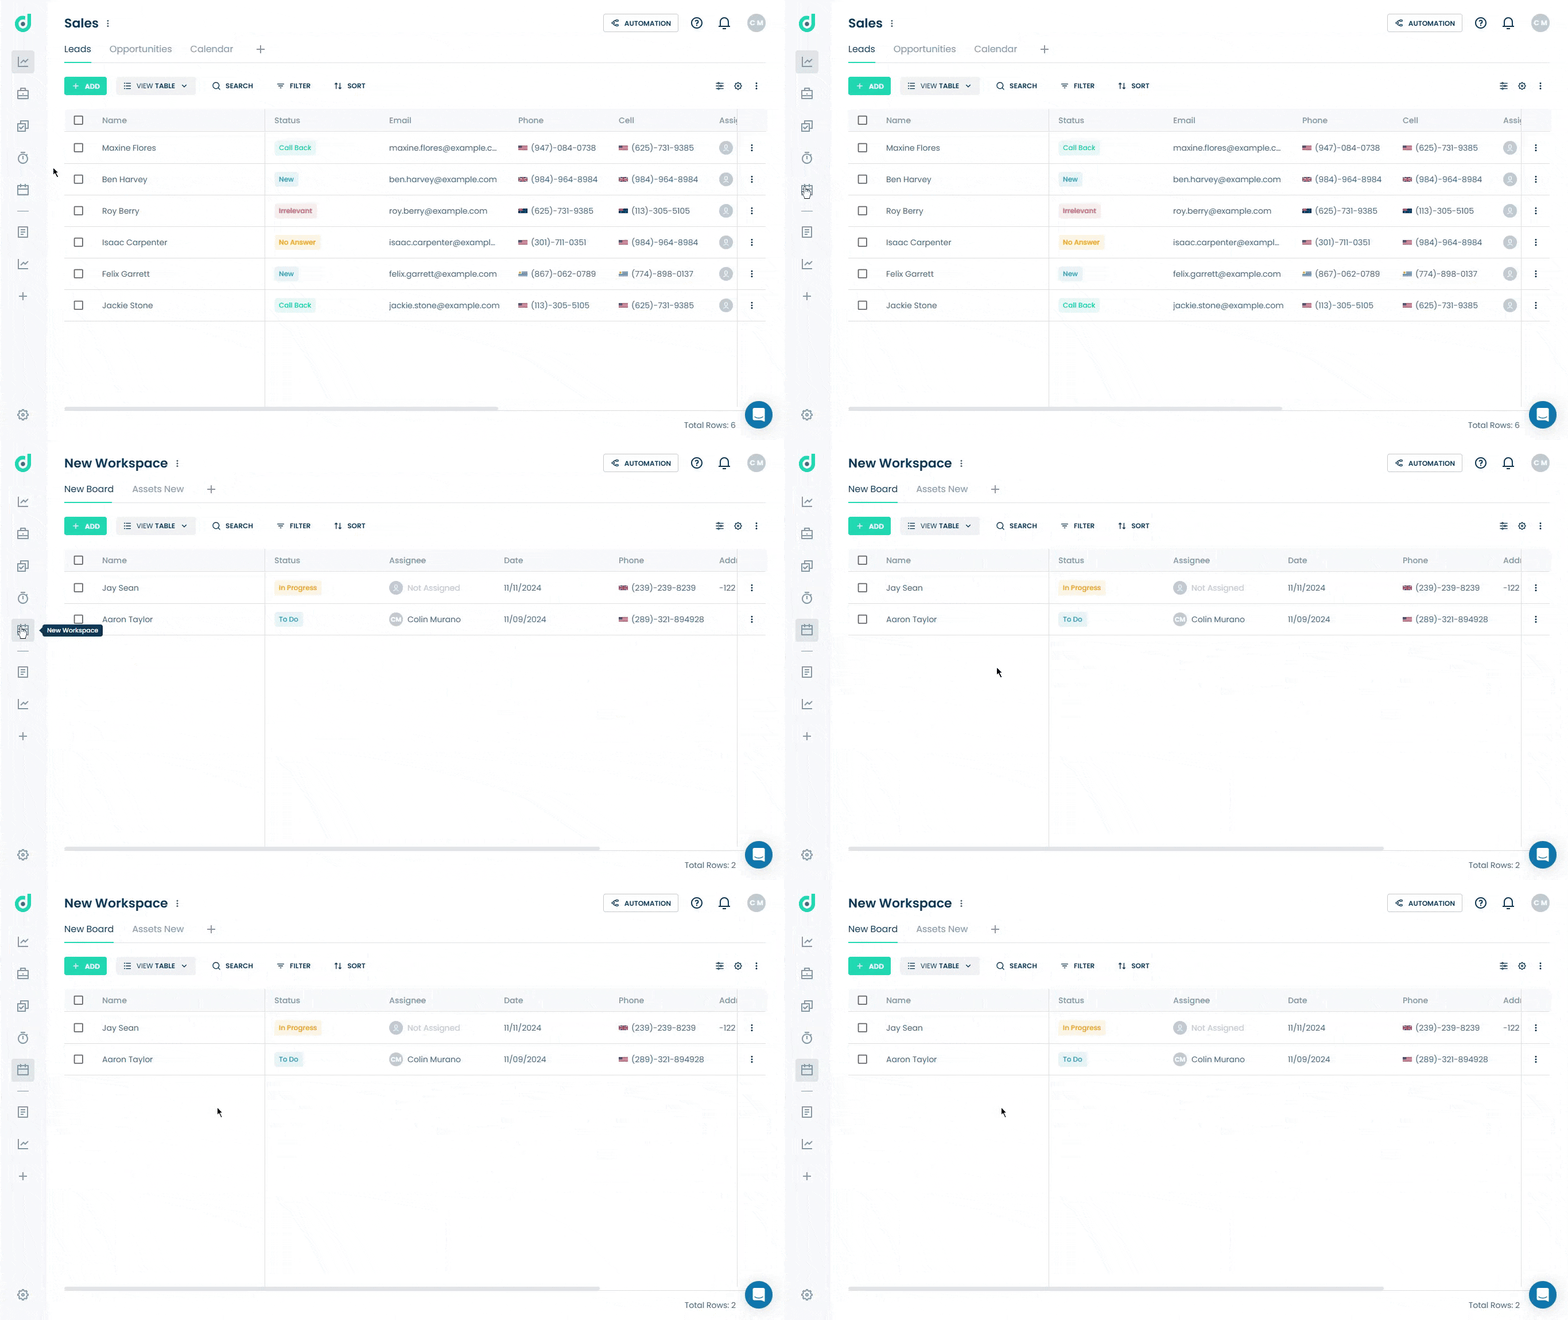
Step 1: Click on the Workspace button from the side navigation menu bar.
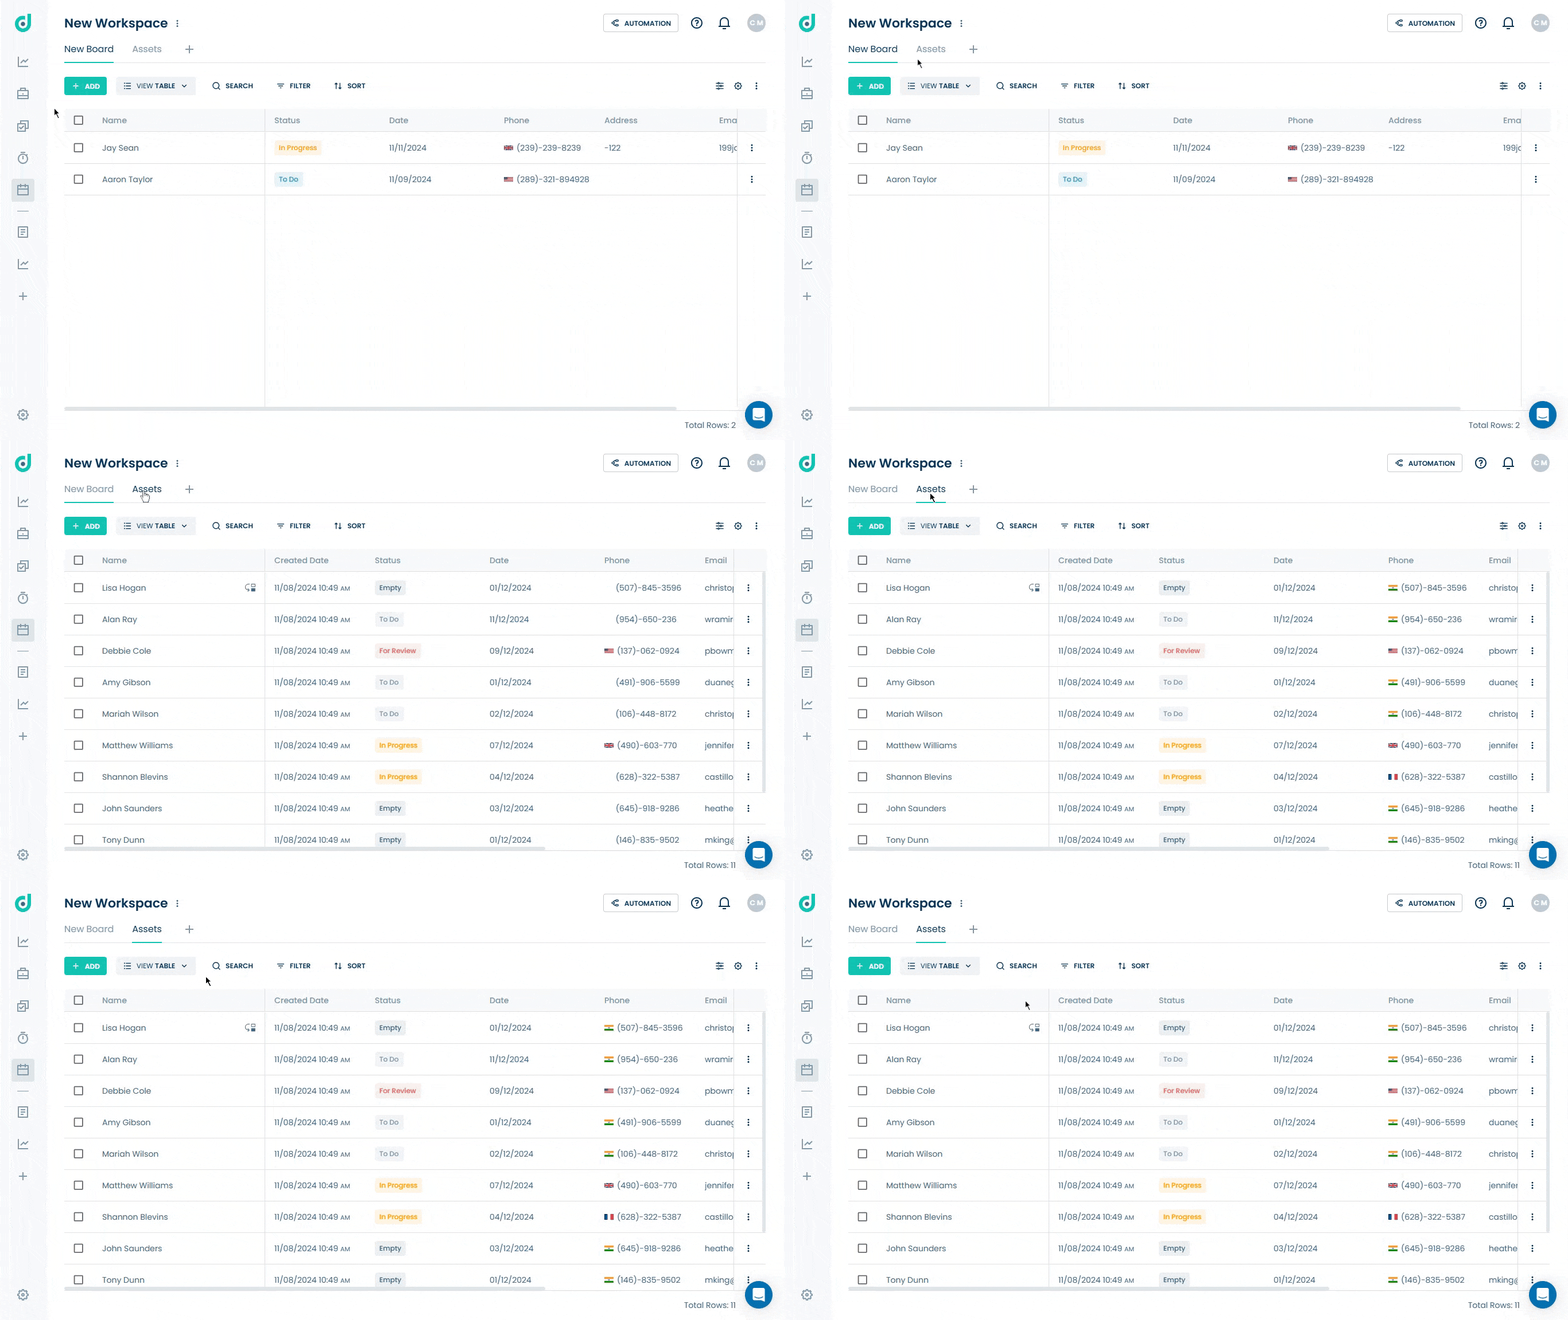
Step 2: Select the board where you want to add date fields.
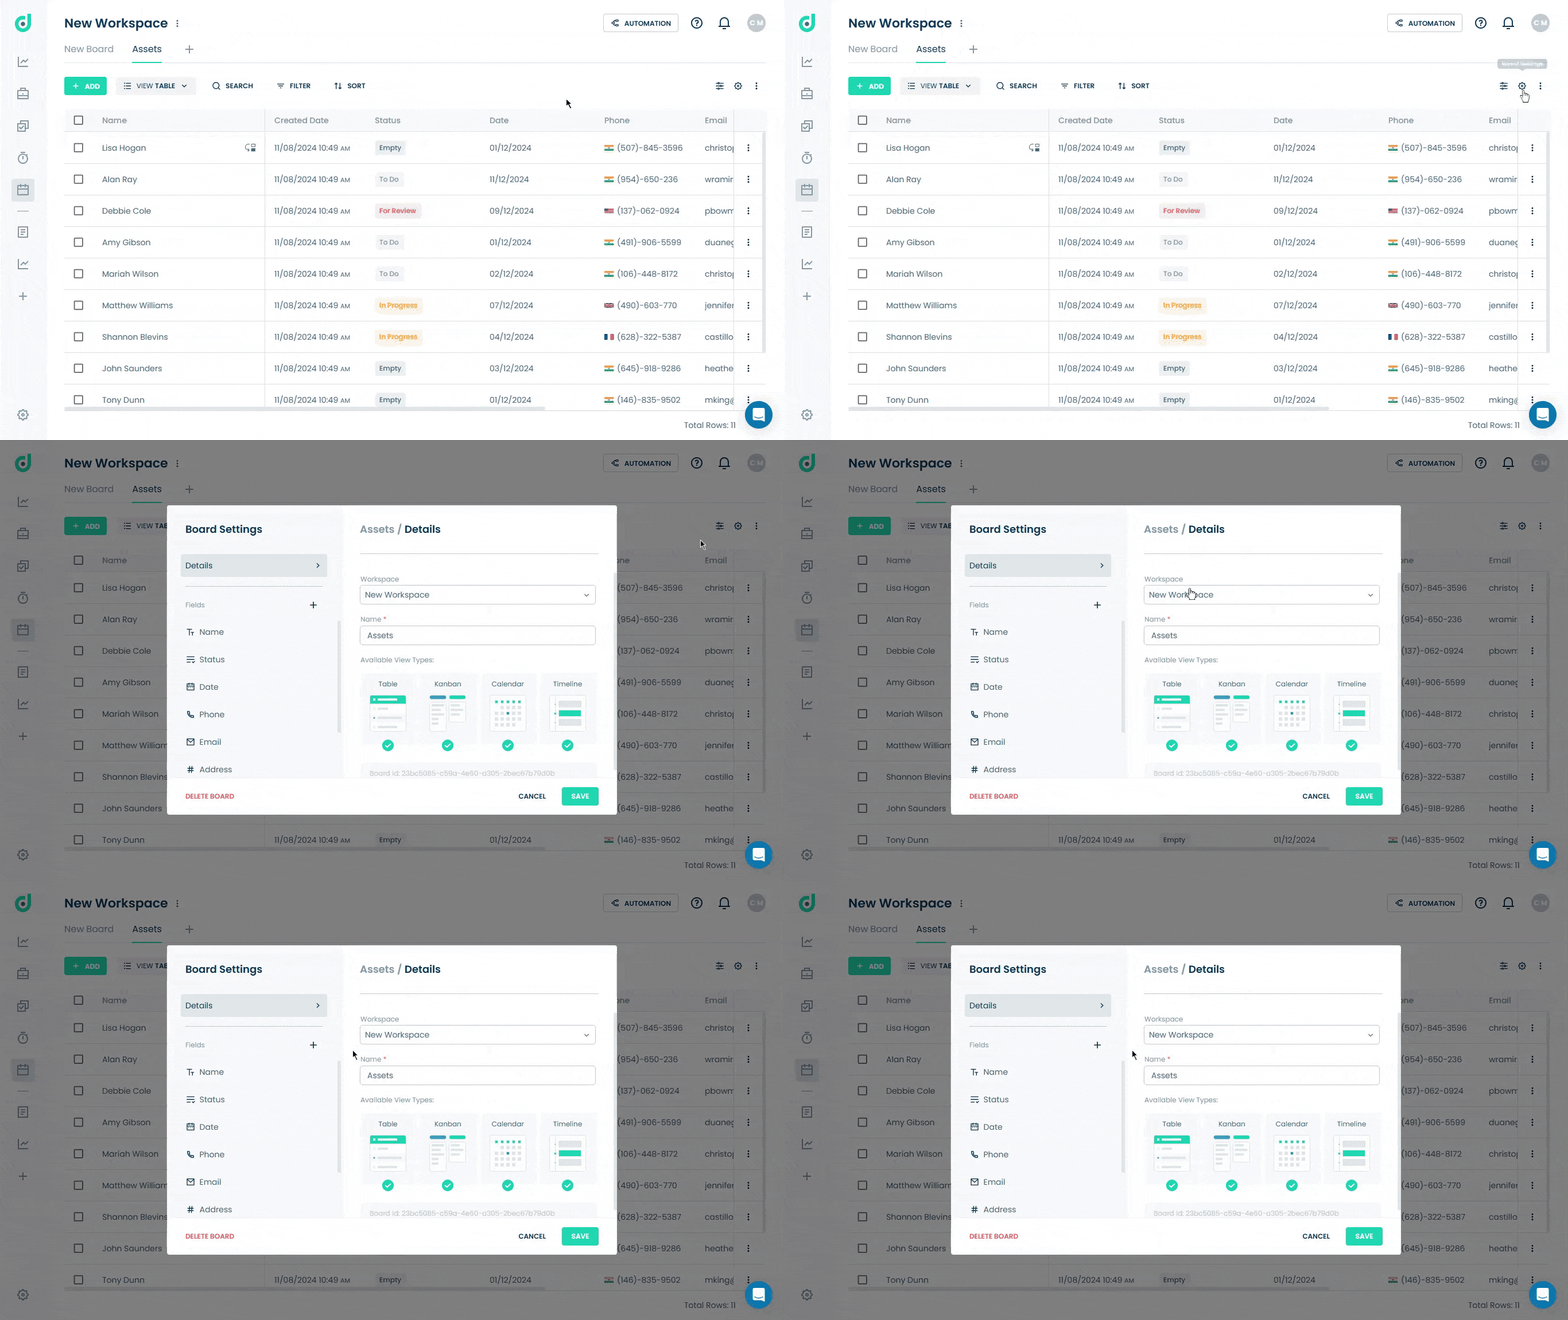
Step 3: Click on the Setting icon from the right side of the interface.
Date
The Date field in OneDeck helps you track and manage important timelines by marking key dates or deadlines for records. It’s ideal for keeping records with specific due dates organized and accessible.
Add Date Field
Step 1: Click on the “+” button from the field section.
Note: The user can also find the “Date” as default field type, listed on the board settings, if not seen, click on the new field to add new.
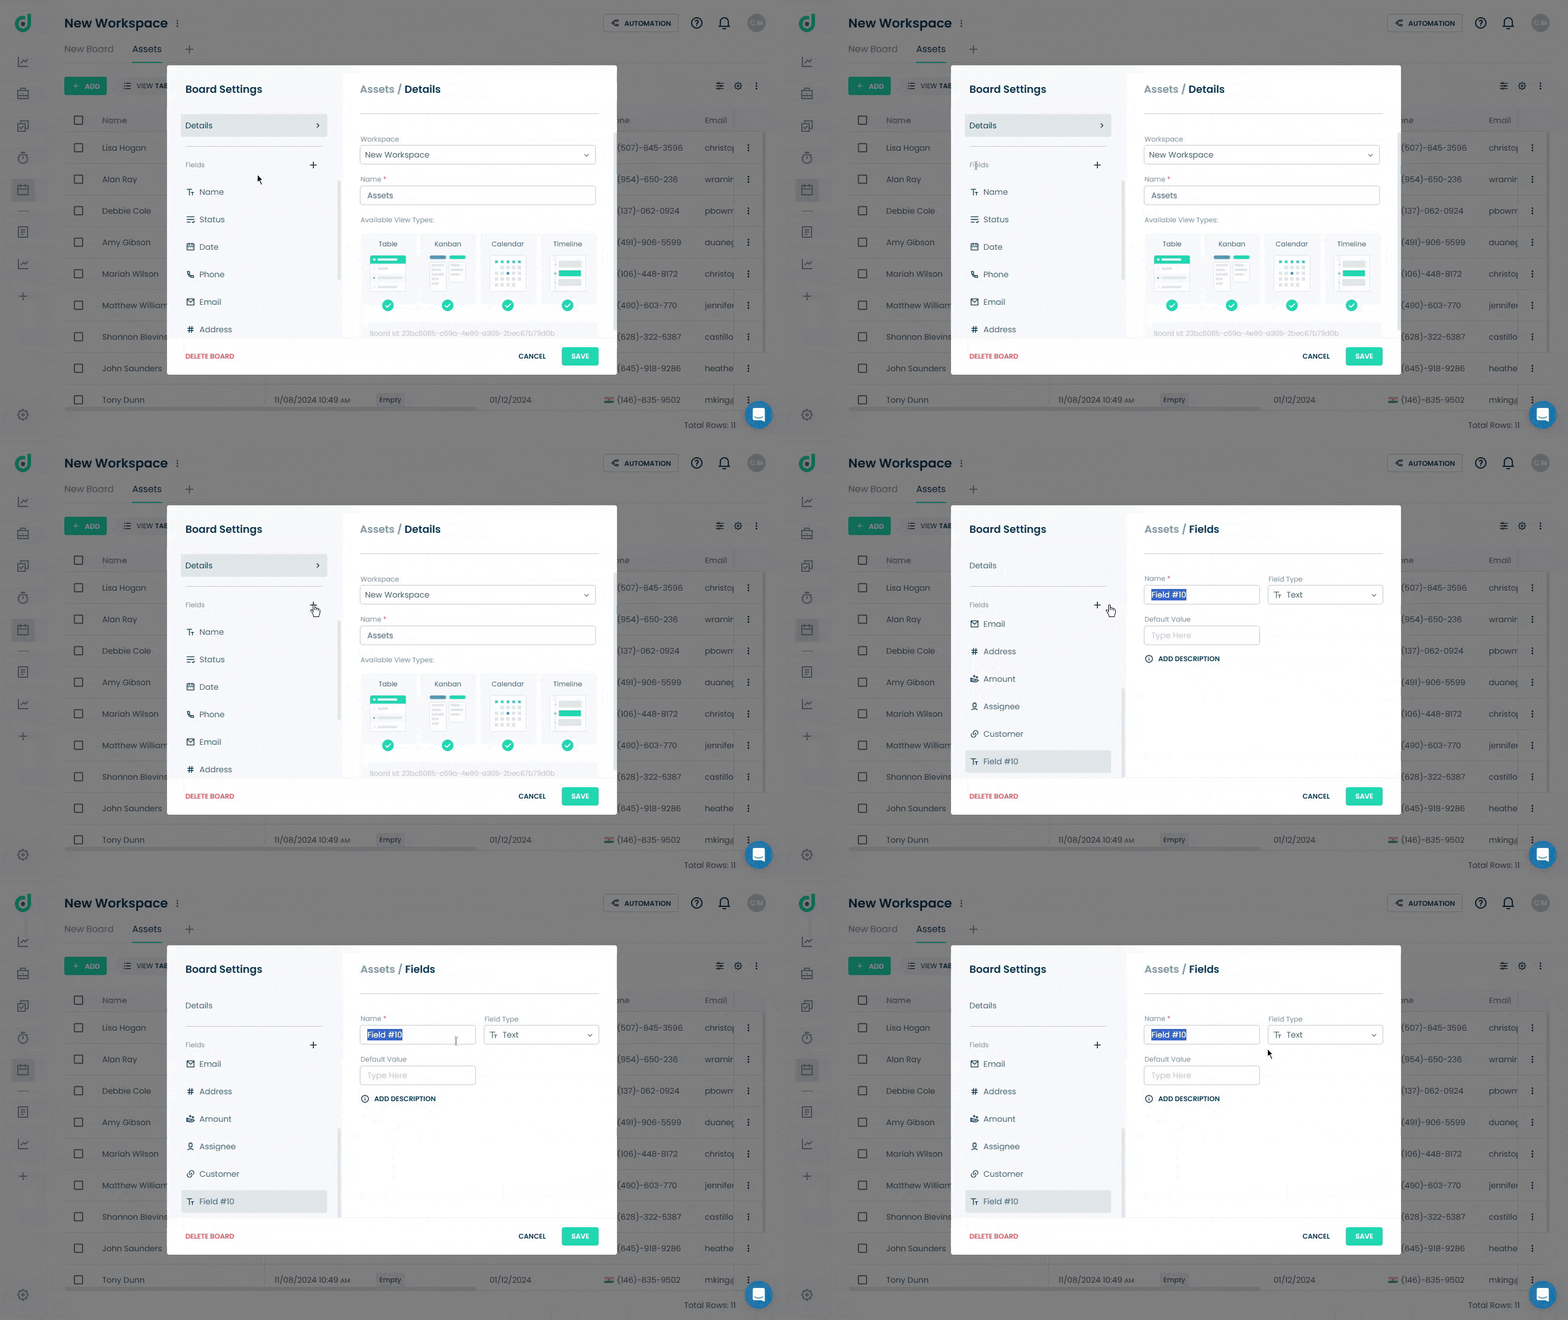
Step 2: Enter the field name and select “Date” as the field type.
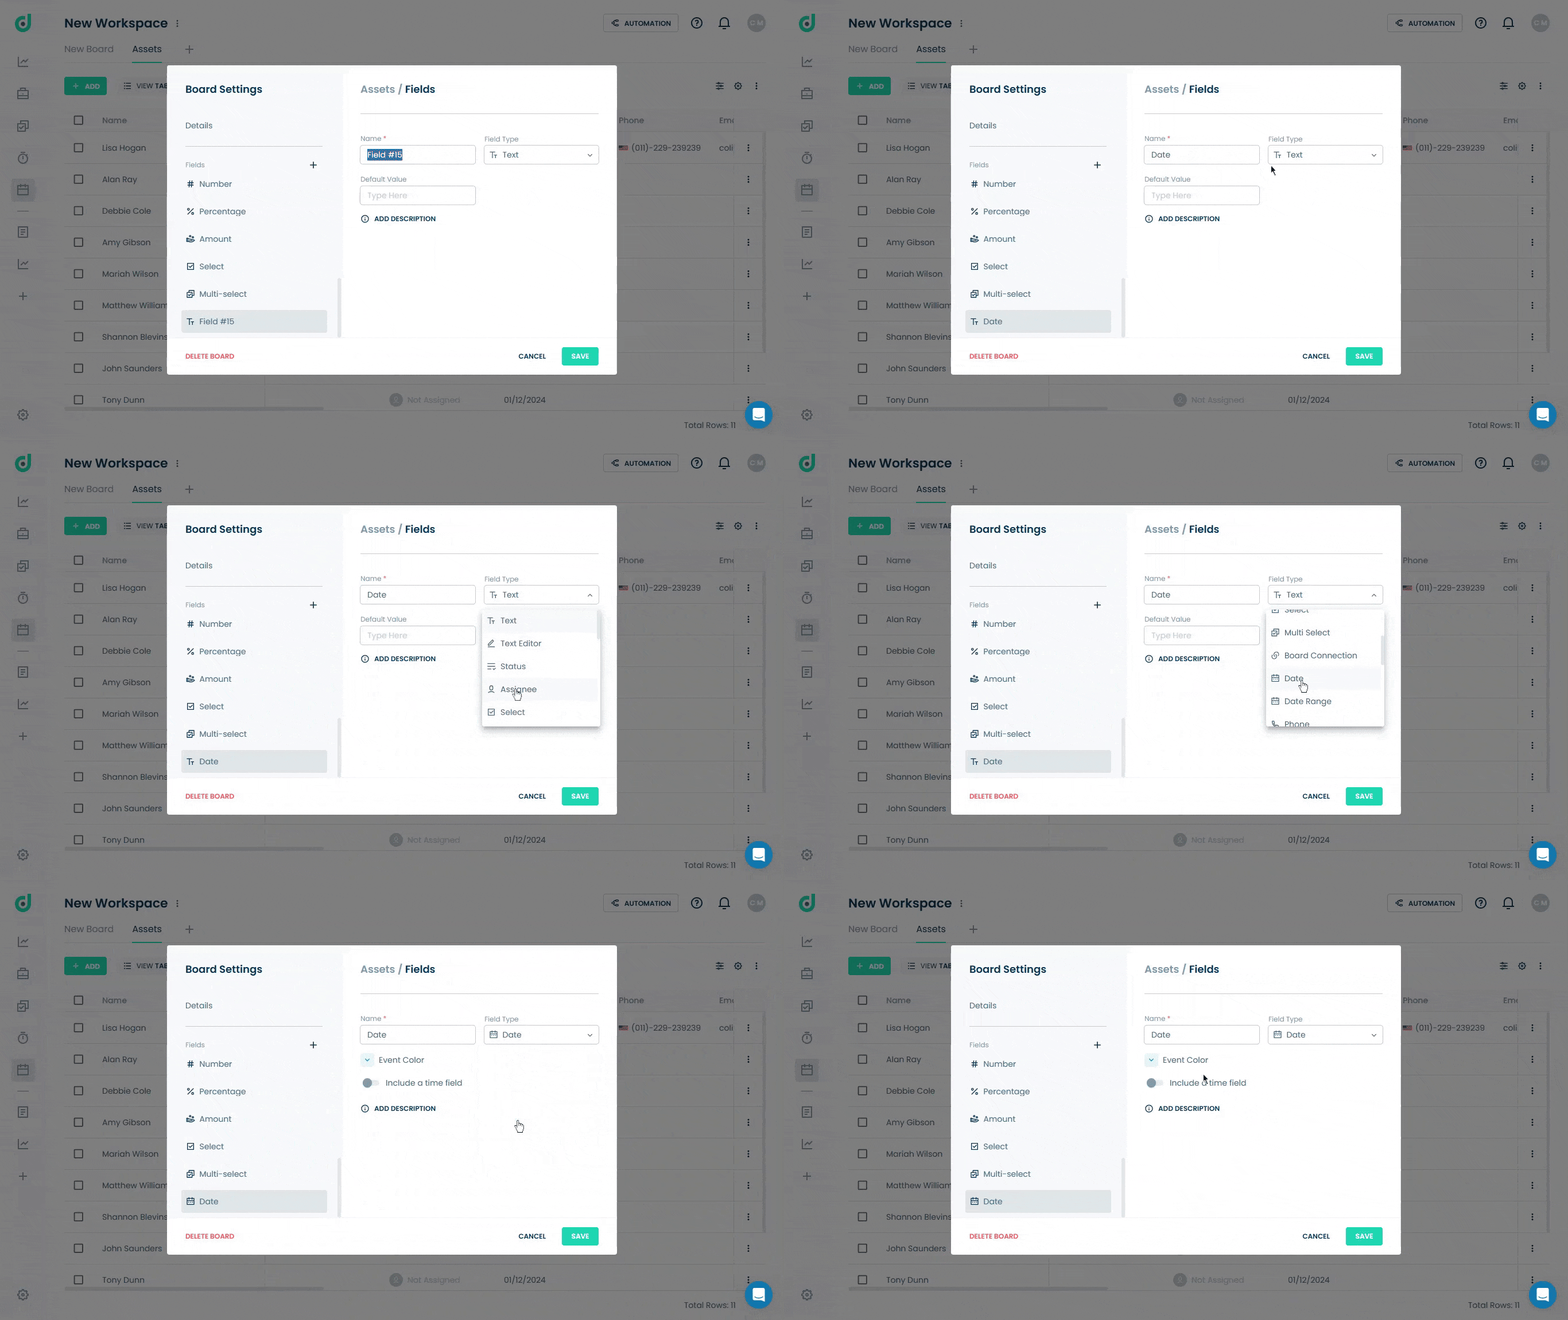
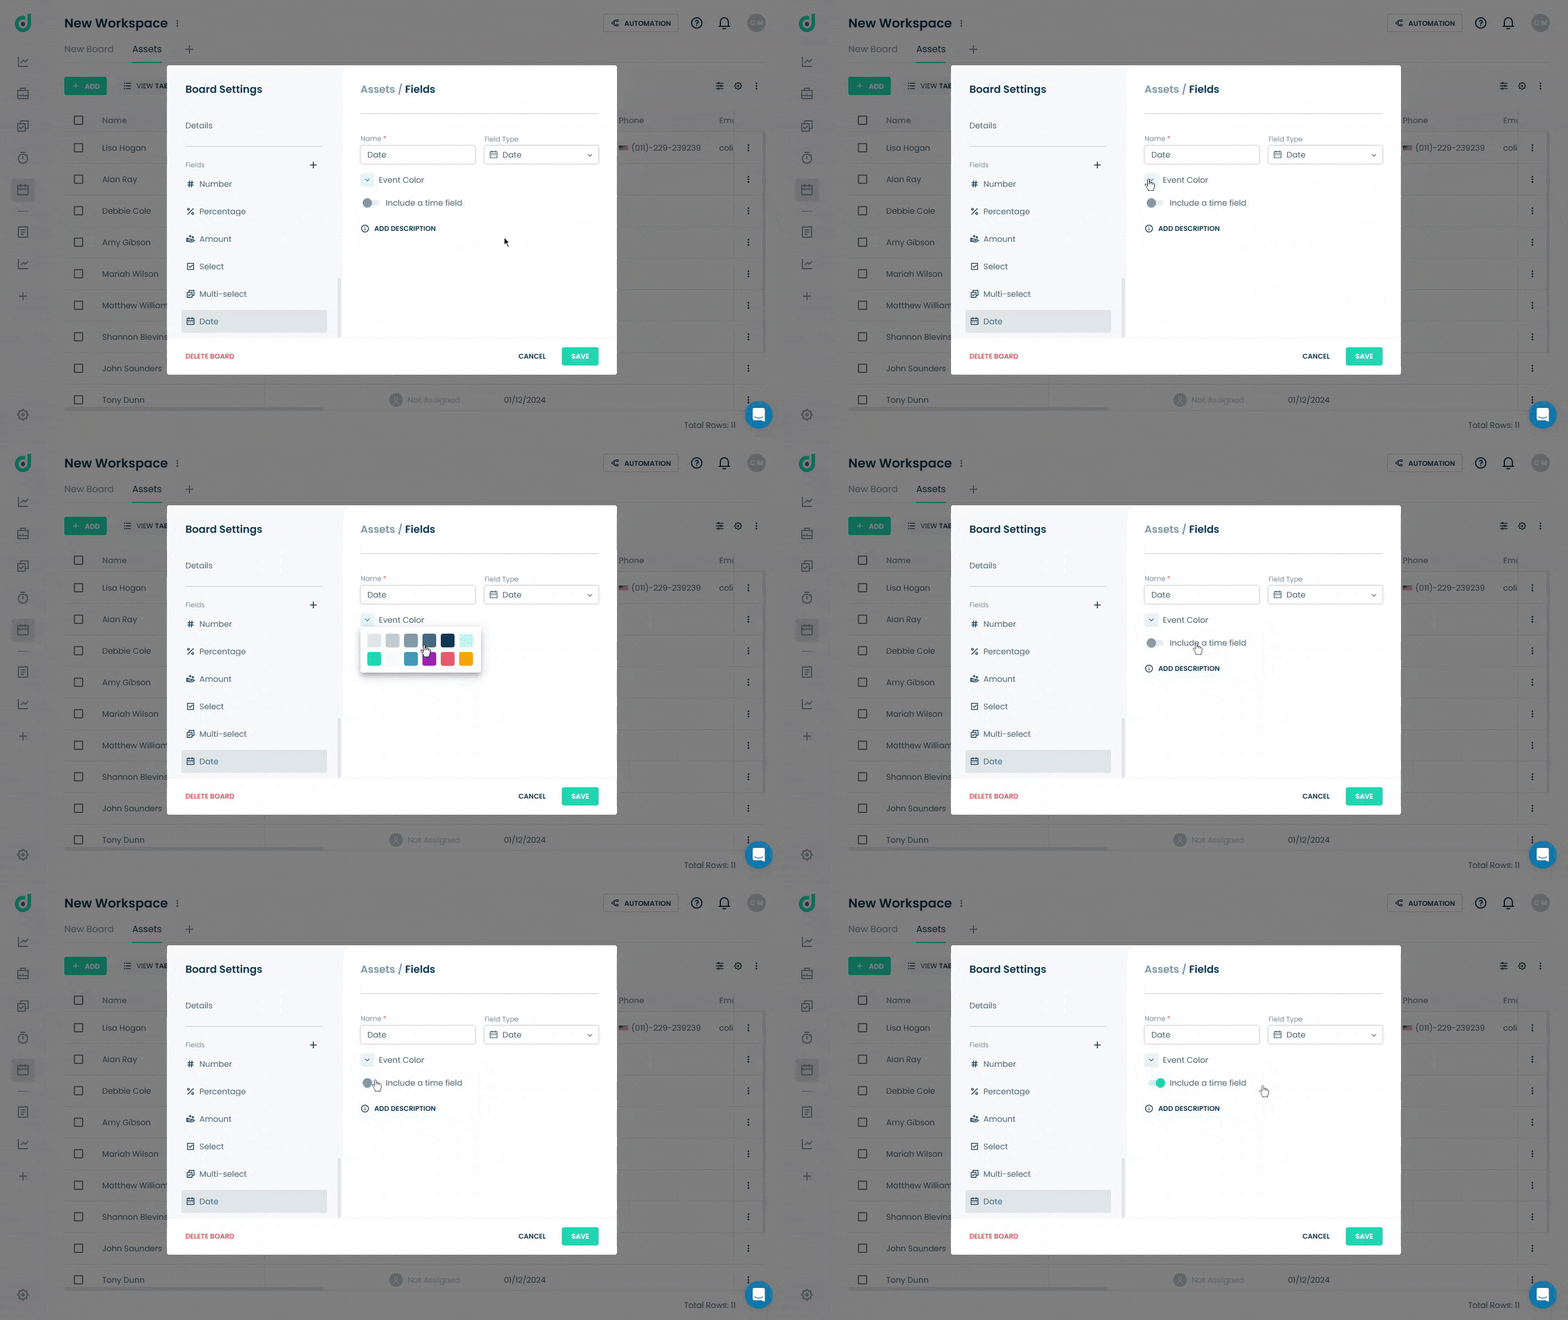
Step 3: (Optional) Select a color for the date event, toggle the option to include a time field, and add a description for additional context.
Note: The selected color will represent the record in the Calendar and Timeline views.
Step 4: Click on the SAVE button.
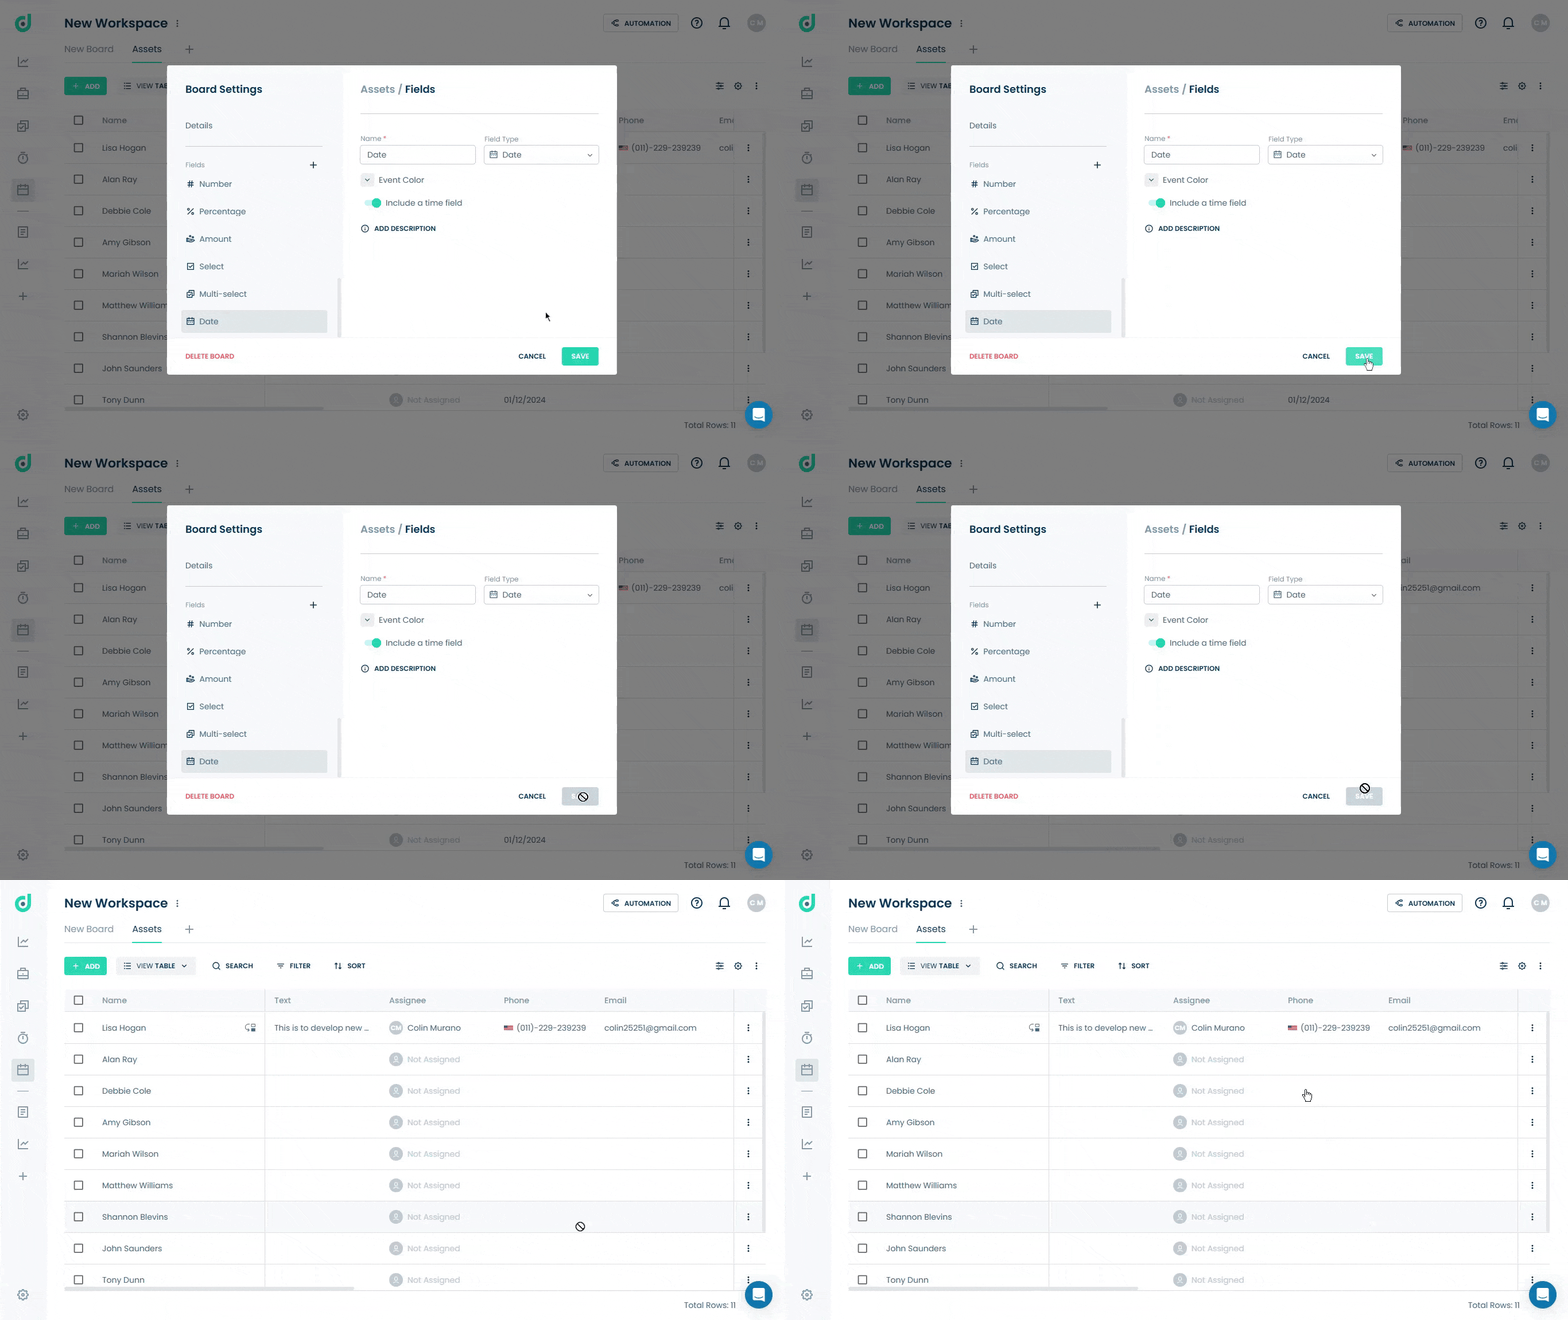
Use Date Field
Once you have added the Date field as a field type, you can assign and track specific dates, such as deadlines or milestones, for various records within your board. This makes the Calendar and Timeline Views available, which are particularly useful for visualizing records across specific date ranges.
Step 1: Click on the Record you want to add a date to.
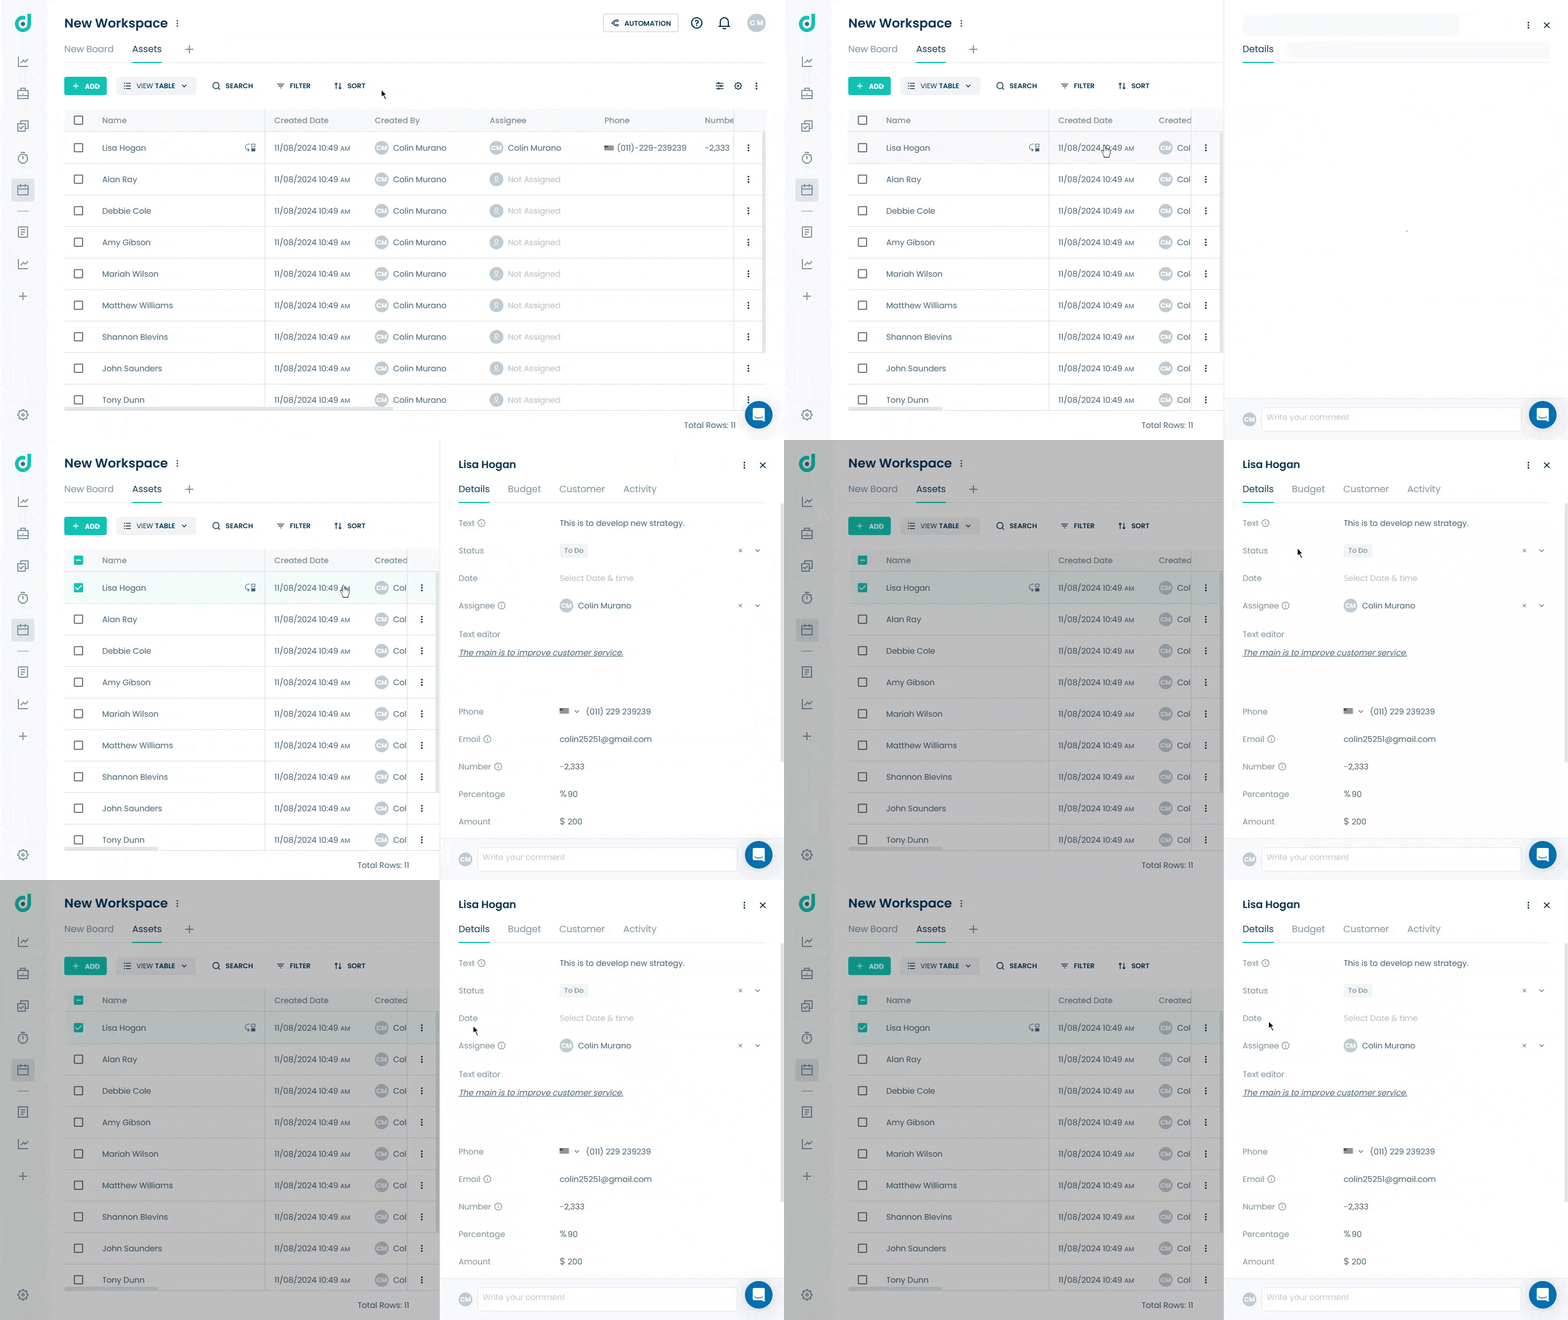
Step 2: In the record's details, locate the Date field and choose the preferred date and time for the record.
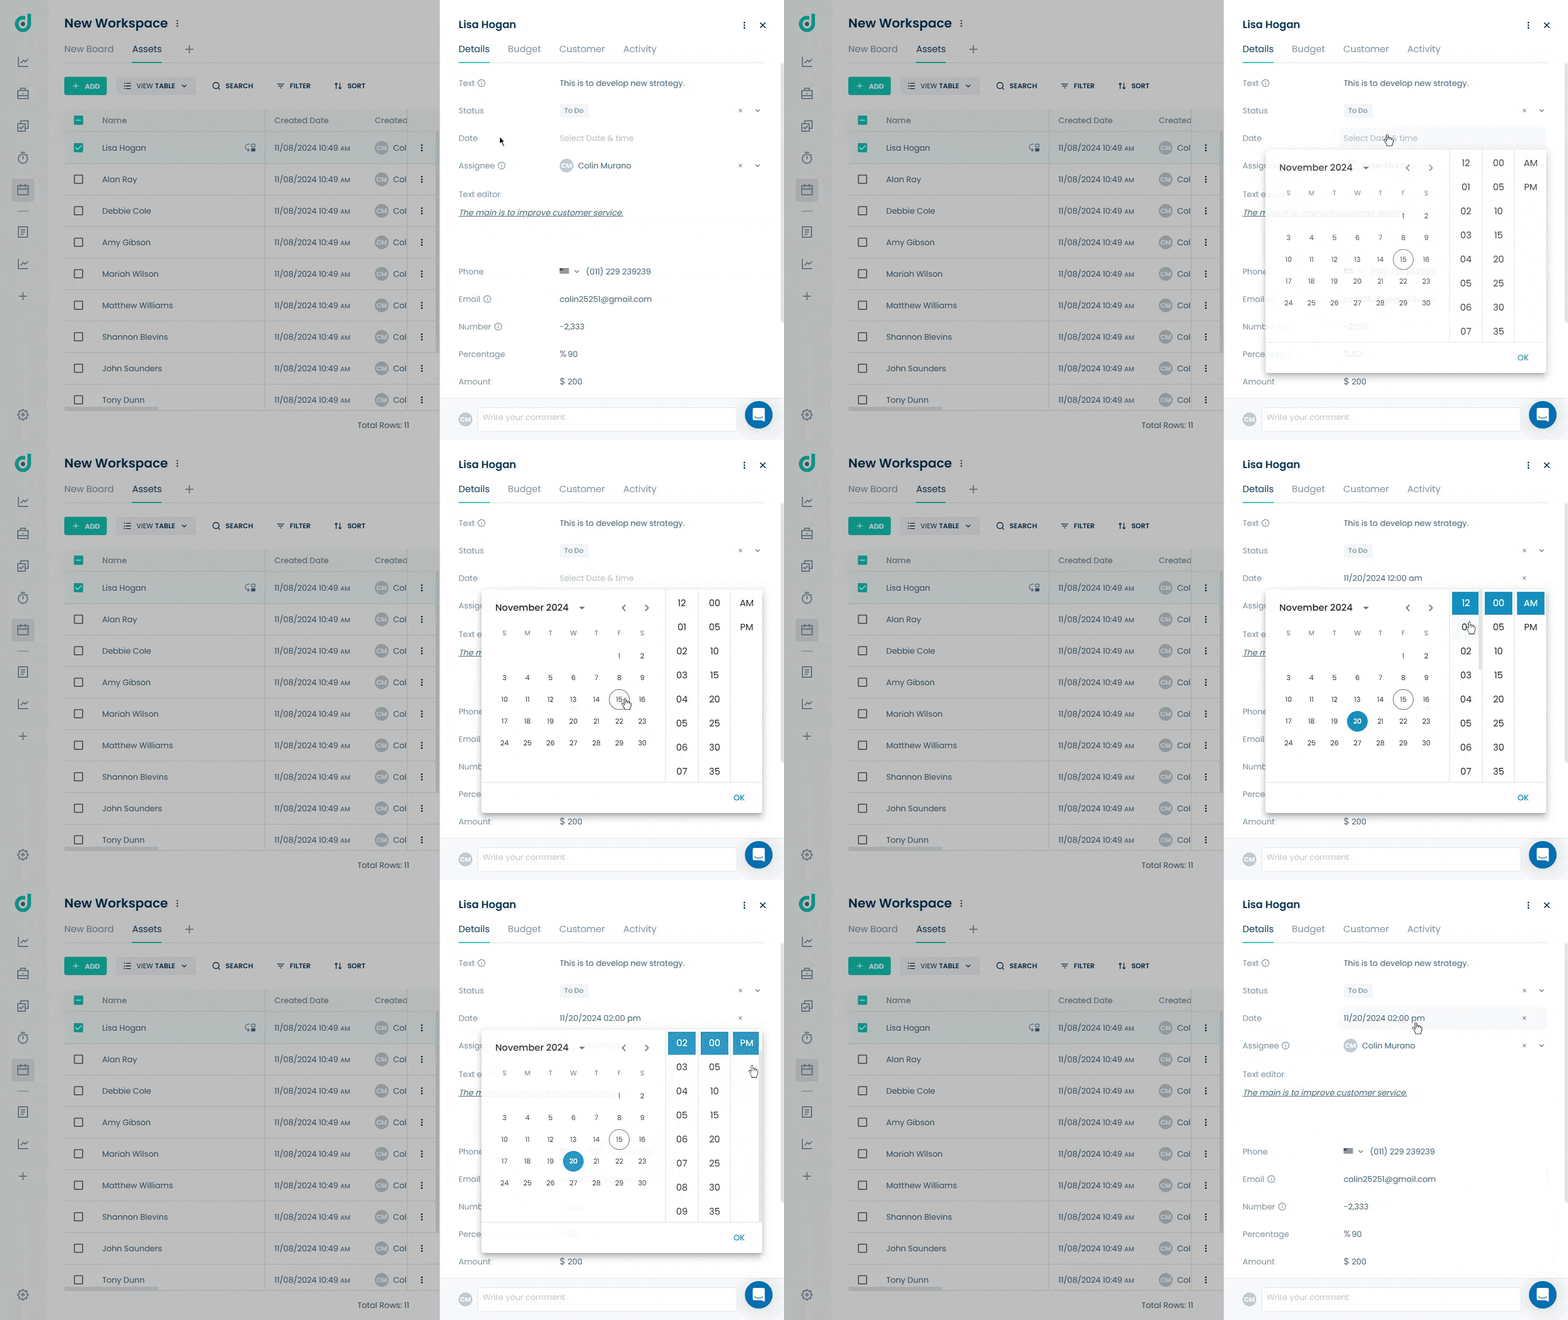
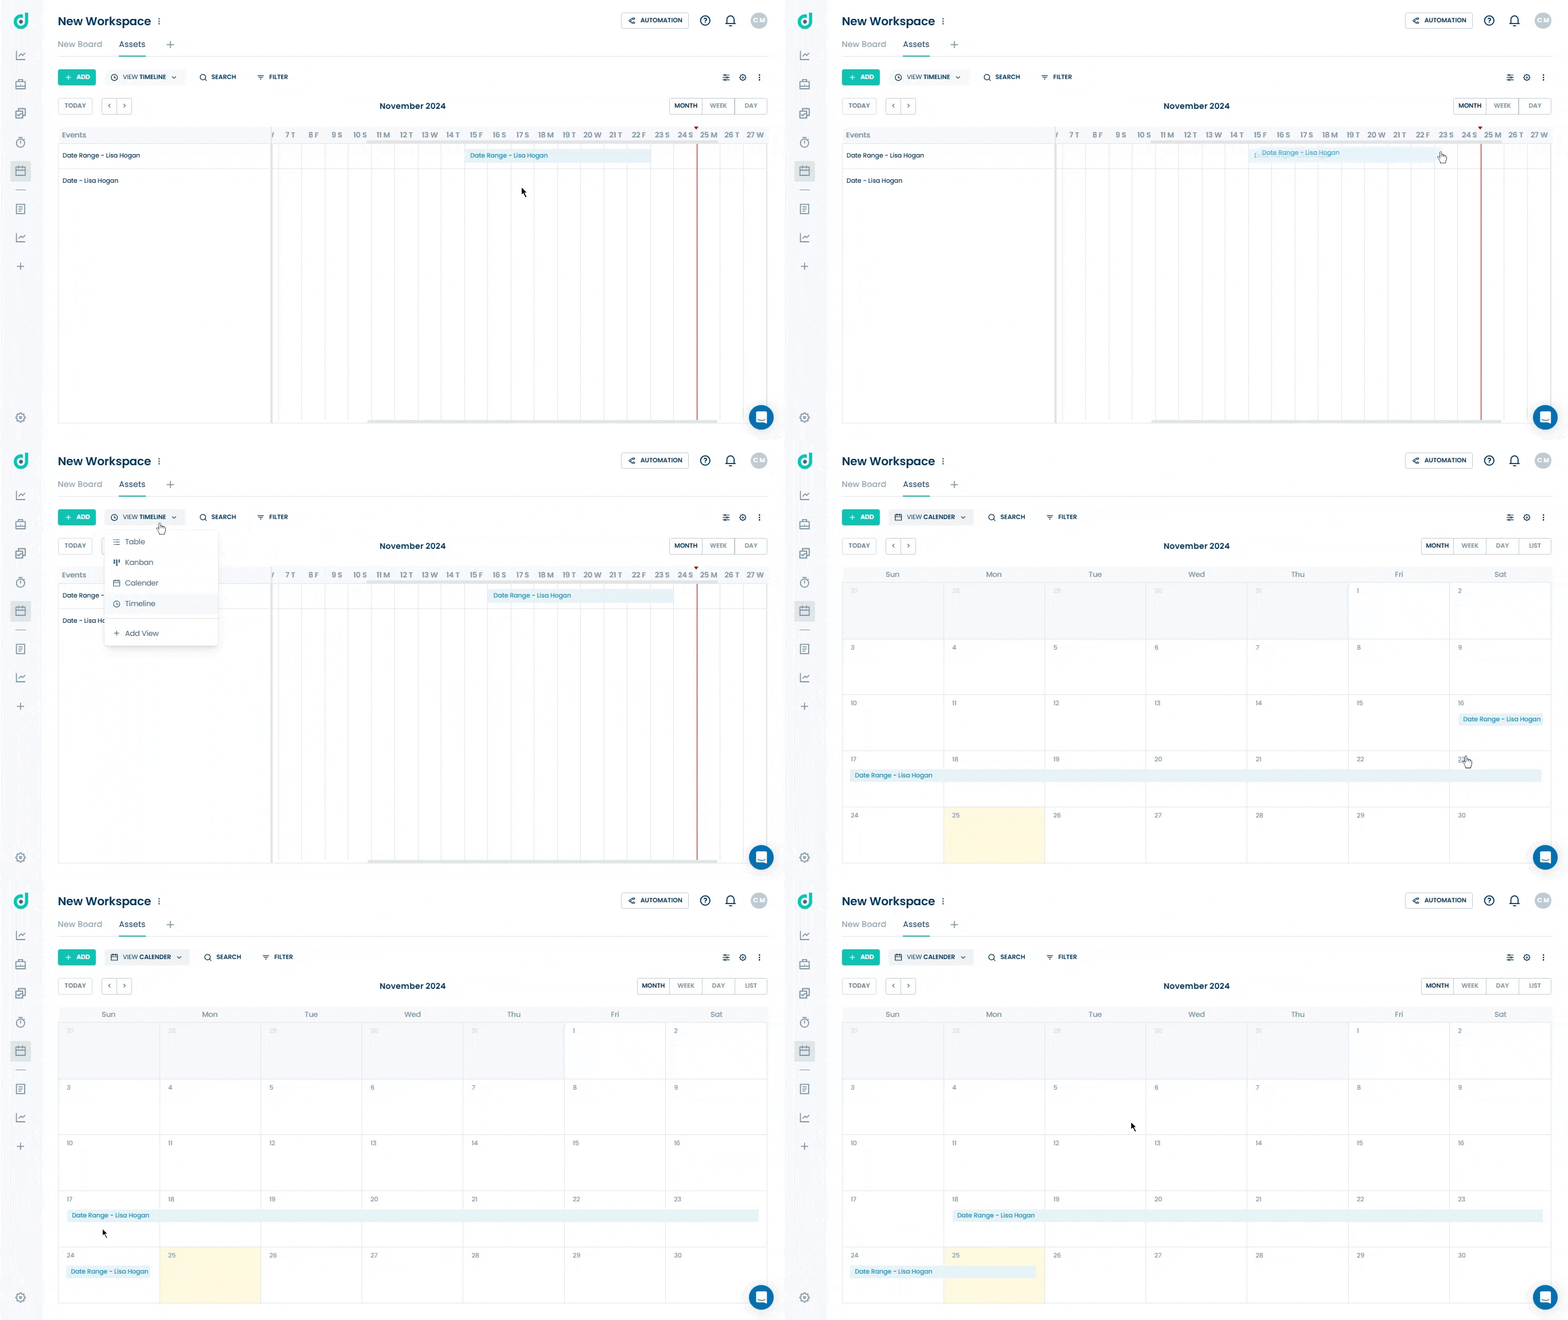
You can then view the selected dates and assigned colors in the Calendar & Timeline board views, reflecting the event settings you’ve customized.
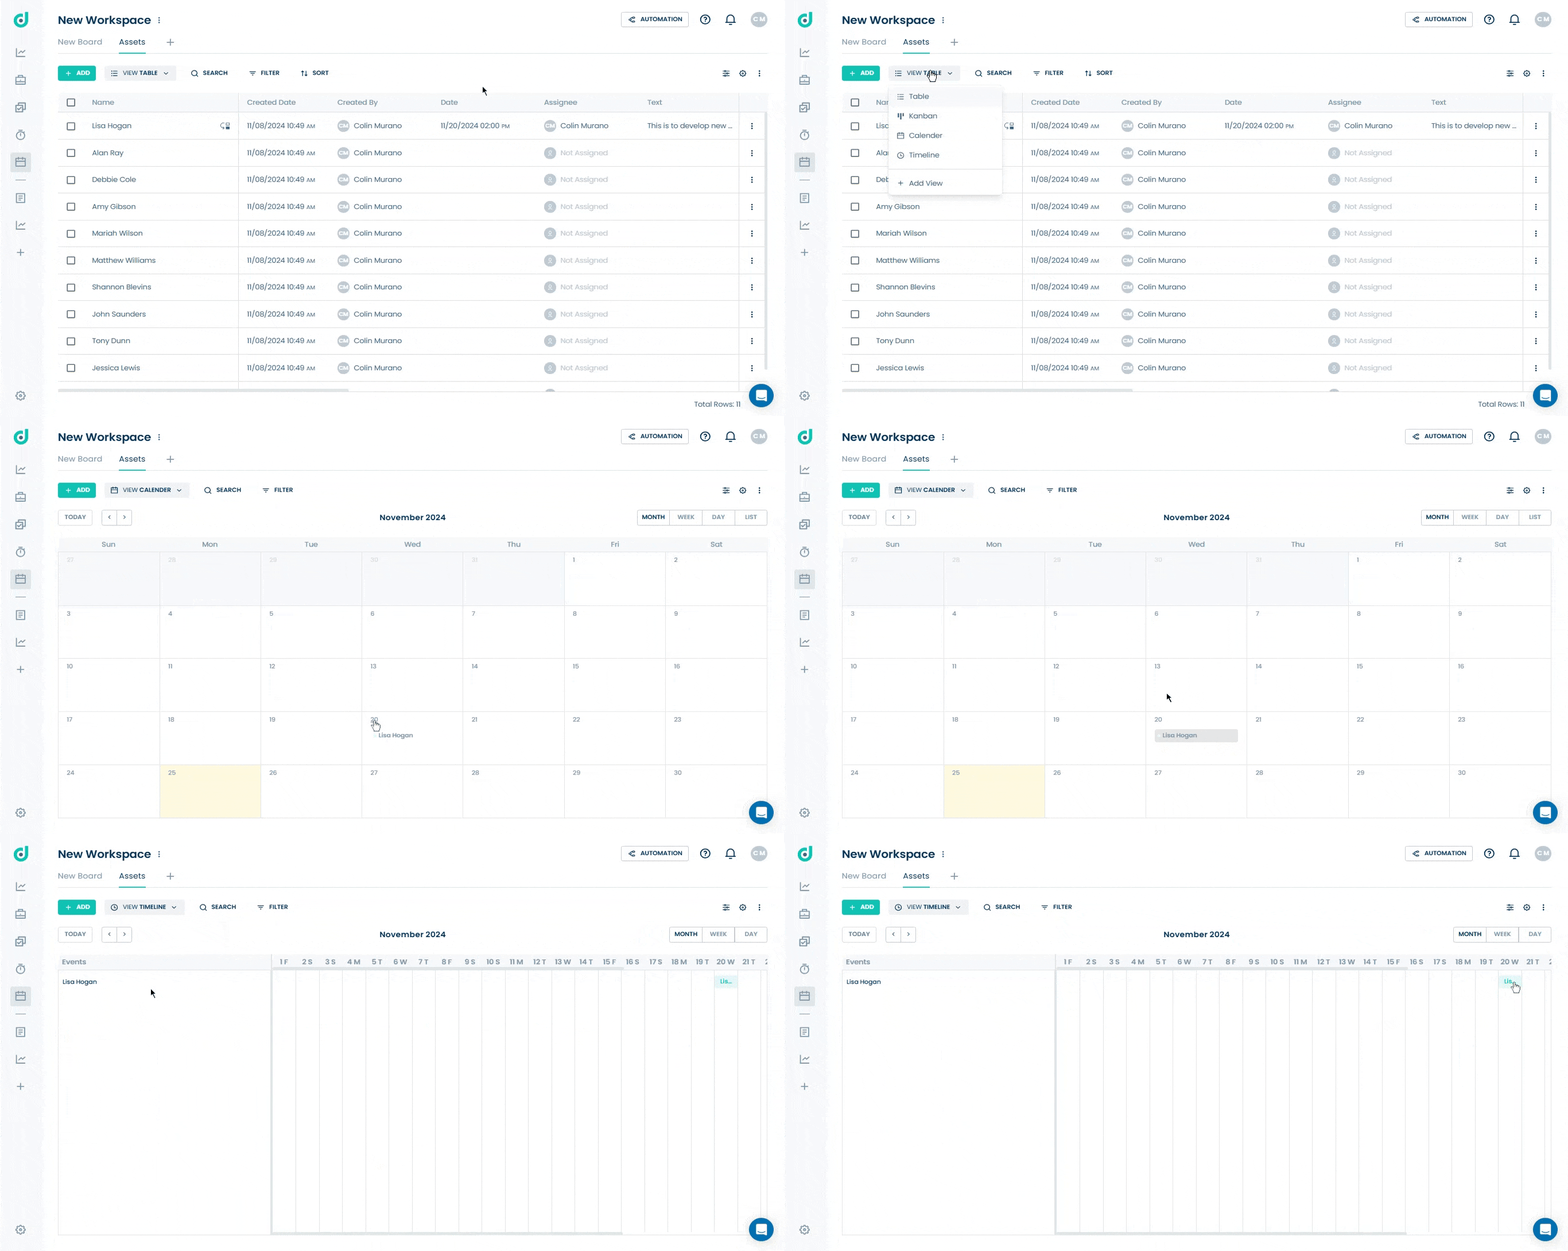
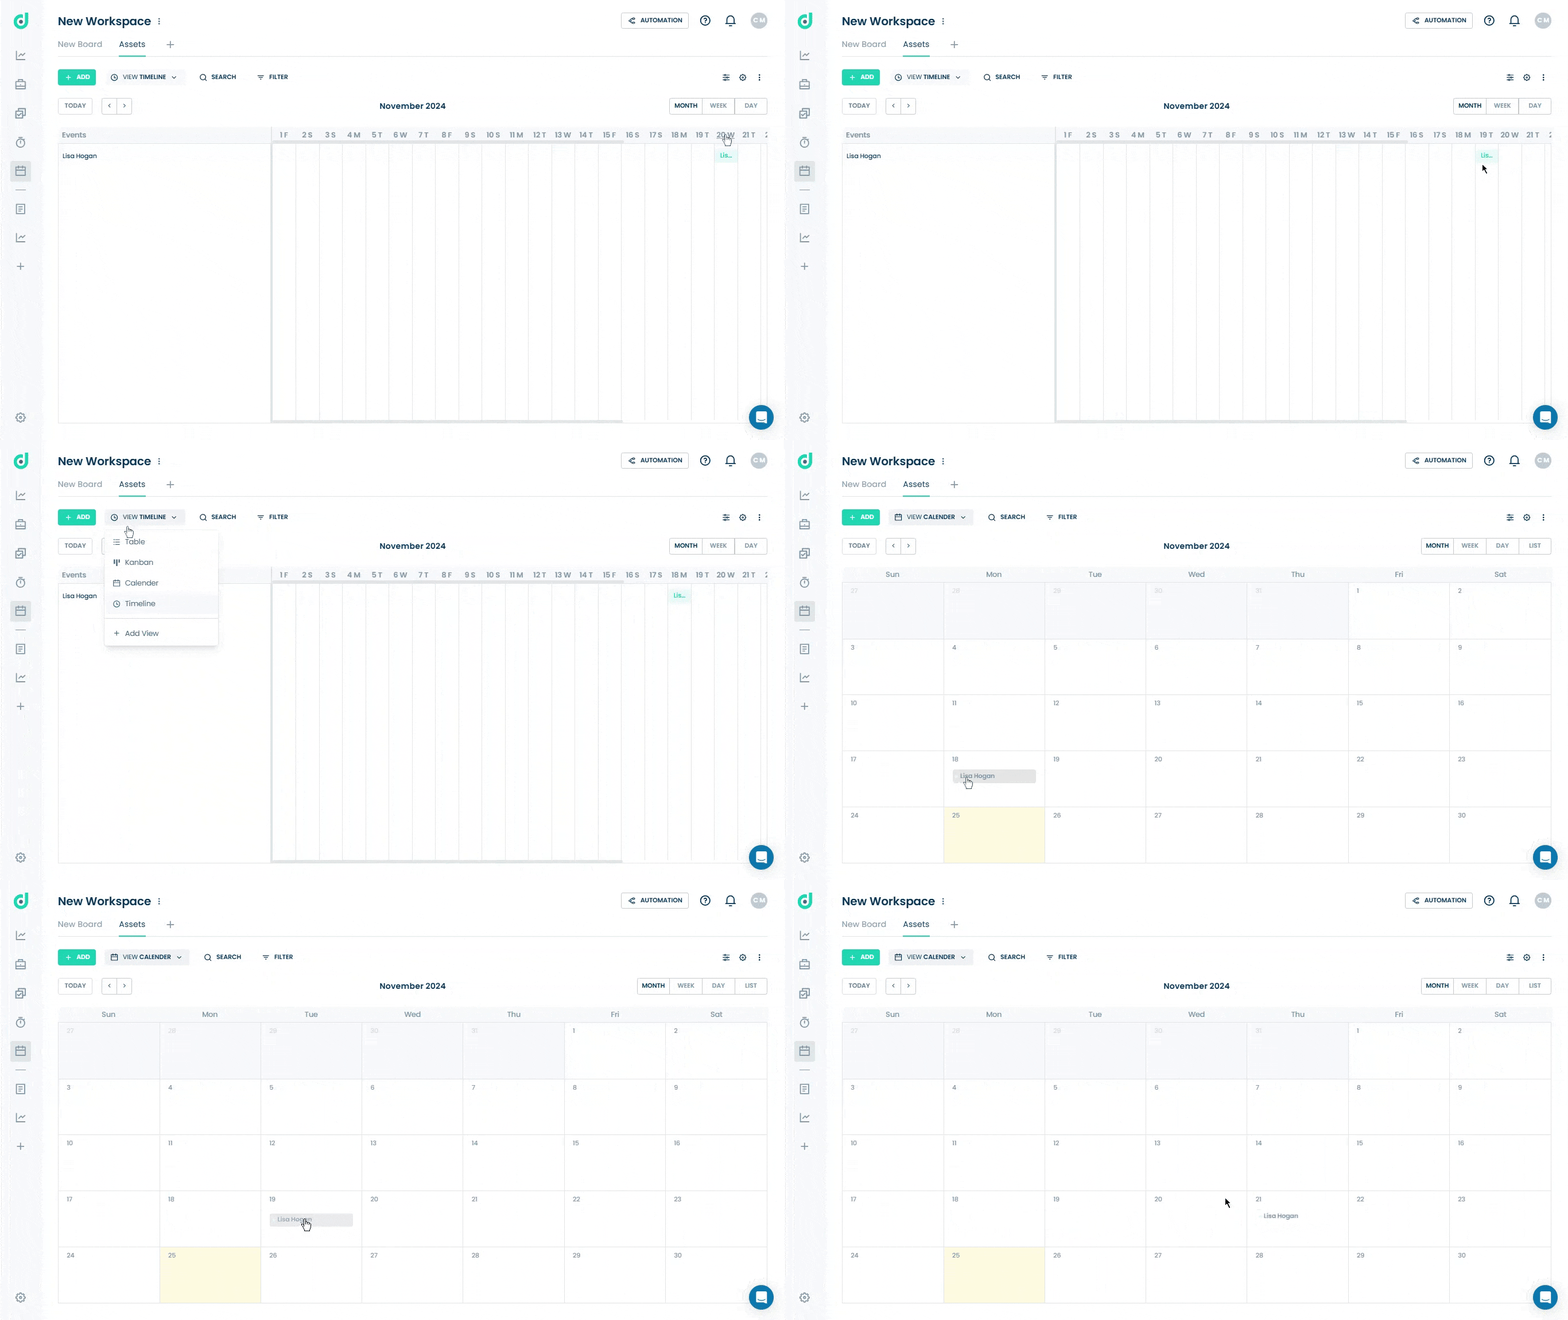
Note : You can drag and extend the record on the Calendar and Timeline Views.
Date Range
The Date Range field in OneDeck enables you to set a range of dates for records, making it easy to track deadlines, timelines, and other time-sensitive information. With the Date Range field, you can clearly see the start and end dates for records, helping you manage timelines efficiently.
Add Date Range Field
Step 1: Click on the “+” button from the field section.
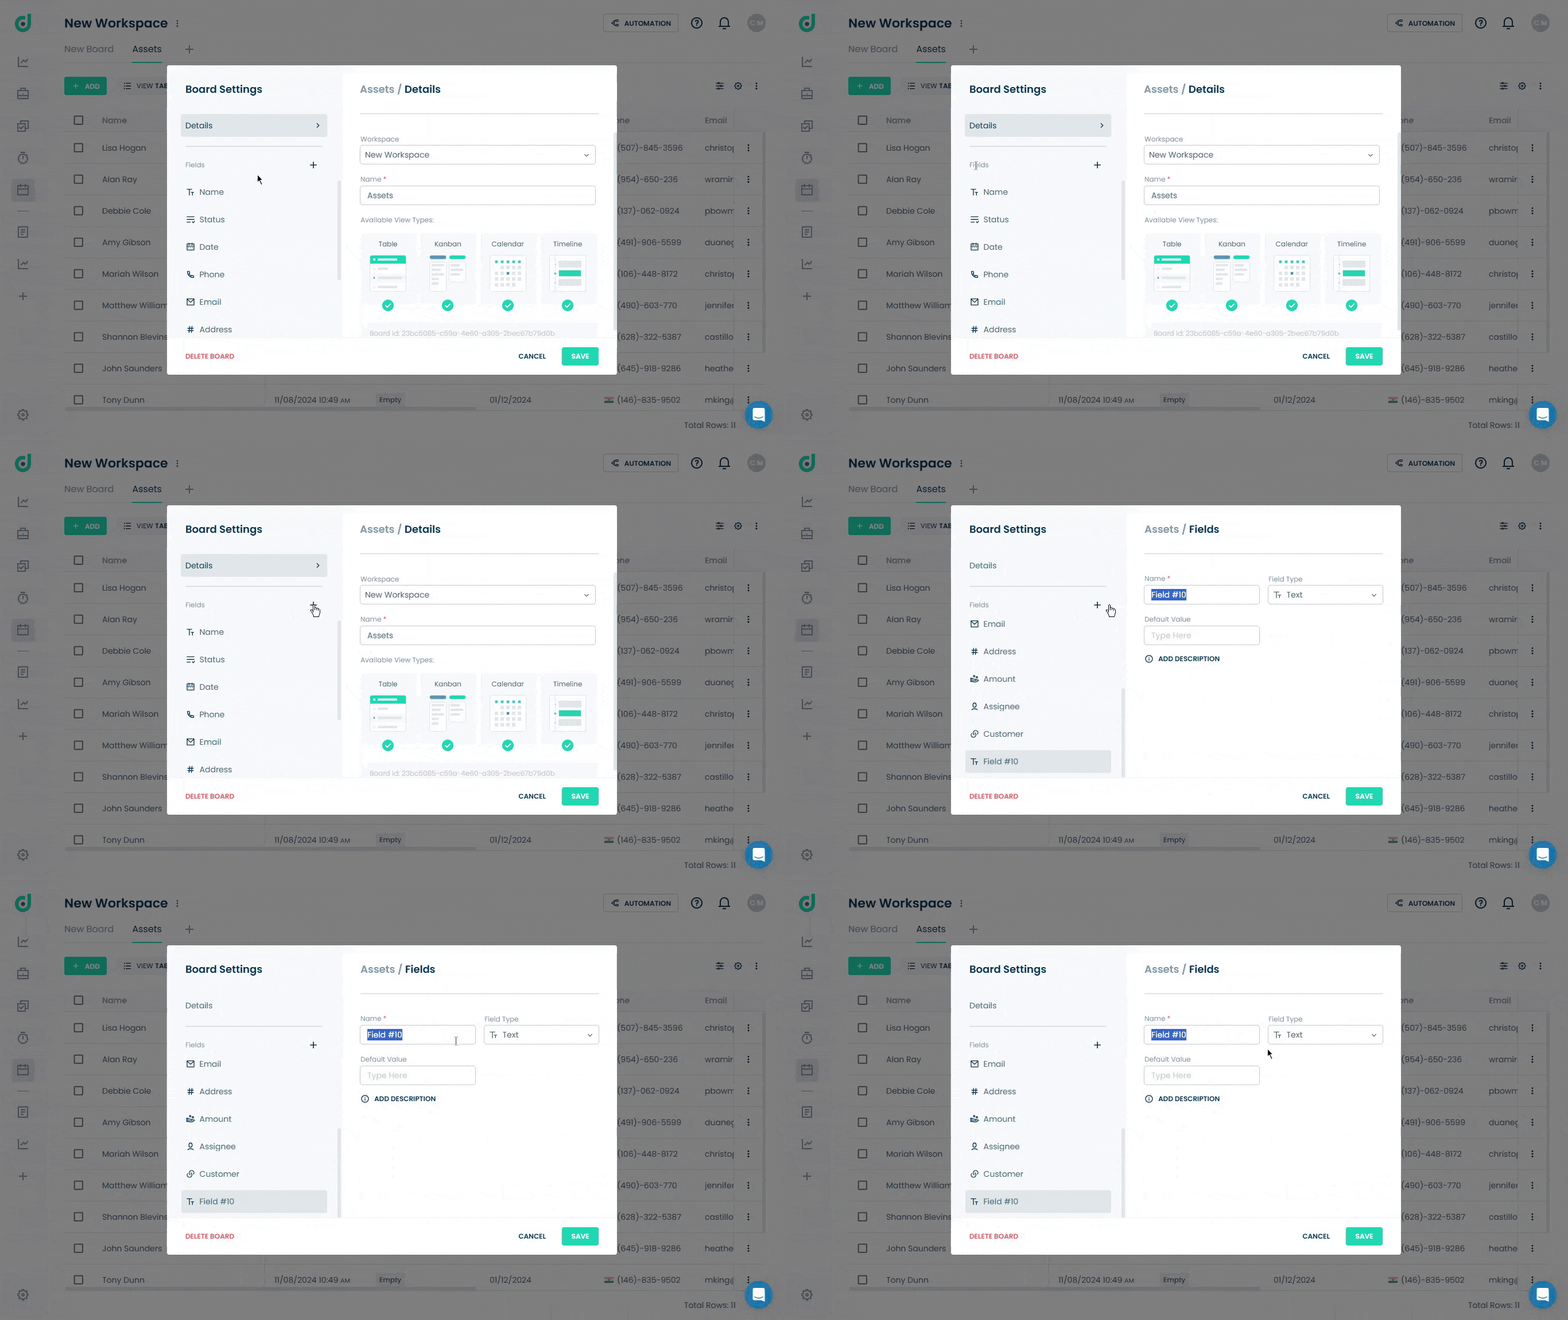
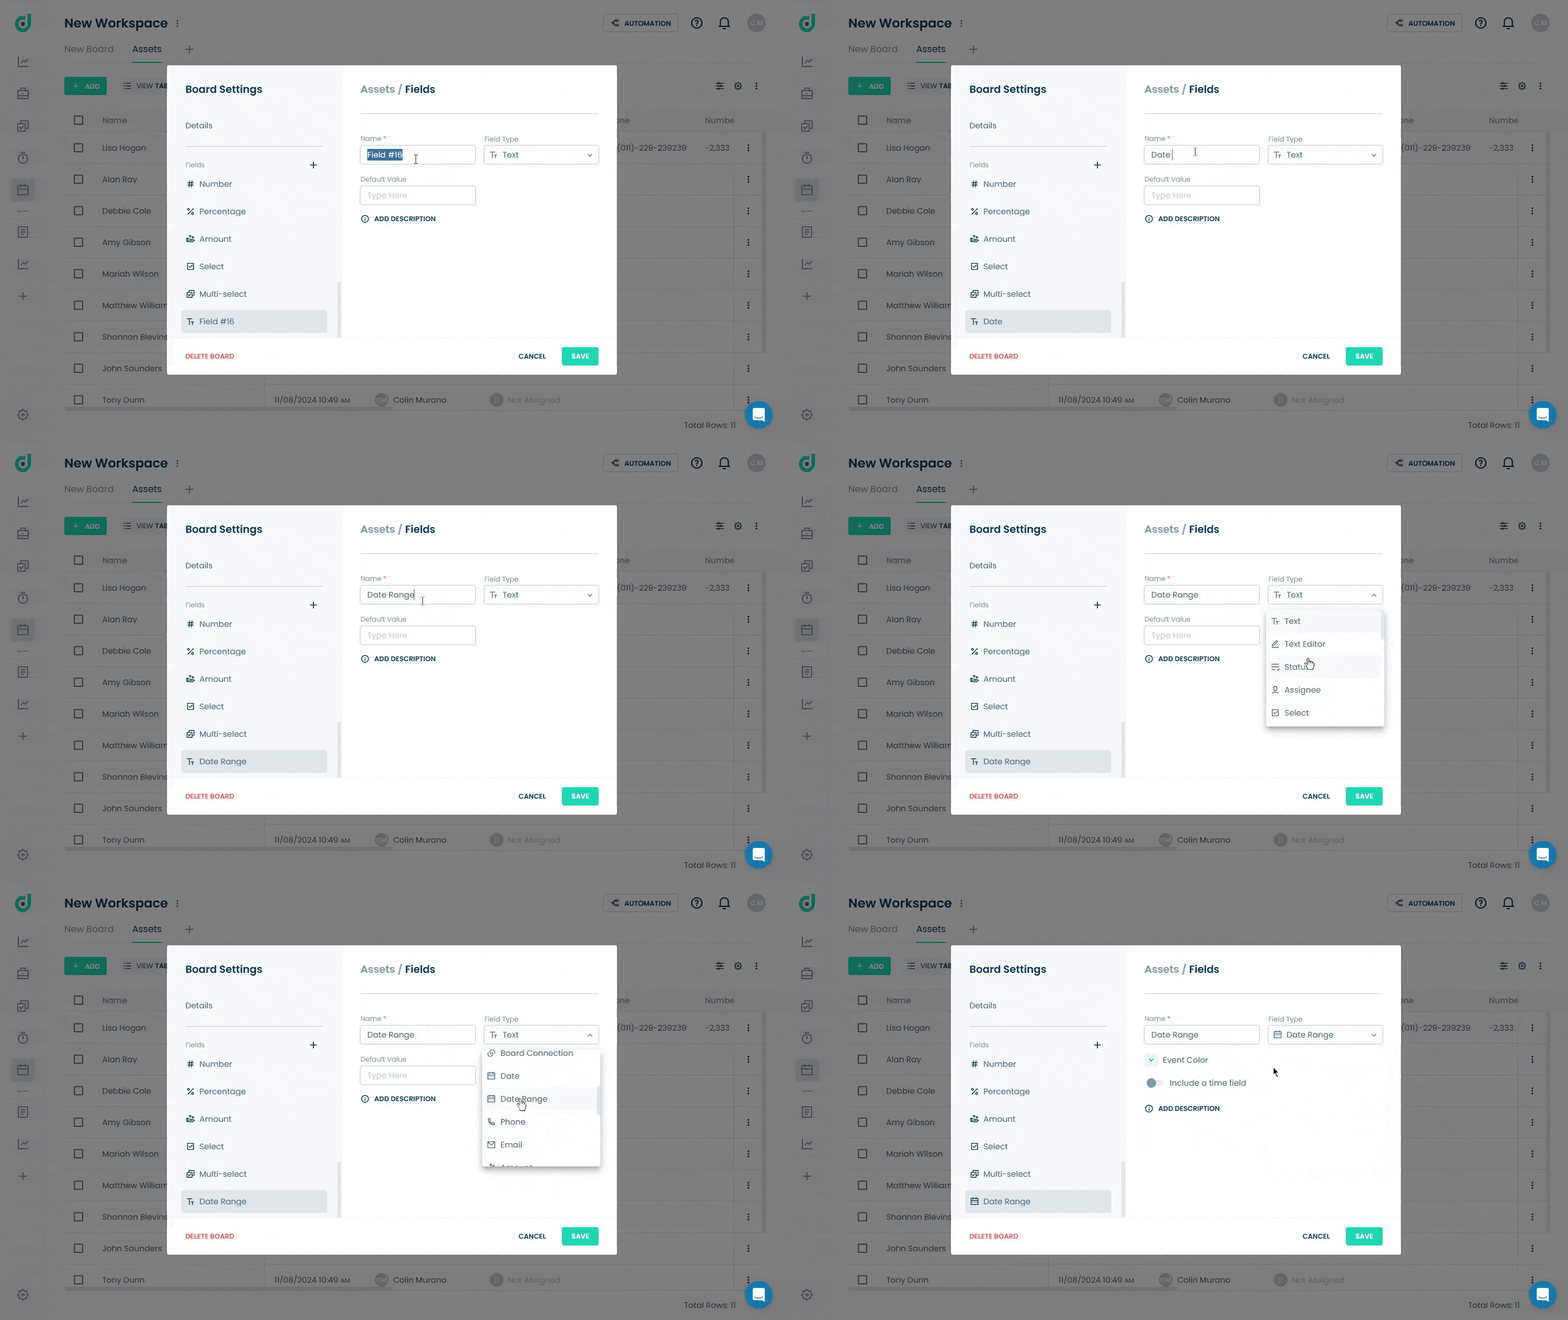
Step 2: Enter the field name and select “Date Range” as the field type.
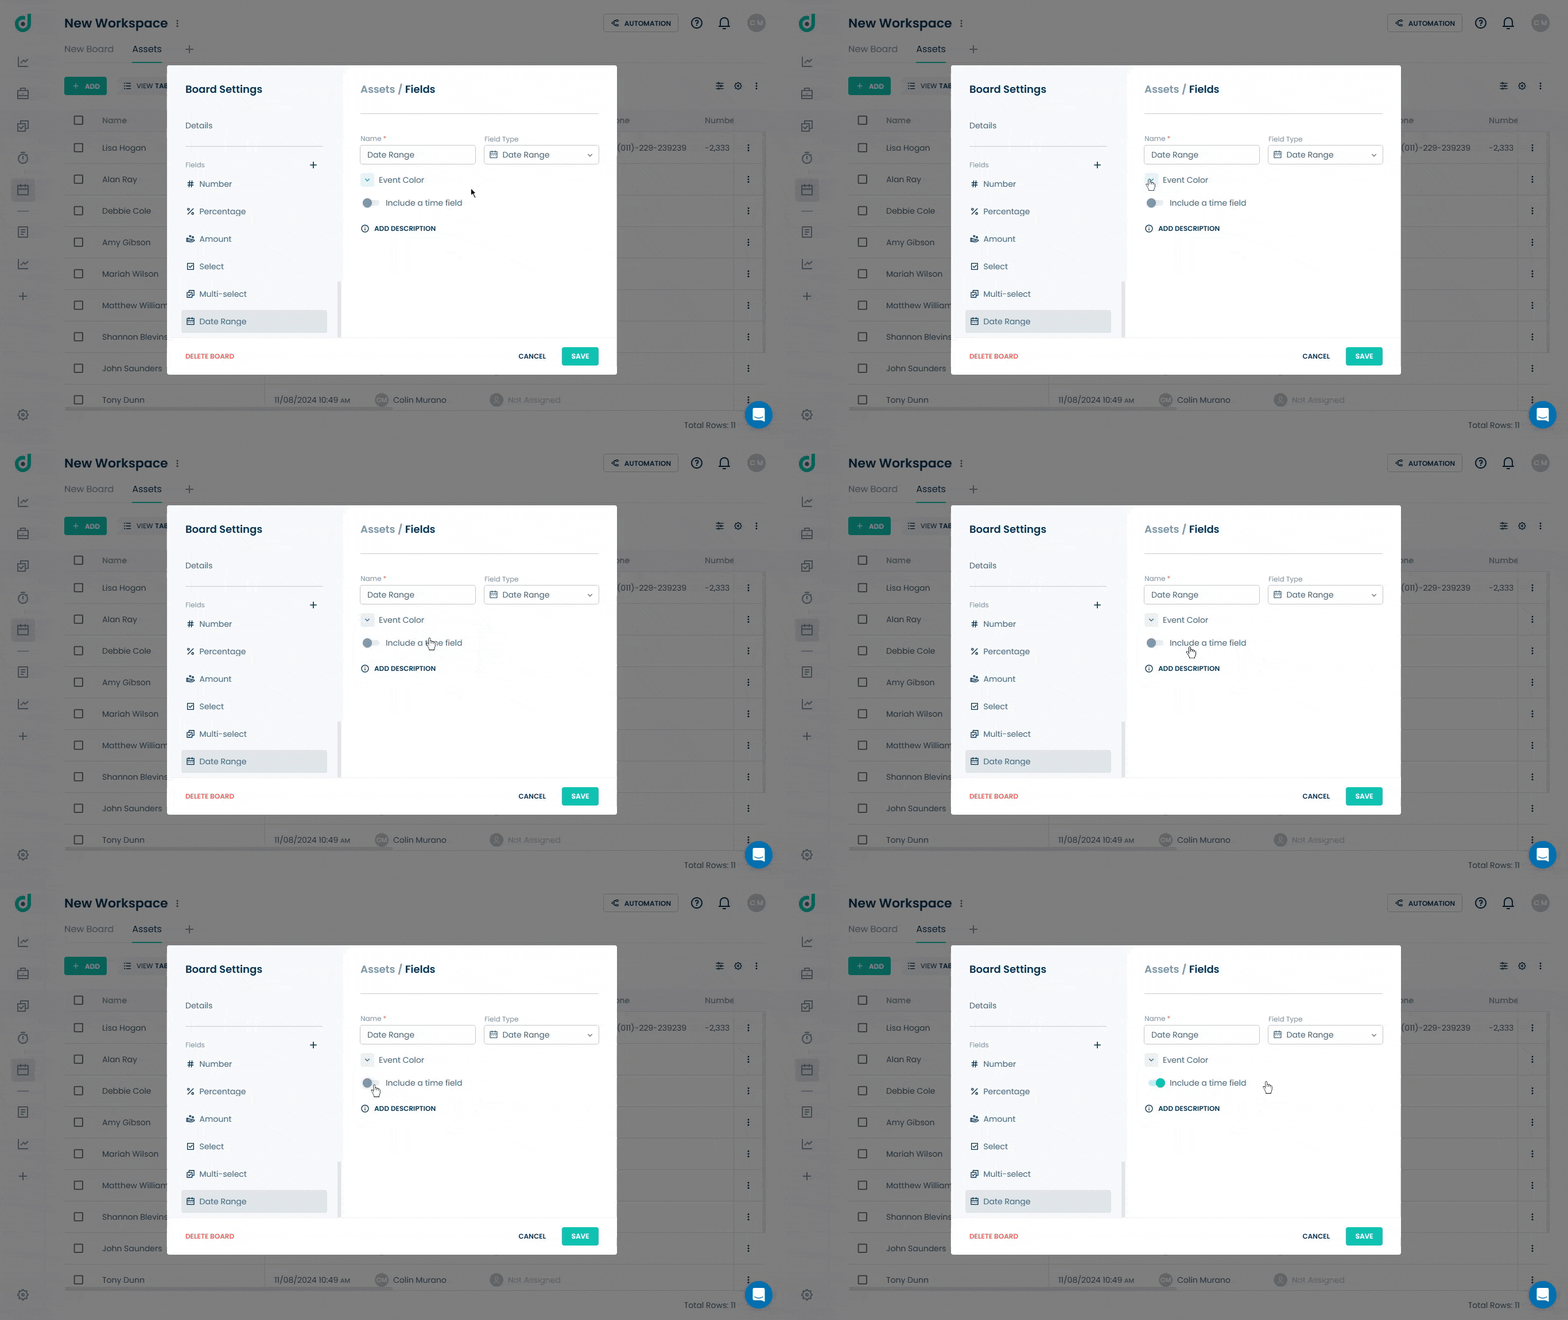
Step 3: (Optional) Select a color for the date range event, toggle the option to include a time field, and add a description for additional context.
Note: The selected color will represent the record in the Calendar and Timeline views.
Step 4: Click on the SAVE button.

Use Date Range Field
Once you have added the Date field as a field type, you can assign and track specific dates, such as deadlines or milestones, for various records within your board. This also makes the Calendar and Timeline Views available, which are particularly useful for visualizing records across specific date ranges.
Step 1: Click on the Record you want to add a date range to.
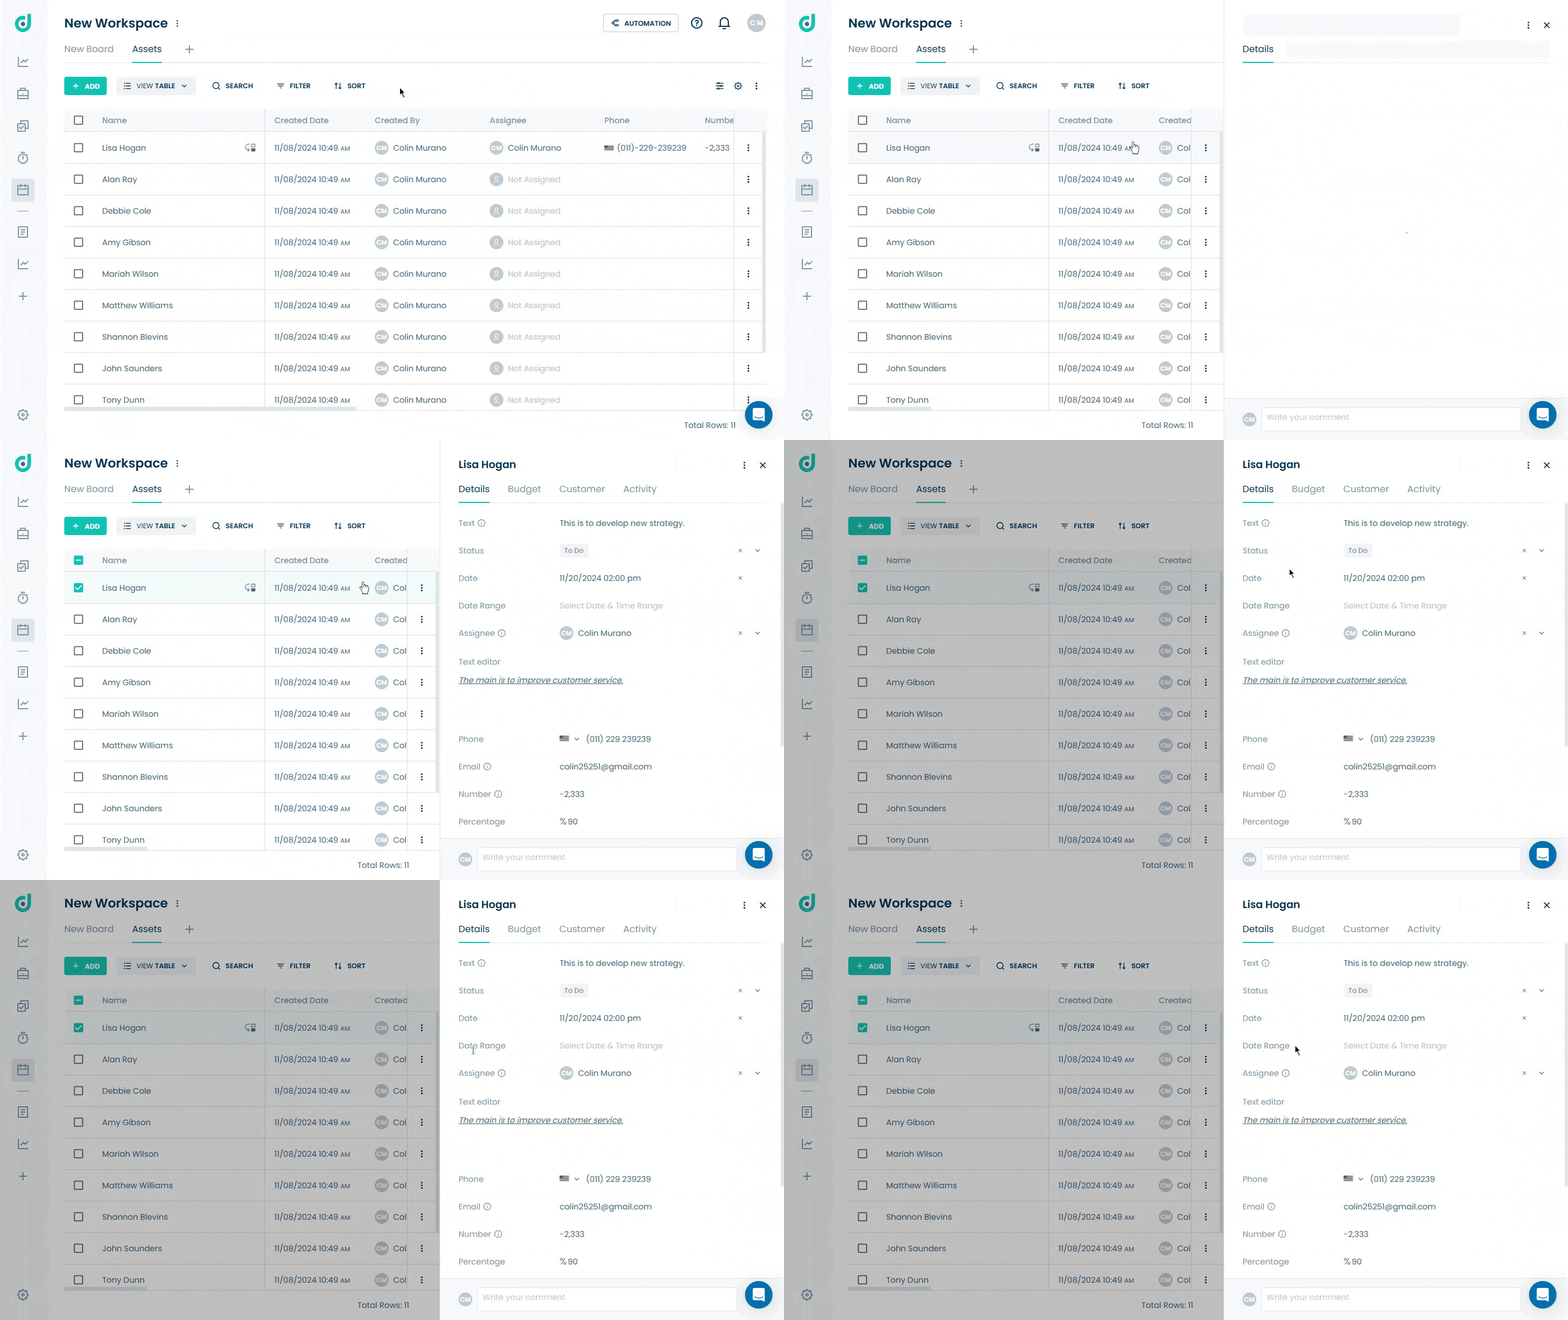
Step 2: In the record's details, locate the Date Range field and choose the preferred dates and time for the record.
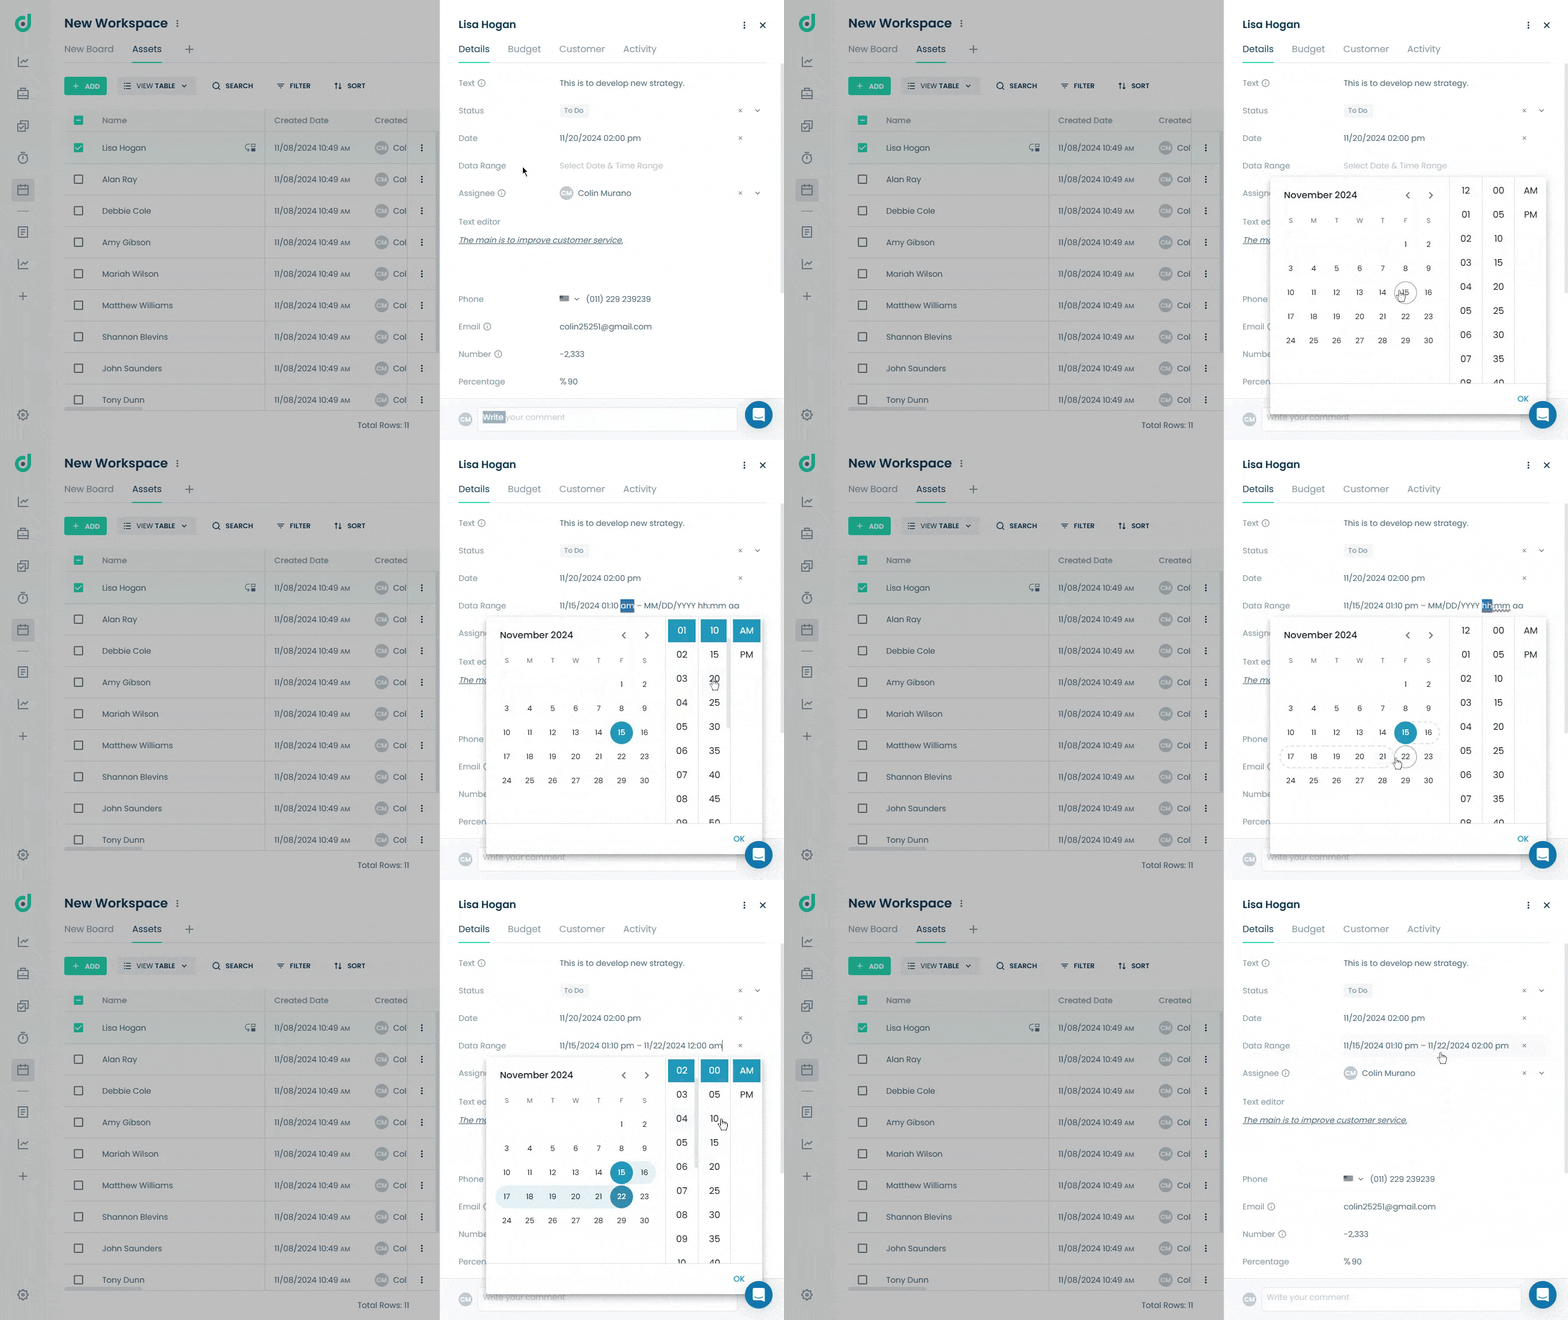
Then, you can view the selected dates and colors in the Calendar & Timeline board view, based on the event setting you’ve customized.
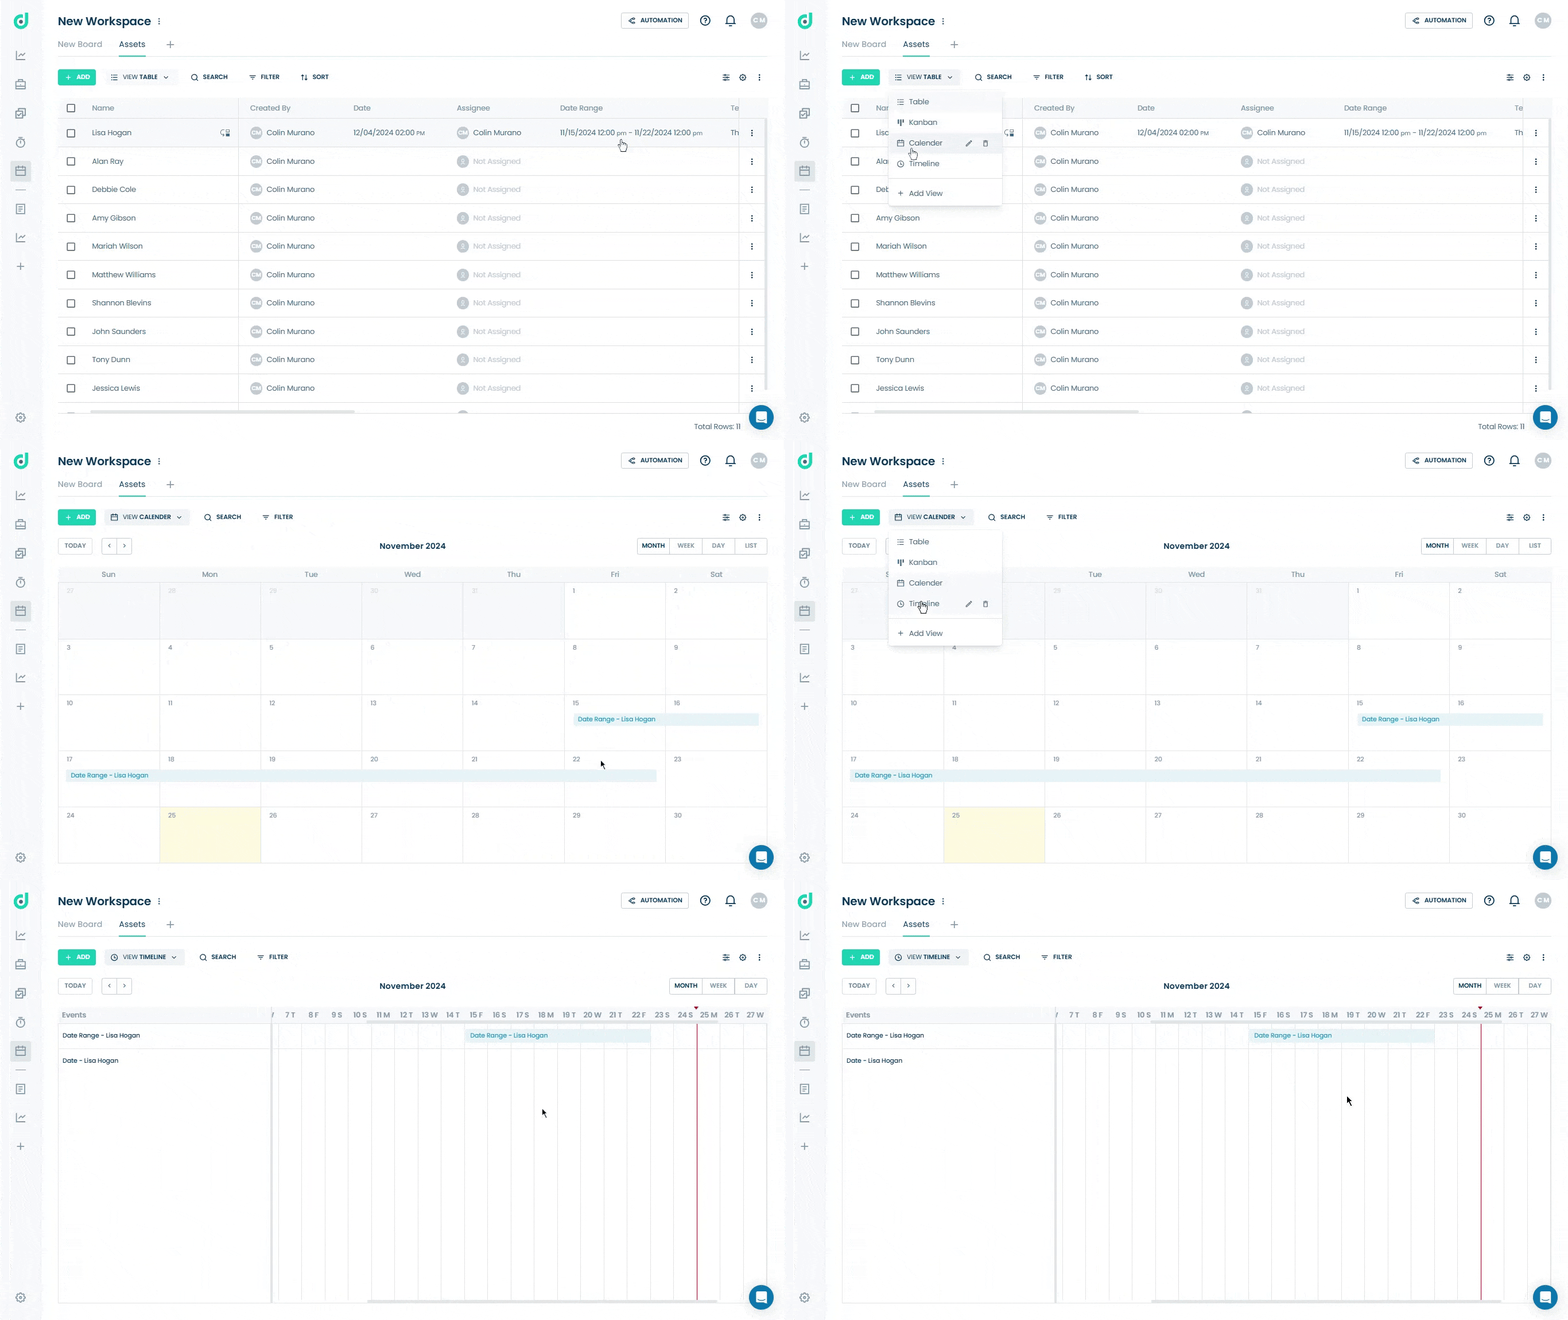
Note: You can drag and extend the record on the Calendar and Timeline Views.
