OneDeck Help Center
Data Entry Fields
OneDeck’s Data Entry fields make it easy to capture and organize diverse information across your boards. Use the Text field for plain text, descriptions, or the Text Editor for enhanced formatting options.
The Phone and Email fields allow you to store essential communication details. For tracking financials, the Amount field records values with customizable currency and precision, while the Percent field captures progress and completion rates.
Together, these fields provide a seamless way to enter, organize, and utilize data for any business need. In this documentation, we’ll walk you through the steps to add and use the following data entry board fields:
- Text
- Text Editor
- Phone
- Number
- Amount
- Percent
Let’s get started 🚀
Navigation
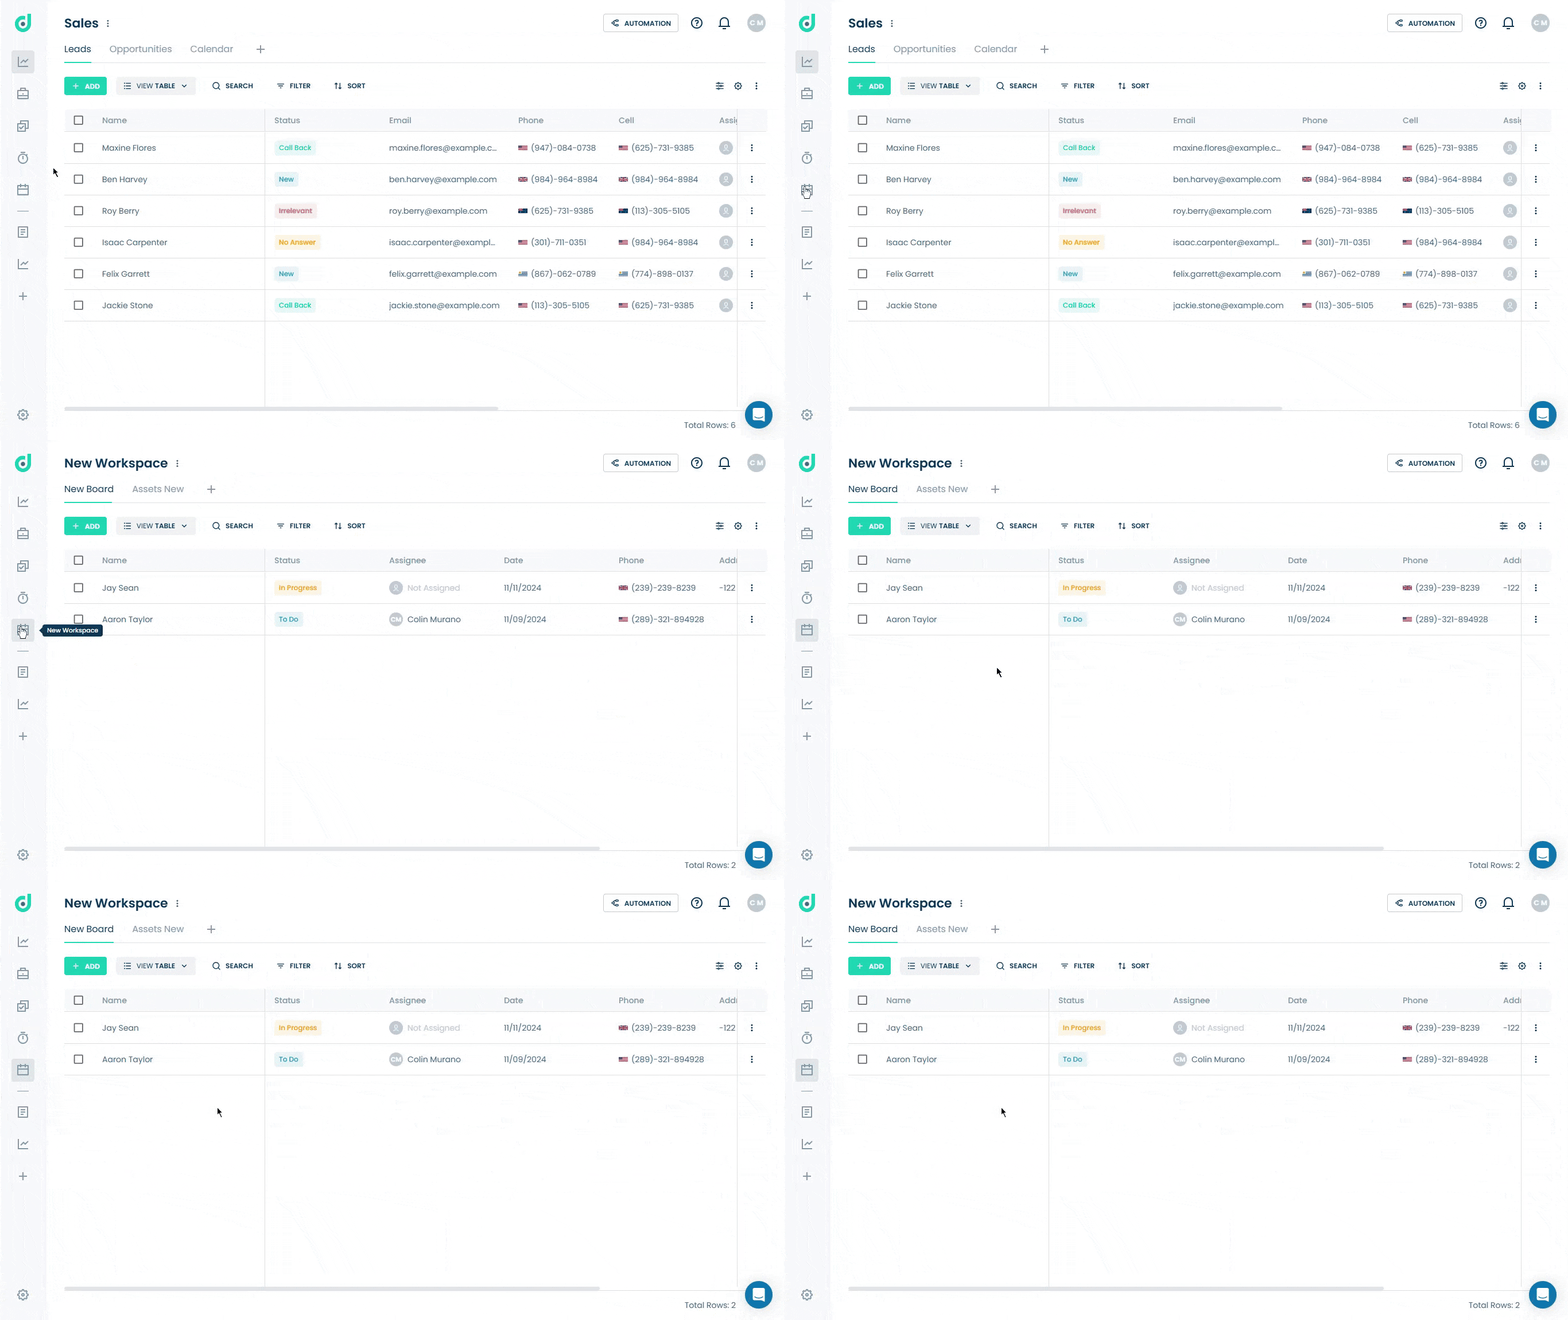
Step 1: Click on the Workspace button from the side navigation menu bar.
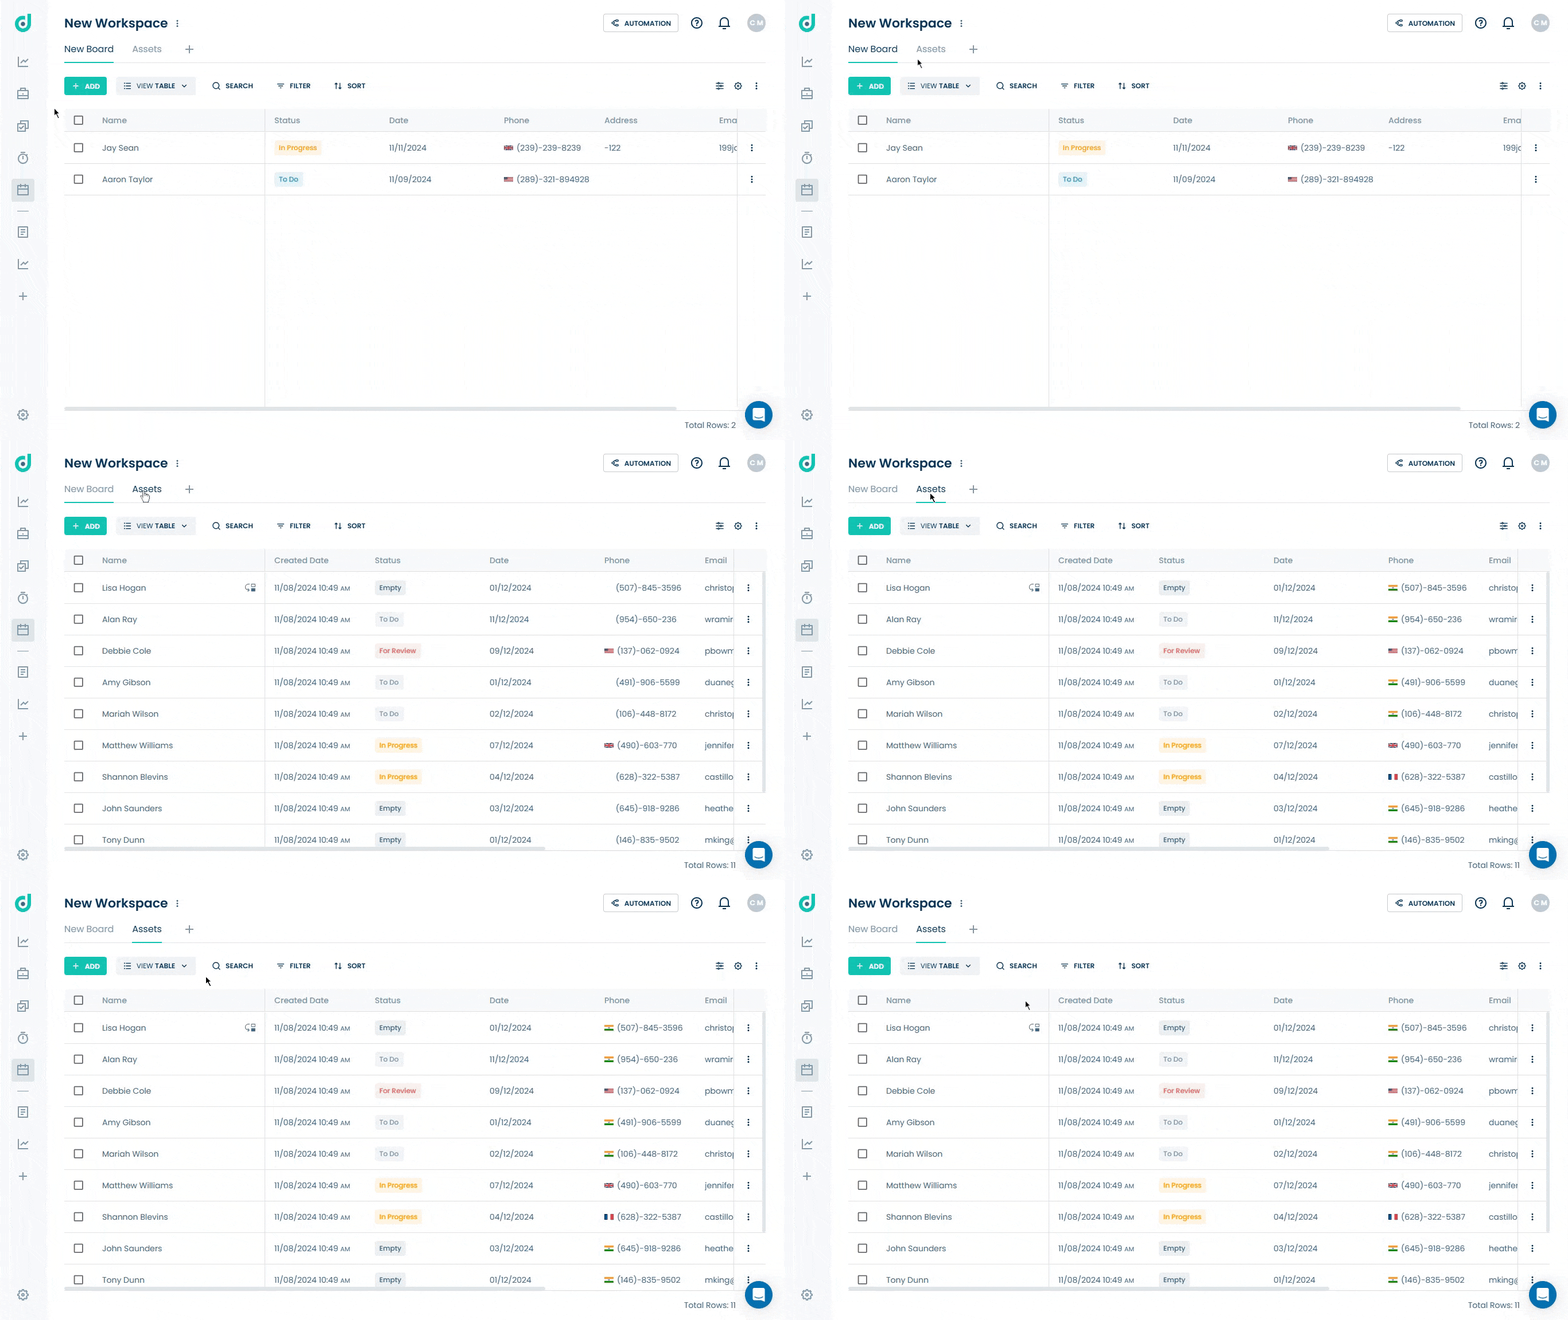
Step 2: Select the board where you want to add data entry fields.
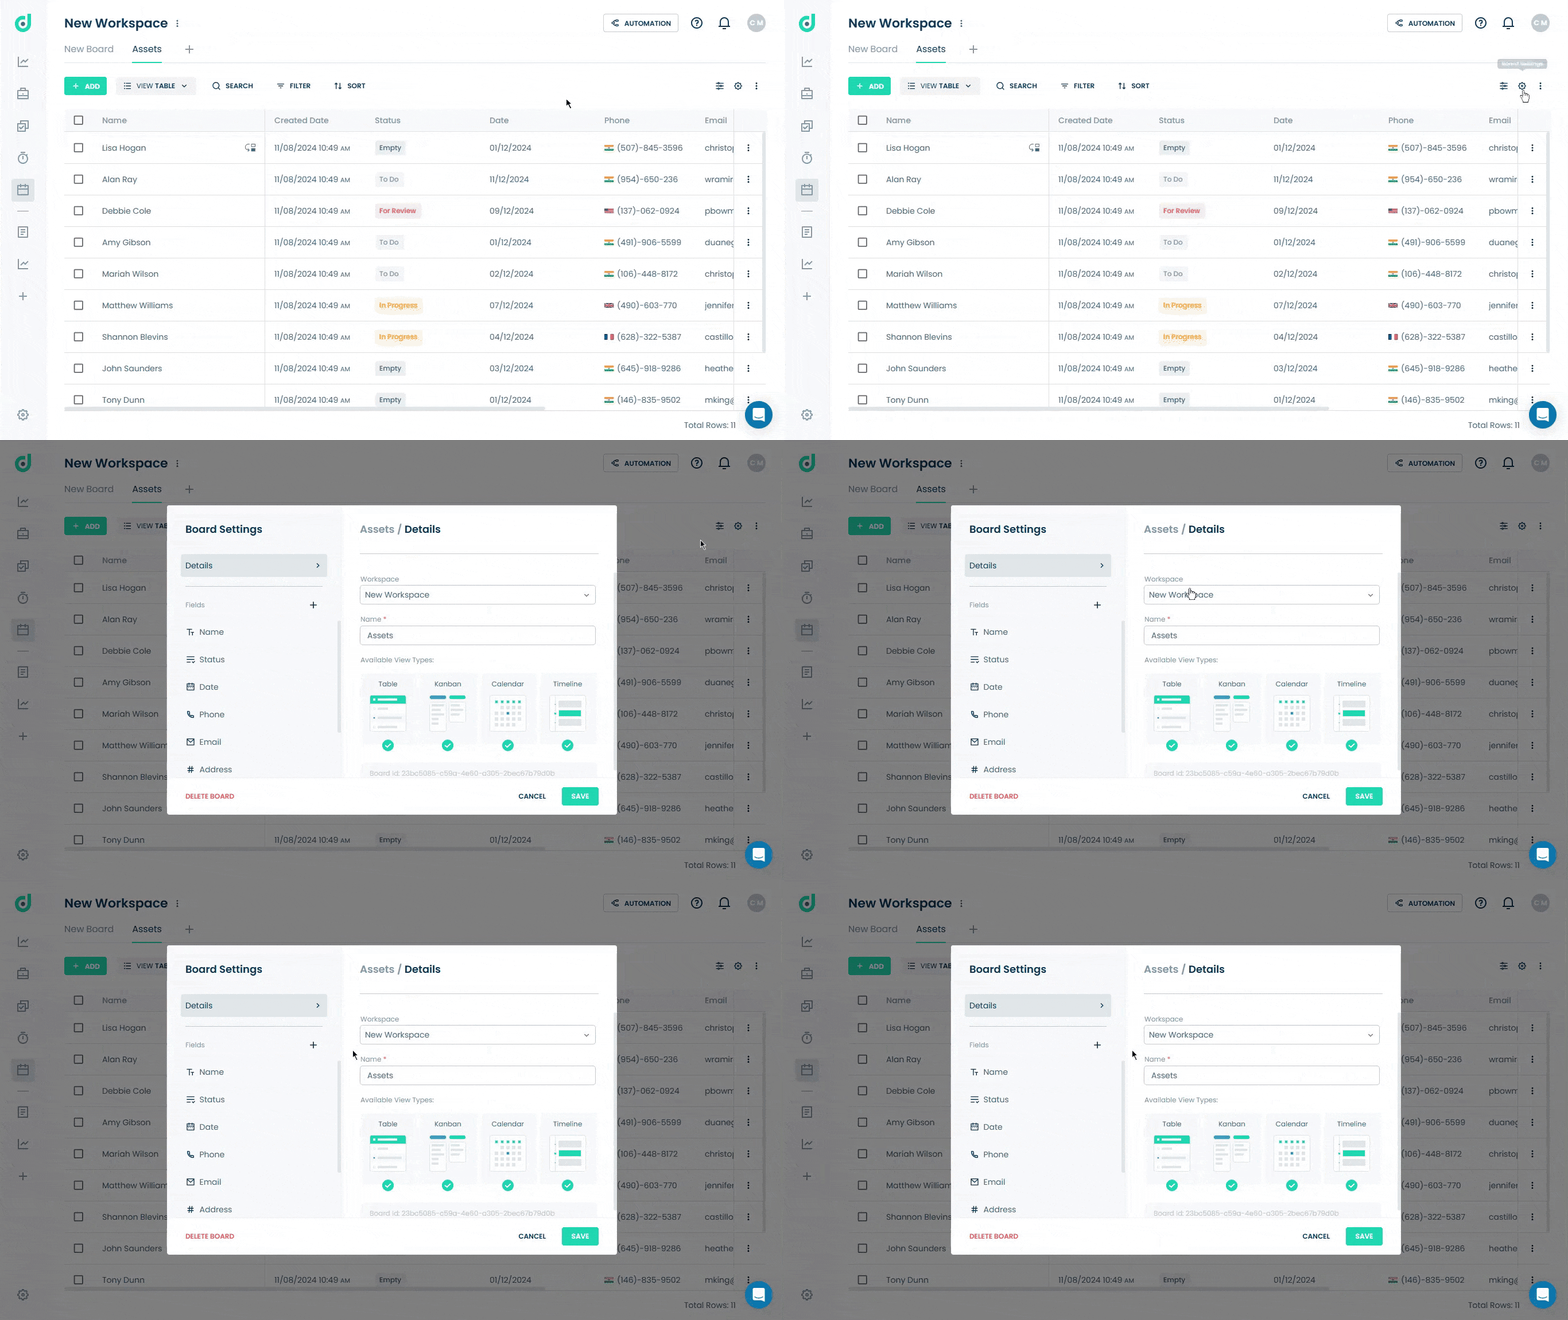
Step 3: Click on the Setting icon from the right side of the interface.
Text
The Text field in OneDeck offers flexibility for capturing various types of information, from plain text to URLs. It’s good for adding searchable, customizable descriptions to any board, enhancing data organization and accessibility.
Add Text Field
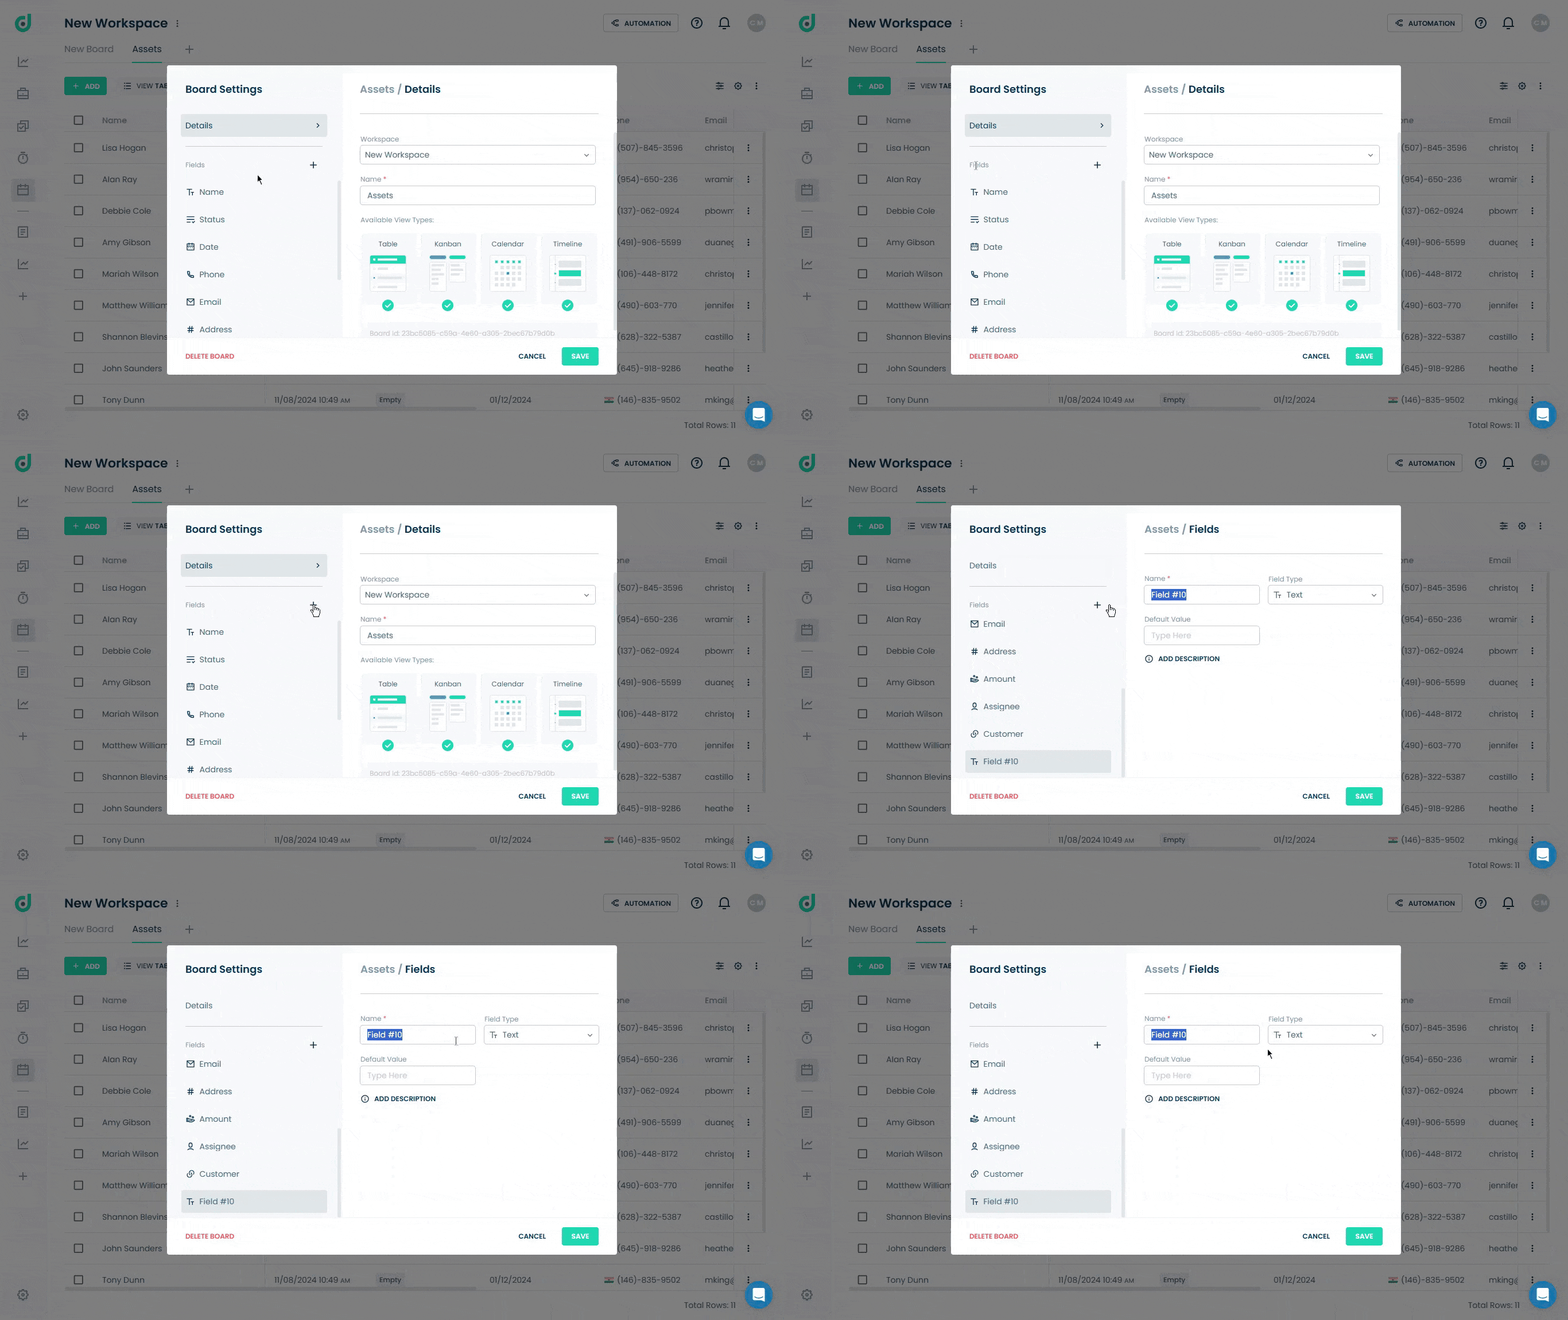
Step 1: Click on the “+” button from the field section.
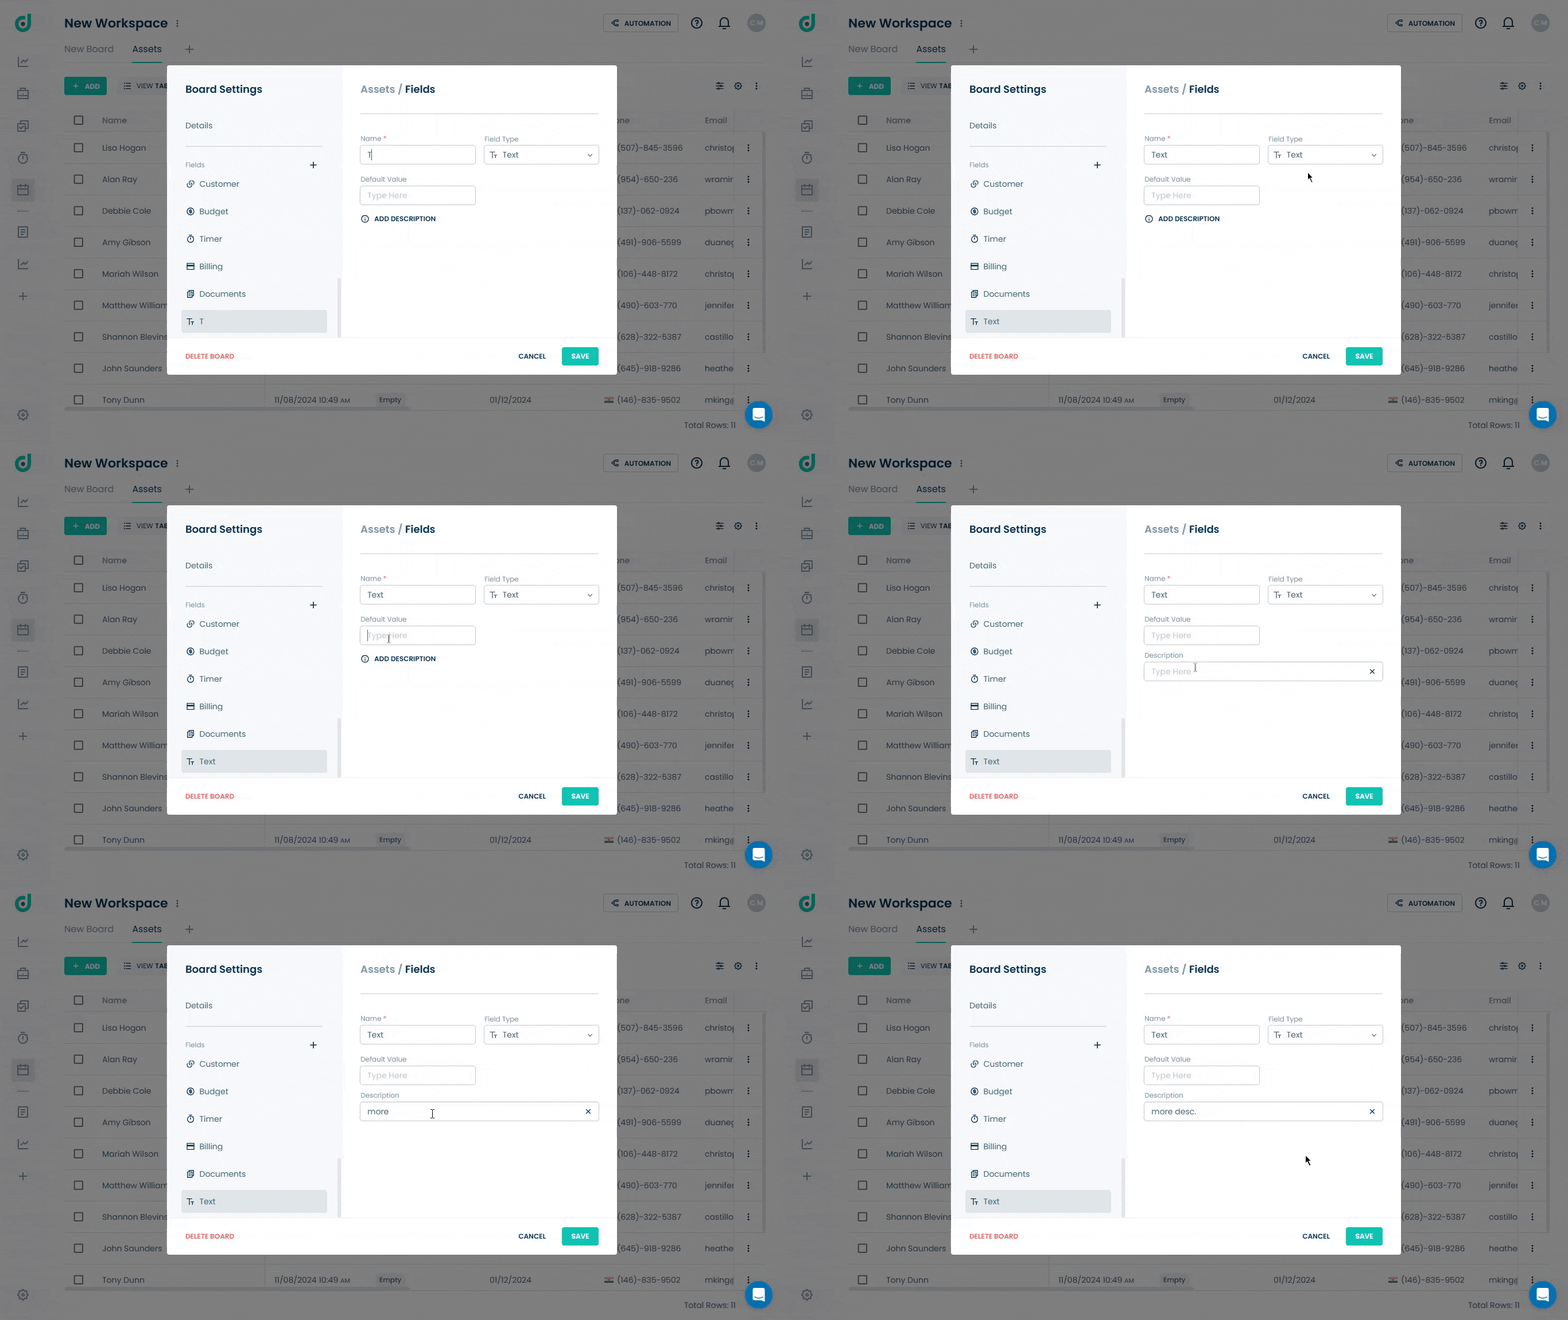
Step 2: Enter the field name and select “Text” as the field type. Optionally, add a default value and a description for additional context.
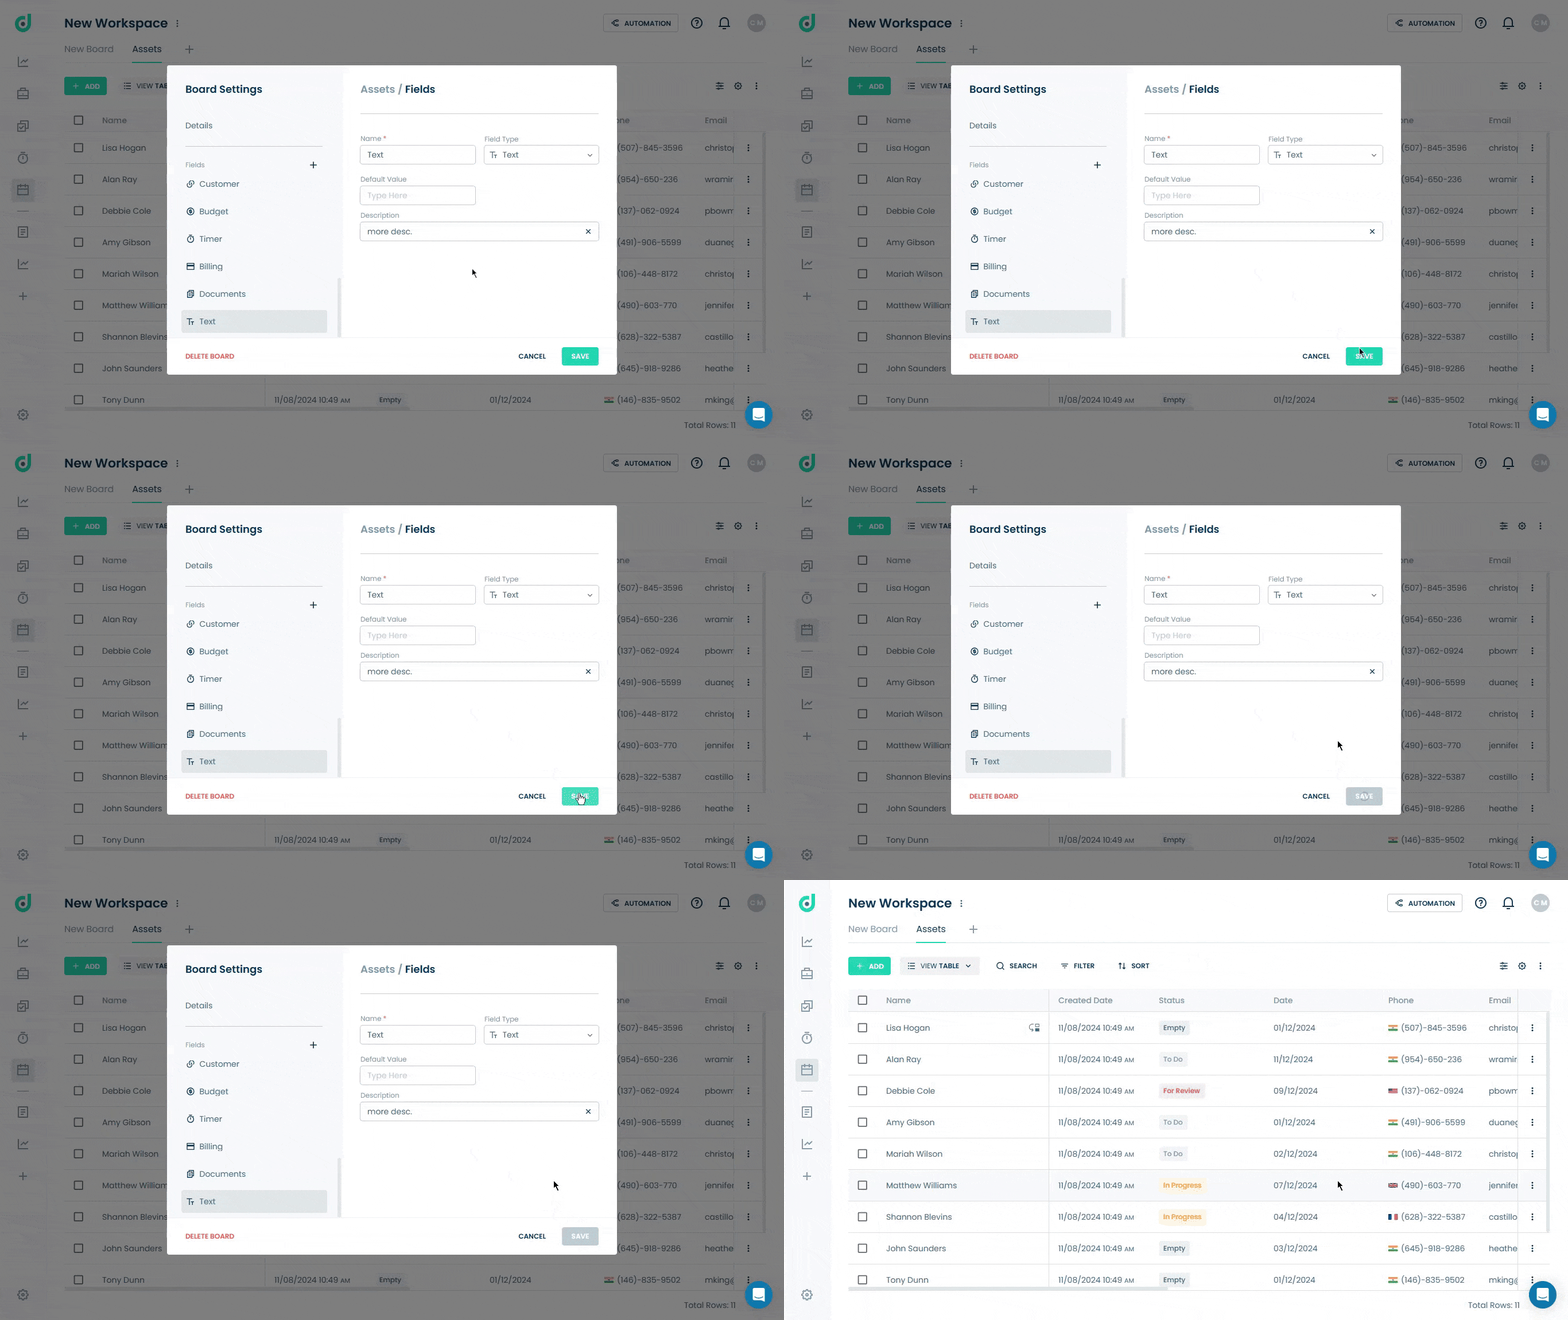
Step 3: Click on the SAVE button.
Use Text Field
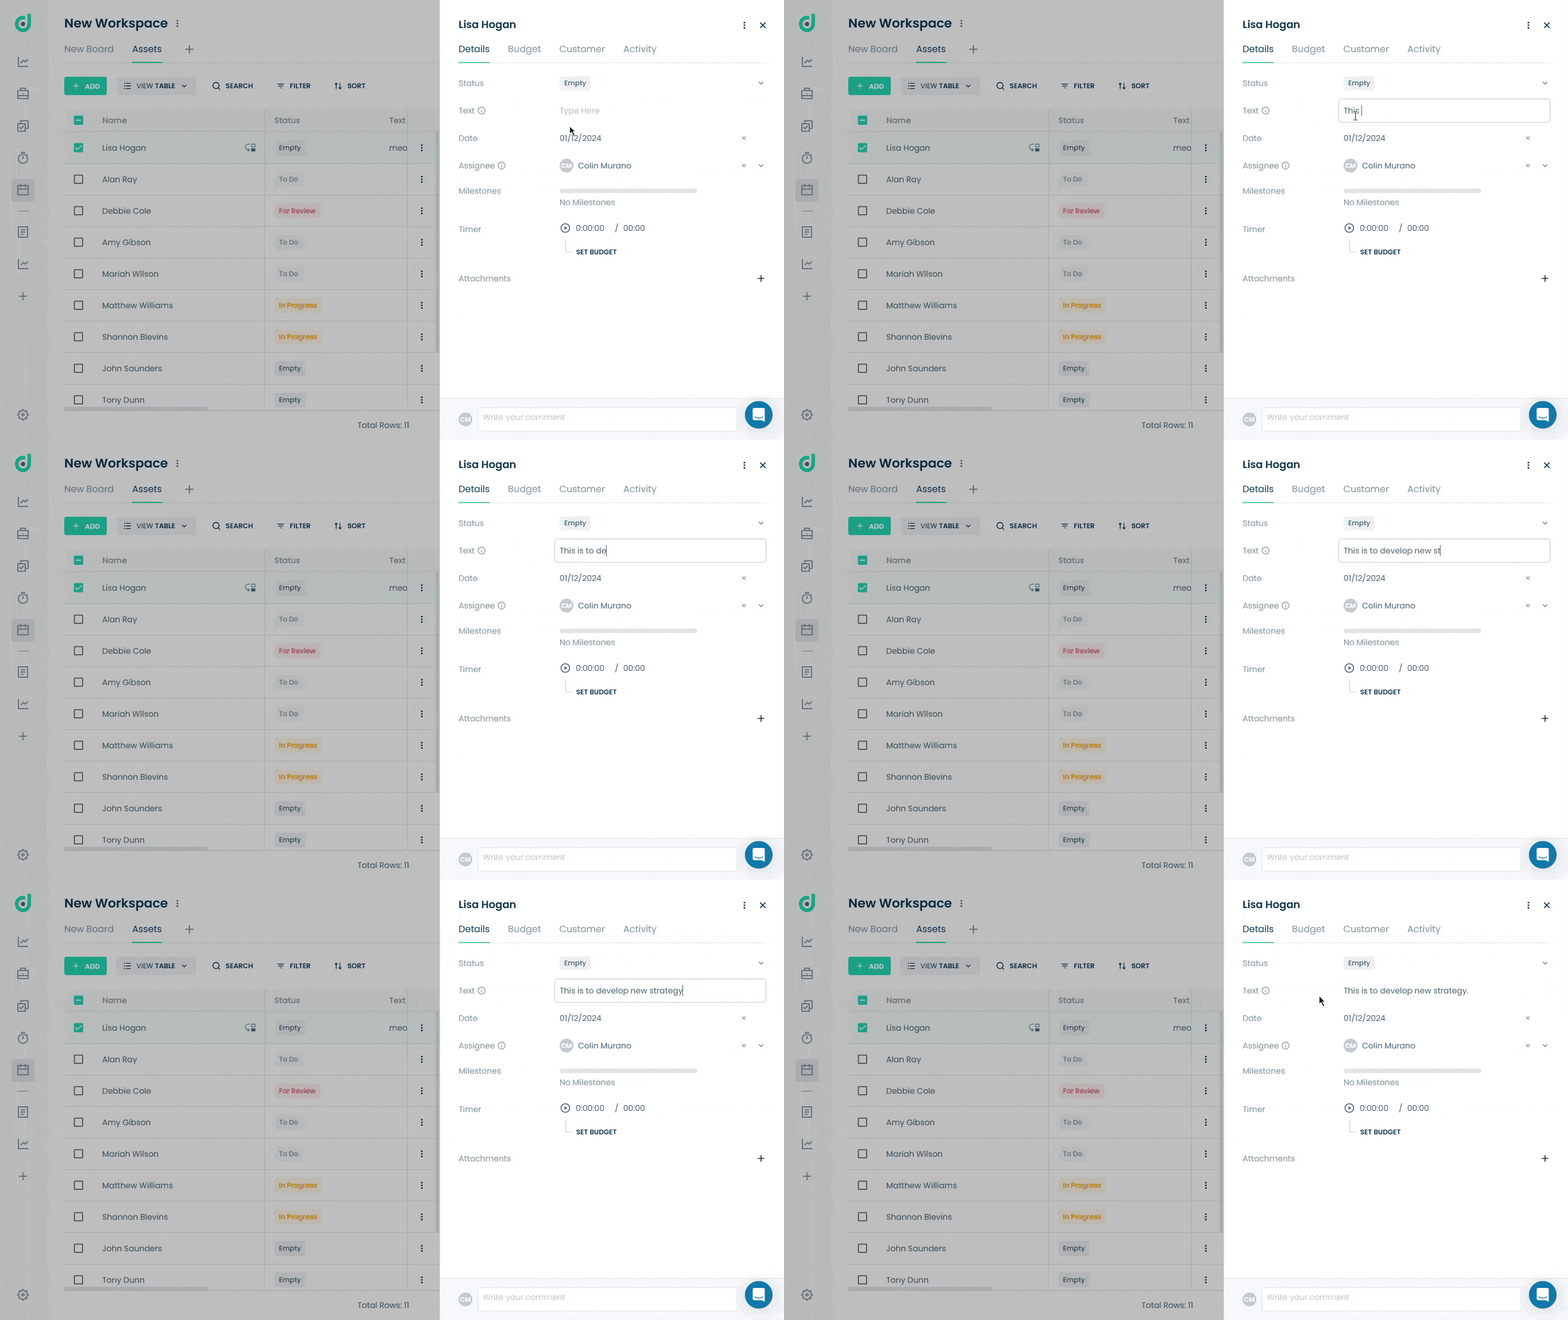
Once you have added Text as a field type, you can add long-form descriptions, making it suitable for various types of information such as record descriptions, customer feedback, or notes.
Step 1: Click on the Record you want to add a text to.
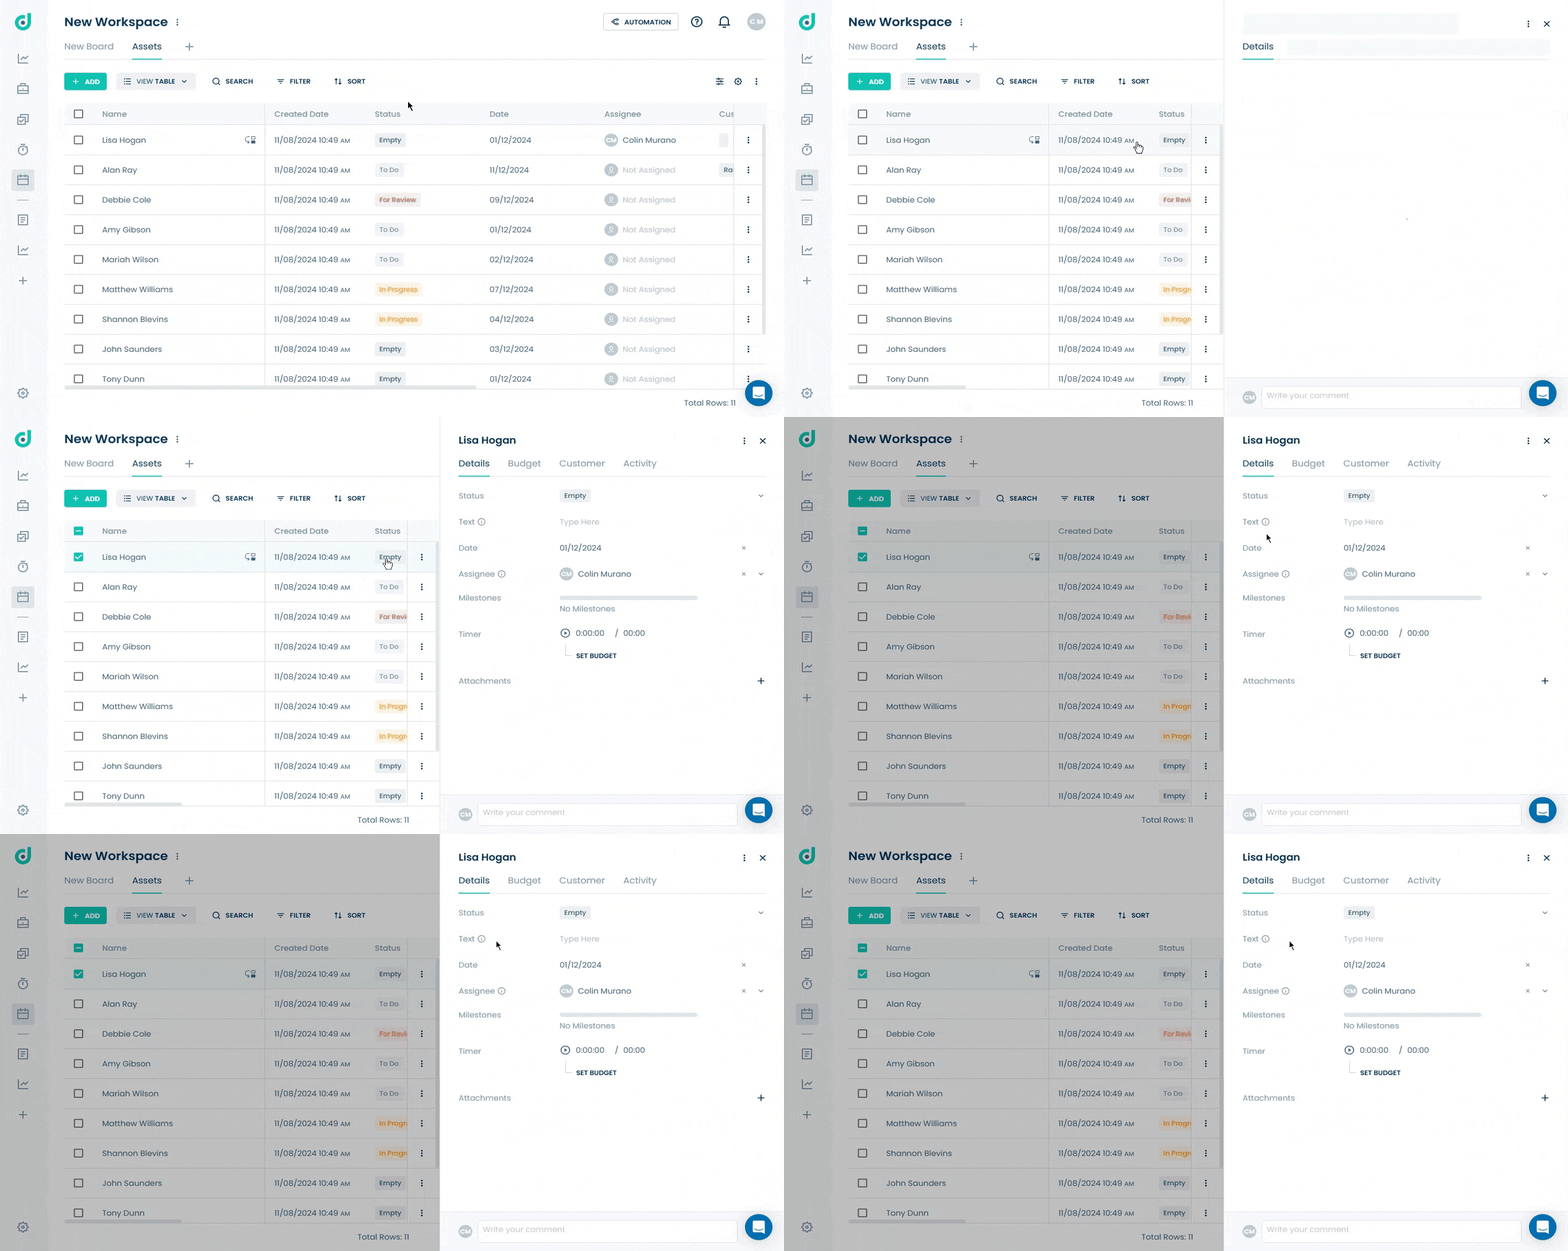
Step 2: In the record's details, locate the Text field and add a text.
Text Editor
The Text Editor field in OneDeck enables rich text formatting, ideal for adding detailed notes or instructions to boards. Users can apply styles like bold, italic, underline, strikethrough, and add lists, enhancing documentation and readability.
Add Text Editor Field
Step 1: Click on the “+” button from the field section.
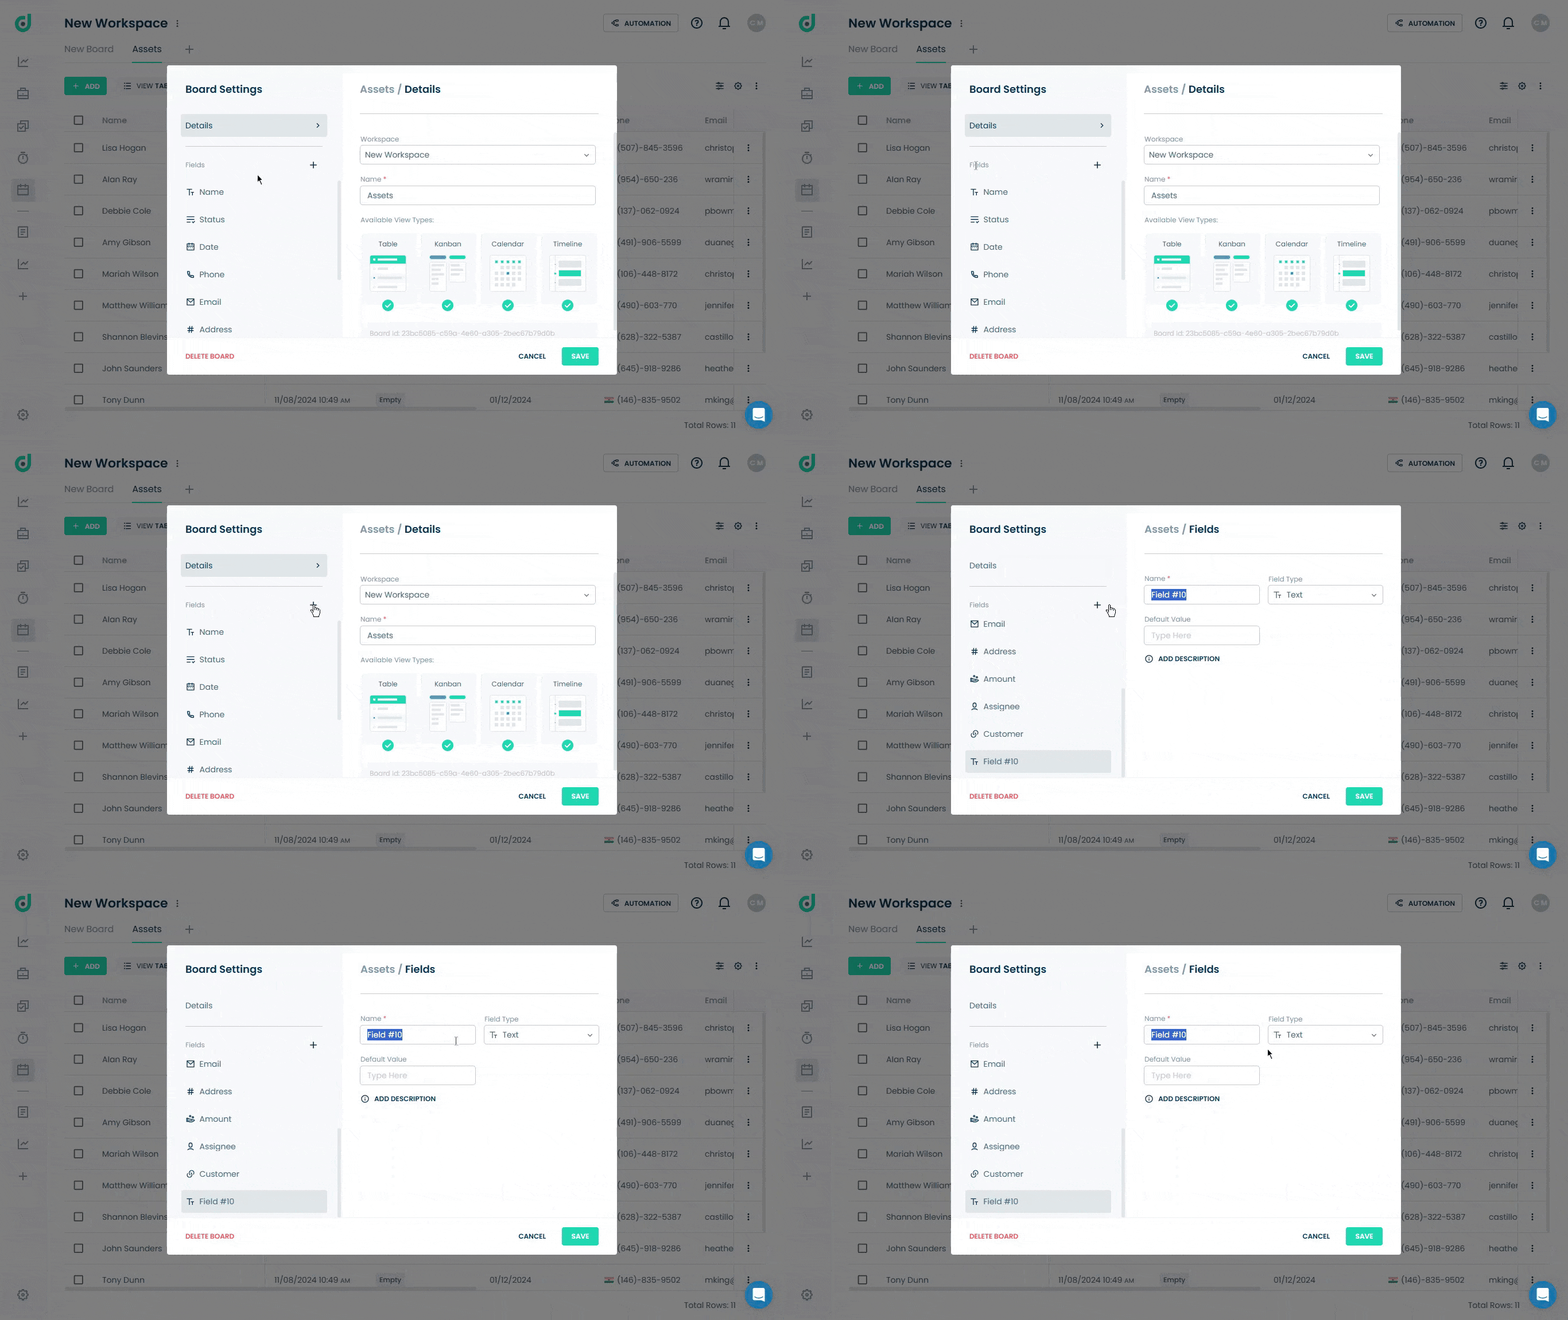
Step 2: Enter the field name and select “Text Editor” as the field type. Optionally, add a default value and a description for additional context.
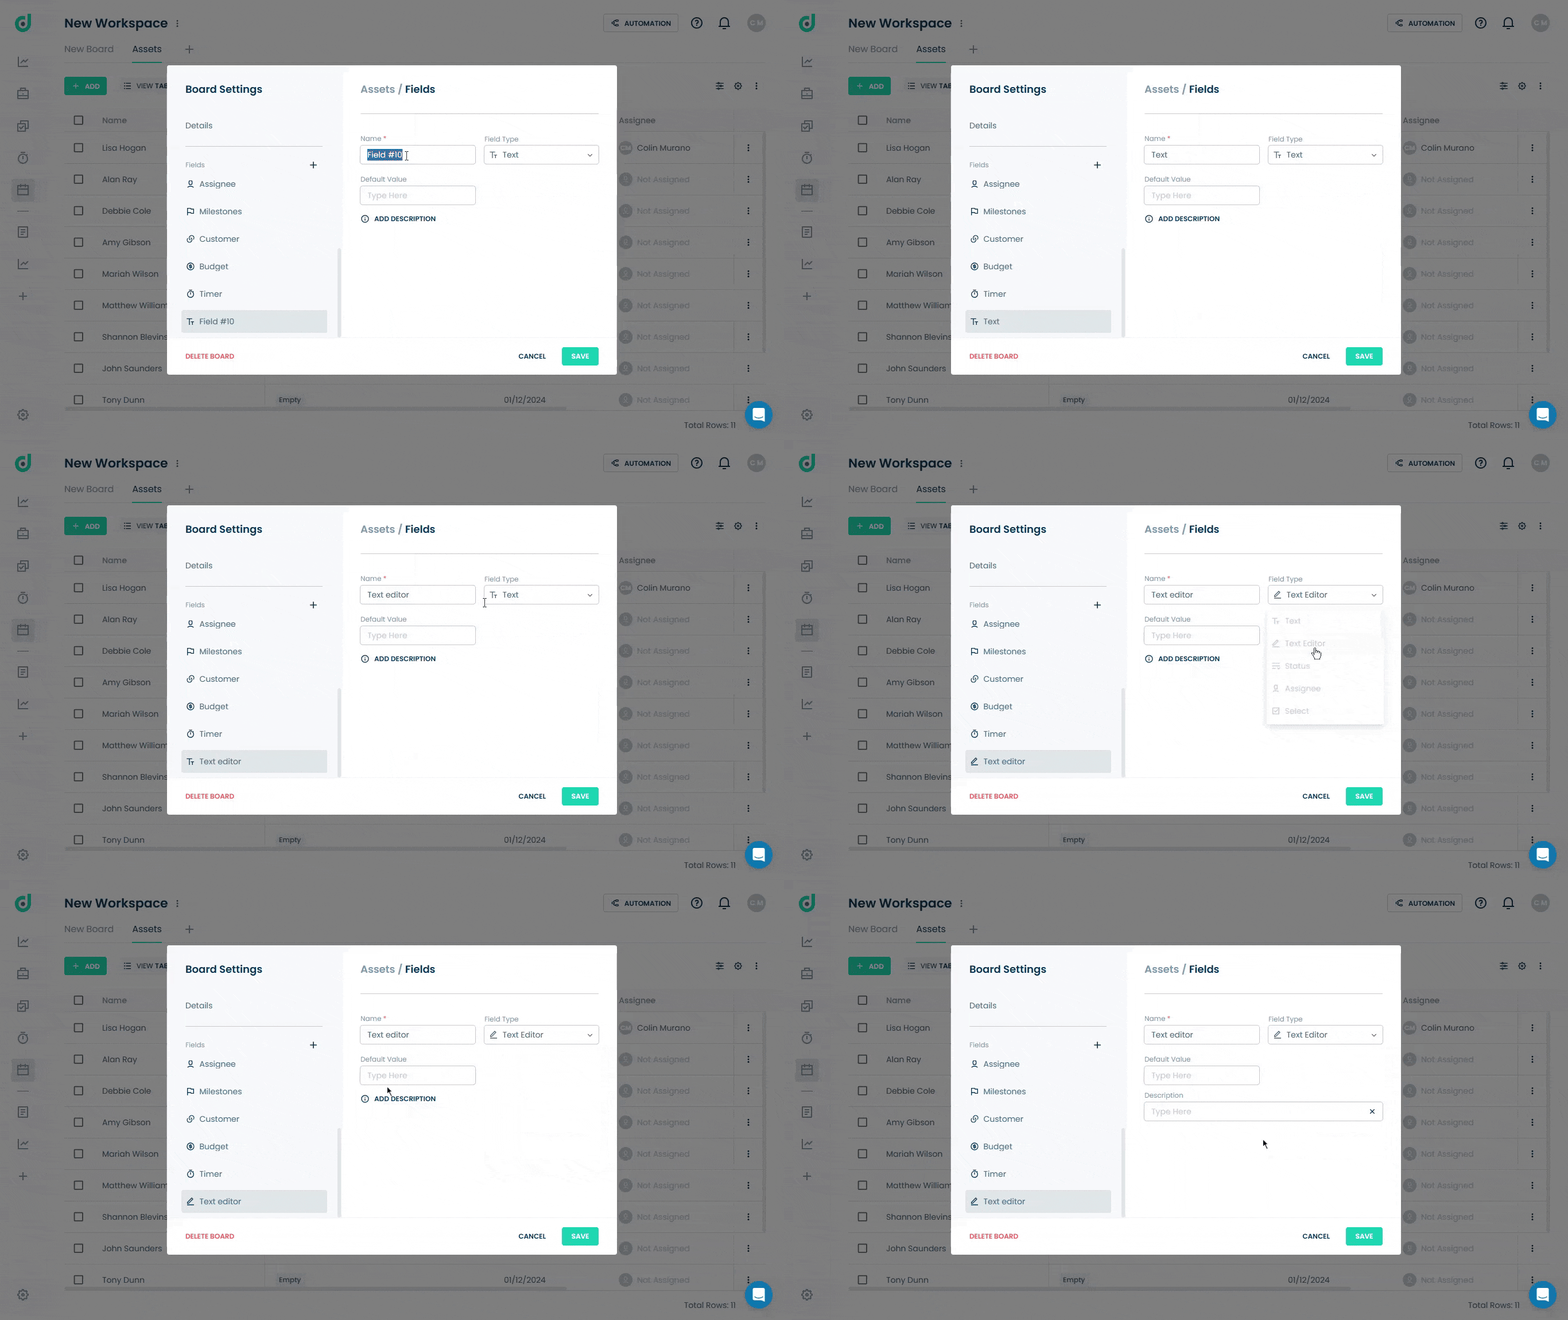
Step 3: Click on the SAVE button.
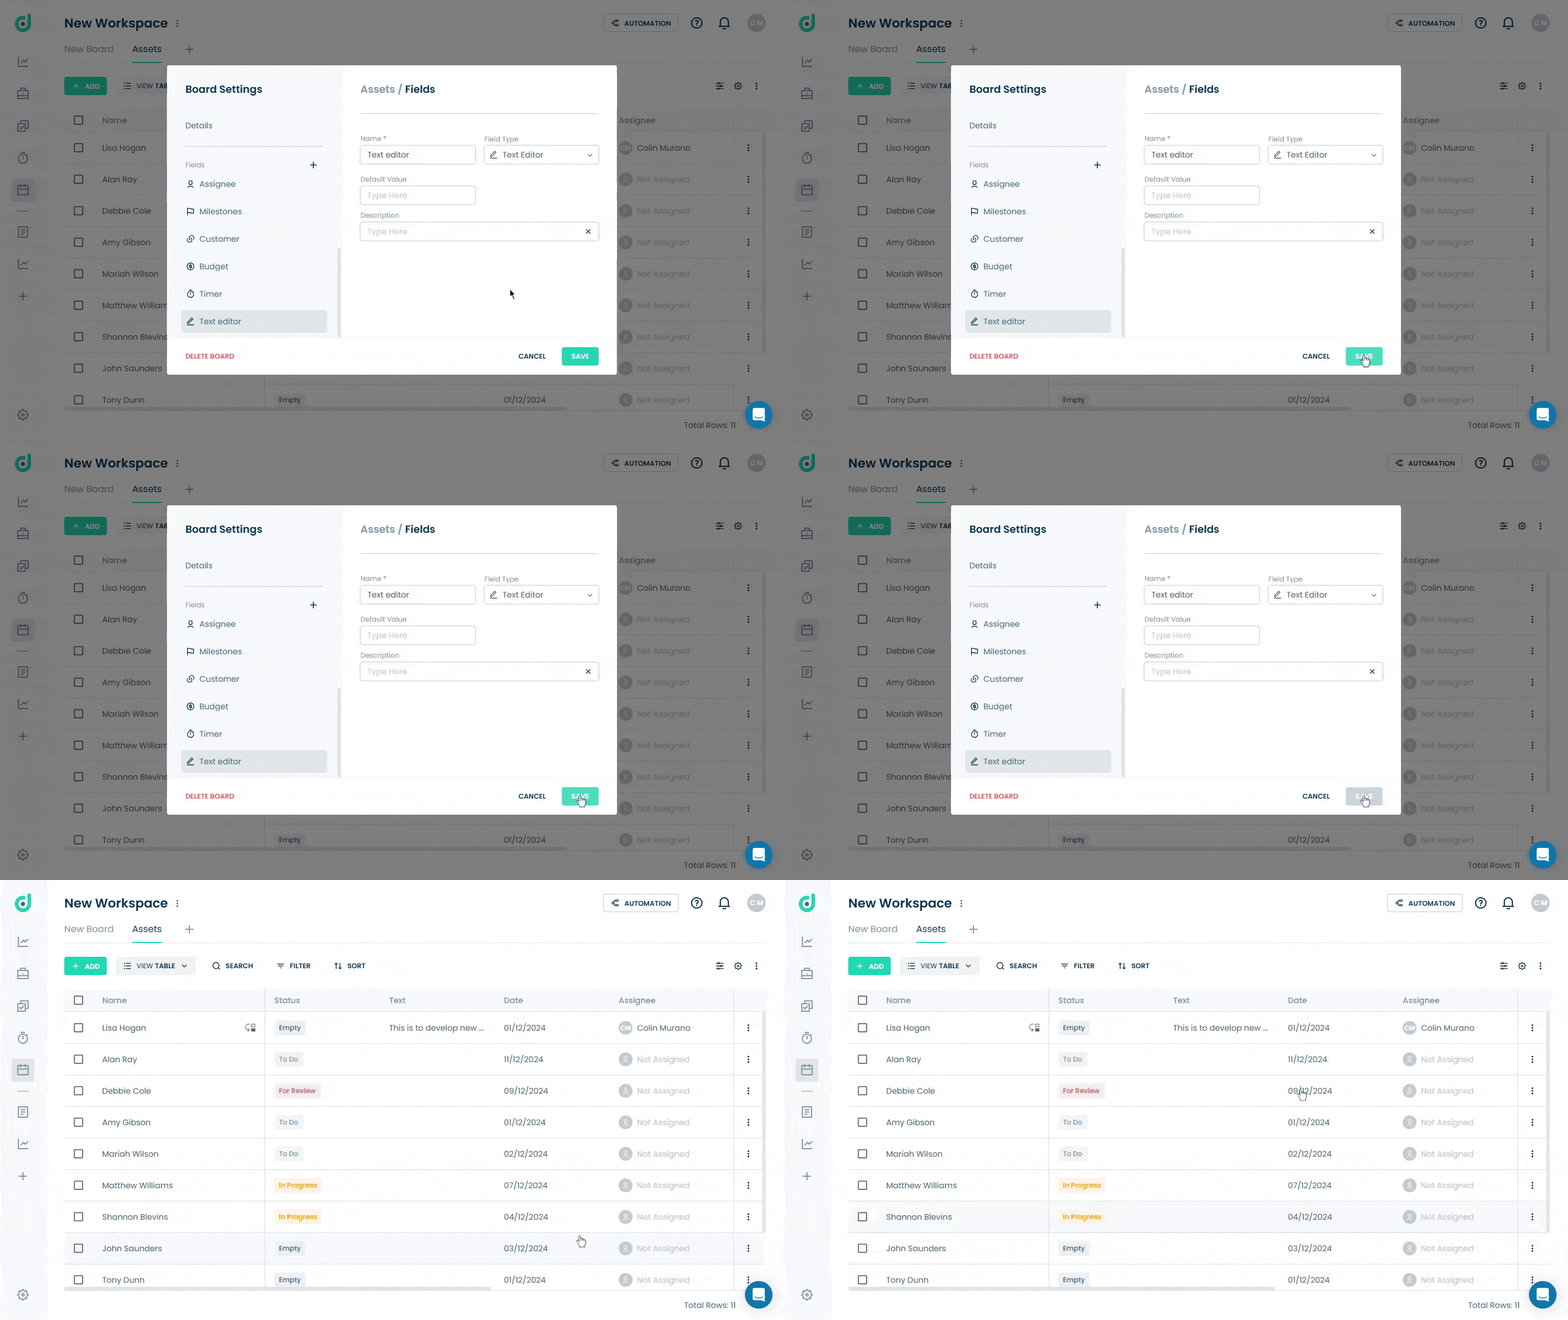
Use Text Editor Field
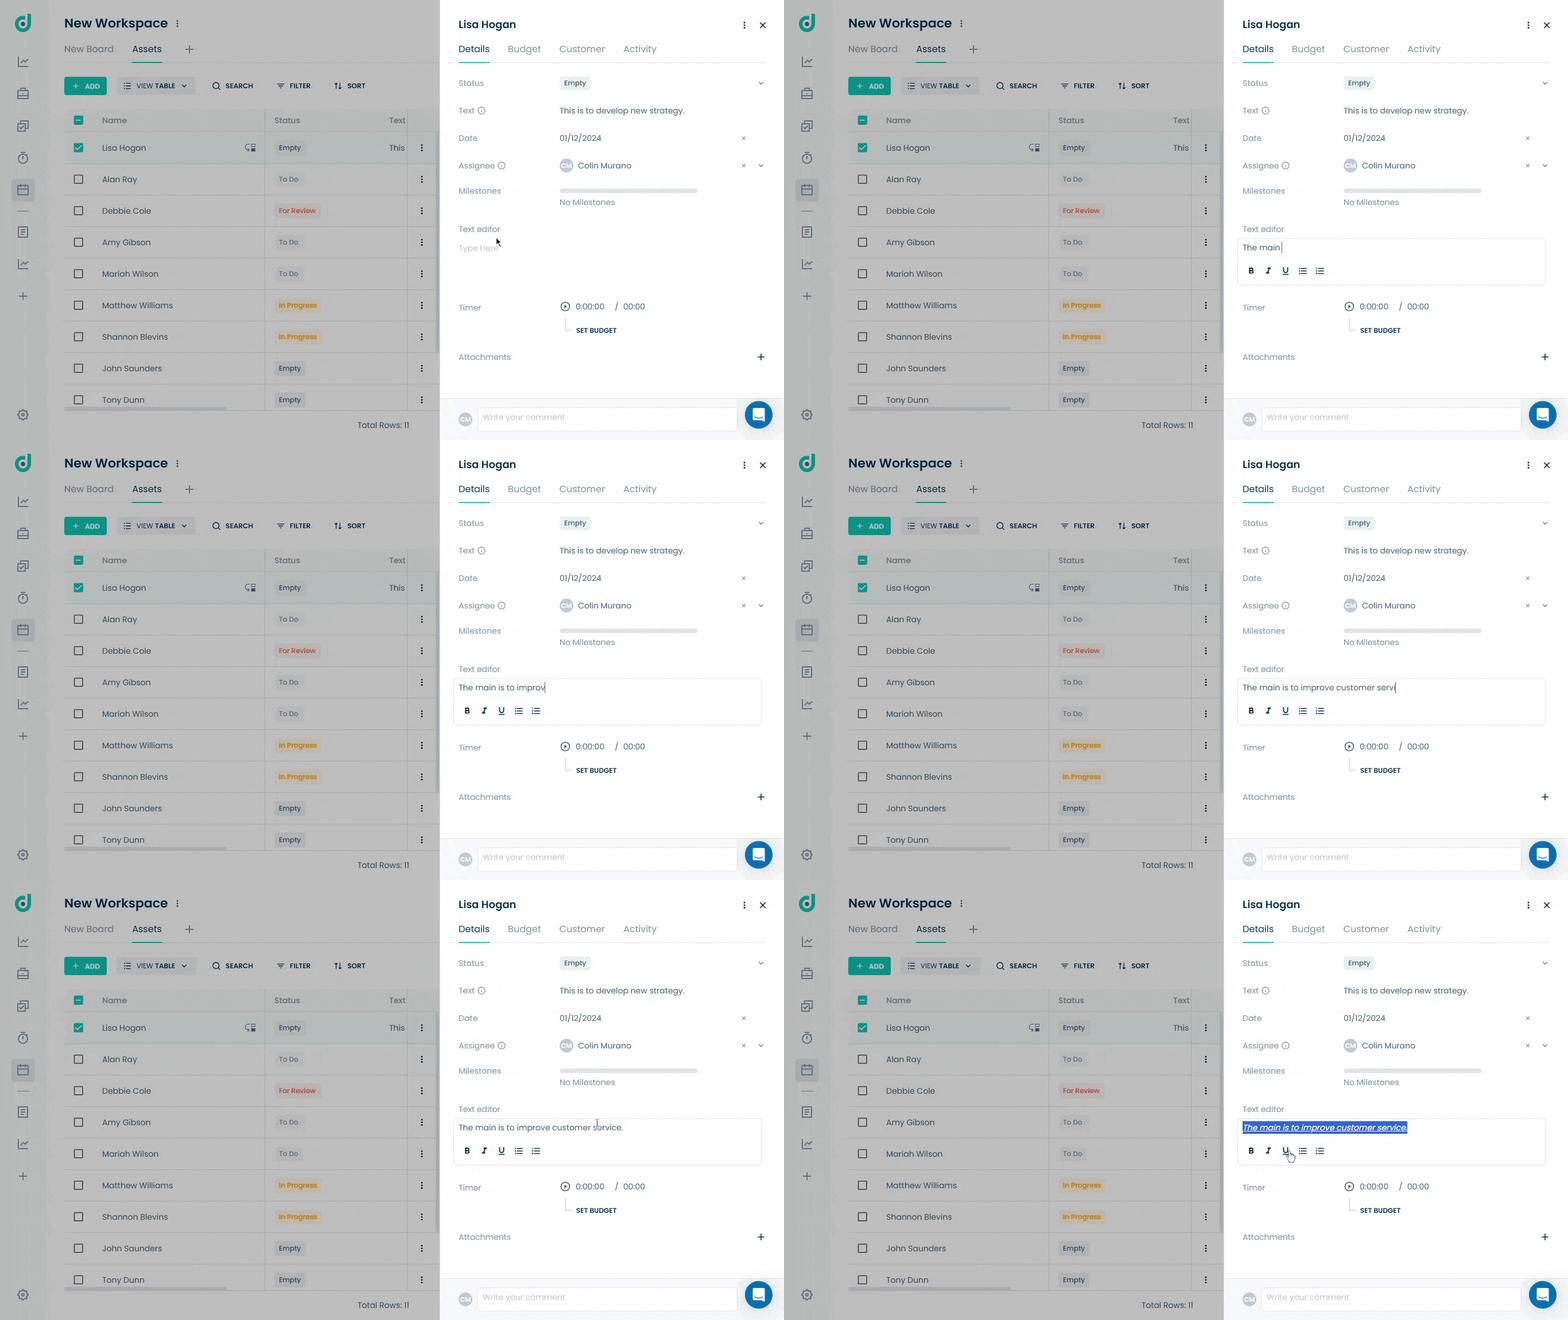
Once you have added the Text Editor as a field type, you can include rich text content, with formatting options like bold, italics, underline, strikethrough and more, making it ideal for detailed notes, or extended descriptions.
Step 1: Click on the Record you want to add a text to.
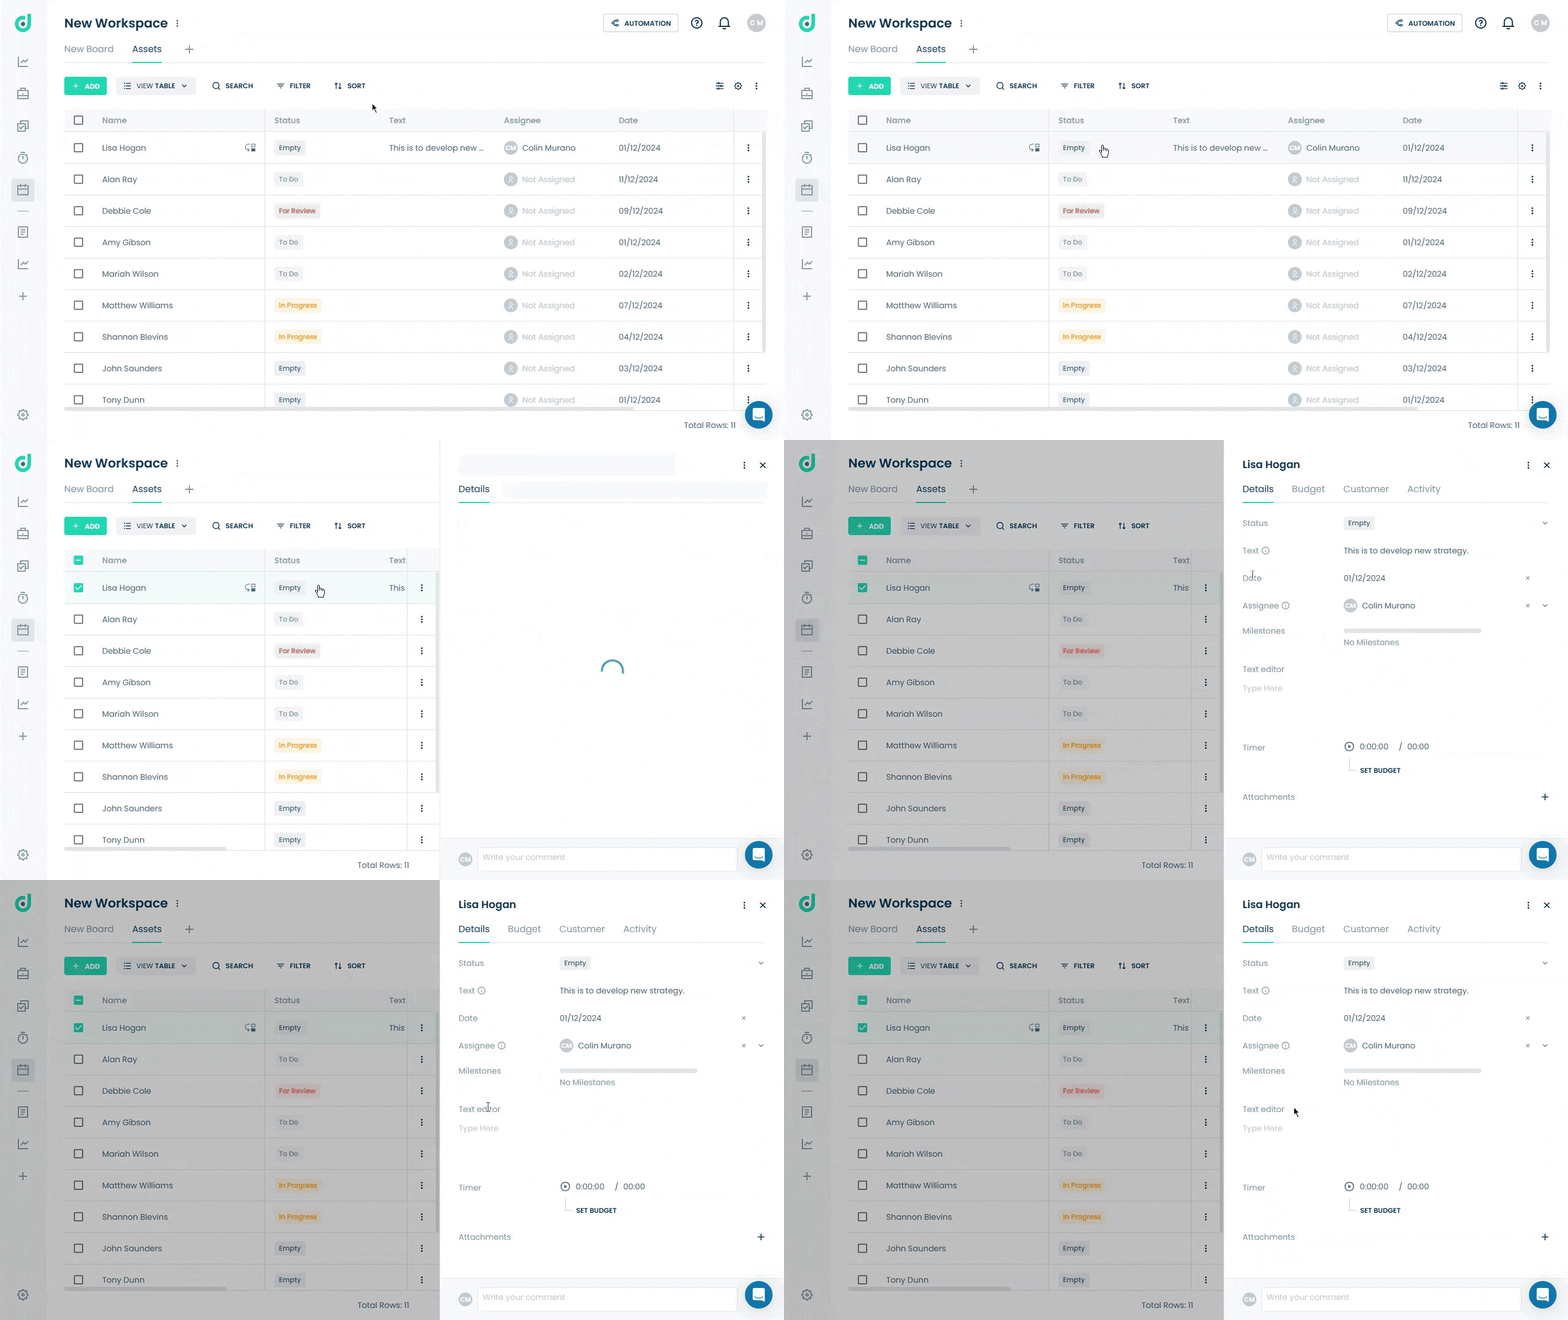
Step 2: In the record's details, locate the Text Editor field and add a customized description.
Phone
The Phone field in OneDeck allows you to store and organize contact information for team members or clients. It’s ideal for tracking phone numbers, making communication management easy and accessible within your boards.
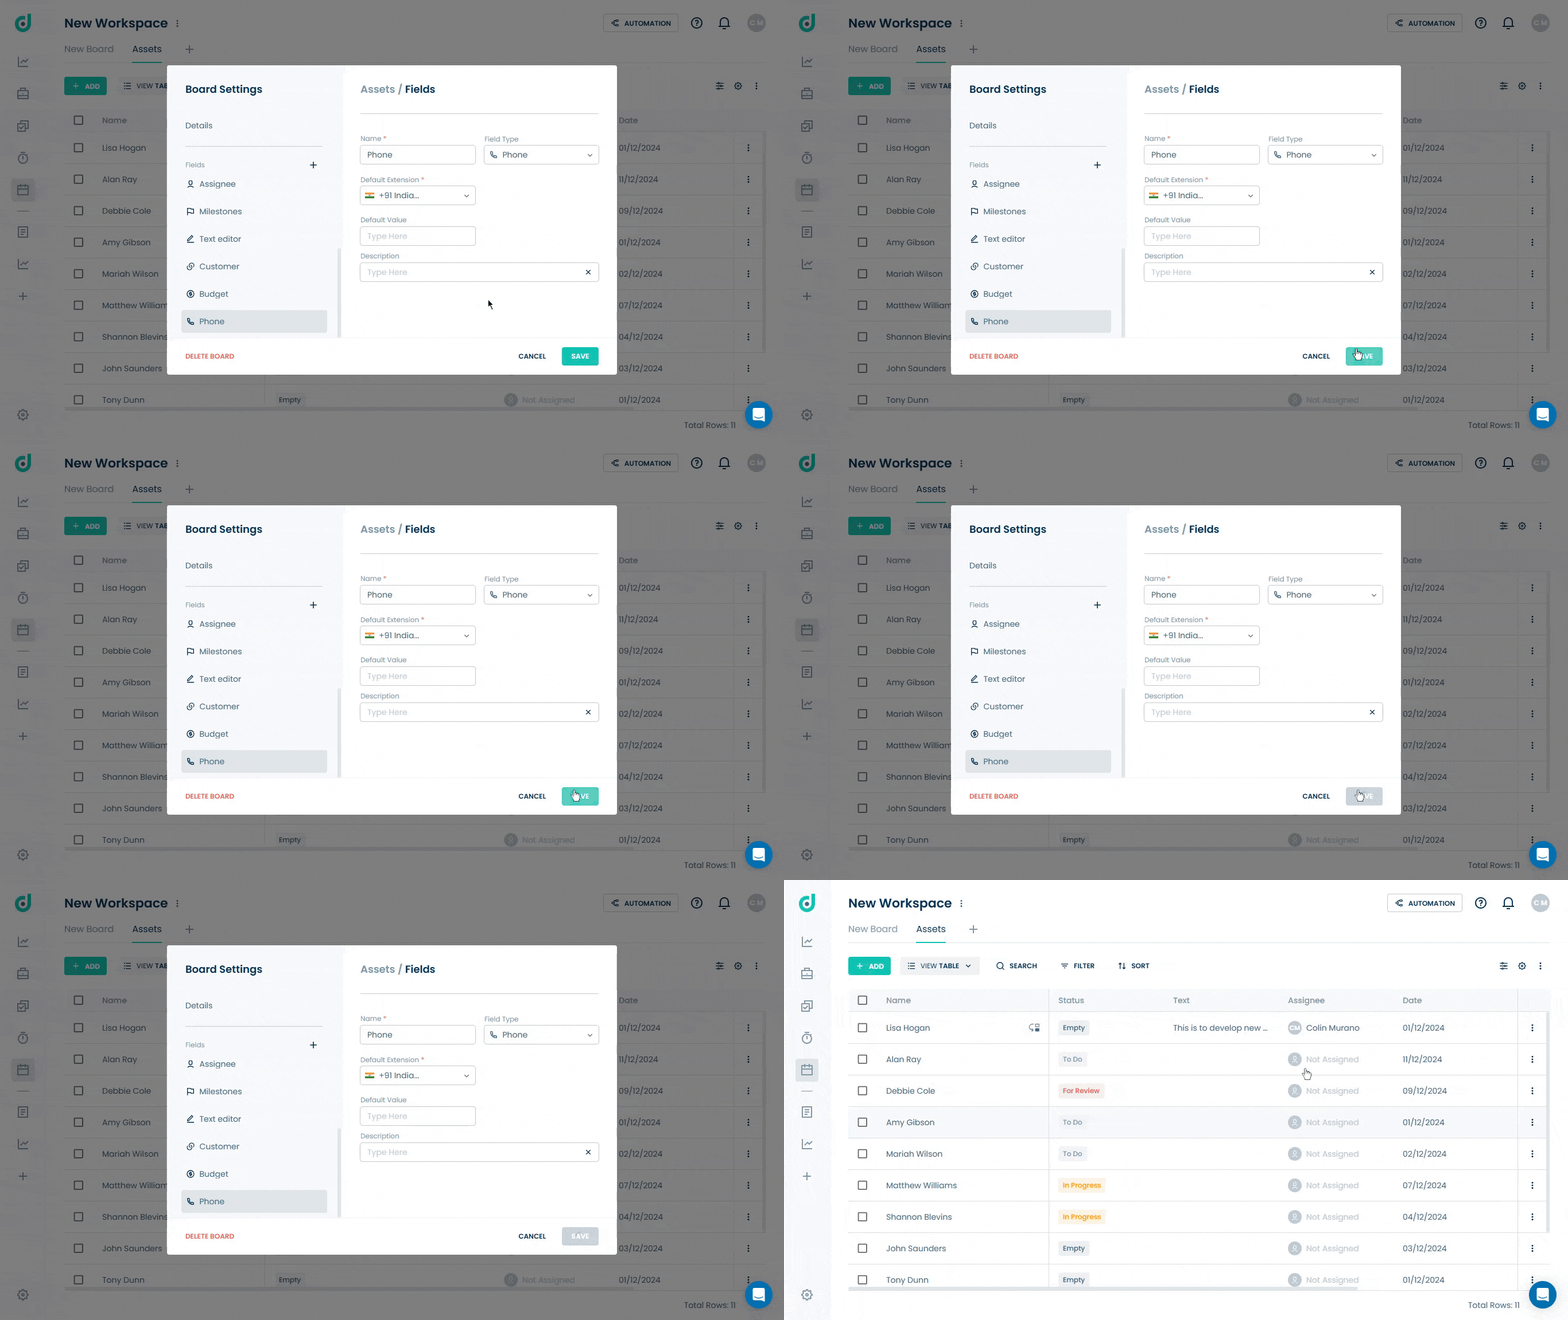
Add Phone Field
Step 1: Click on the “+” button from the field section.
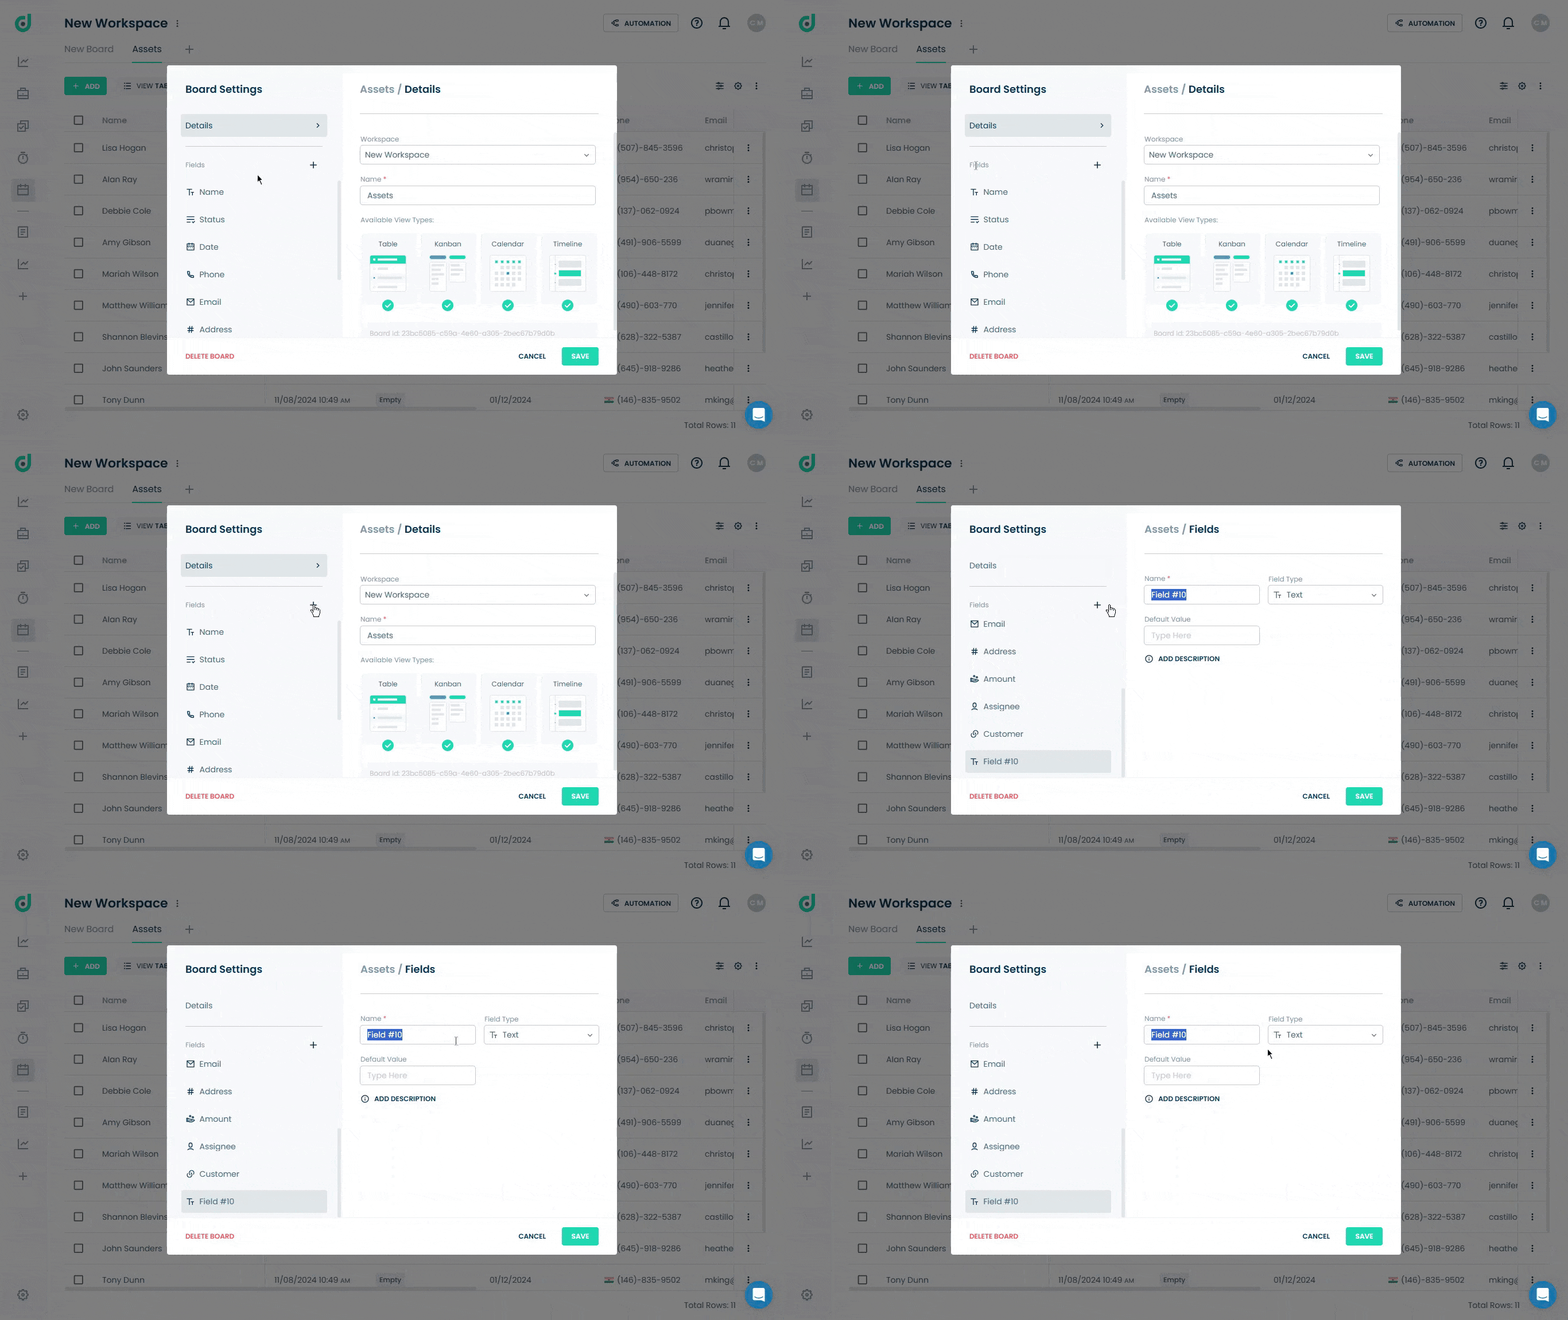
Step 2: Enter the field name and select “Phone” as the field type with country code default extension. Optionally, add a default value and a description for additional context.
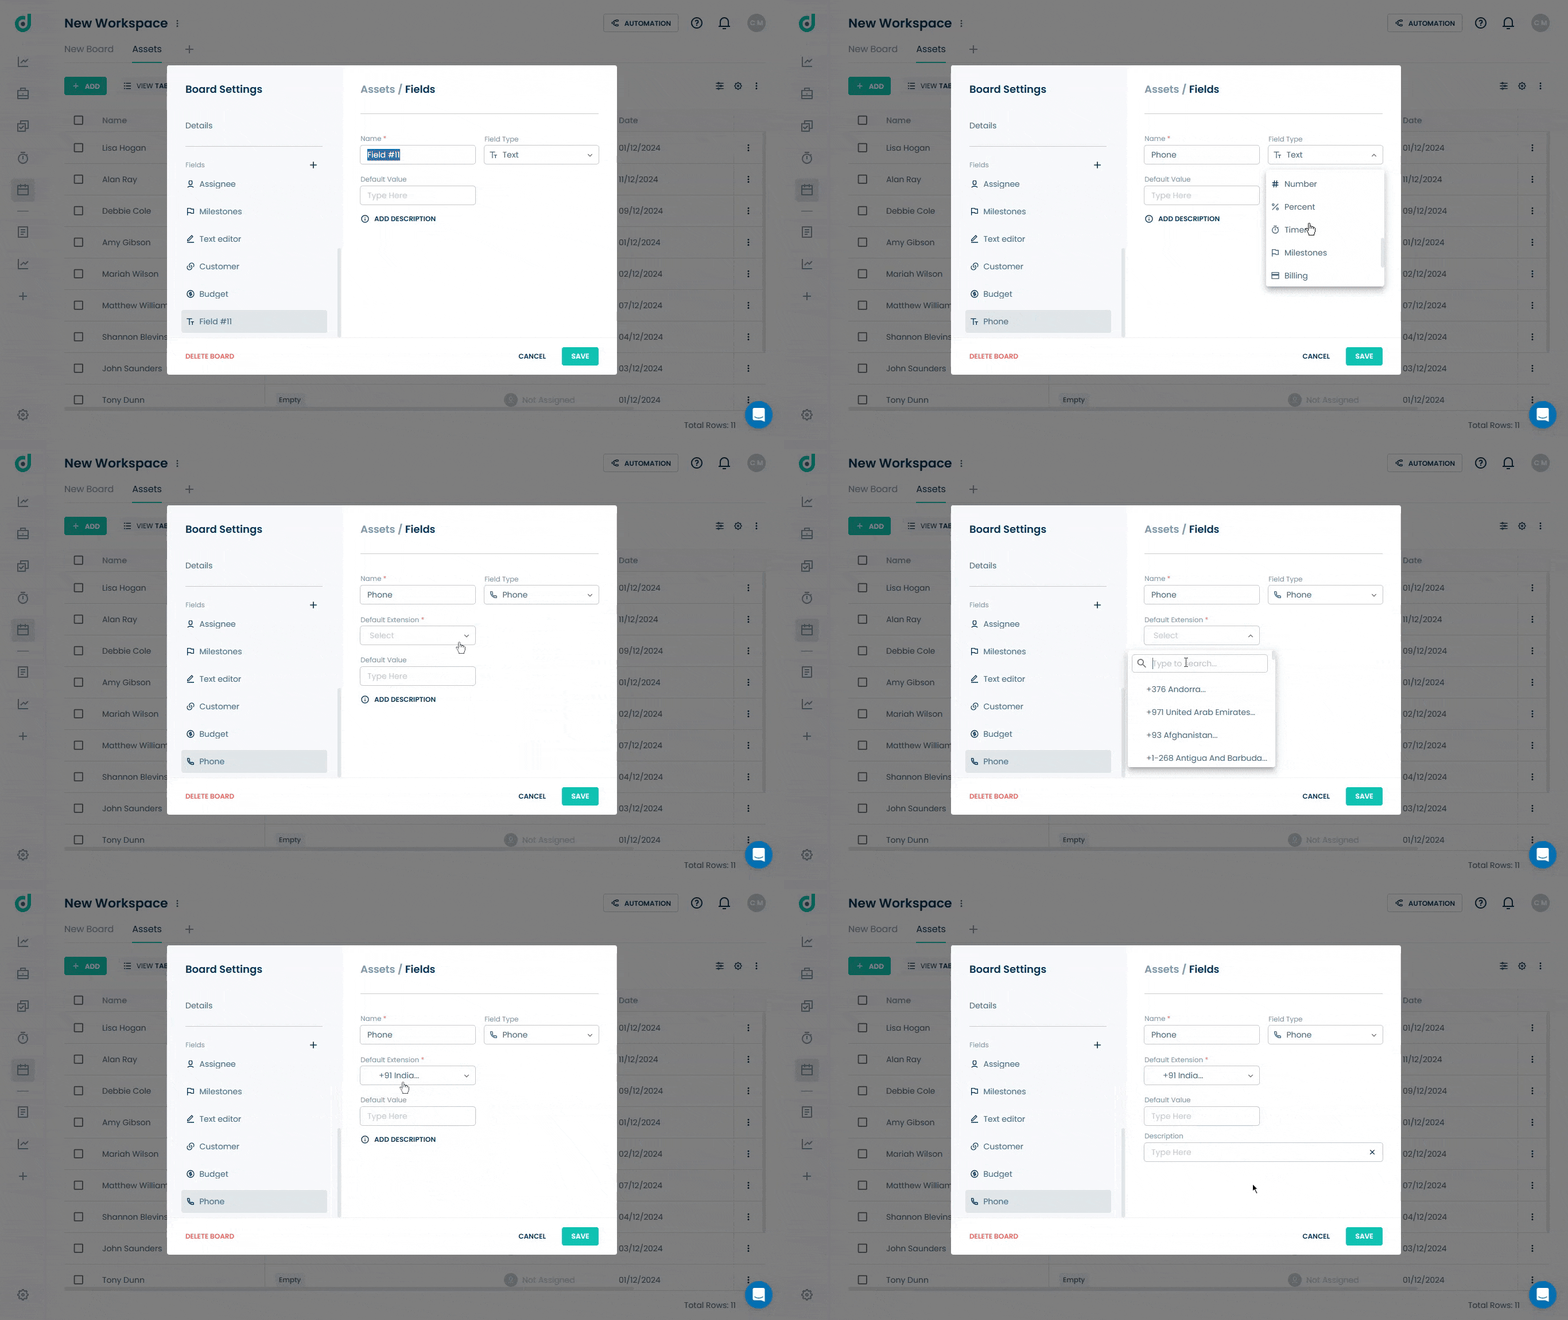
Step 3: Click on the SAVE button.
Use Phone Field
Once you have added the Phone field as a field type, you can store and organize contact information for team members or clients.
Step 1: Click on the Record you want to add a phone number to.
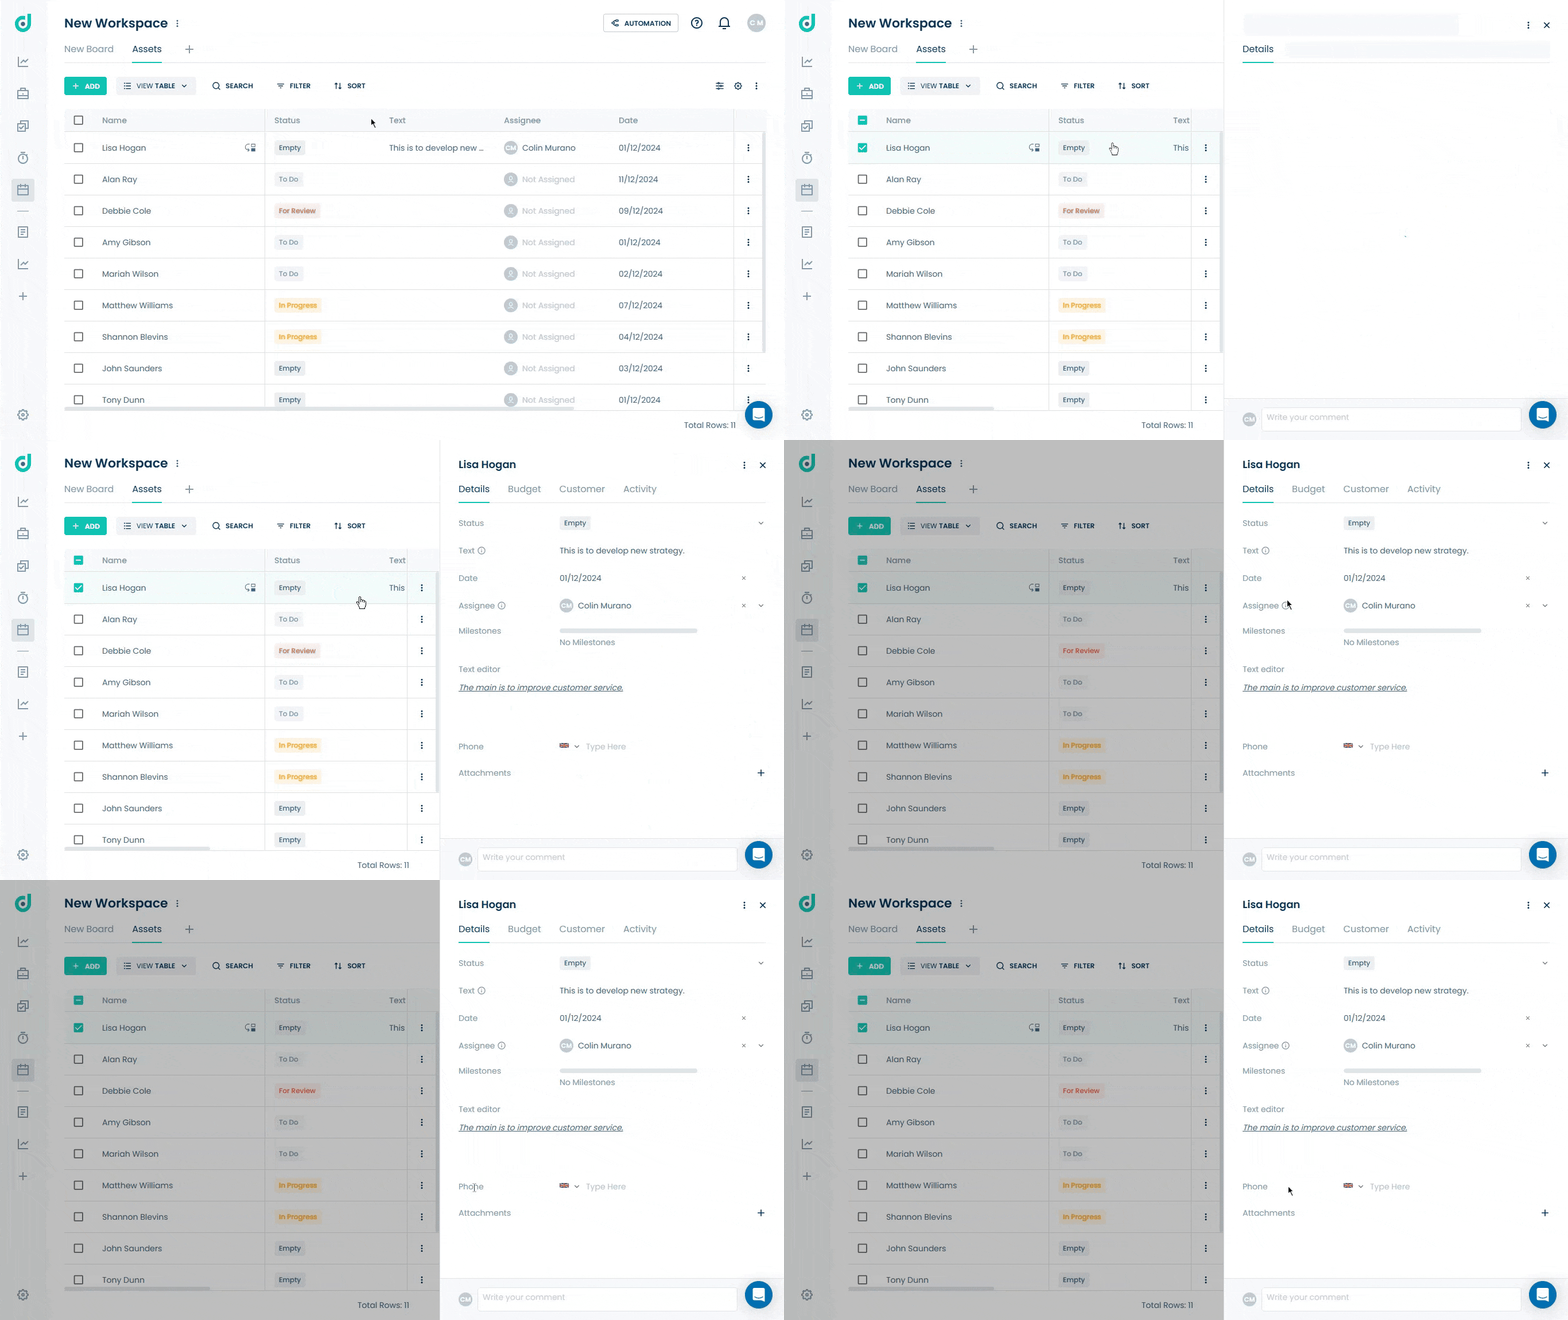
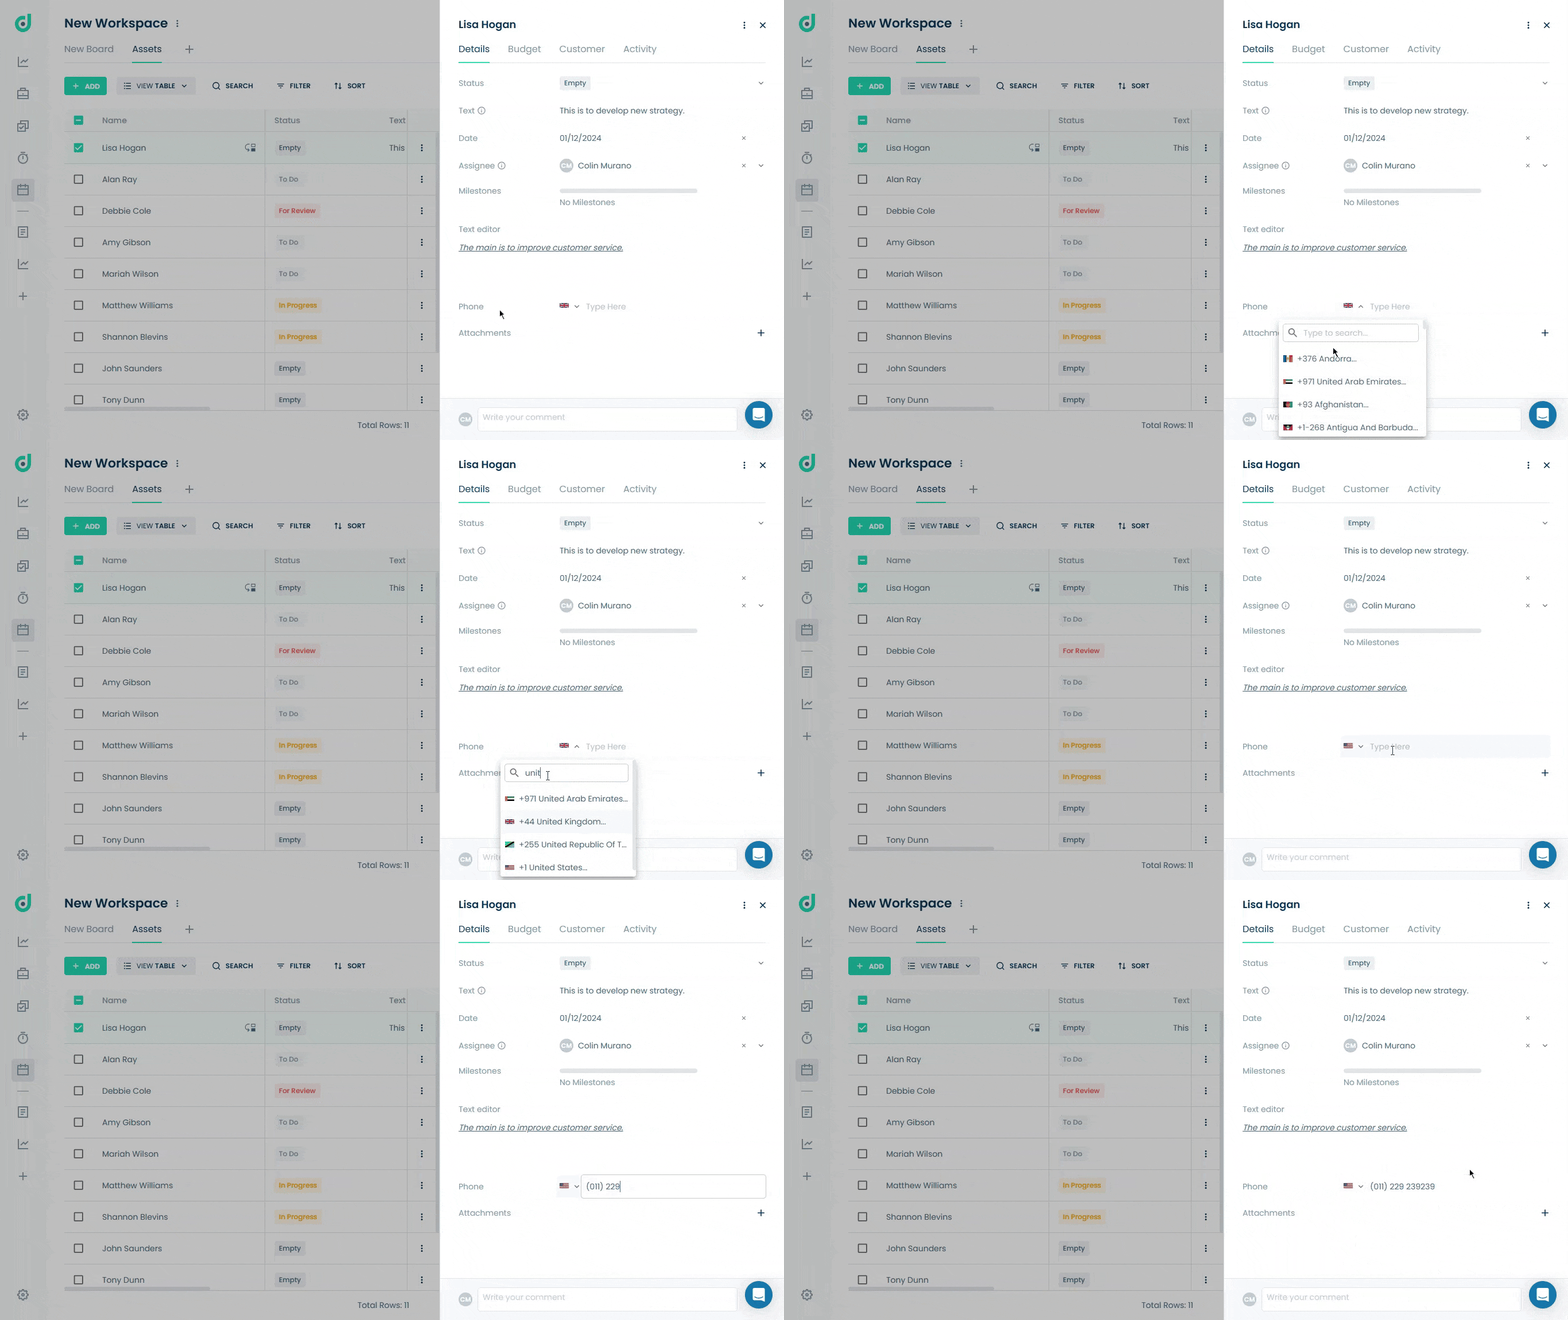
Step 2: In the record's details, locate the Phone field to select the country code and enter a phone number.
The Email field in OneDeck allows you to store and organize email addresses for team members, clients, or other contacts. It’s ideal for tracking communication, maintaining a clear record of interactions, and associating emails with specific tasks, projects, or clients, making communication management easy and accessible within your boards.
Add Email Field
Step 1: Click on the “+” button from the field section.
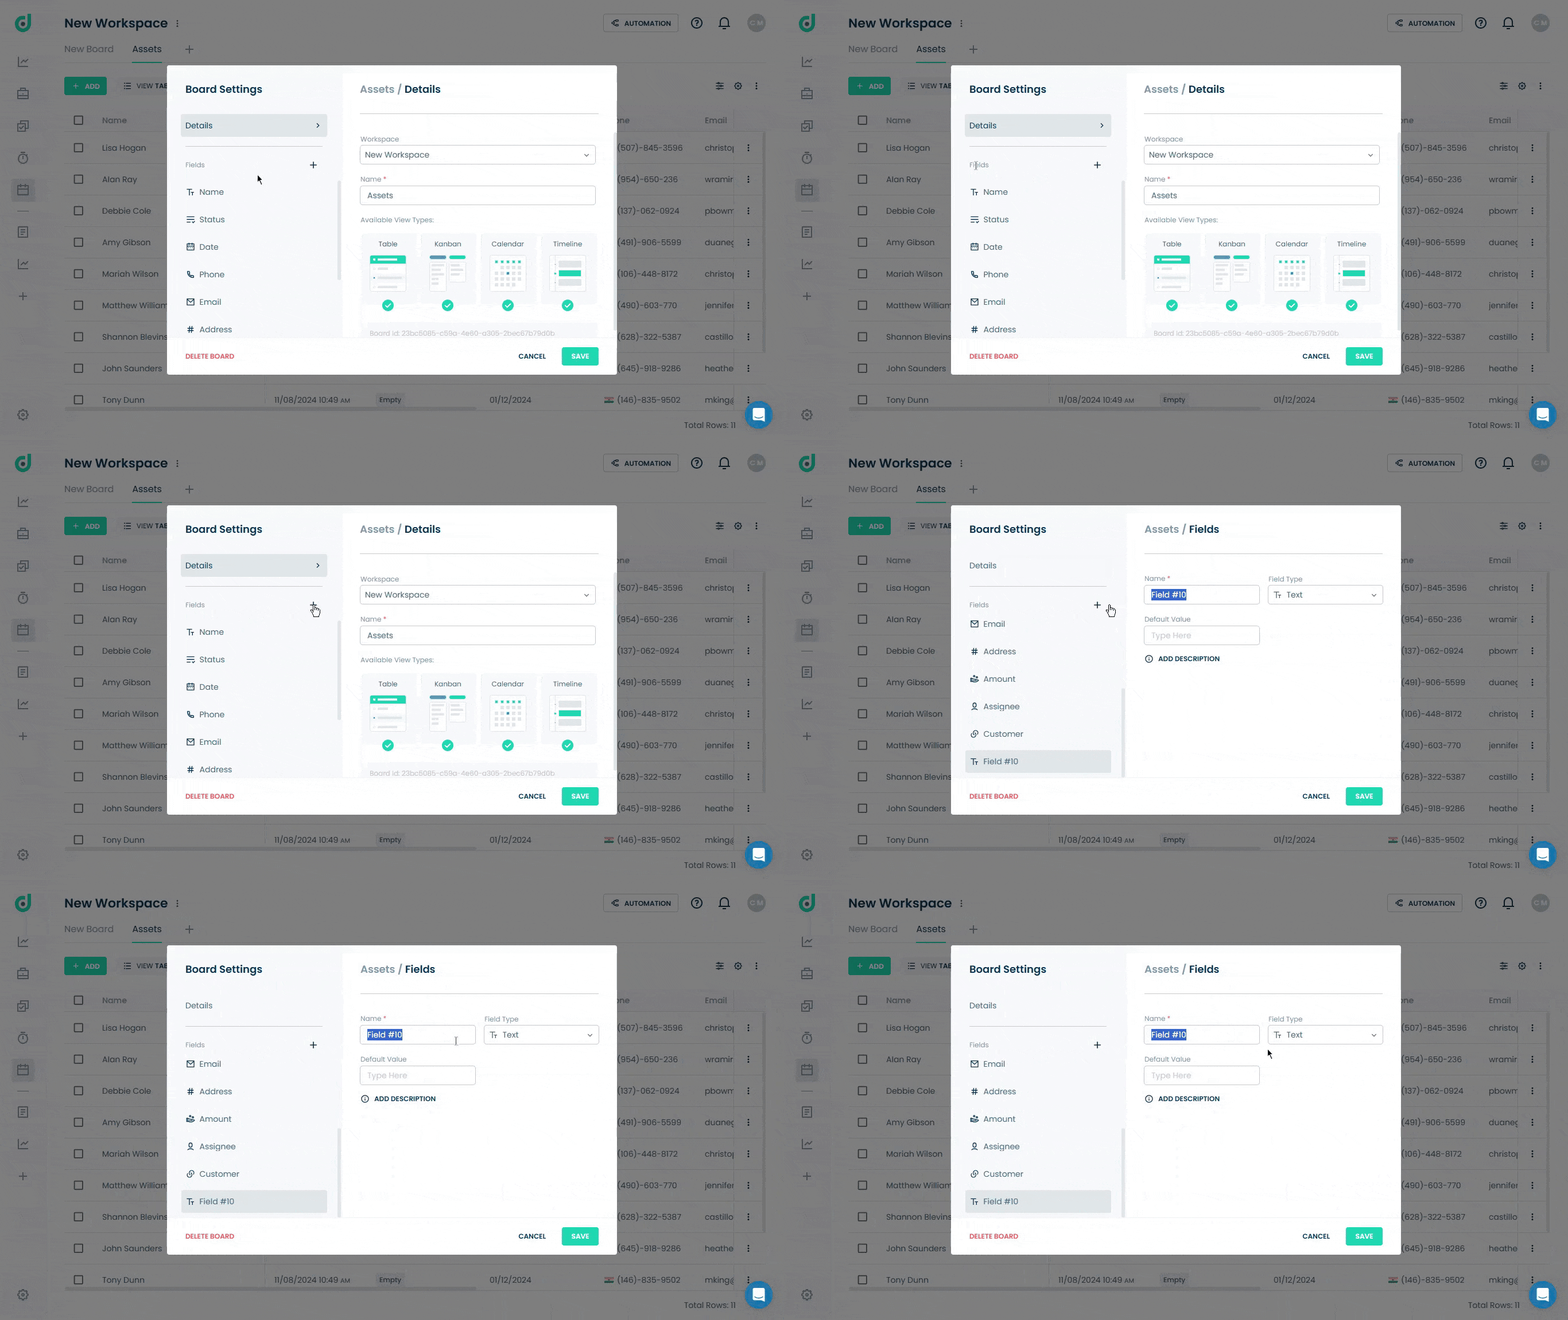
Step 2: Enter the field name and select “Email” as the field type. Optionally, add a default value and a description for additional context.
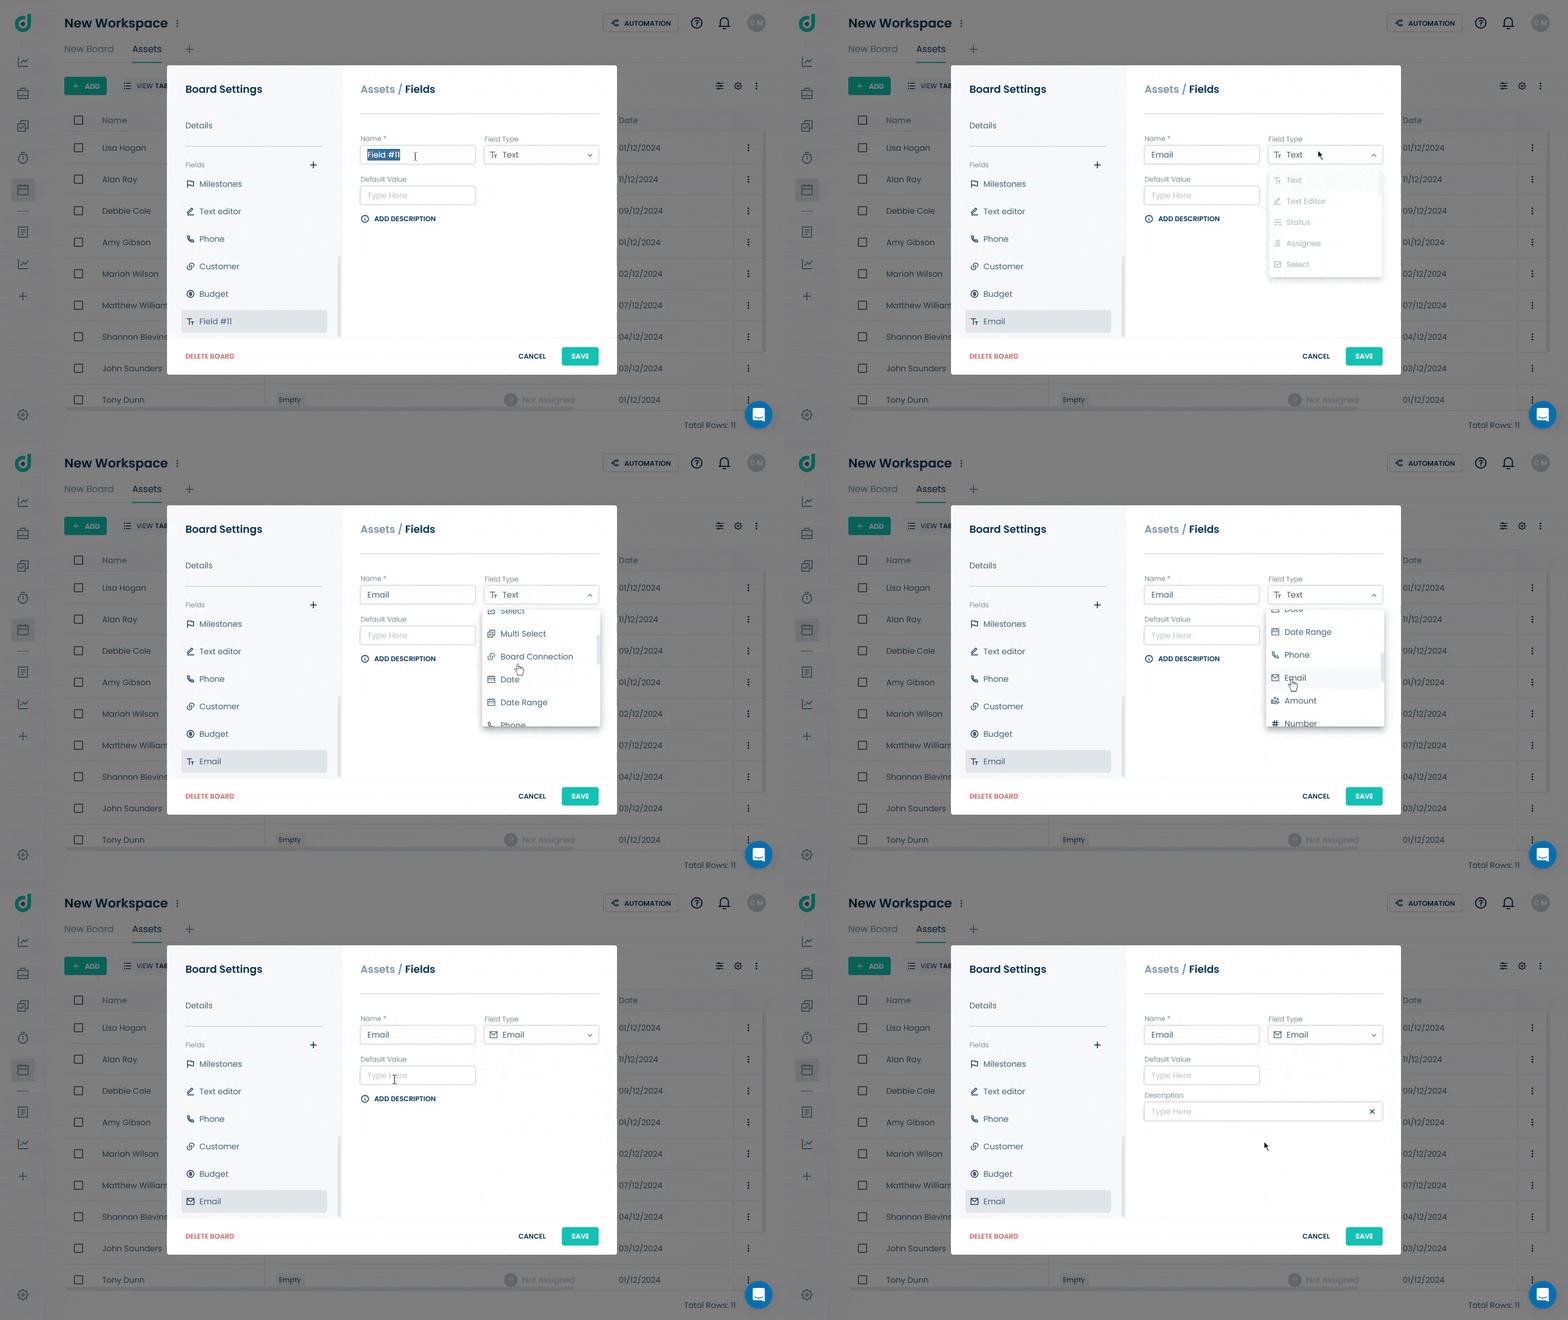
Step 3: Click on the SAVE button.
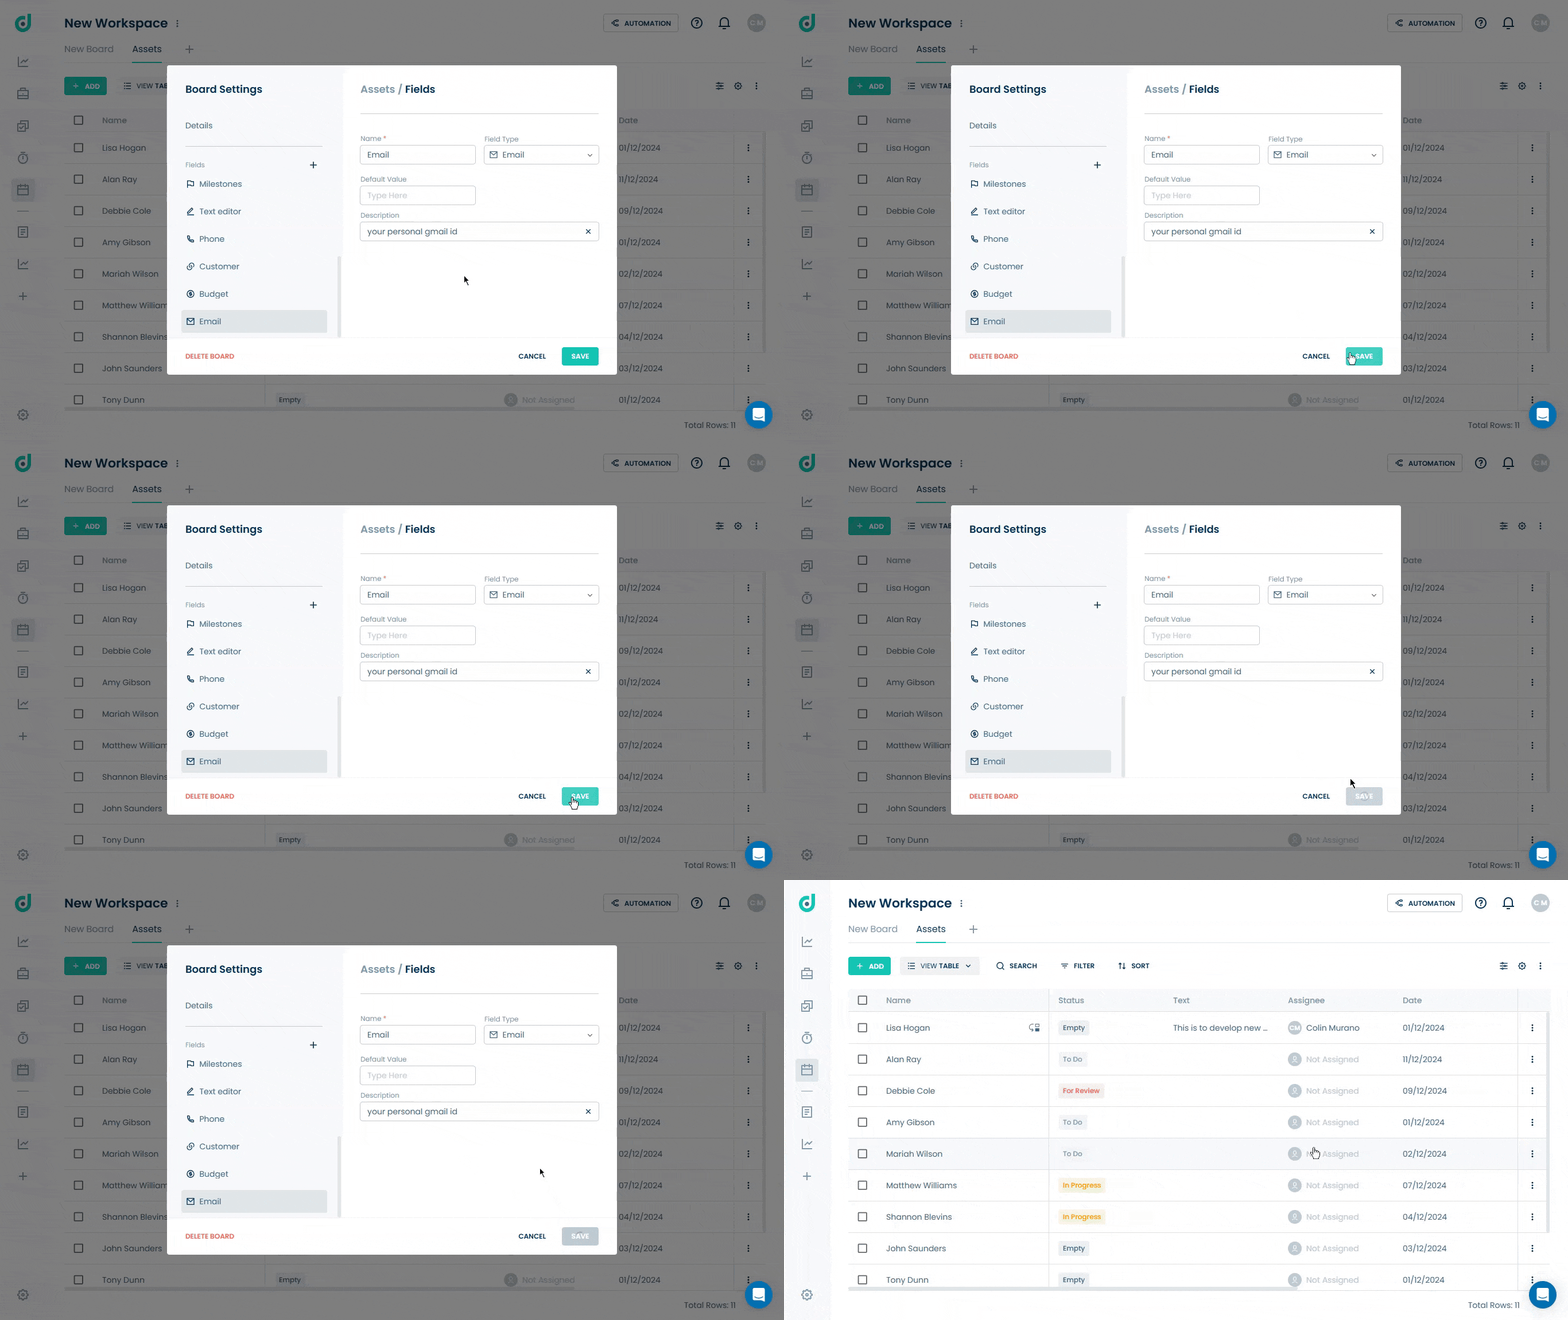
Use Email Field
Once you have added the Email field as a field type, you can store and organize email addresses for team members, clients, or other contacts.
Step 1: Click on the Record you want to add an email to.
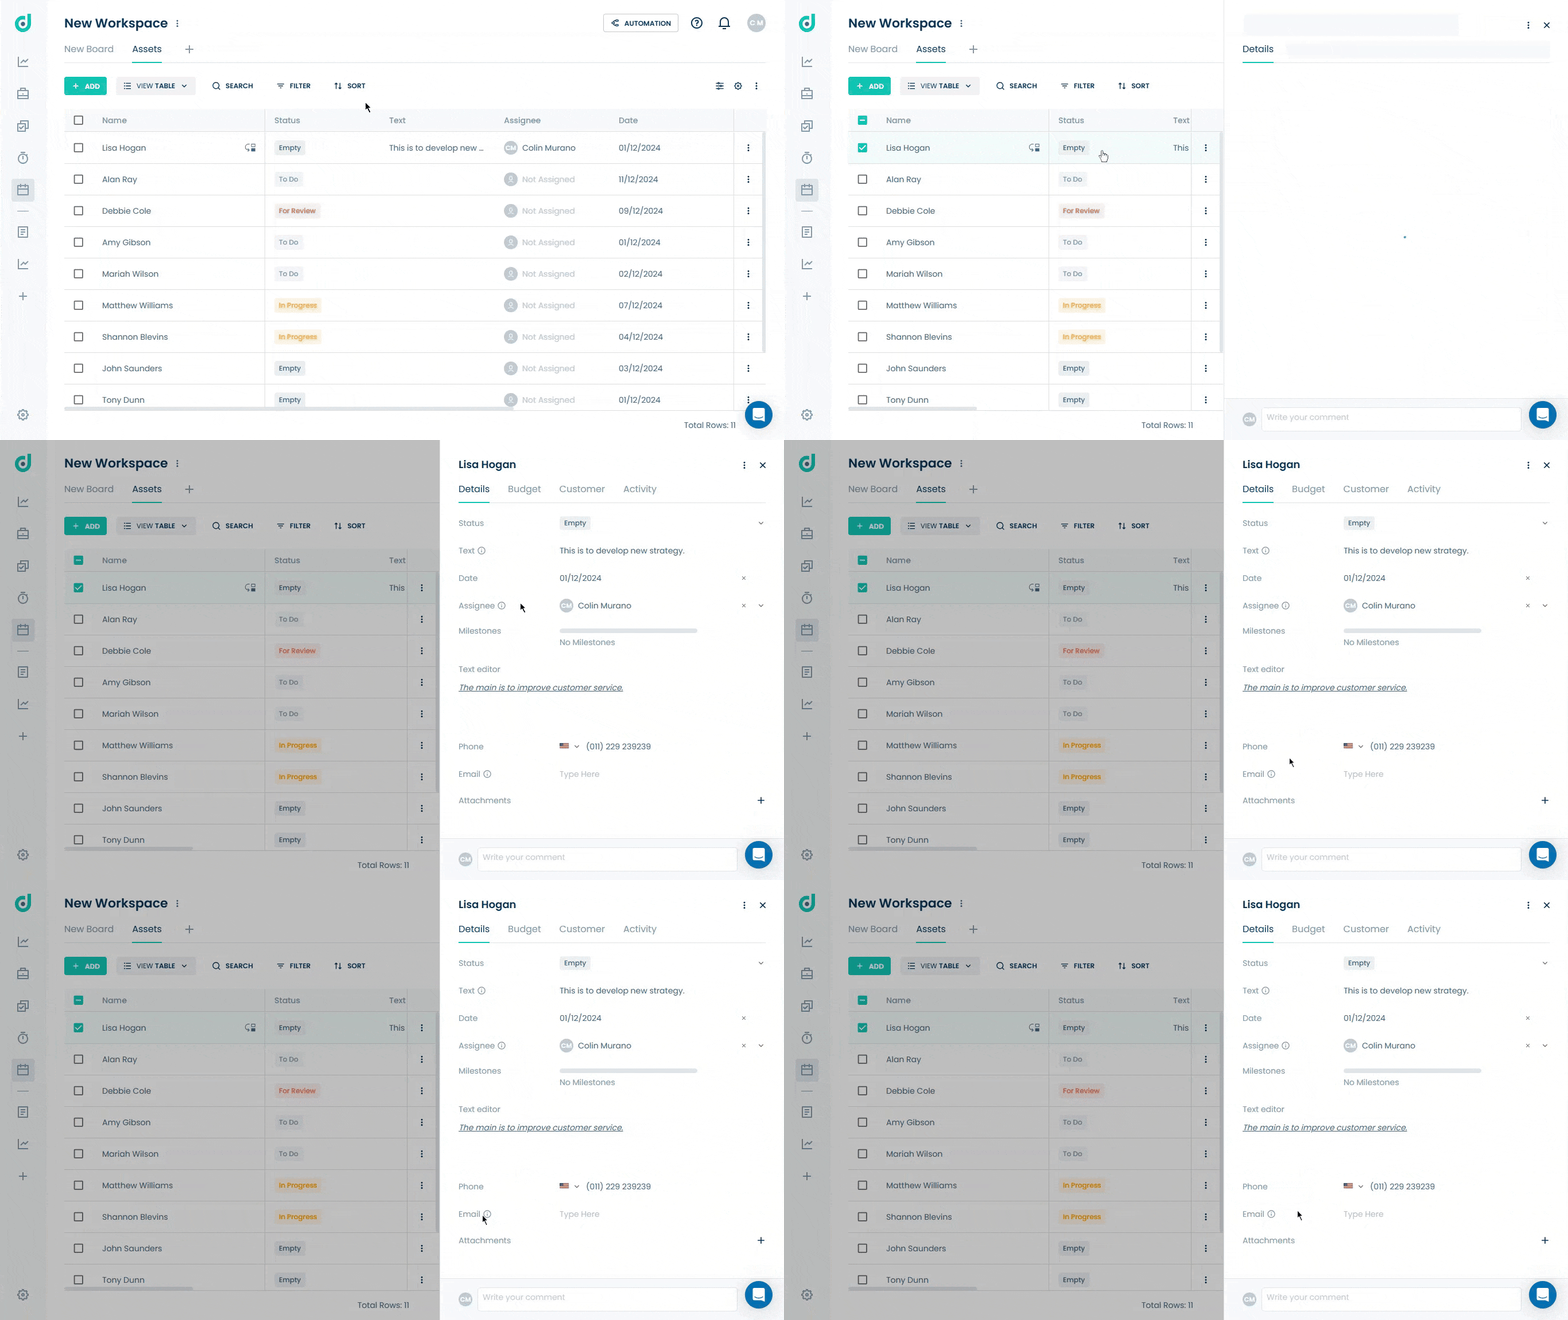
Step 2: In the record's details, locate the Email field and add an email id.
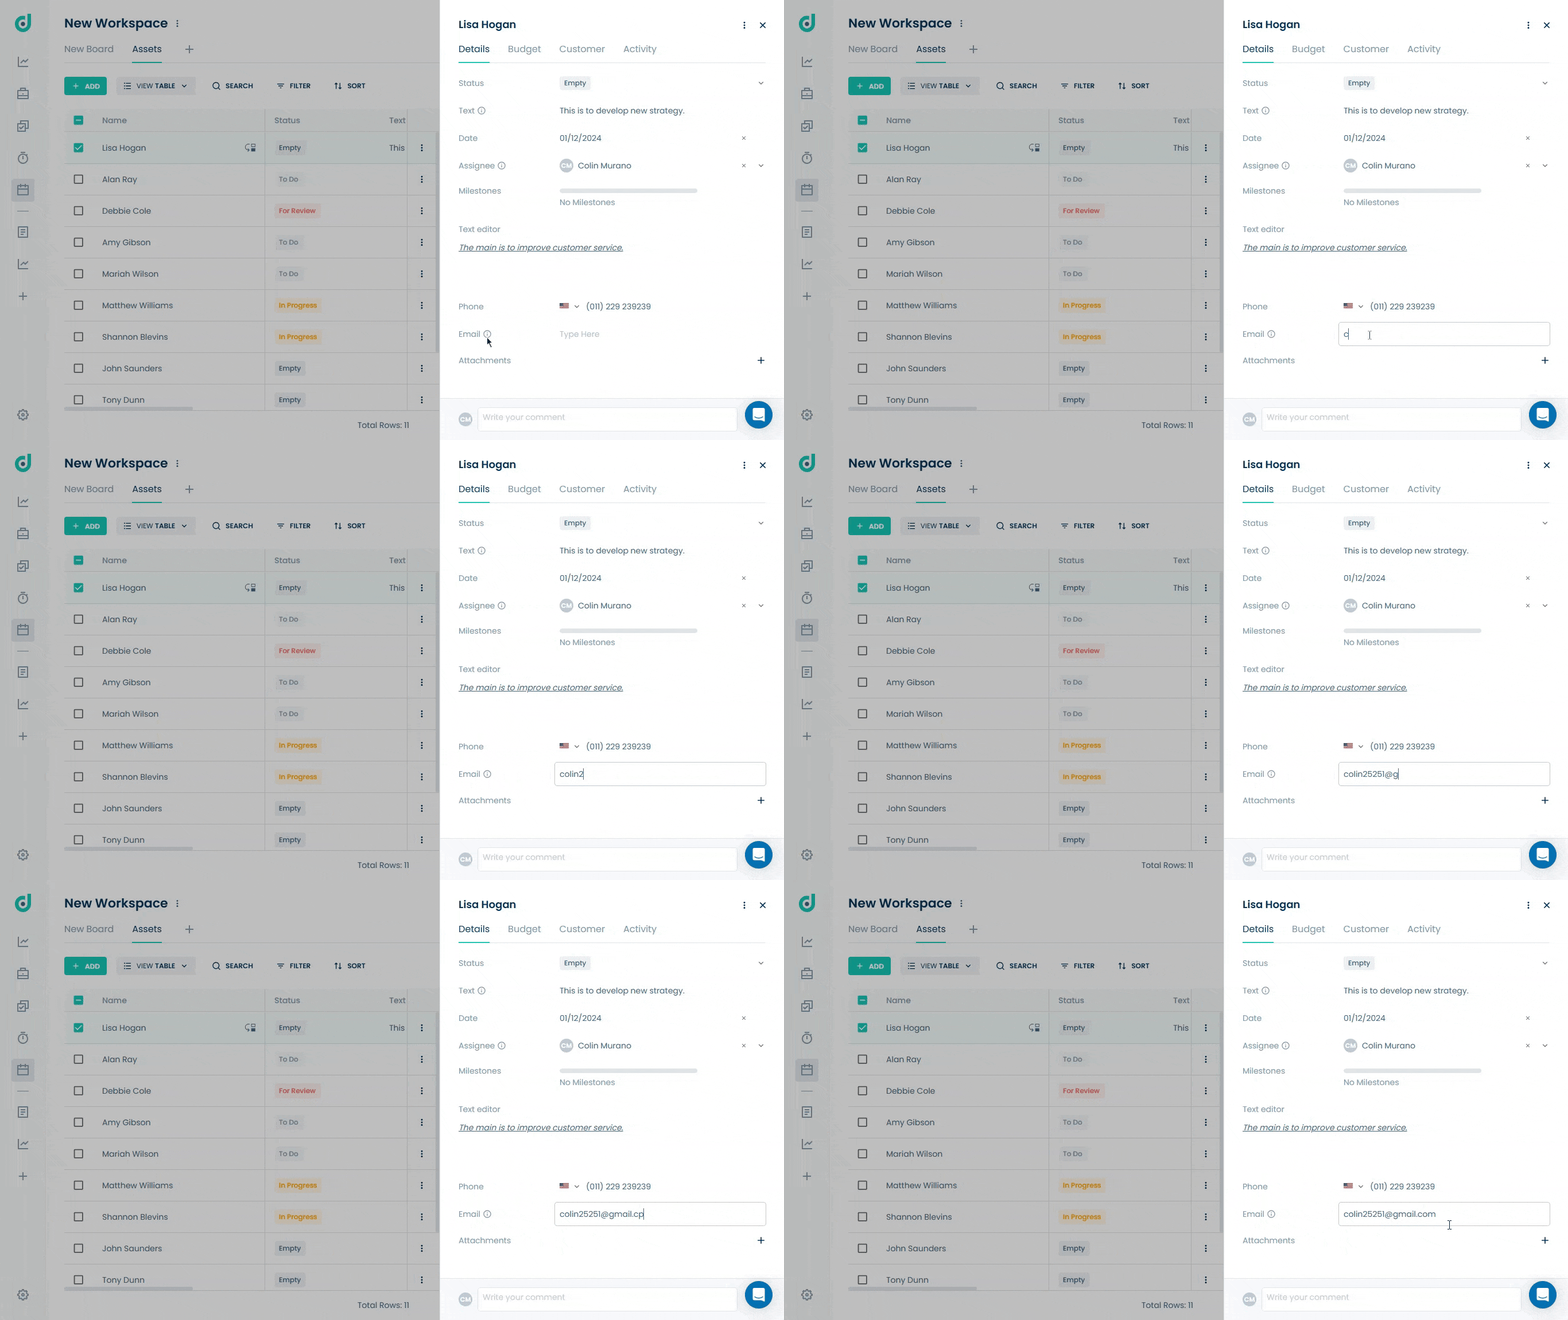
Number
The Number field in OneDeck allows you to store and manage numerical data for a variety of purposes, such as tracking expenses, quantities, or percentages. It’s ideal for inputting any numerical data, including decimals and negative values, and performing calculations like addition, subtraction, multiplication, or division across multiple Number fields, making data management easy and flexible within your boards.
Add Number Field
Step 1: Click on the “+” button from the field section.
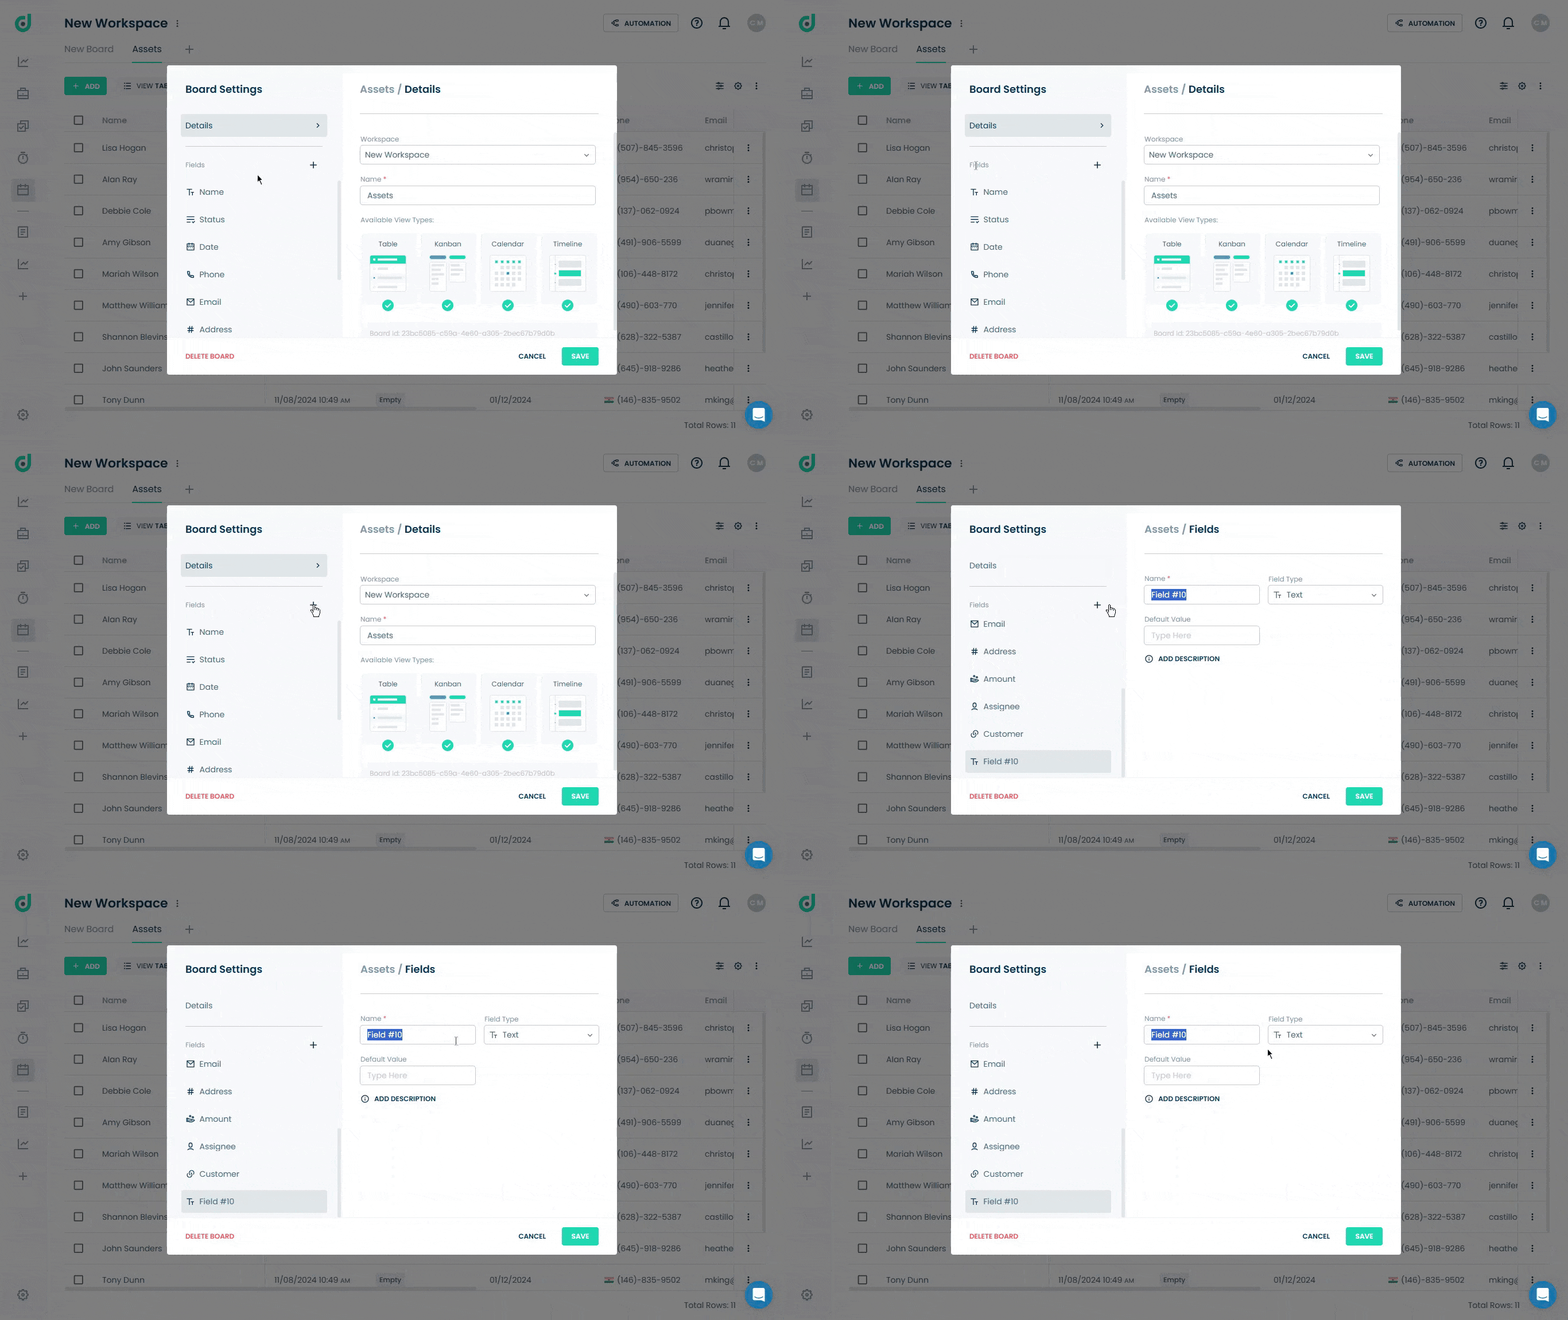
Step 2: Enter the field name and select “Number” as the field type with number format (Decimal or Integer). Optionally, add a default value and a description for additional context.
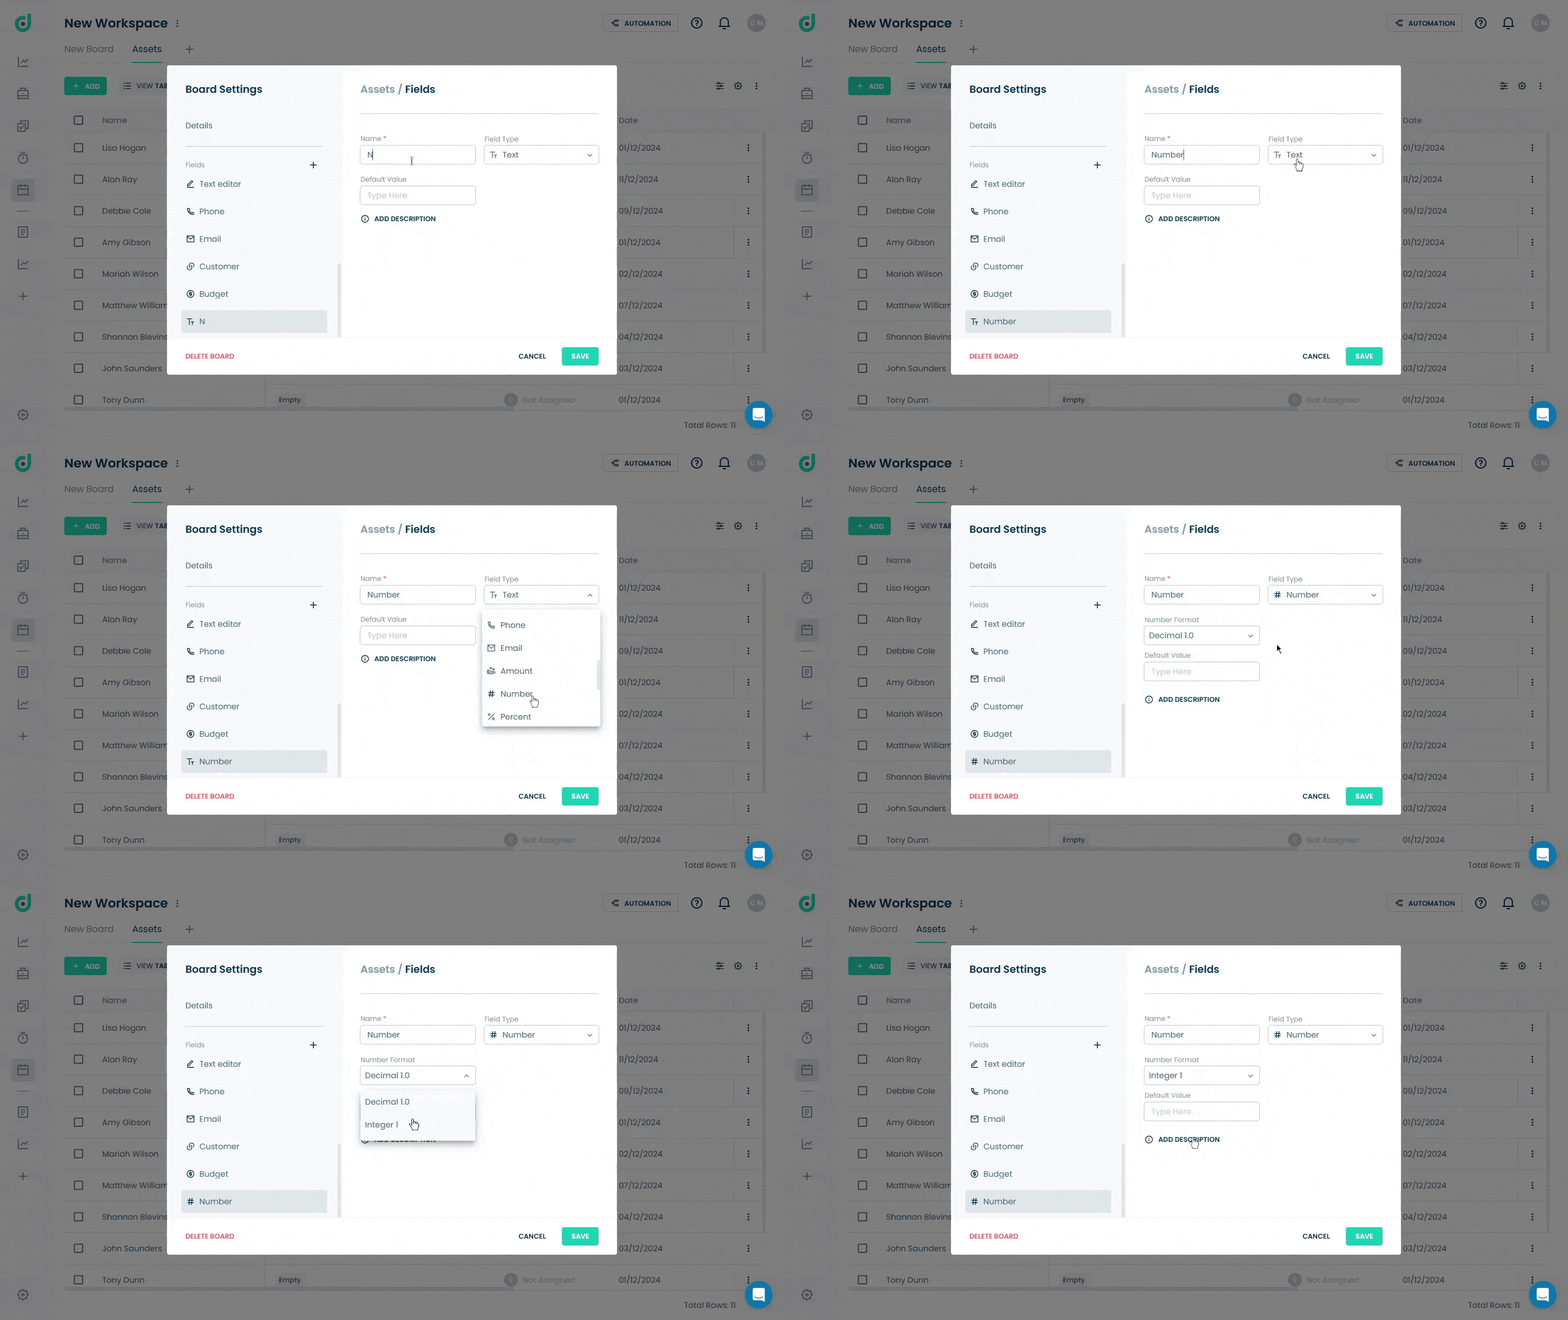
Step 3: Click on the SAVE button.
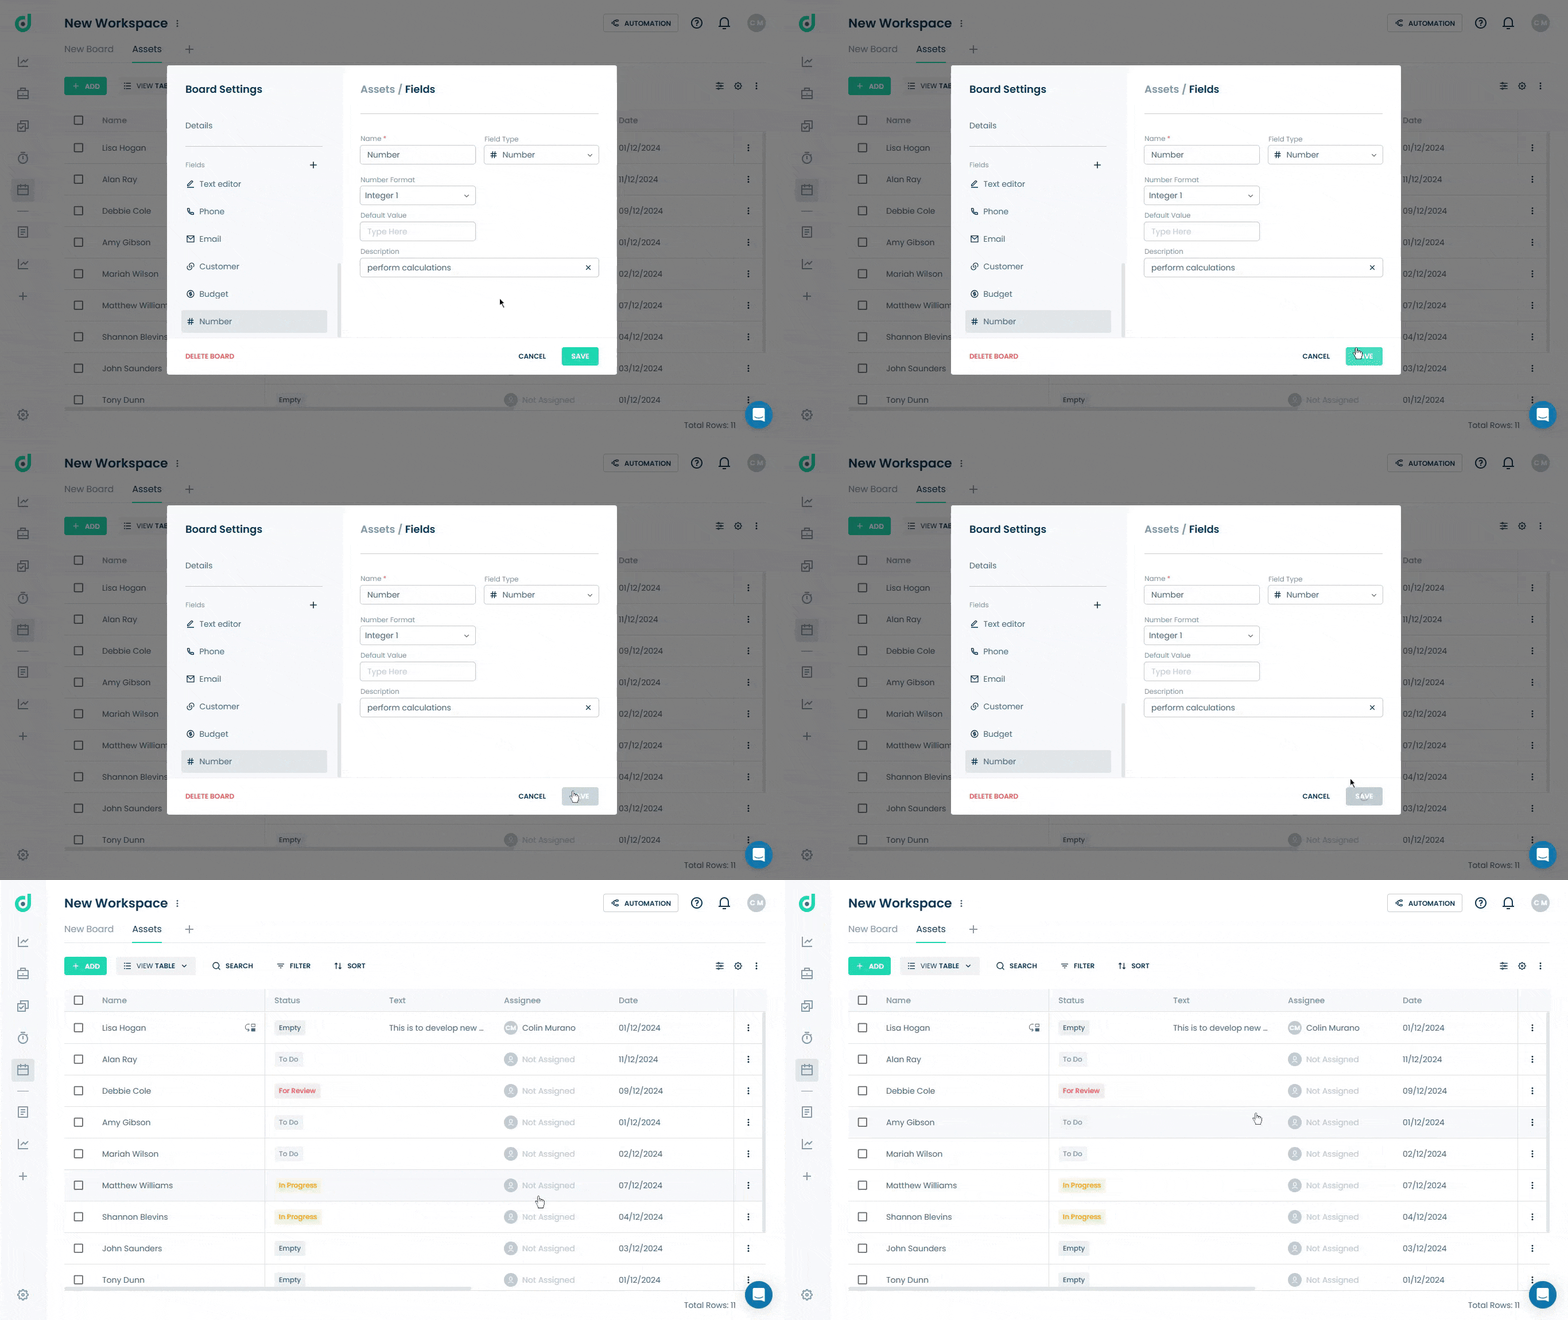
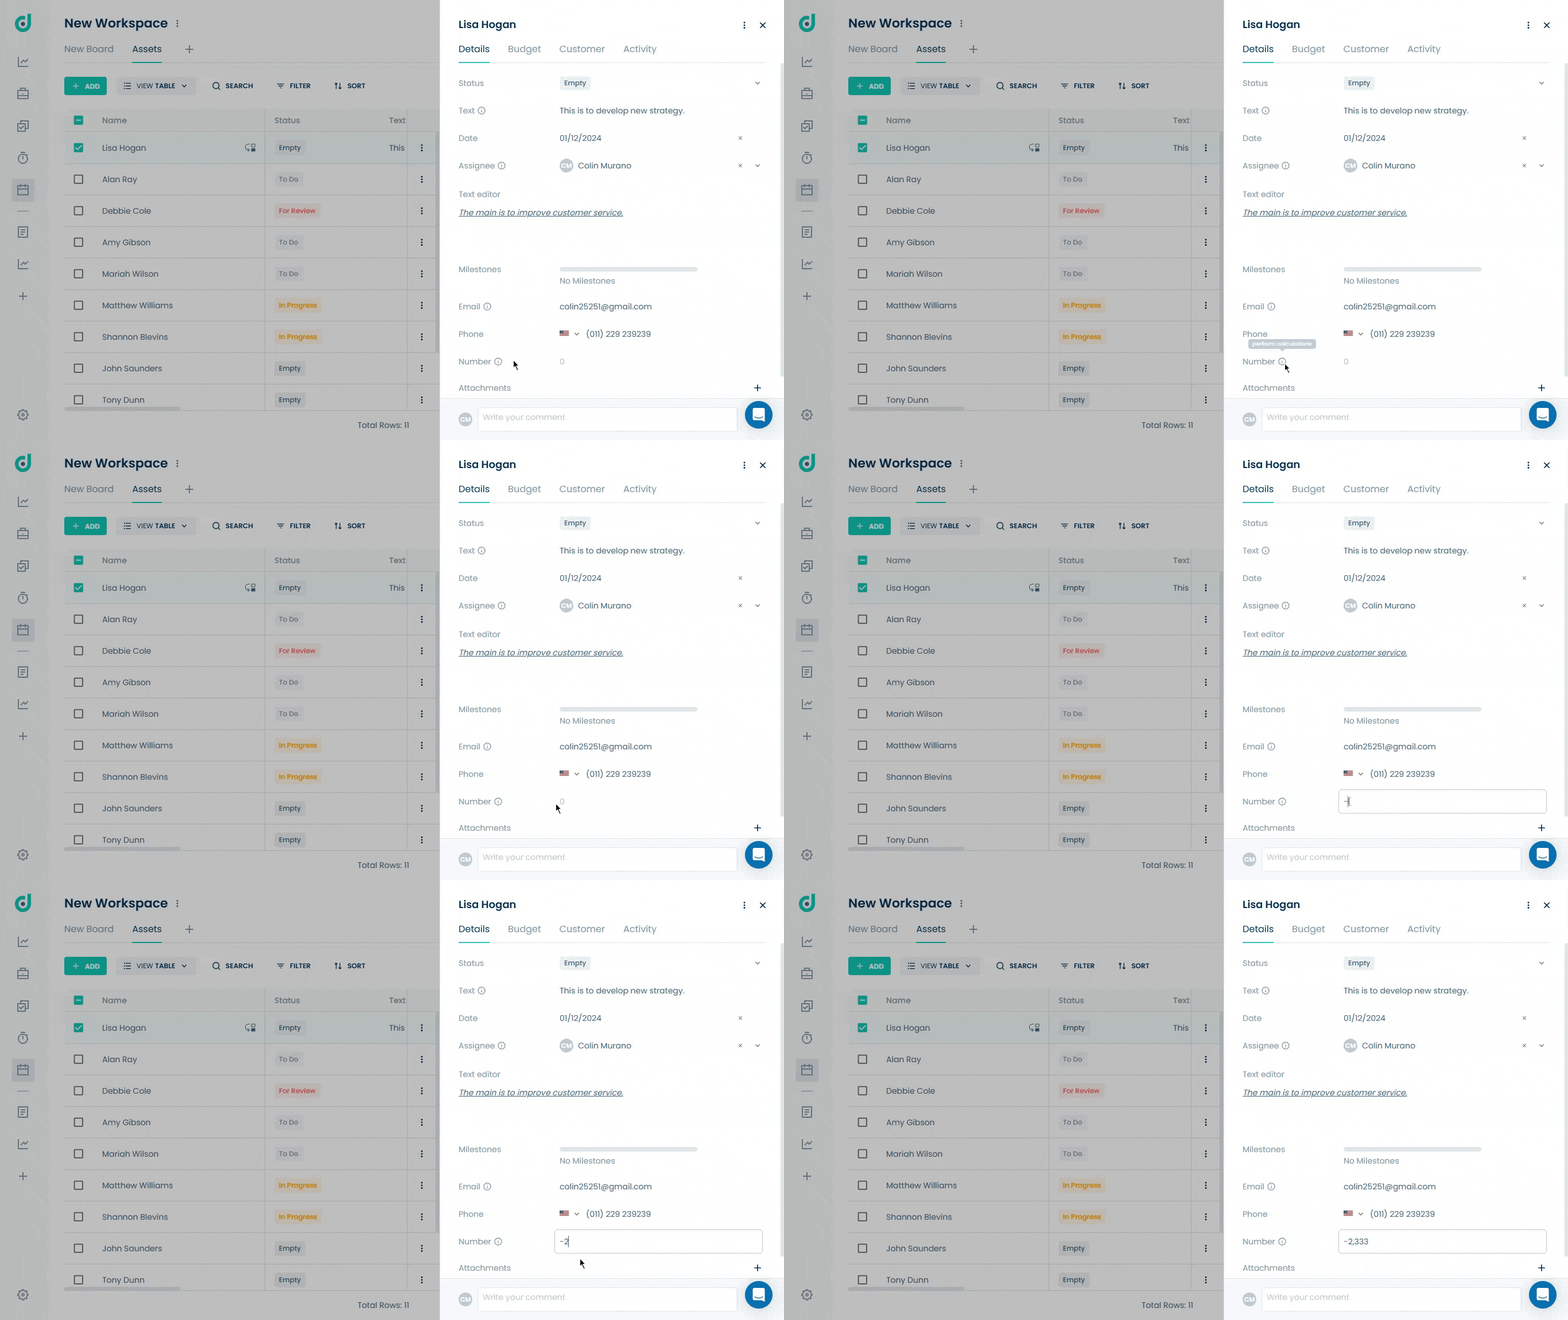
Use Number Field
Once you have added the Number field as a field type, you can store and manage numerical data, such as expenses, quantities, or percentages, for various purposes within your board.
Step 1: Click on the Record you want to add a number.
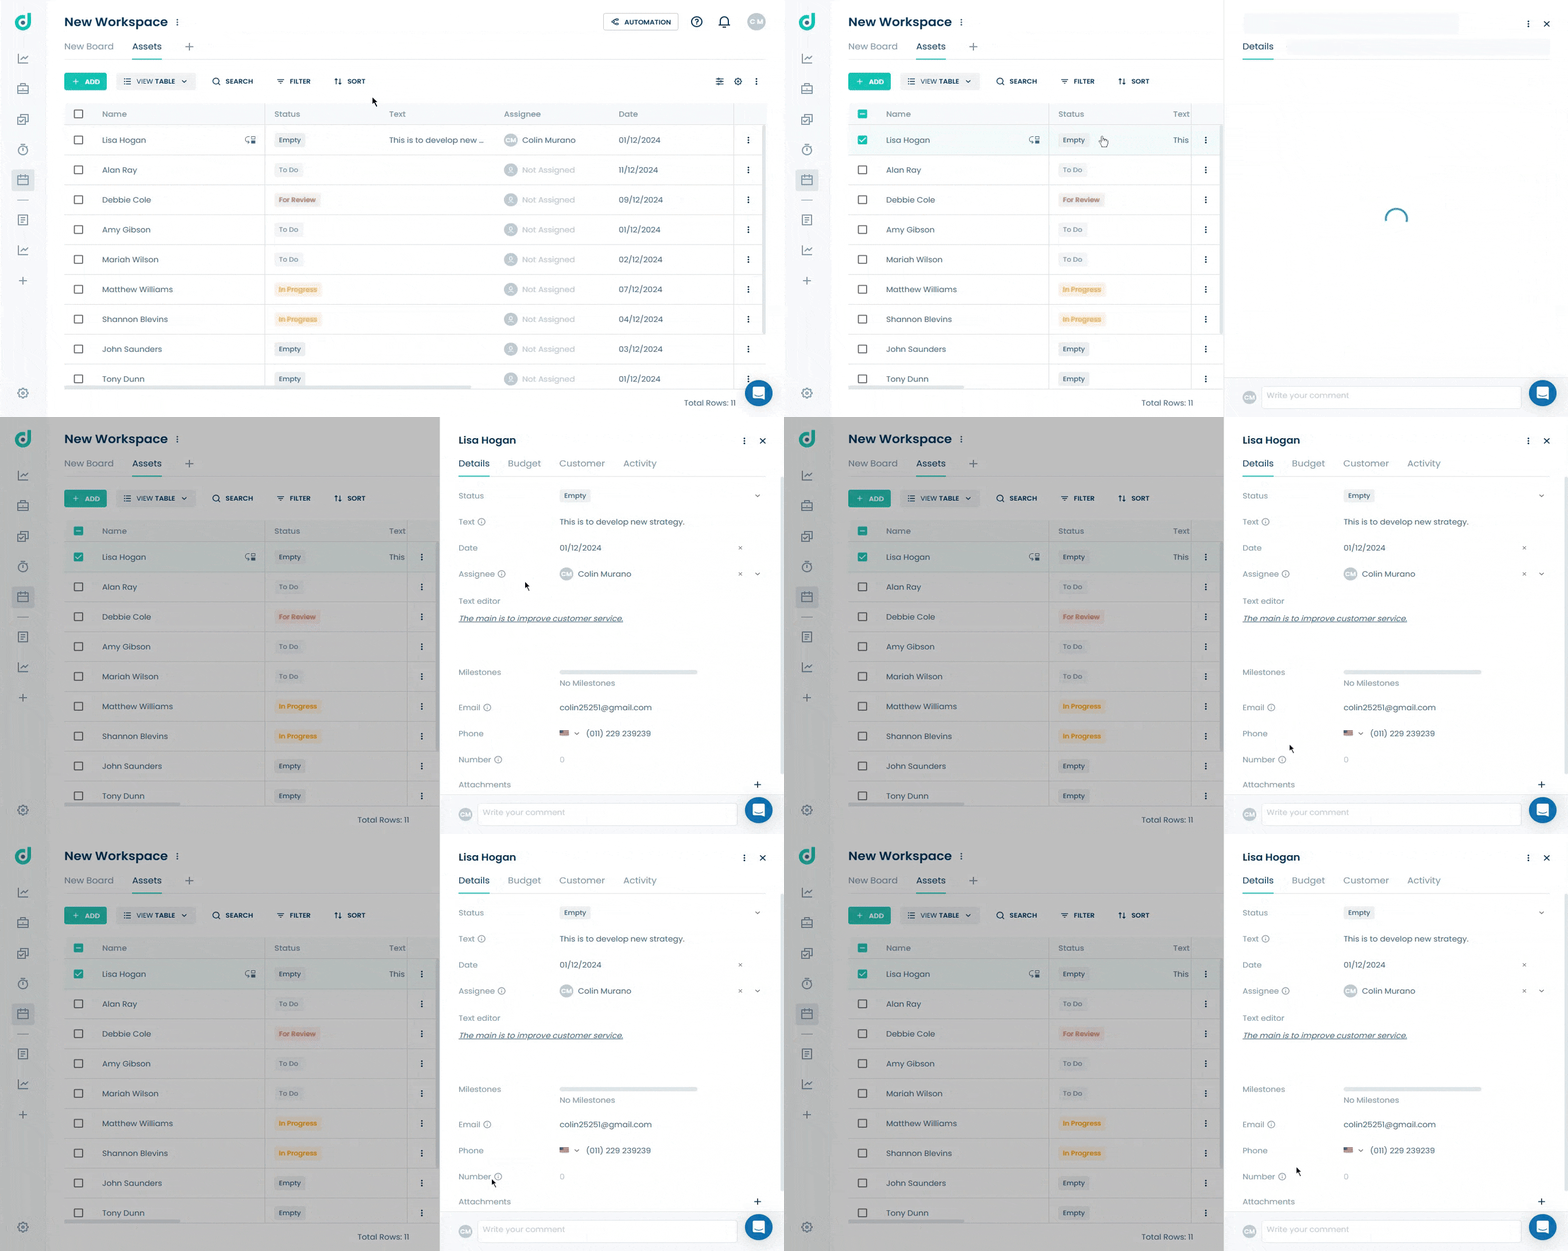
Step 2: In the record's details, locate the Number field and add a numerical formula.
Amount
The Amount field in OneDeck allows you to track the monetary value. You can specify the currency and precision needed, and OneDeck will automatically format values with the correct currency symbol.
Add Amount Field
Step 1: Click on the “+” button from the field section.
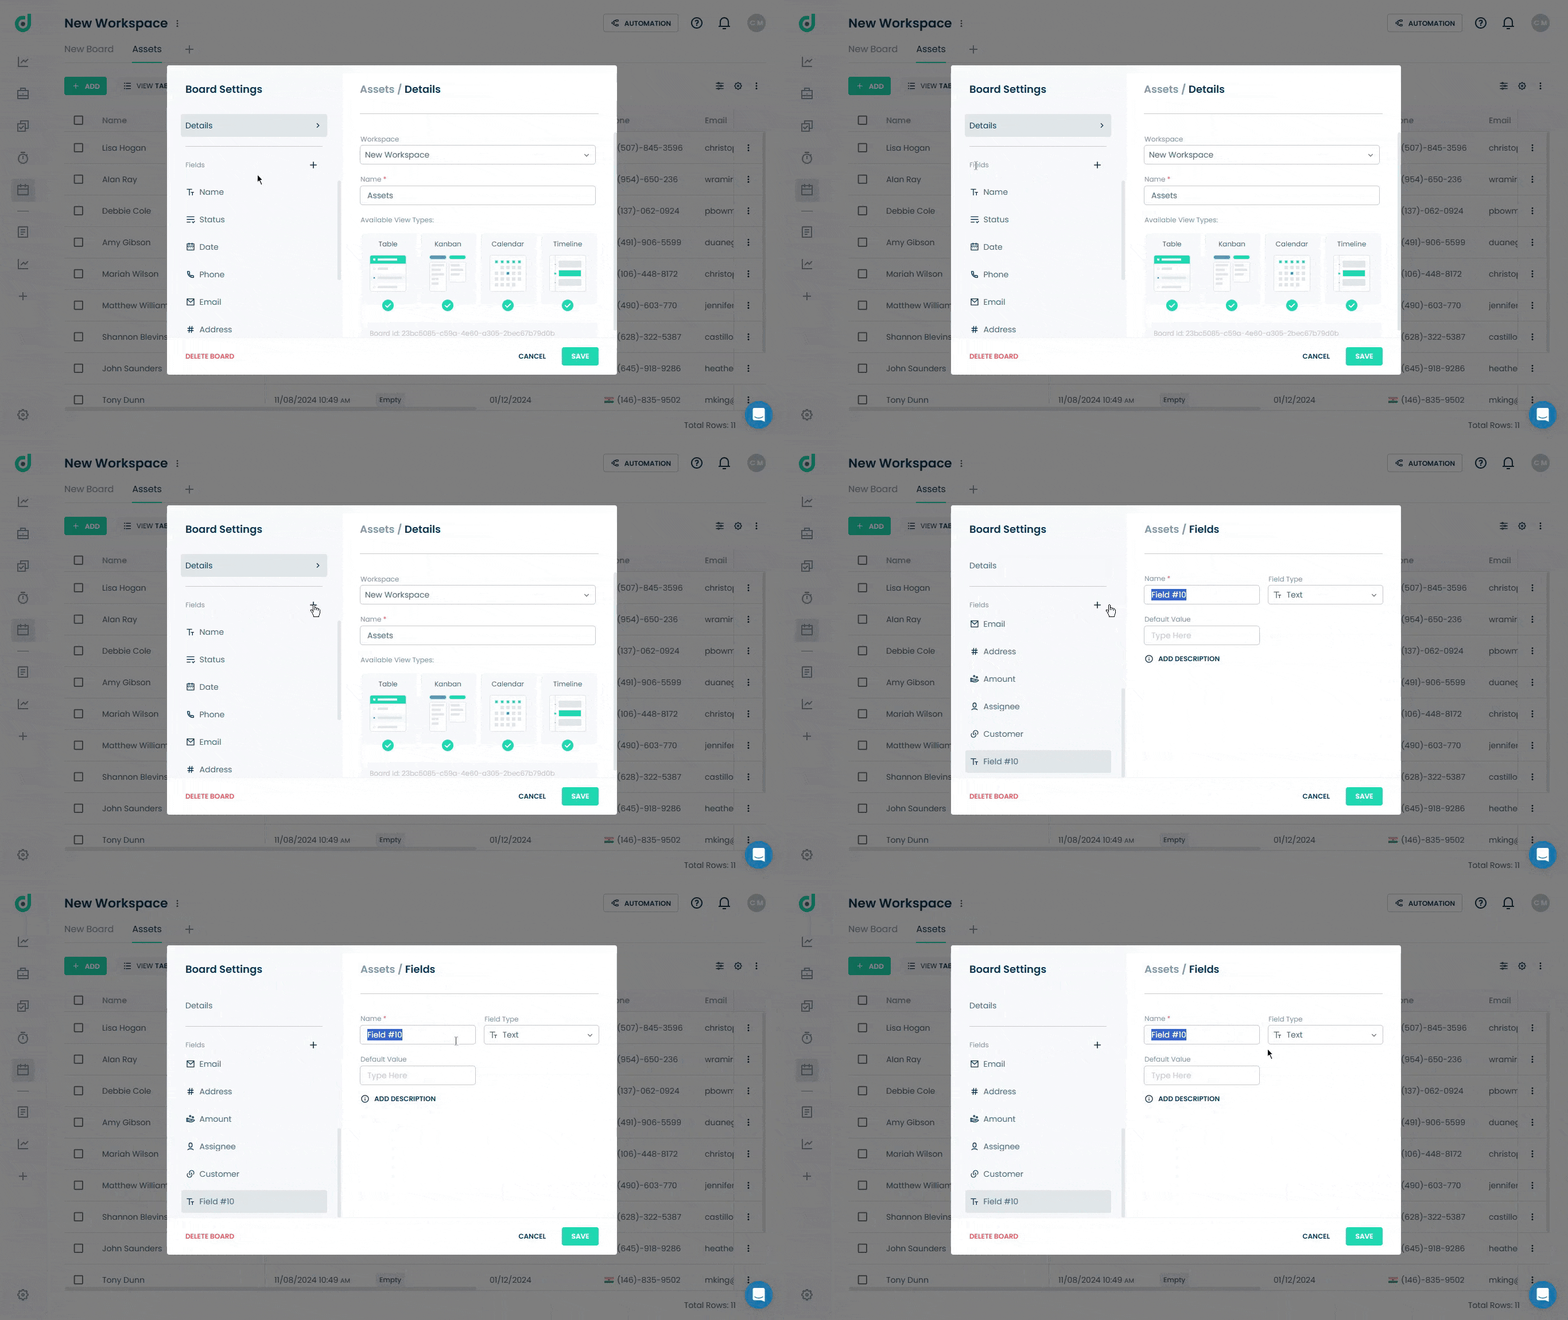
Step 2: Enter the field name and select “Amount” as the field type with the currency. Optionally, add a default value and a description for additional context.##IMAGE##
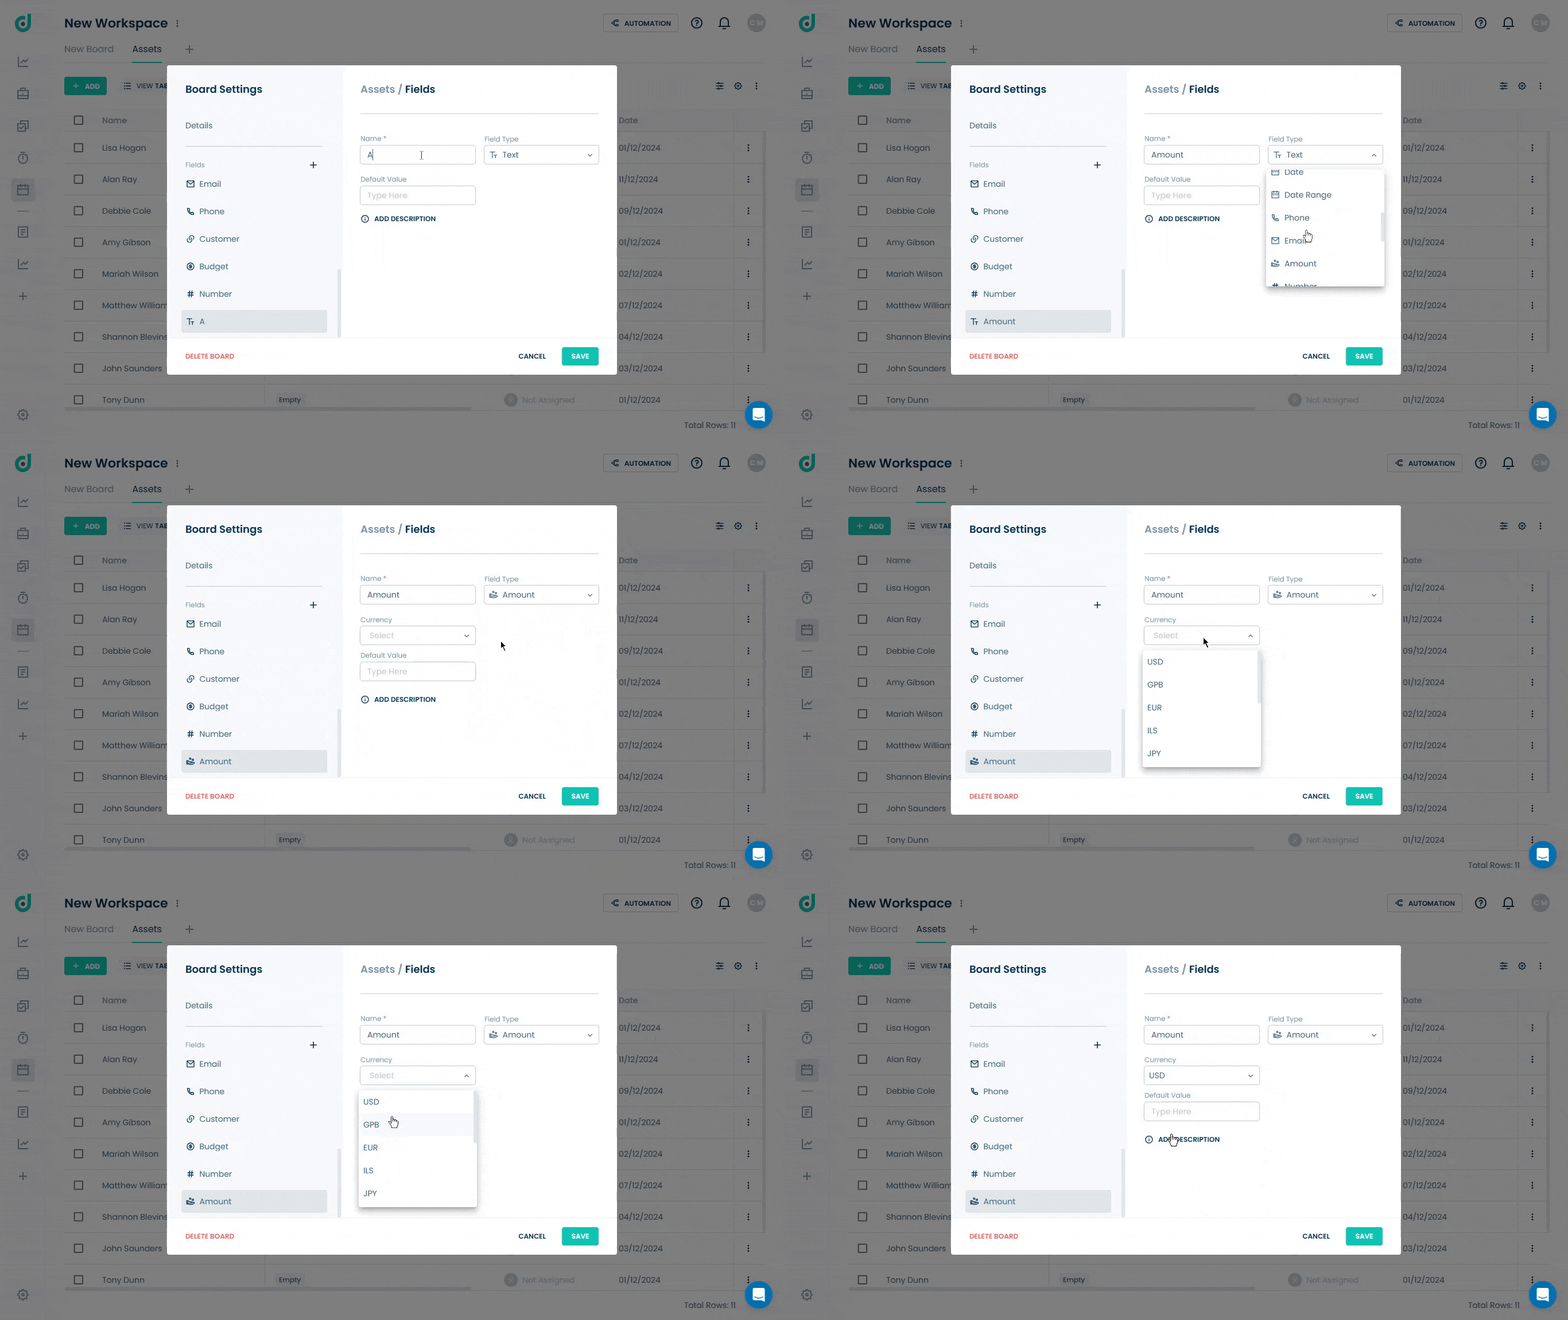
Step 3: Click on the SAVE button.
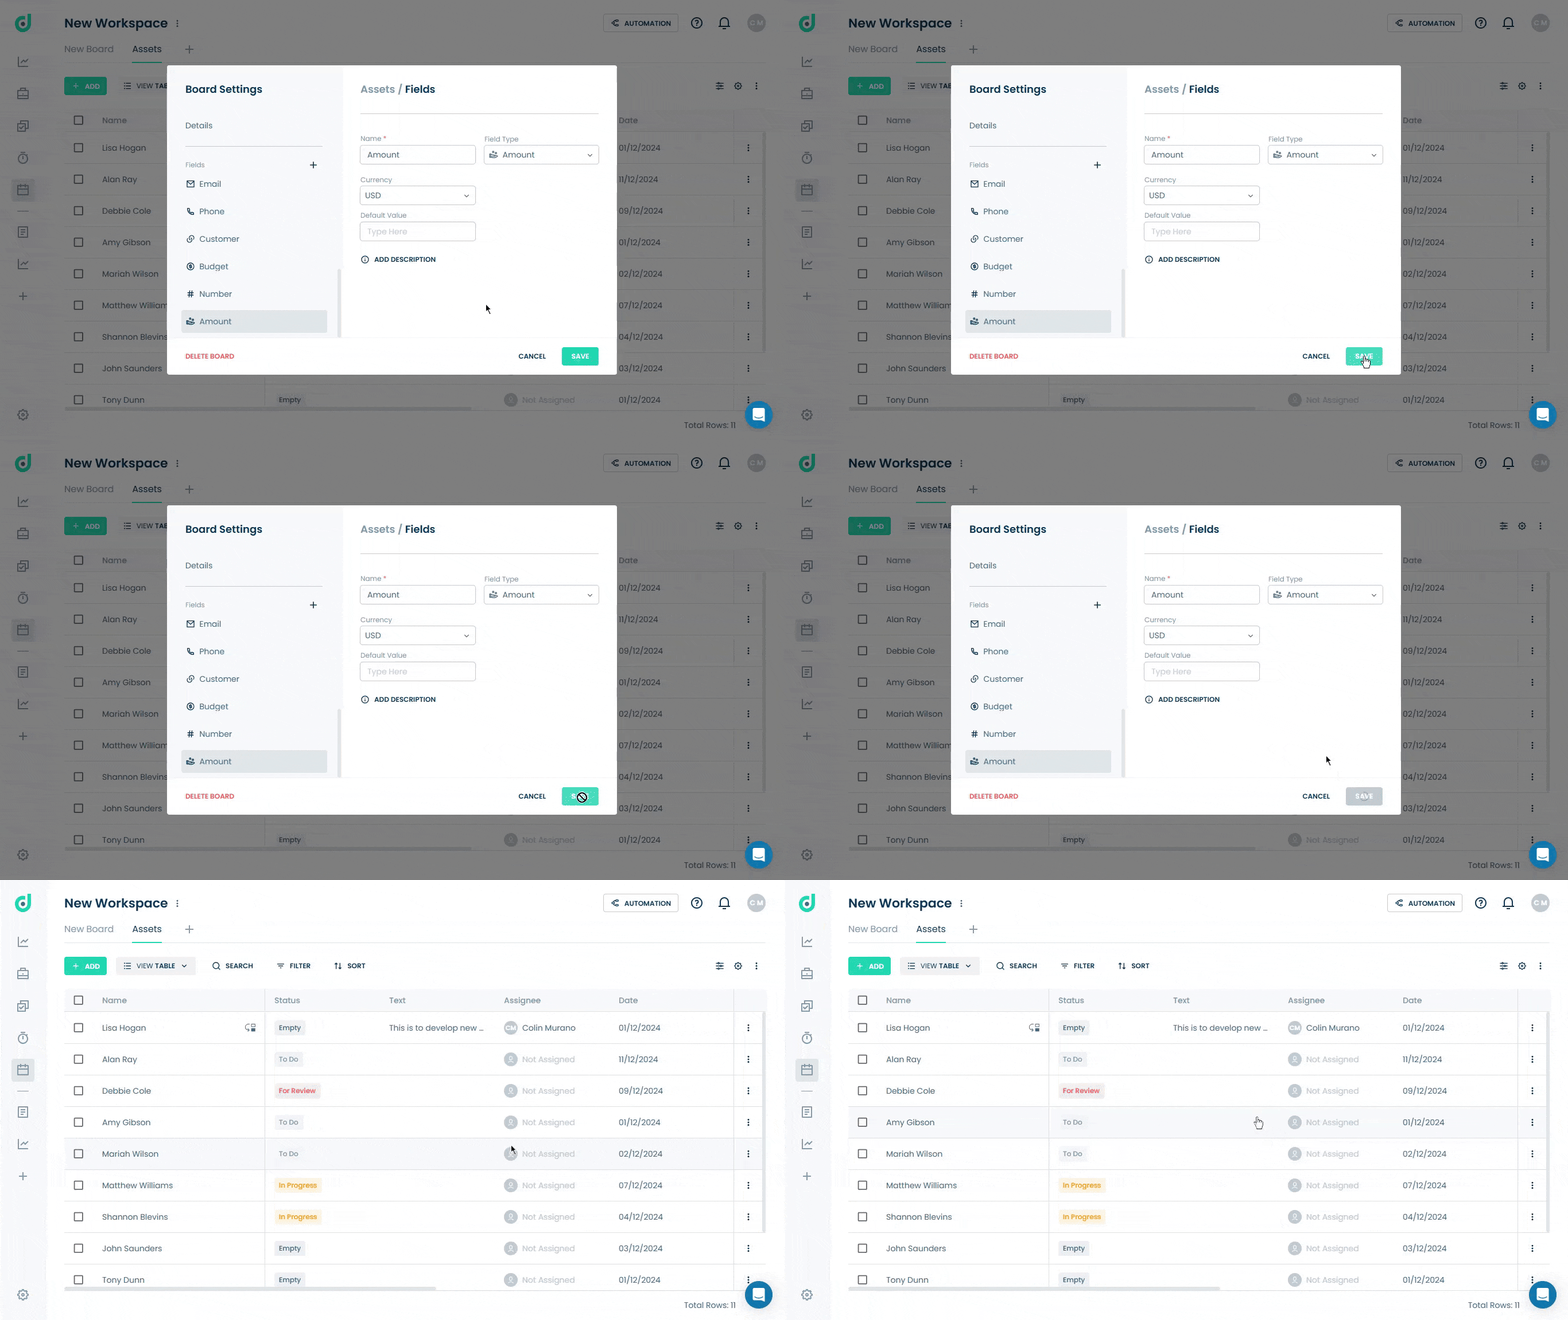
Use Amount Field
Once you have added the Amount field as a field type, you can store and track monetary values, such as budgets or invoices, for various purposes within your board.
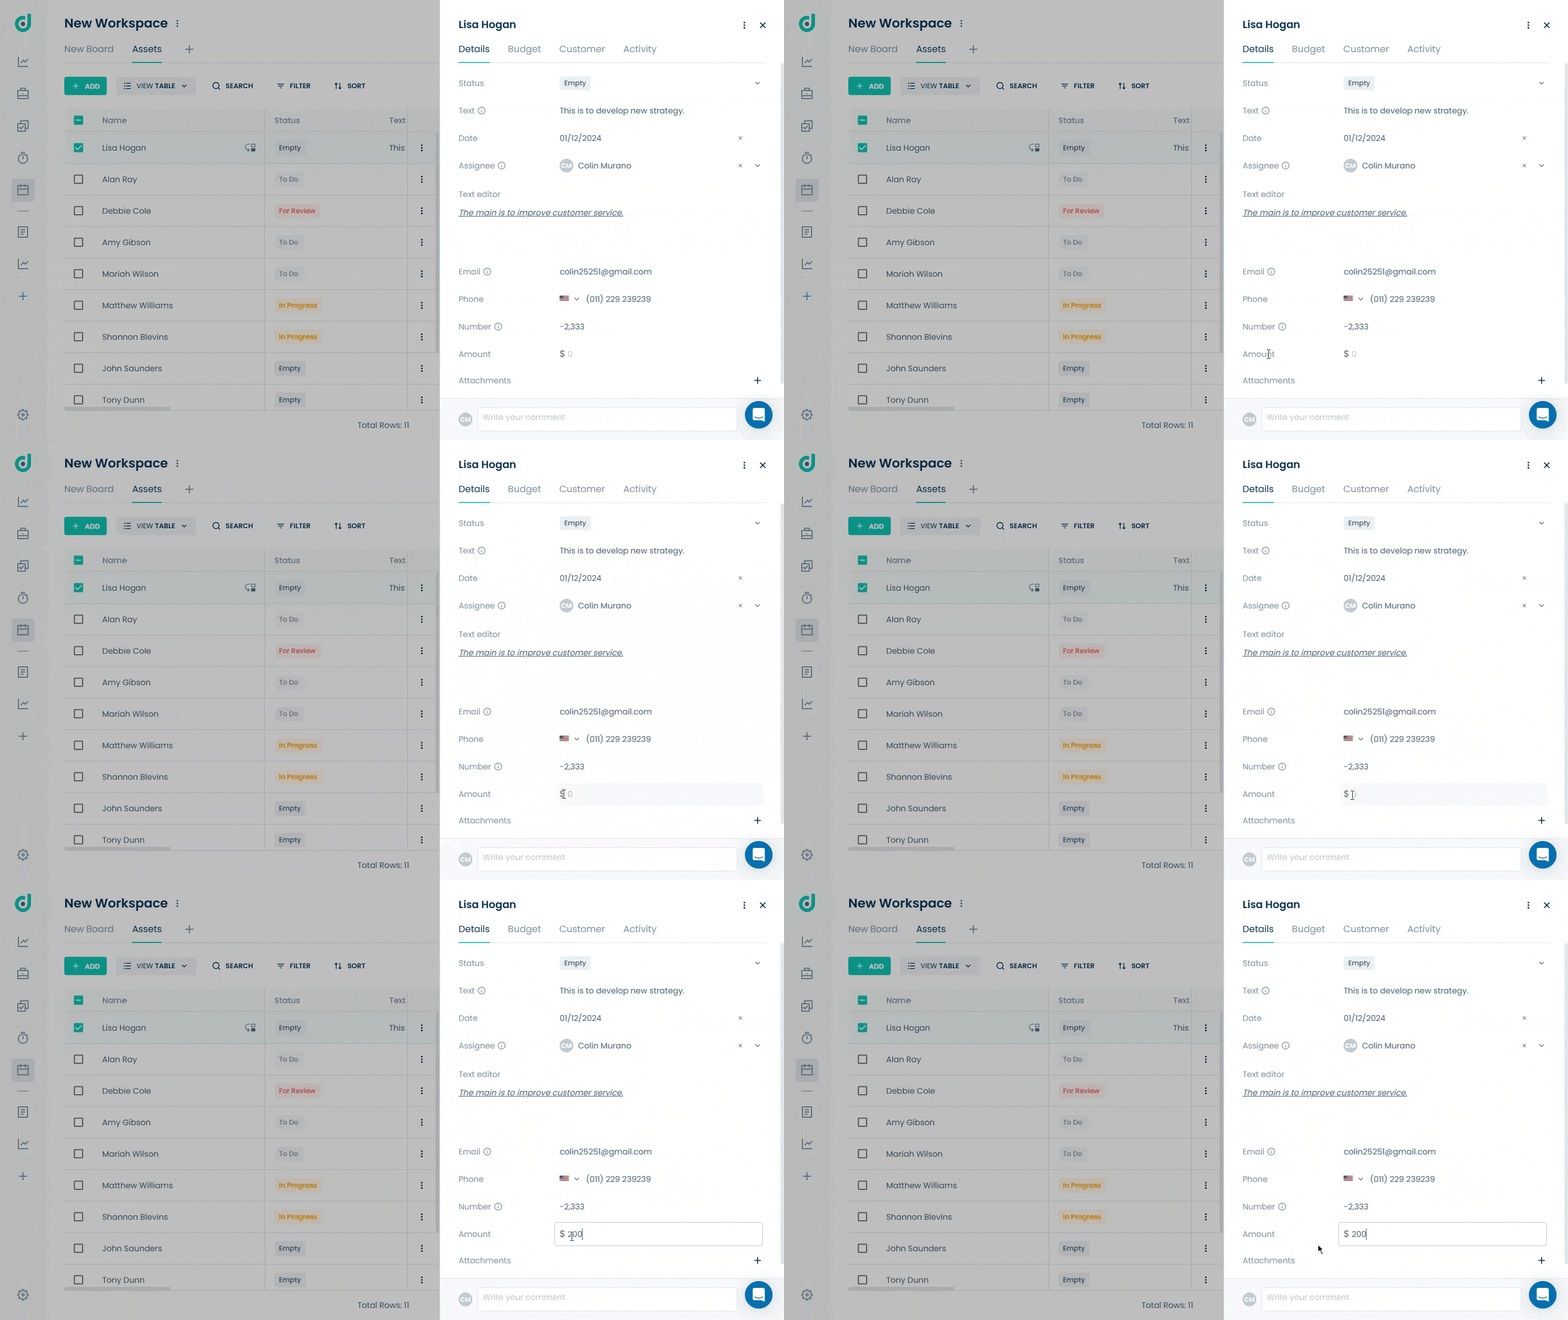
Step 1: Click on the Record you want to add currency amount.

Step 2: In the record's details, locate the Amount field and add a currency amount.
Percent
The Percent field in OneDeck allows you to capture and organize values in percentage format, making it ideal for tracking metrics like progress, completion rates, or other percentage-based measurements. You can easily input values as whole numbers or decimals, and OneDeck will automatically format them as percentages, making data visualization and management seamless within your boards.
Add Percent Field
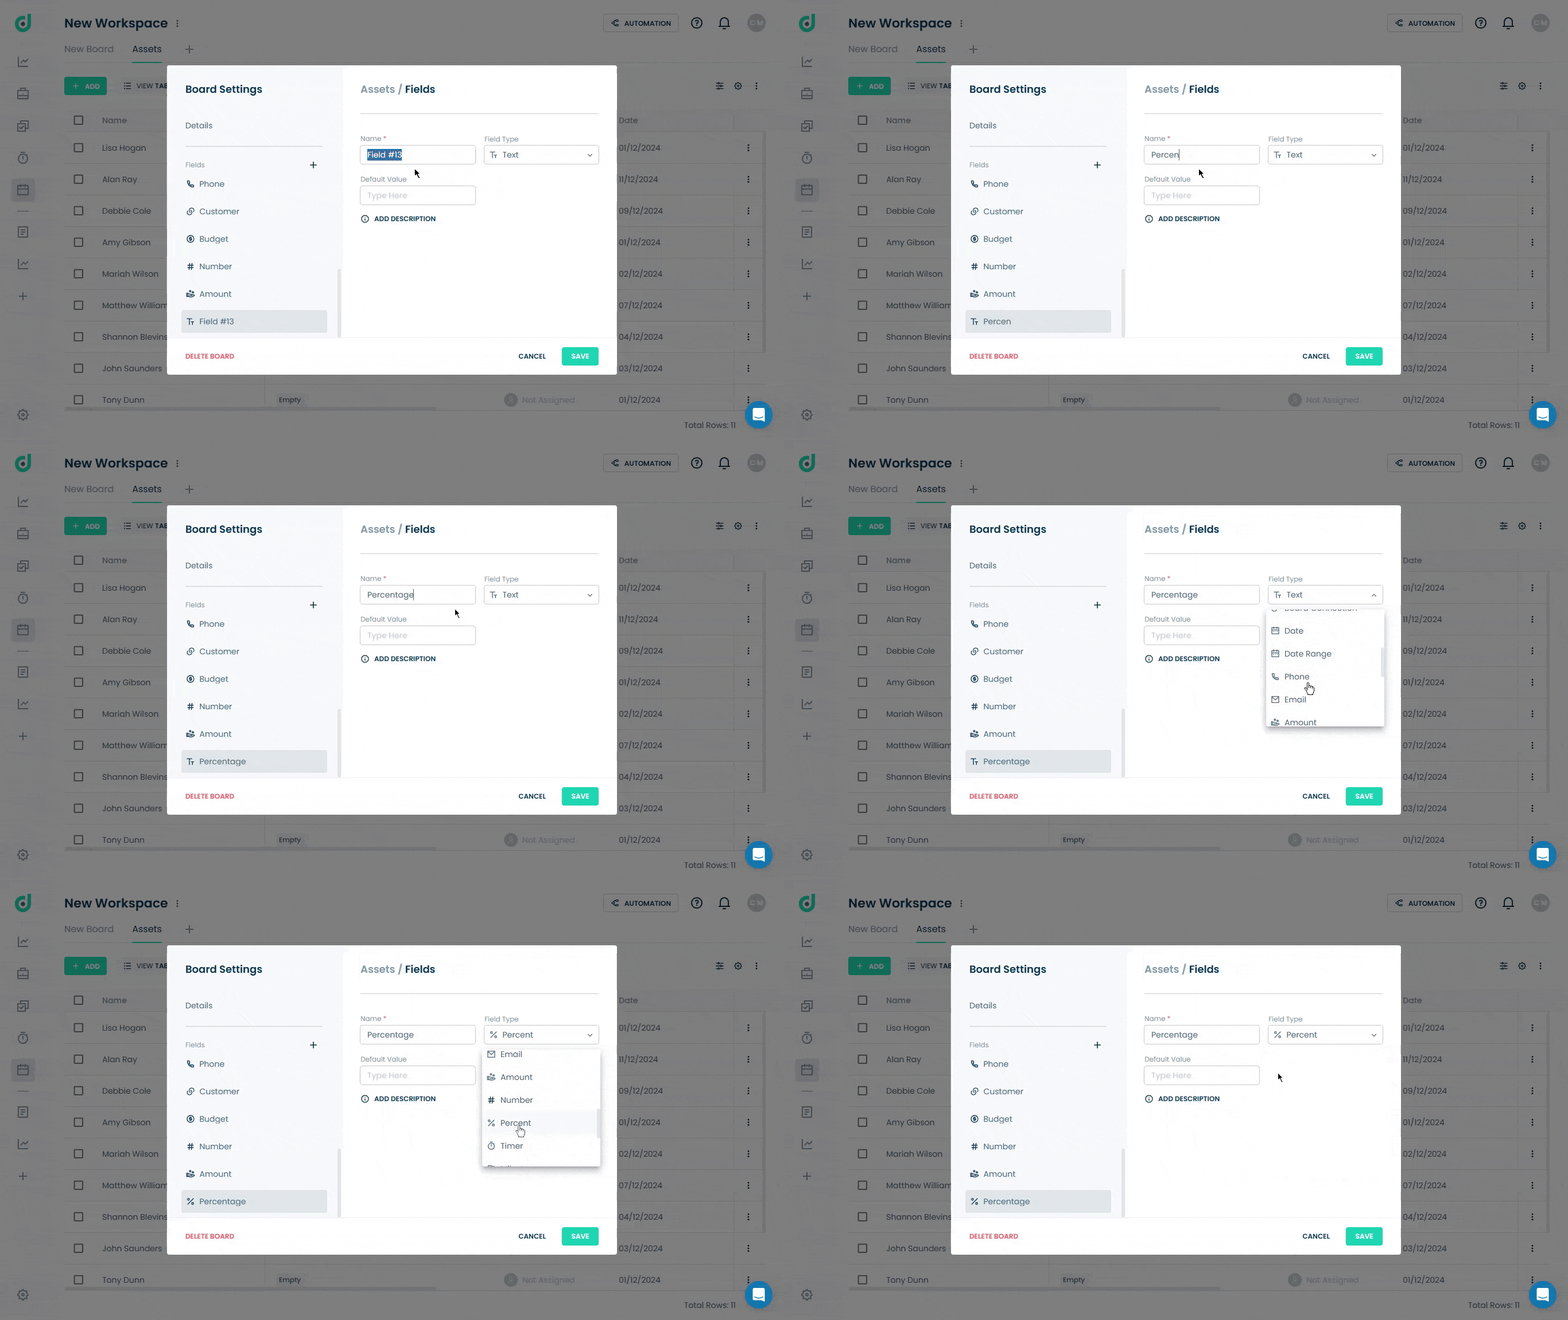
Step 1: Click on the “+” button from the field section.

Step 2: Enter the field name and select “Percent” as the field type. Optionally, add a default value and a description for additional context.
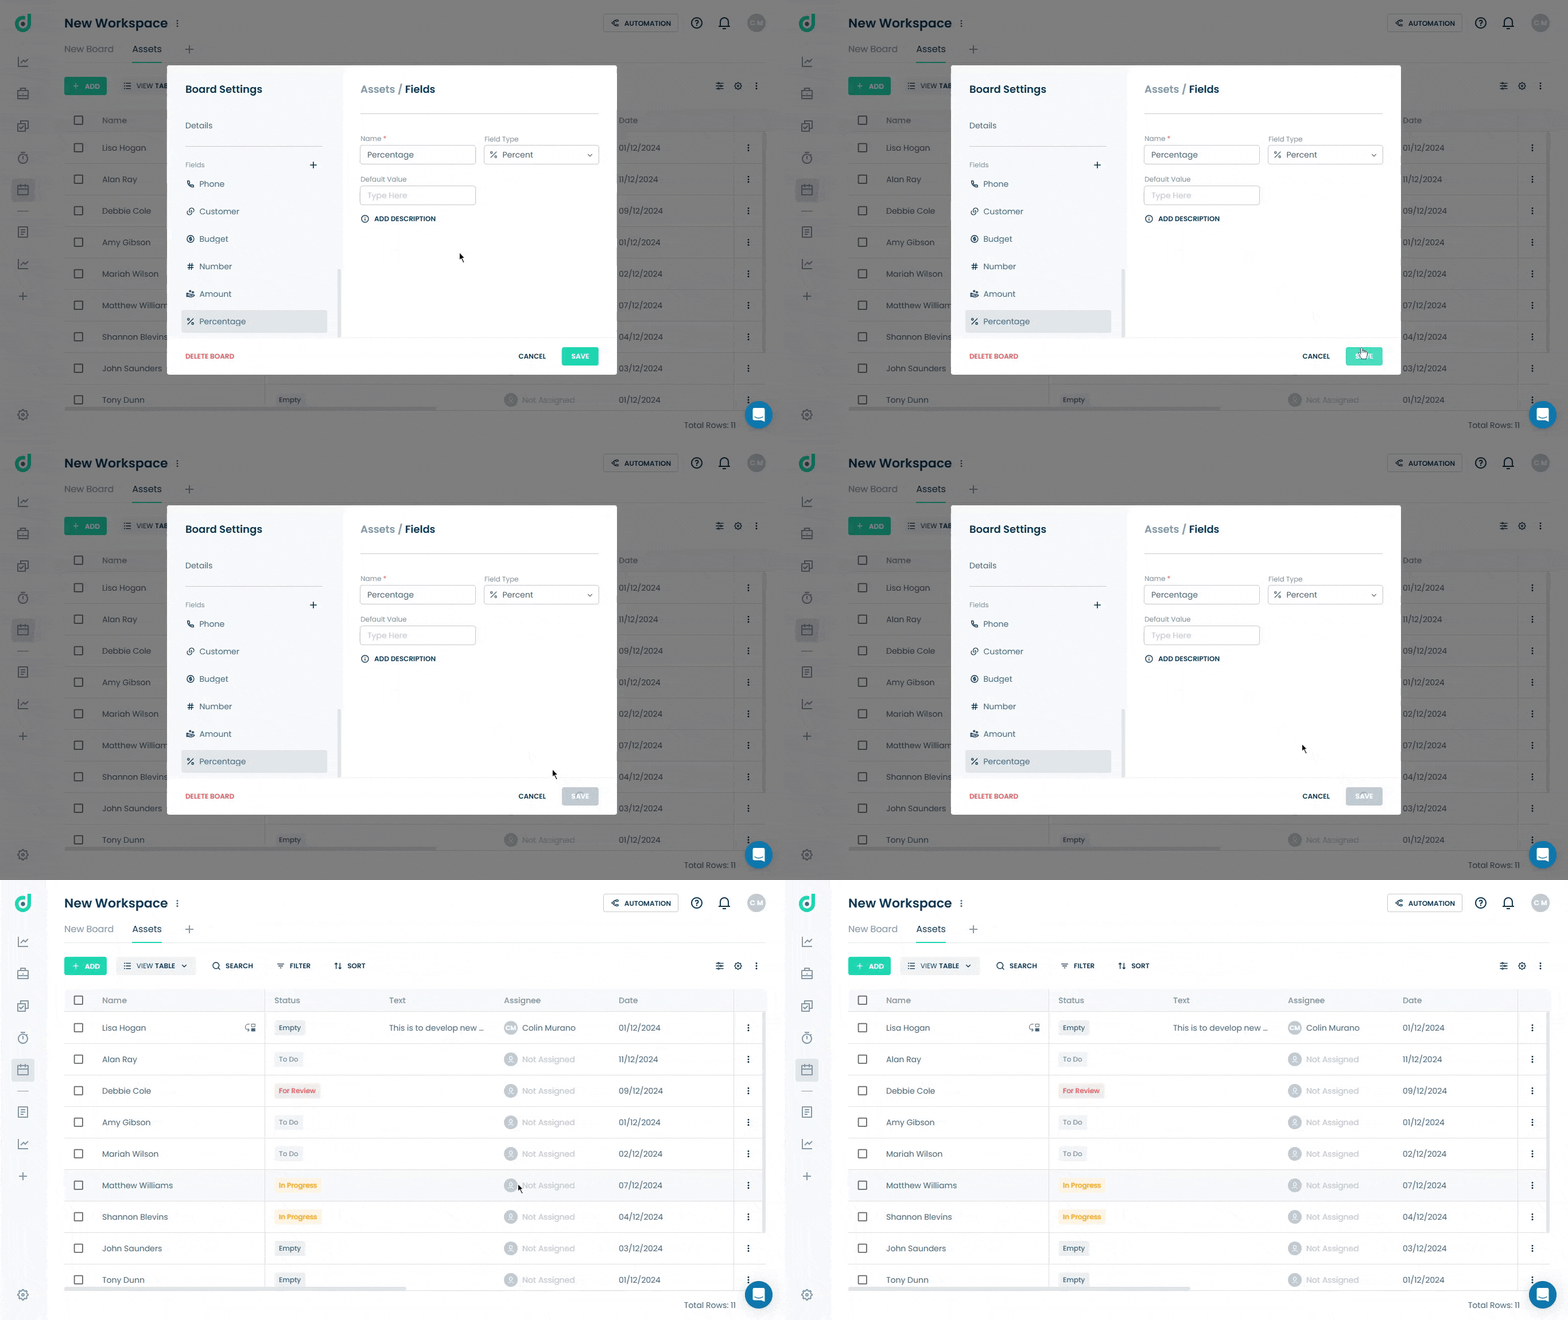
Step 3: Click on the SAVE button.
Use Percent Field
Once you have added the Percent field as a field type, you can add and track percentage values, such as progress or completion rates, for various purposes within your board.
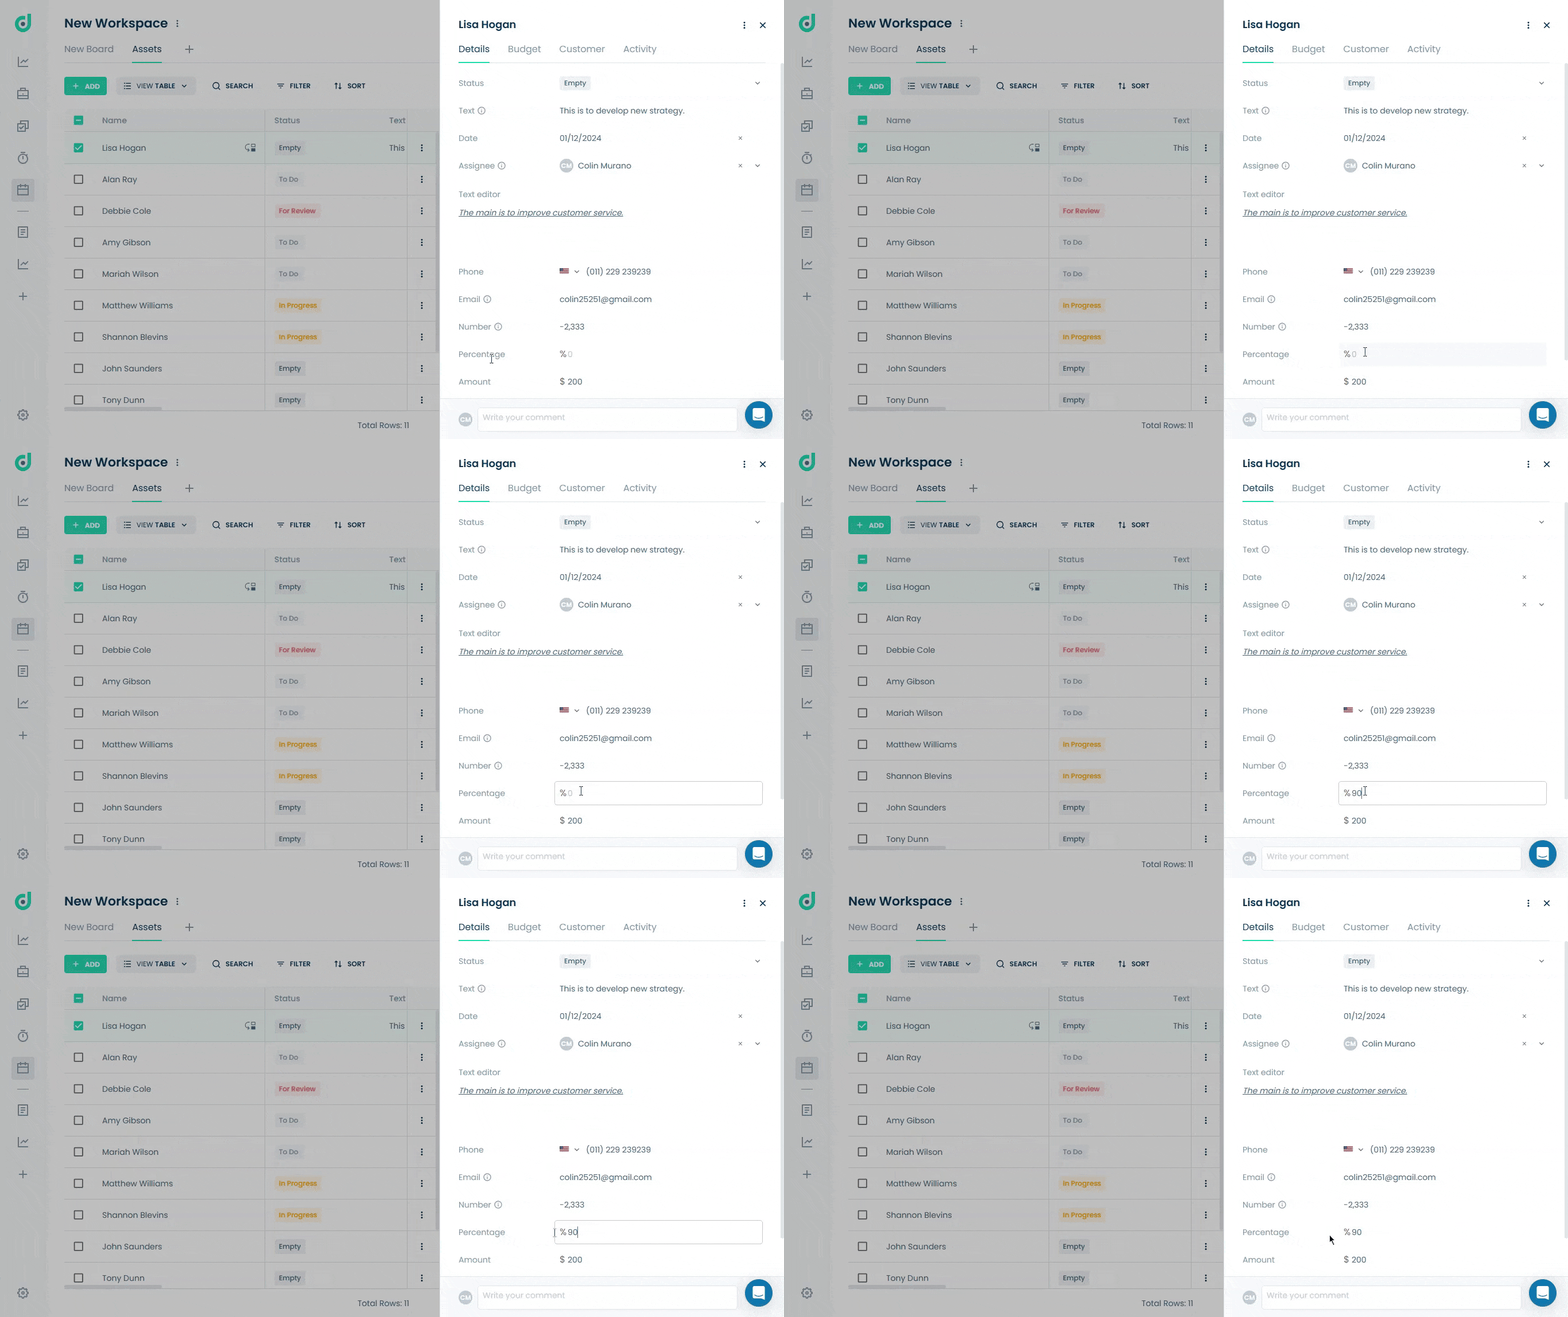
Step 1: Click on the Record you want to add percentage.
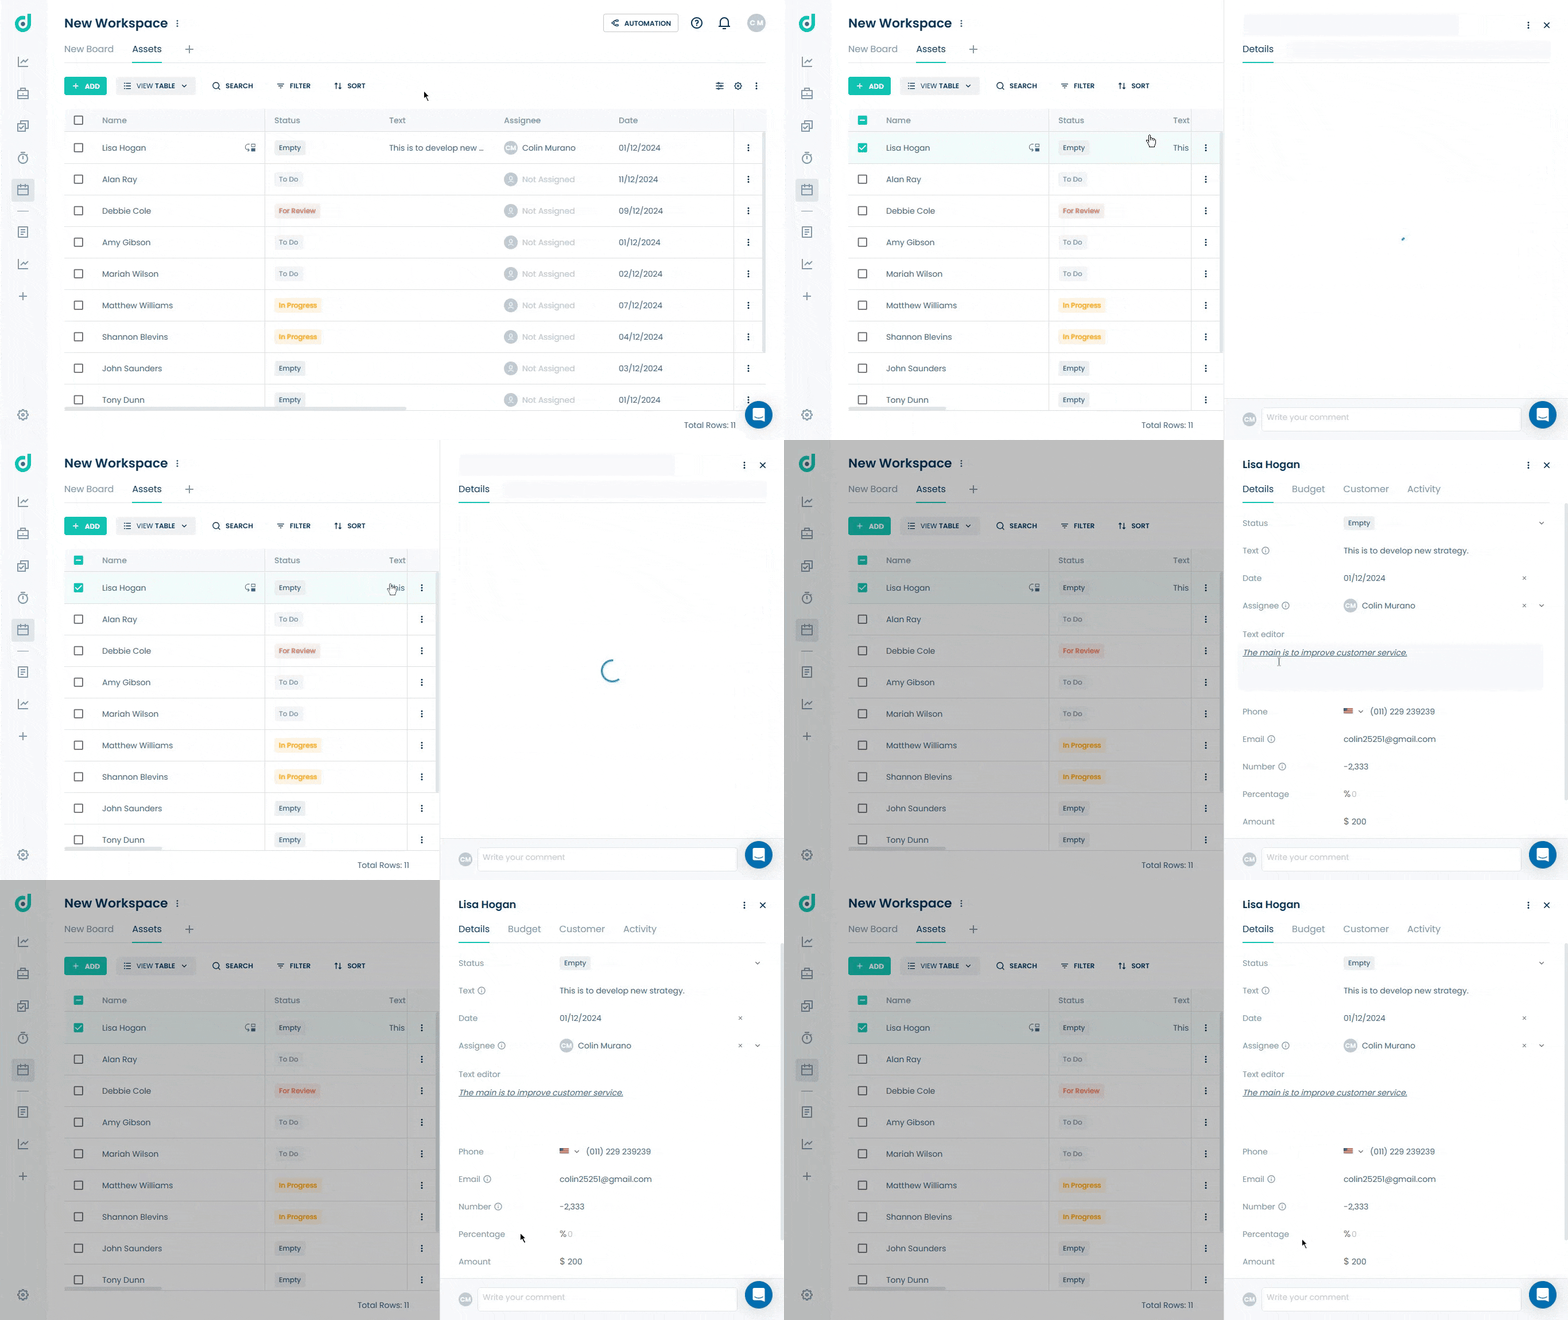
Step 2: In the record's details, locate the Percentage field and add a percent amount.
