OneDeck Help Center
Budget Field
With the Budget field, you can set, track, and manage budgets for records. Add an Items amount and quantity, track expenses in real-time, and monitor spending against the budget. Ideal for managing projects and services, keeping your finances organized, supporting informed decisions, and ensuring you stay within budget.
In this documentation, we’ll walk you through the steps on how to:
- Add Budget Field
- Use Budget Field
Let’s get started 🚀
Add Budget Field
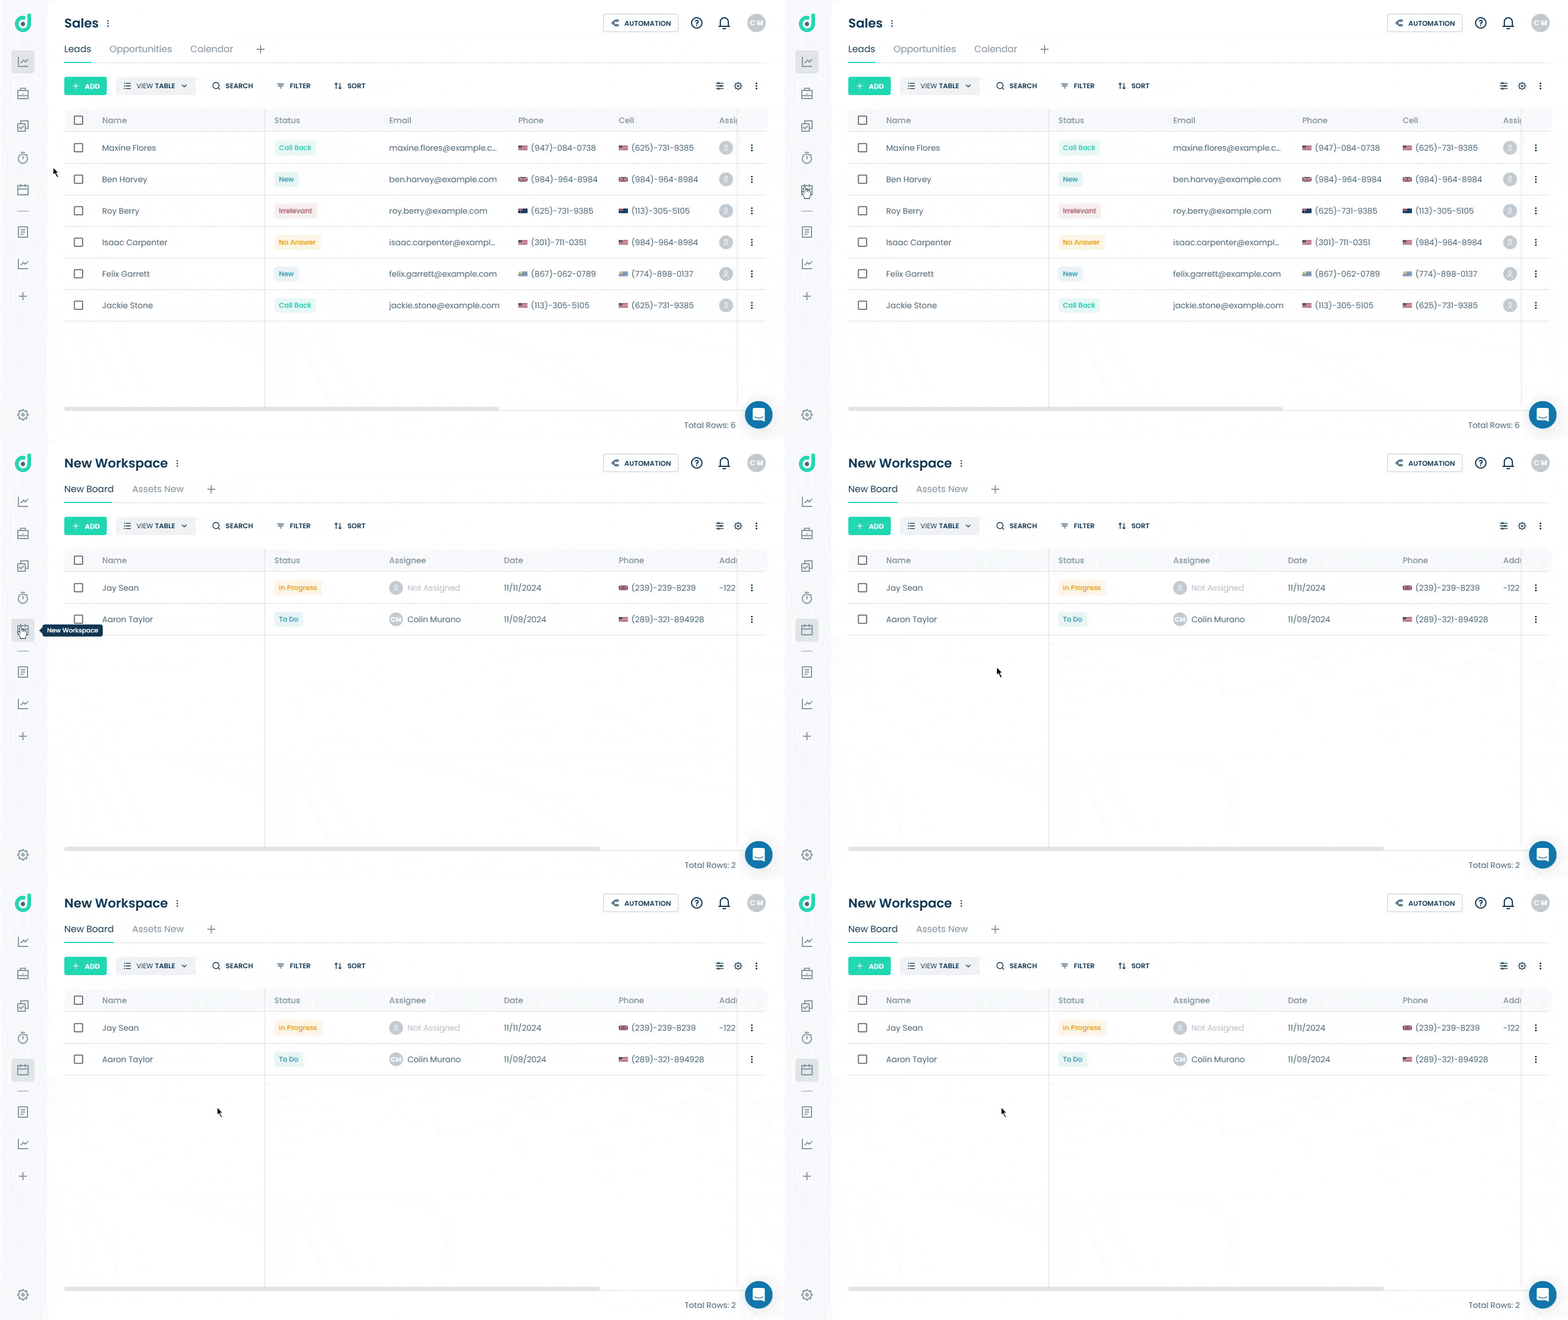
Step 1: Click on the Workspace button from the side navigation menu bar.
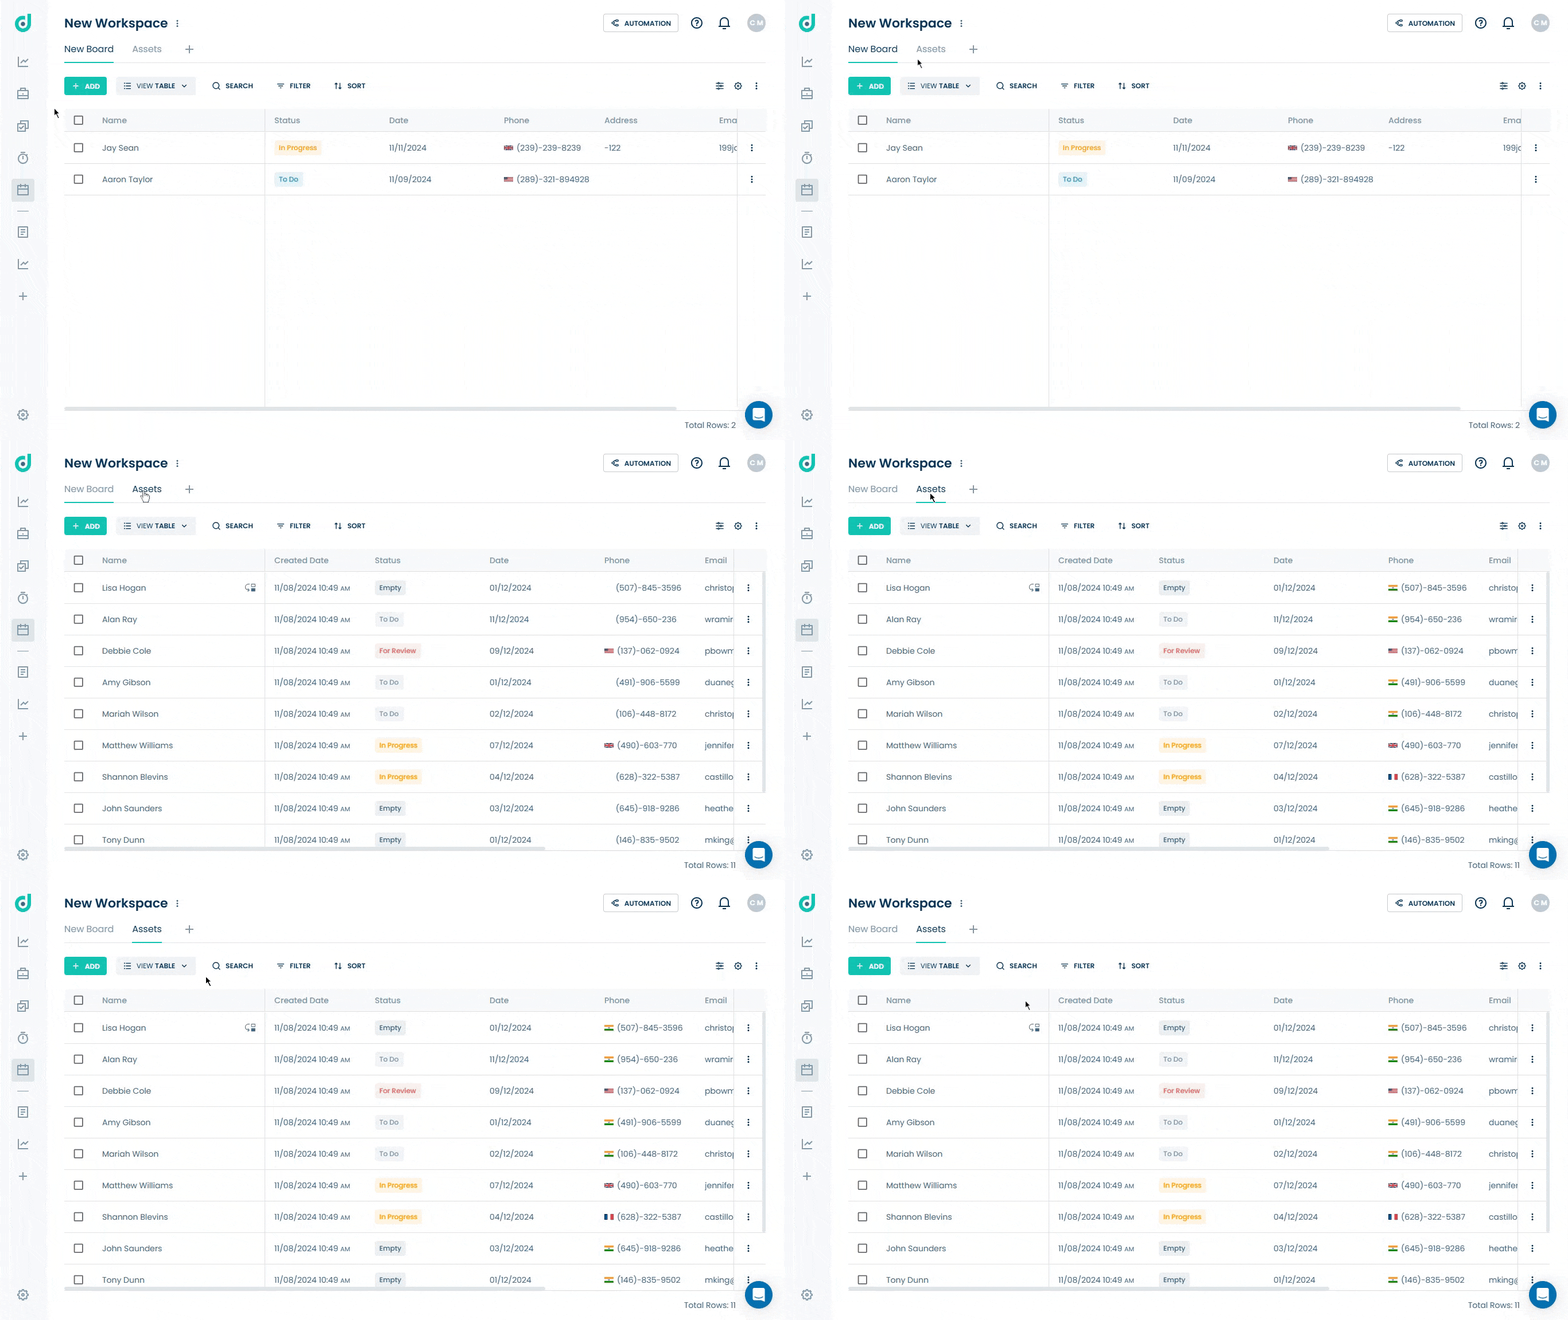
Step 2: Select the board where you want to add a budget field.
Step 3: Click on the Setting icon from the right side of the interface.
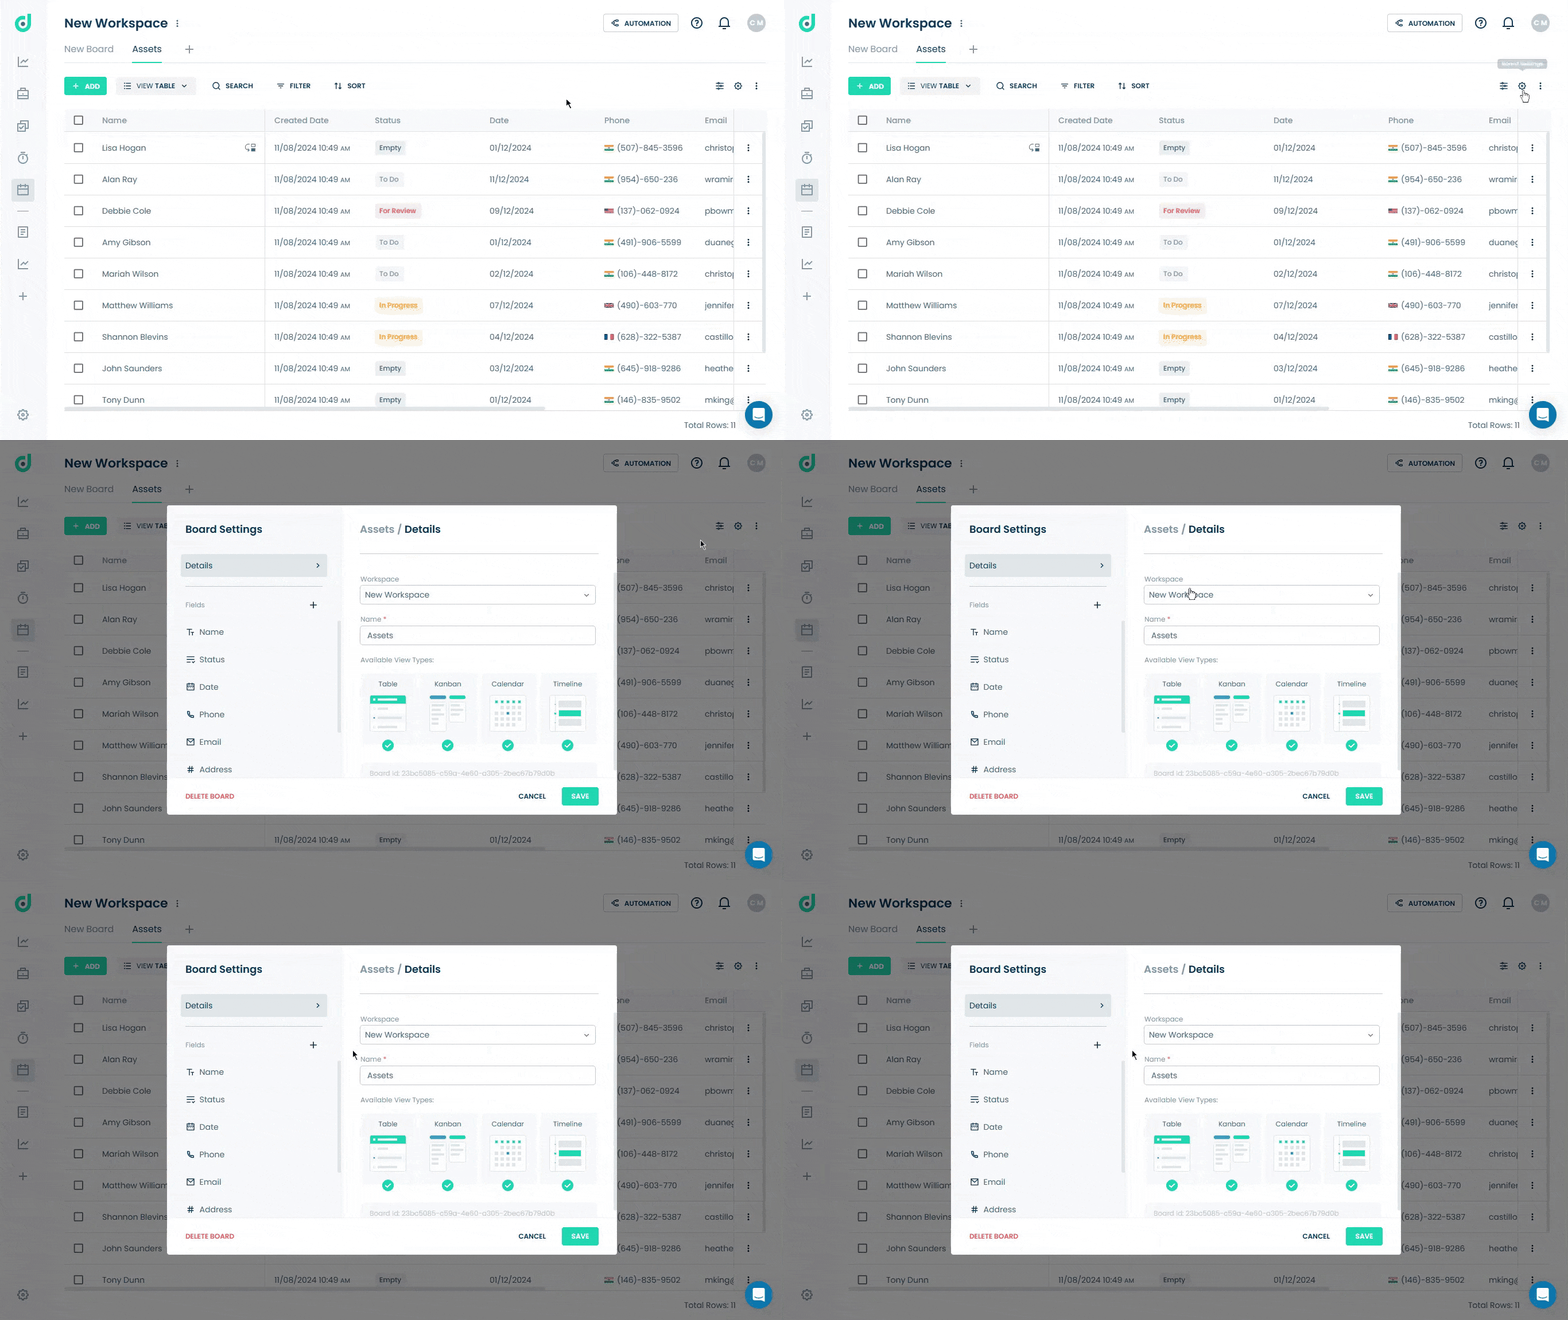
Step 4: Click on the “+” button from the field section.
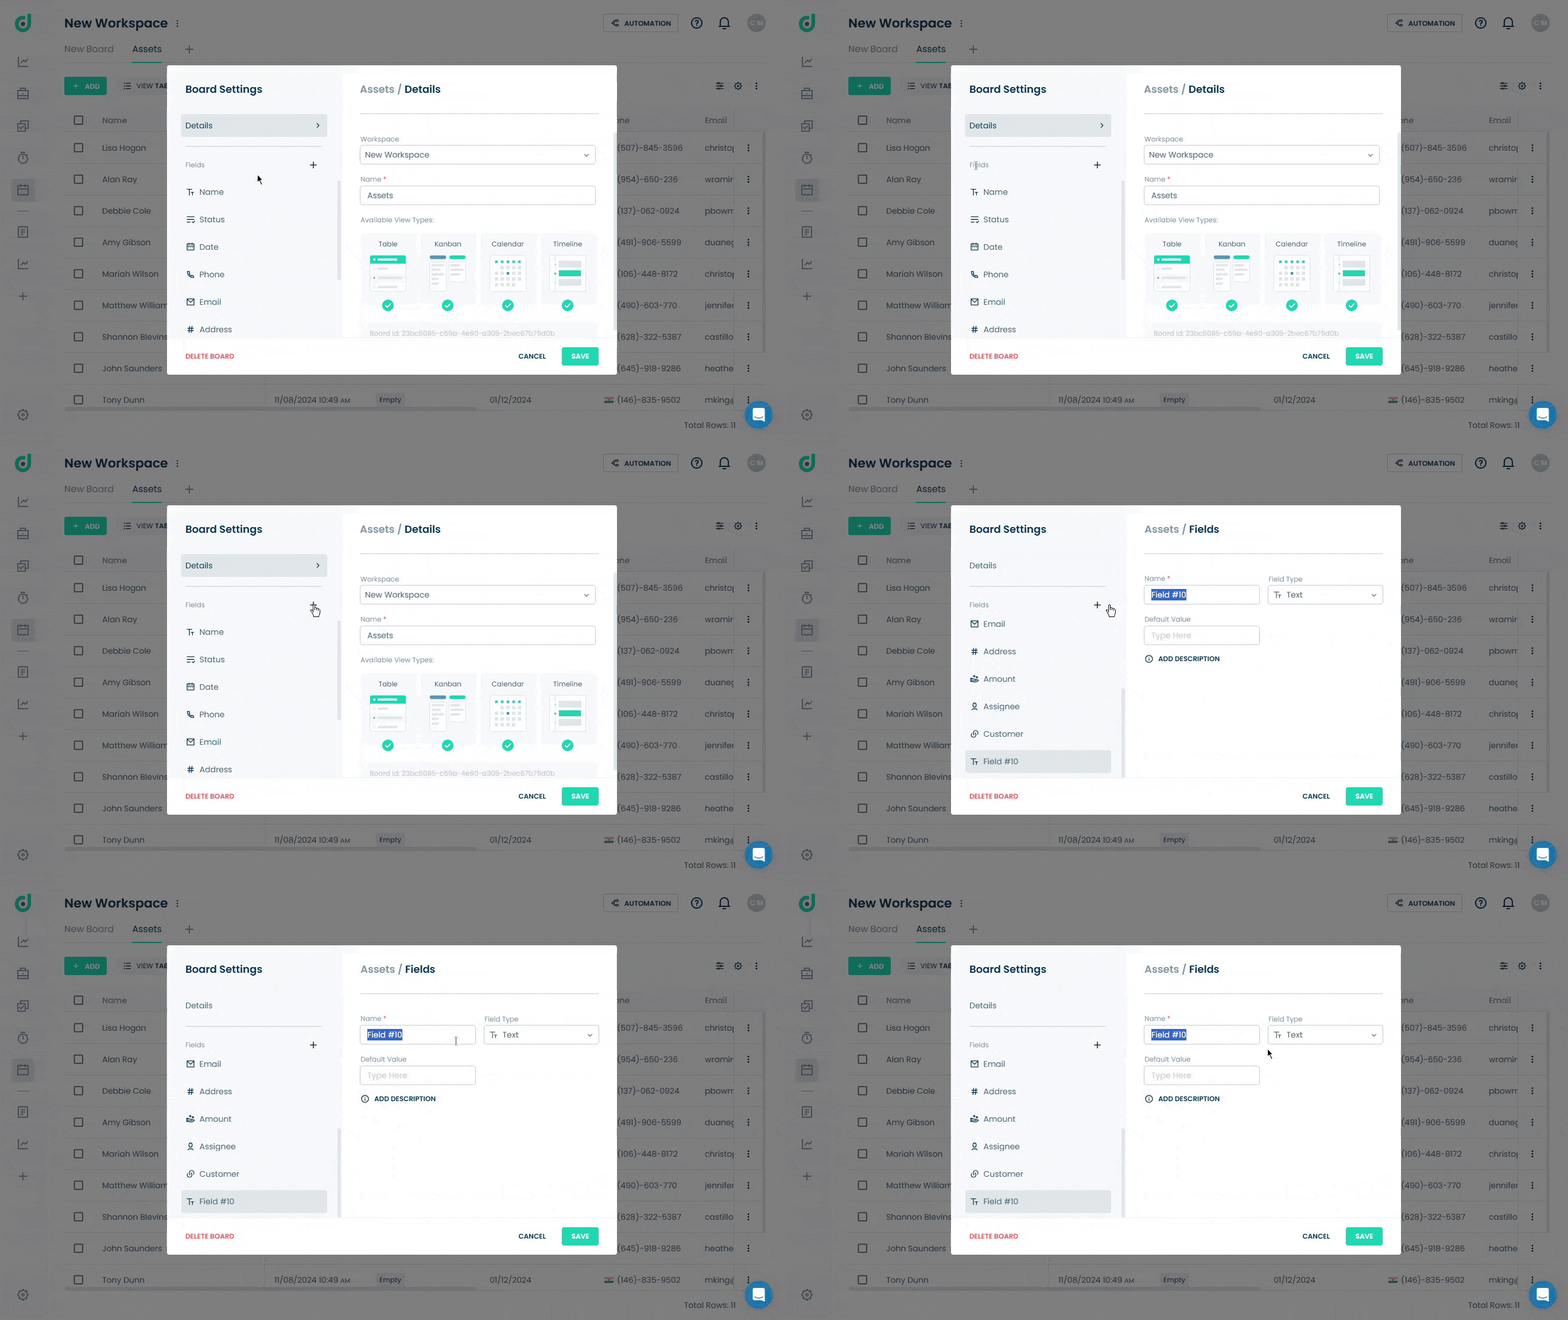
Step 5: Enter the field name and select the “Budget” field type. Add a description (optional) to provide context for the milestone.
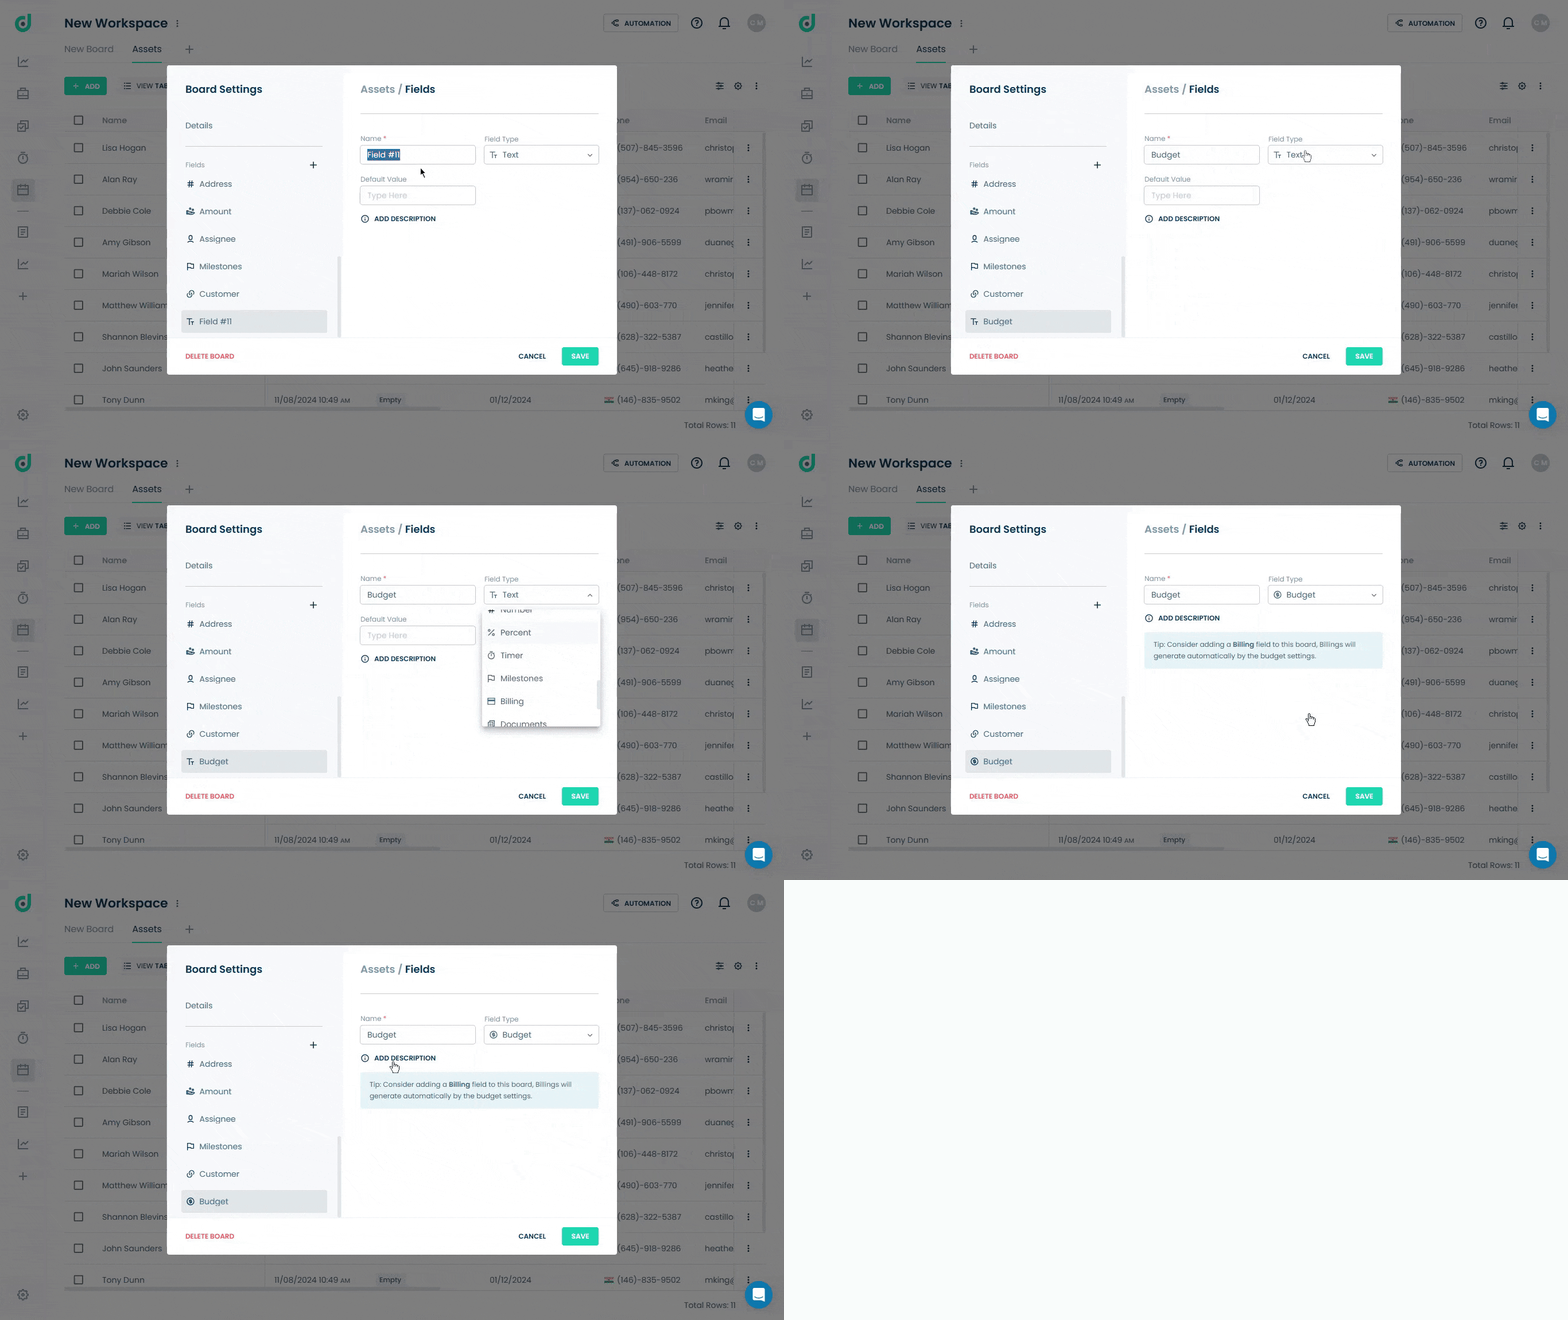
Step 6: Click on the SAVE button.
Use Budget Field
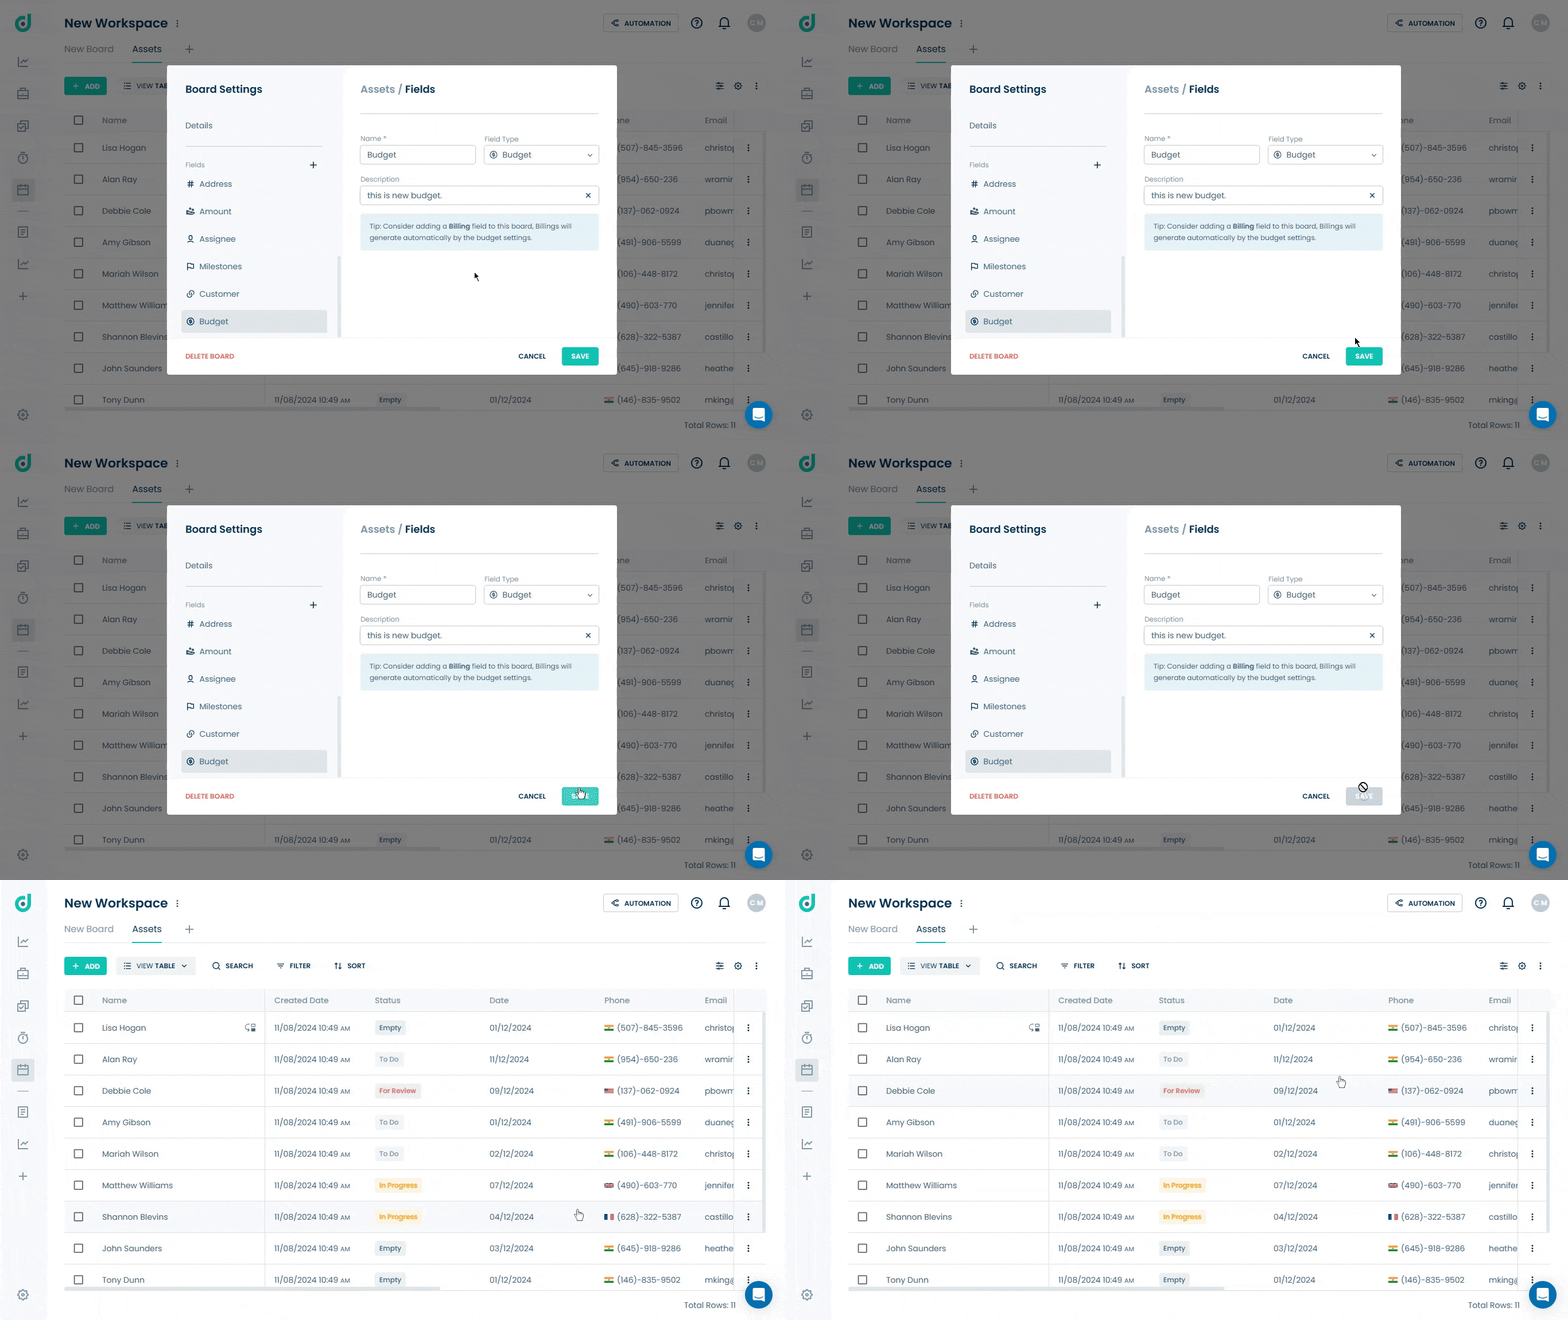
Once you have added a Budget field, you can track and manage budgets for individual records within boards effectively.
Note: To set a budget, you need to change the subscription plan to pro. For more information, refer to the How to manage subscription.
Step 1: Click on the Record you want to set a budget to.
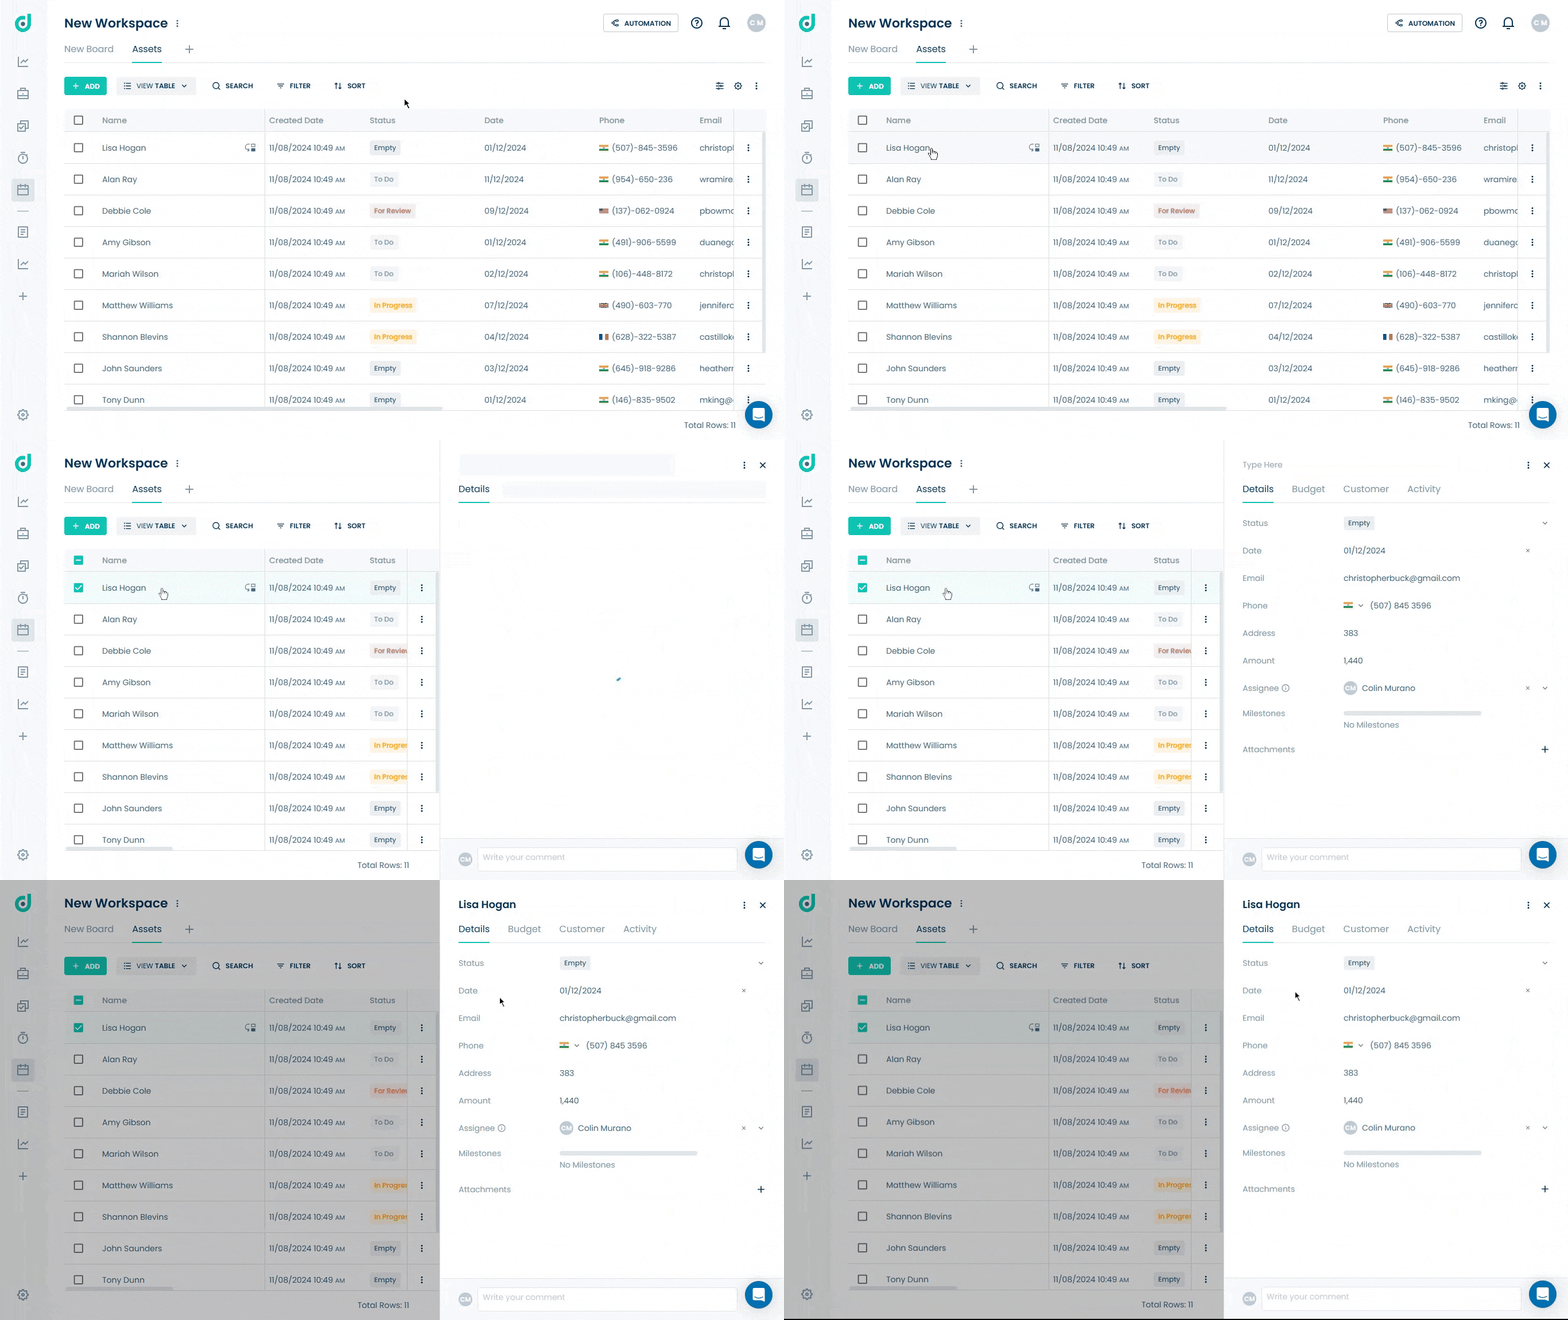
Step 2: Locate the Budget tab from within the record and click on the Add + button to add different types of budget entries.
- Package
- Item
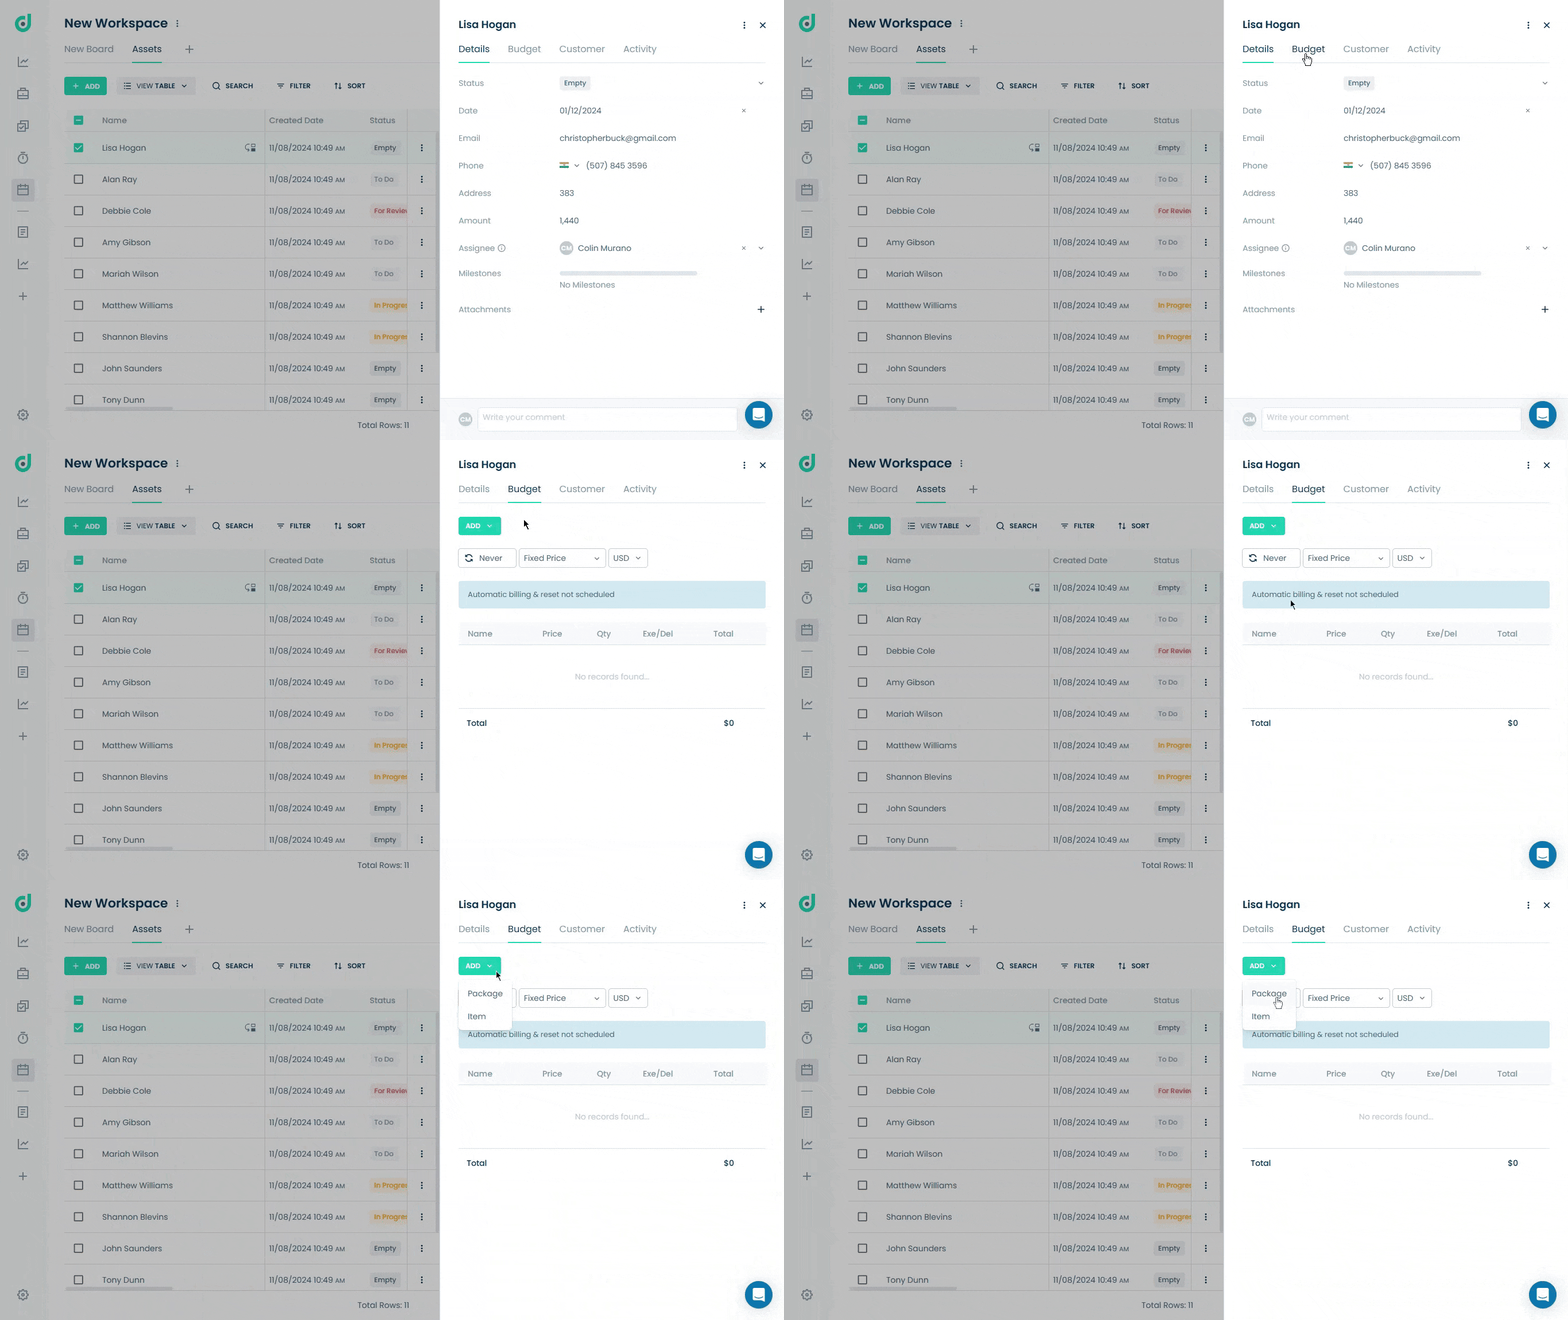
Package
Select this option if you want to create a budget entry that encompasses a group of related items or resources. This is useful for larger businesses where expenses can be categorized.
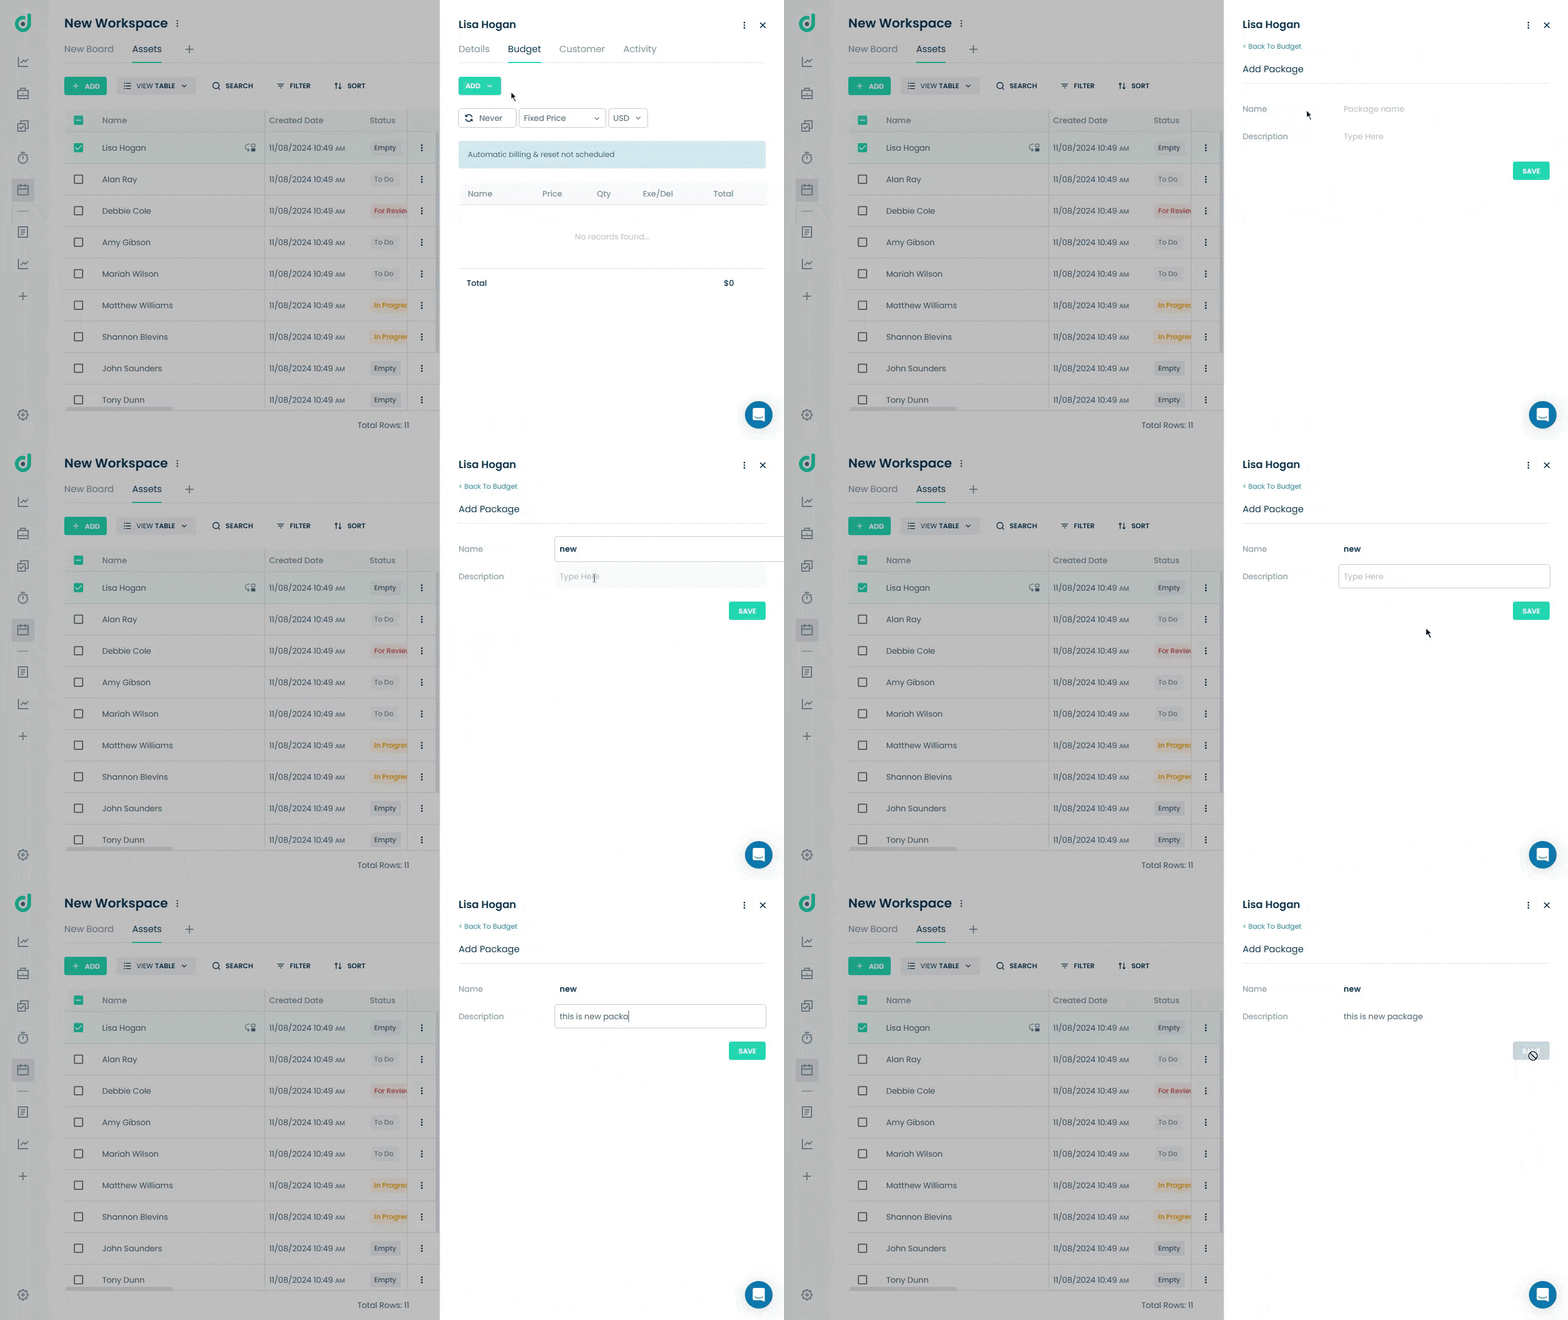
Once a package is added, you can include specific items within the package:
Step 1: Click on the three dots (ellipsis) icon and select Add item option.
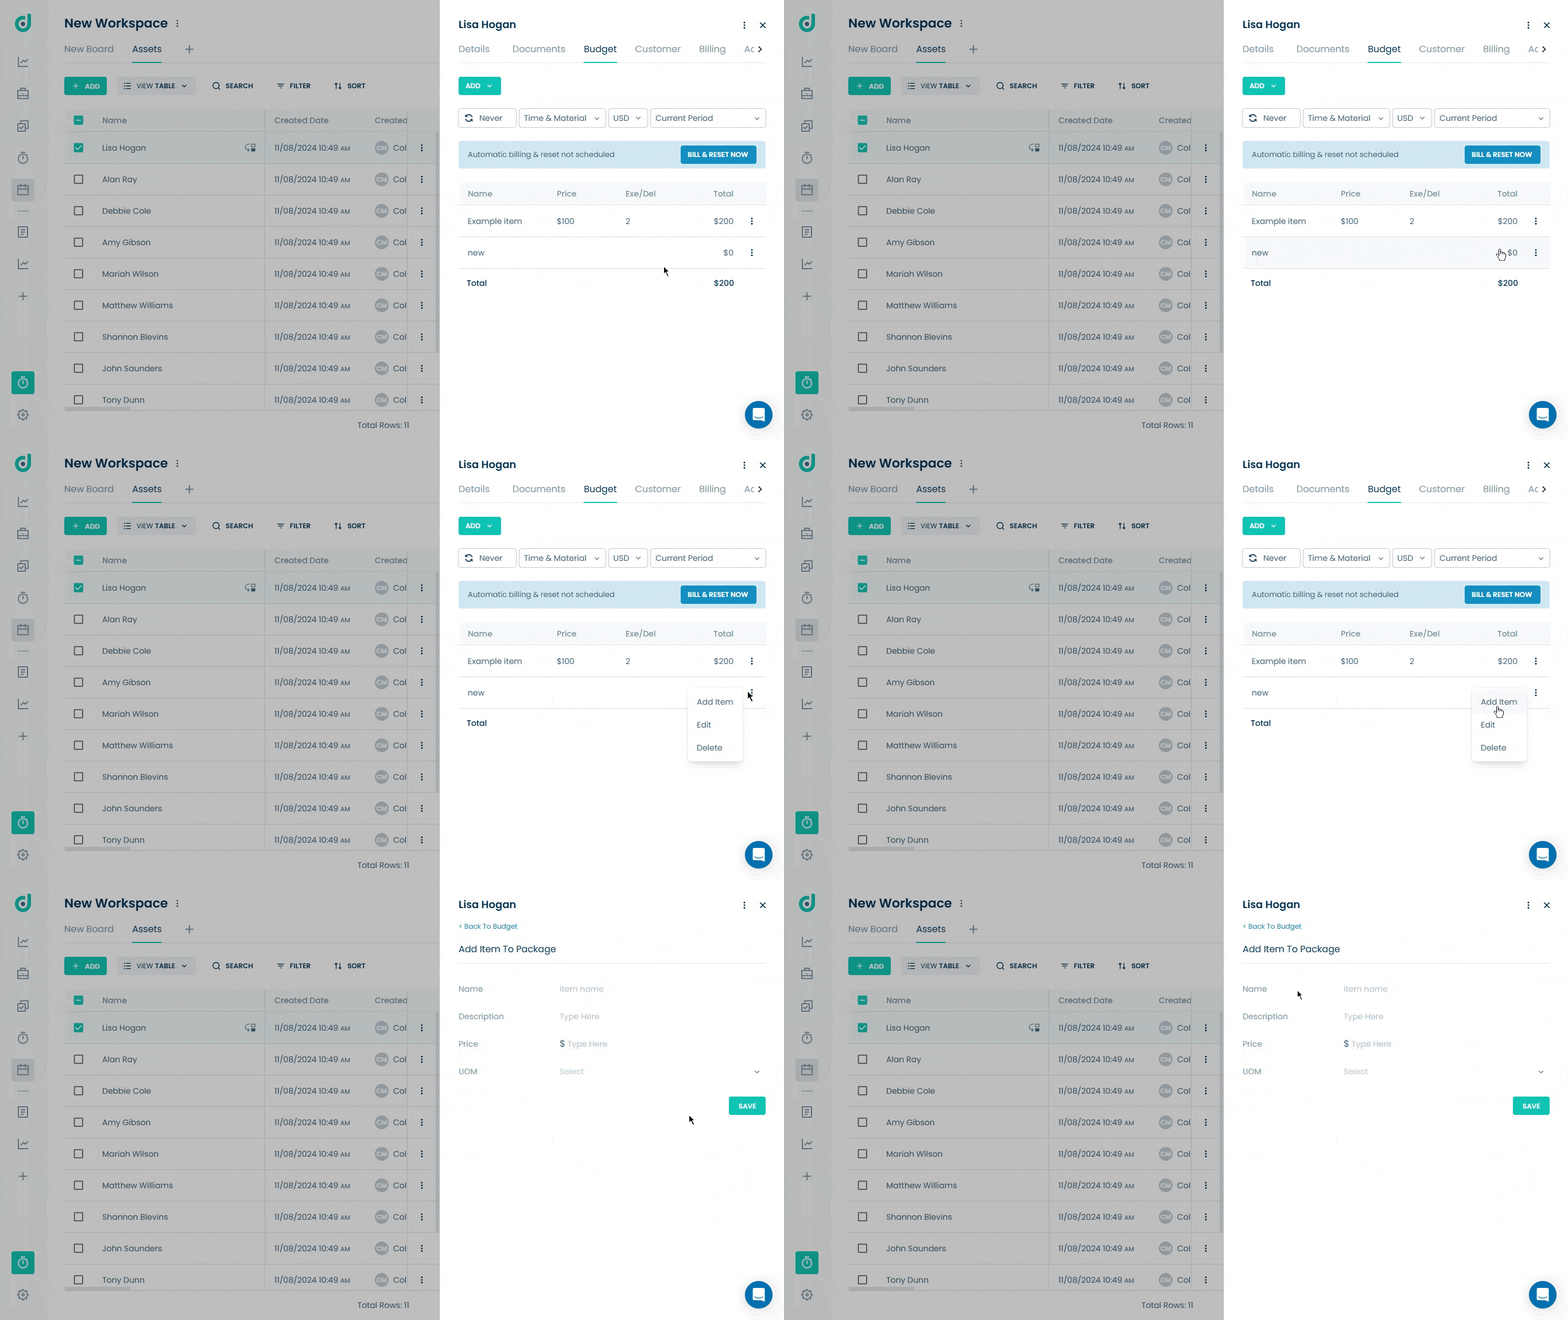
Step 2: Enter the following details for individual budget items.
| Fields | Description |
| Name | Enter a short, descriptive name for the budget item. |
| Description | (Optional) Add more information or notes about the item to clarify its purpose. |
| Price | Enter the price per unit for the item. The dollar sign indicates this is a monetary value. |
| Quantity | Only available if the pricing model is set to Fixed Price. |
| UOM (Unit of Measure) | Select the unit of measure from the dropdown (e.g., pieces, hours) to specify what the quantity represents. |
Once done, save it. You can add more related items to the package.
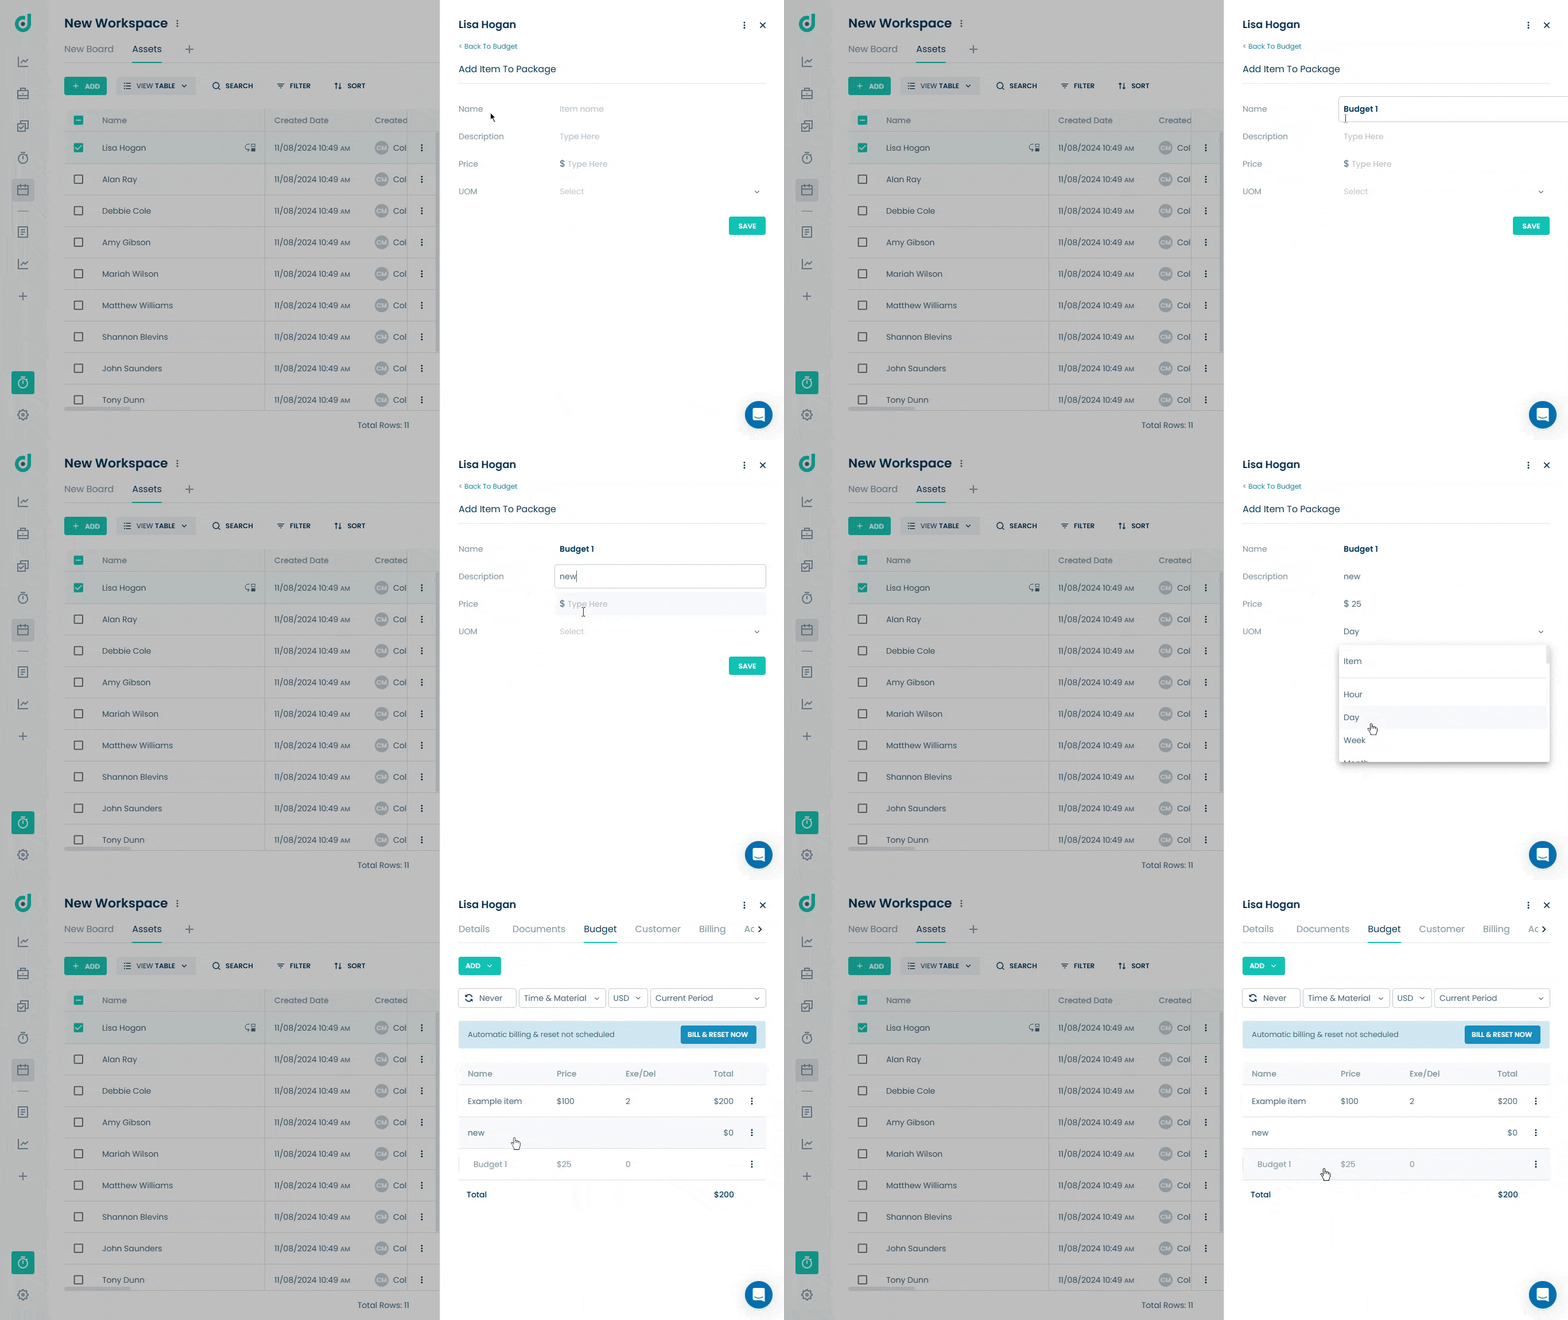
Item
Select this option to add a specific line item to your budget. This could include individual costs such as materials, labor, or other budget items associated with the business.
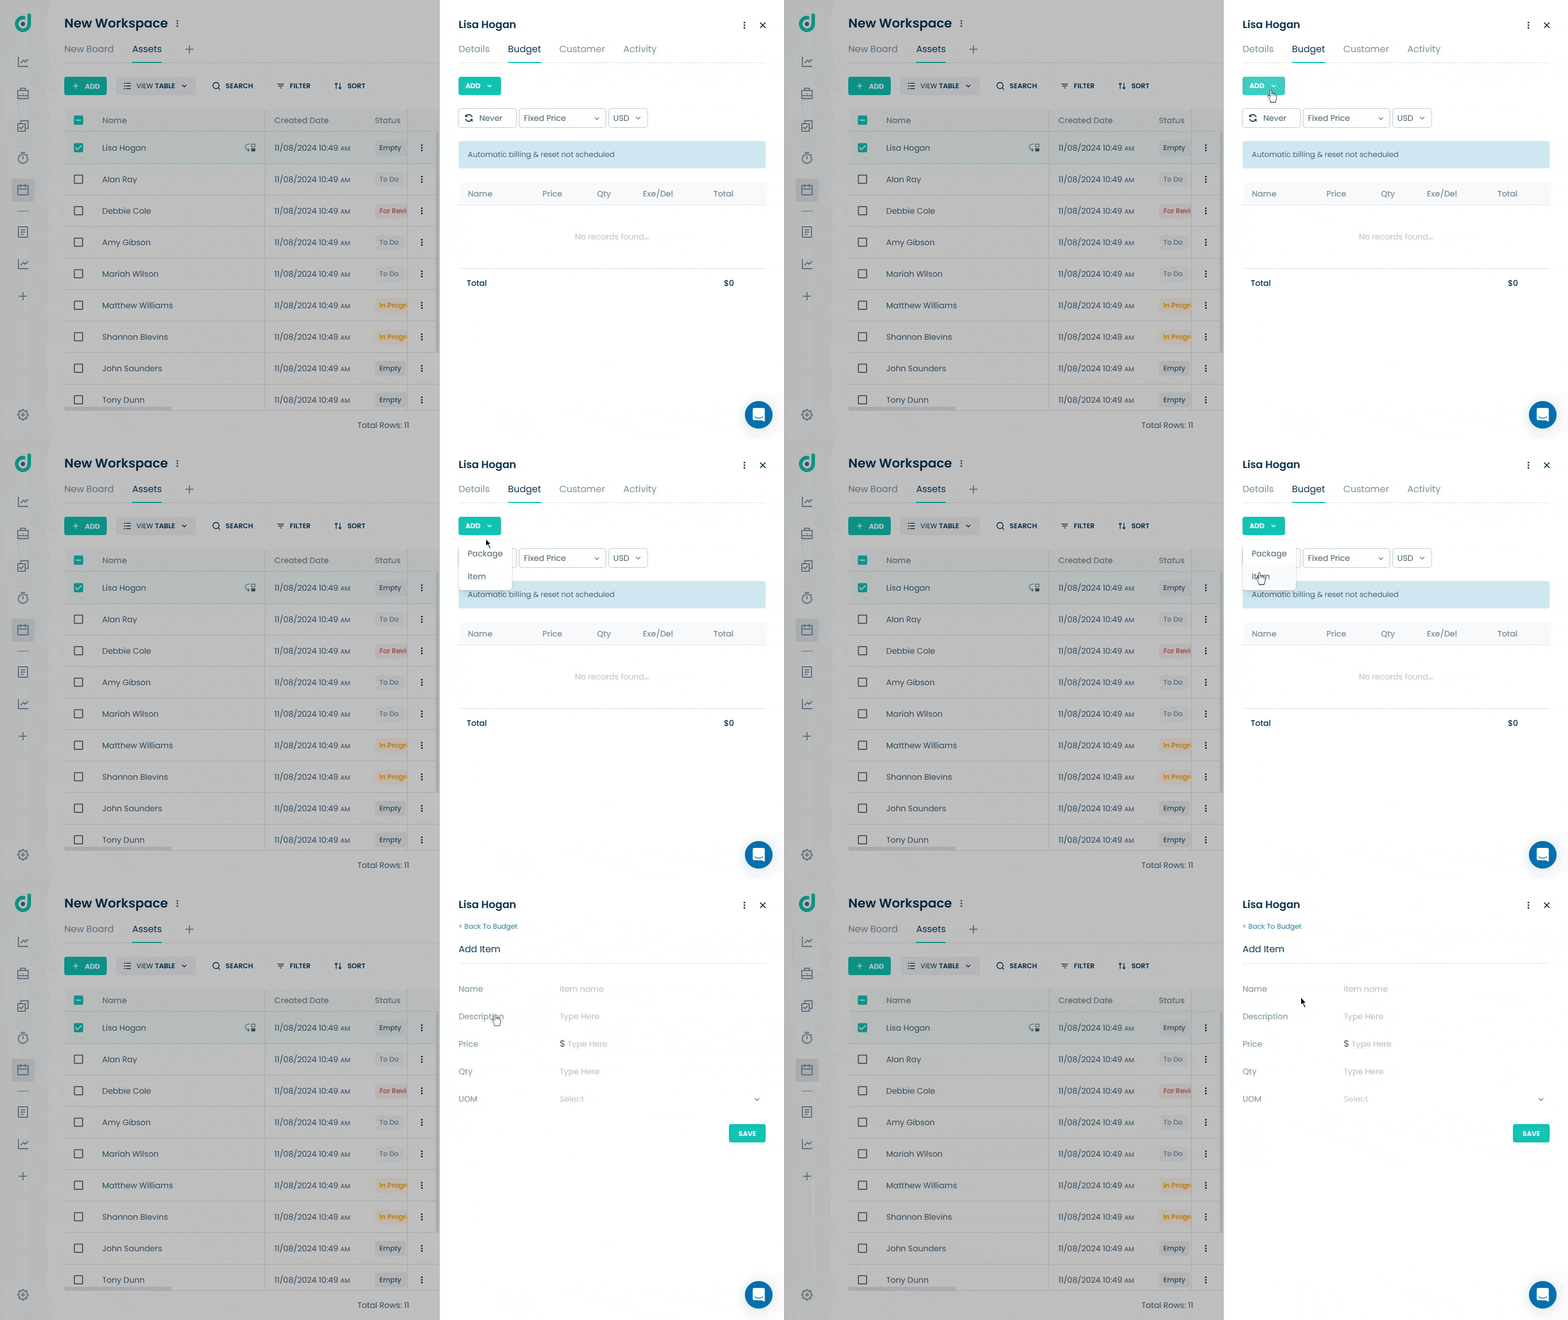
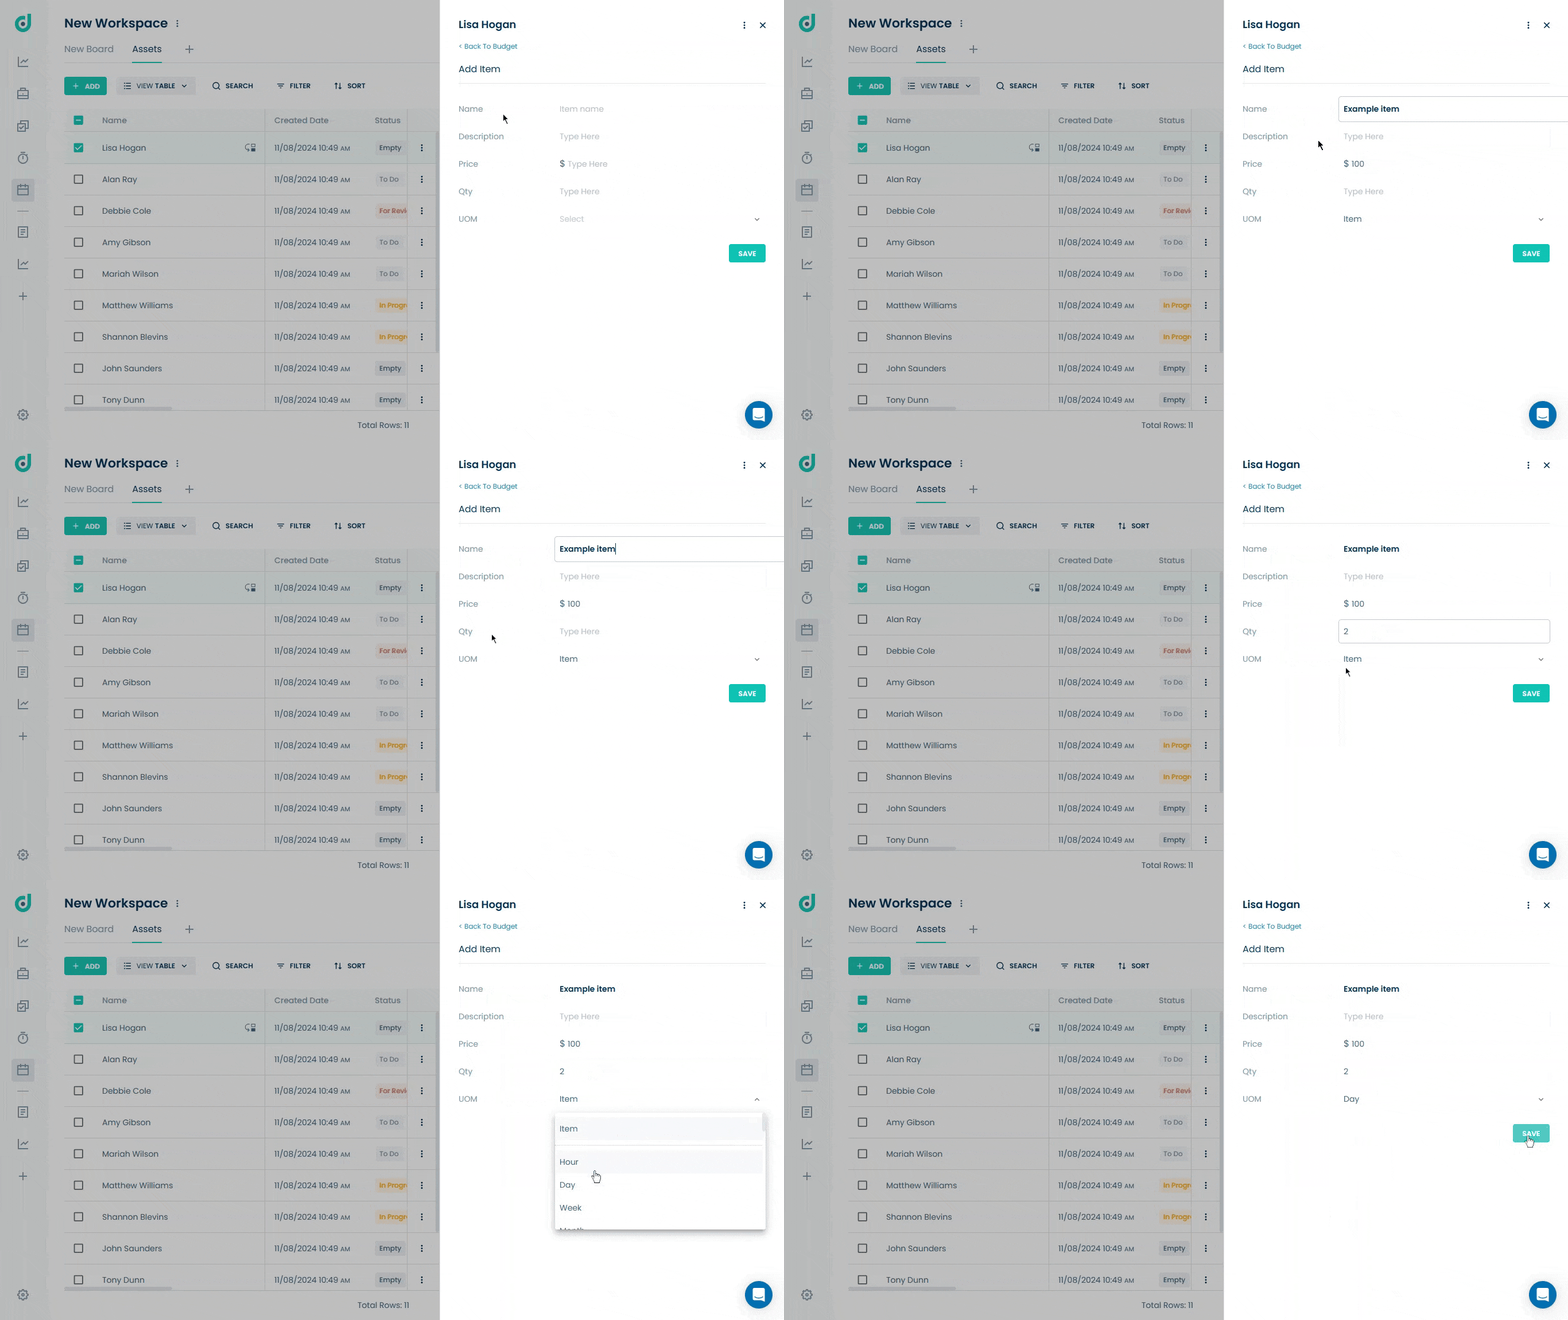
Enter the following details for individual budget items.
| Fields | Description |
| Name | Enter a short, descriptive name for the budget item. |
| Description | (Optional) Add more information or notes about the item to clarify its purpose. |
| Price | Enter the price per unit for the item. The dollar sign indicates this is a monetary value. |
| Qty | Enter the quantity of the item. This combined with the price, will calculate the total cost for this entry. |
| UOM (Unit of Measure) | Select the unit of measure from the dropdown (e.g., pieces, hours) to specify what the quantity represents. |
Configure Budget
OneDeck simplifies budgeting, pricing, and billing for your businesses with the following budget options that you configure:
Pricing Model
It supports various pricing models such as:
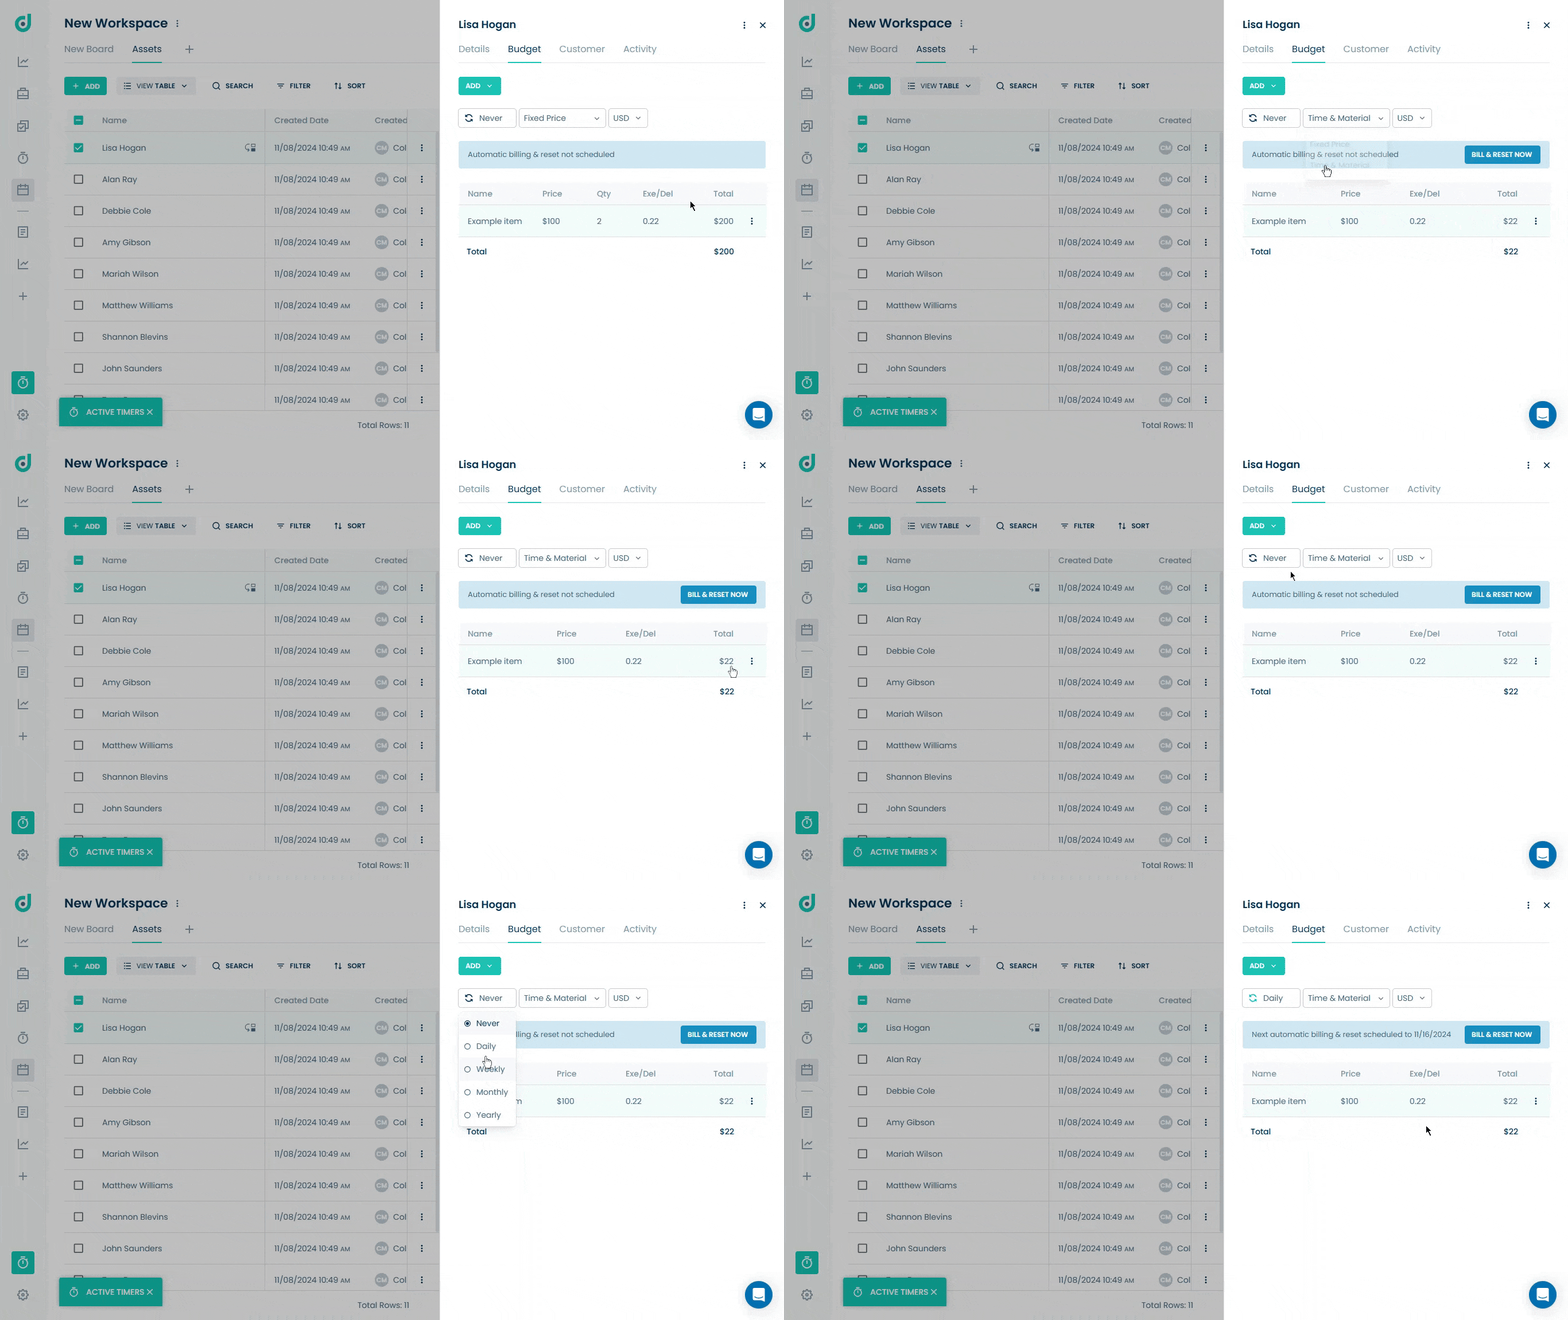
Fixed Pricing: For projects with well-defined scopes, users can set a fixed price based on the overall project requirements.
Time & Material: This model charges customers based on the actual time spent on records and materials used, through the "Time & Material" option. You can also reset the execution and delivery timeline with updated billing to a specific period.
Report Delivery
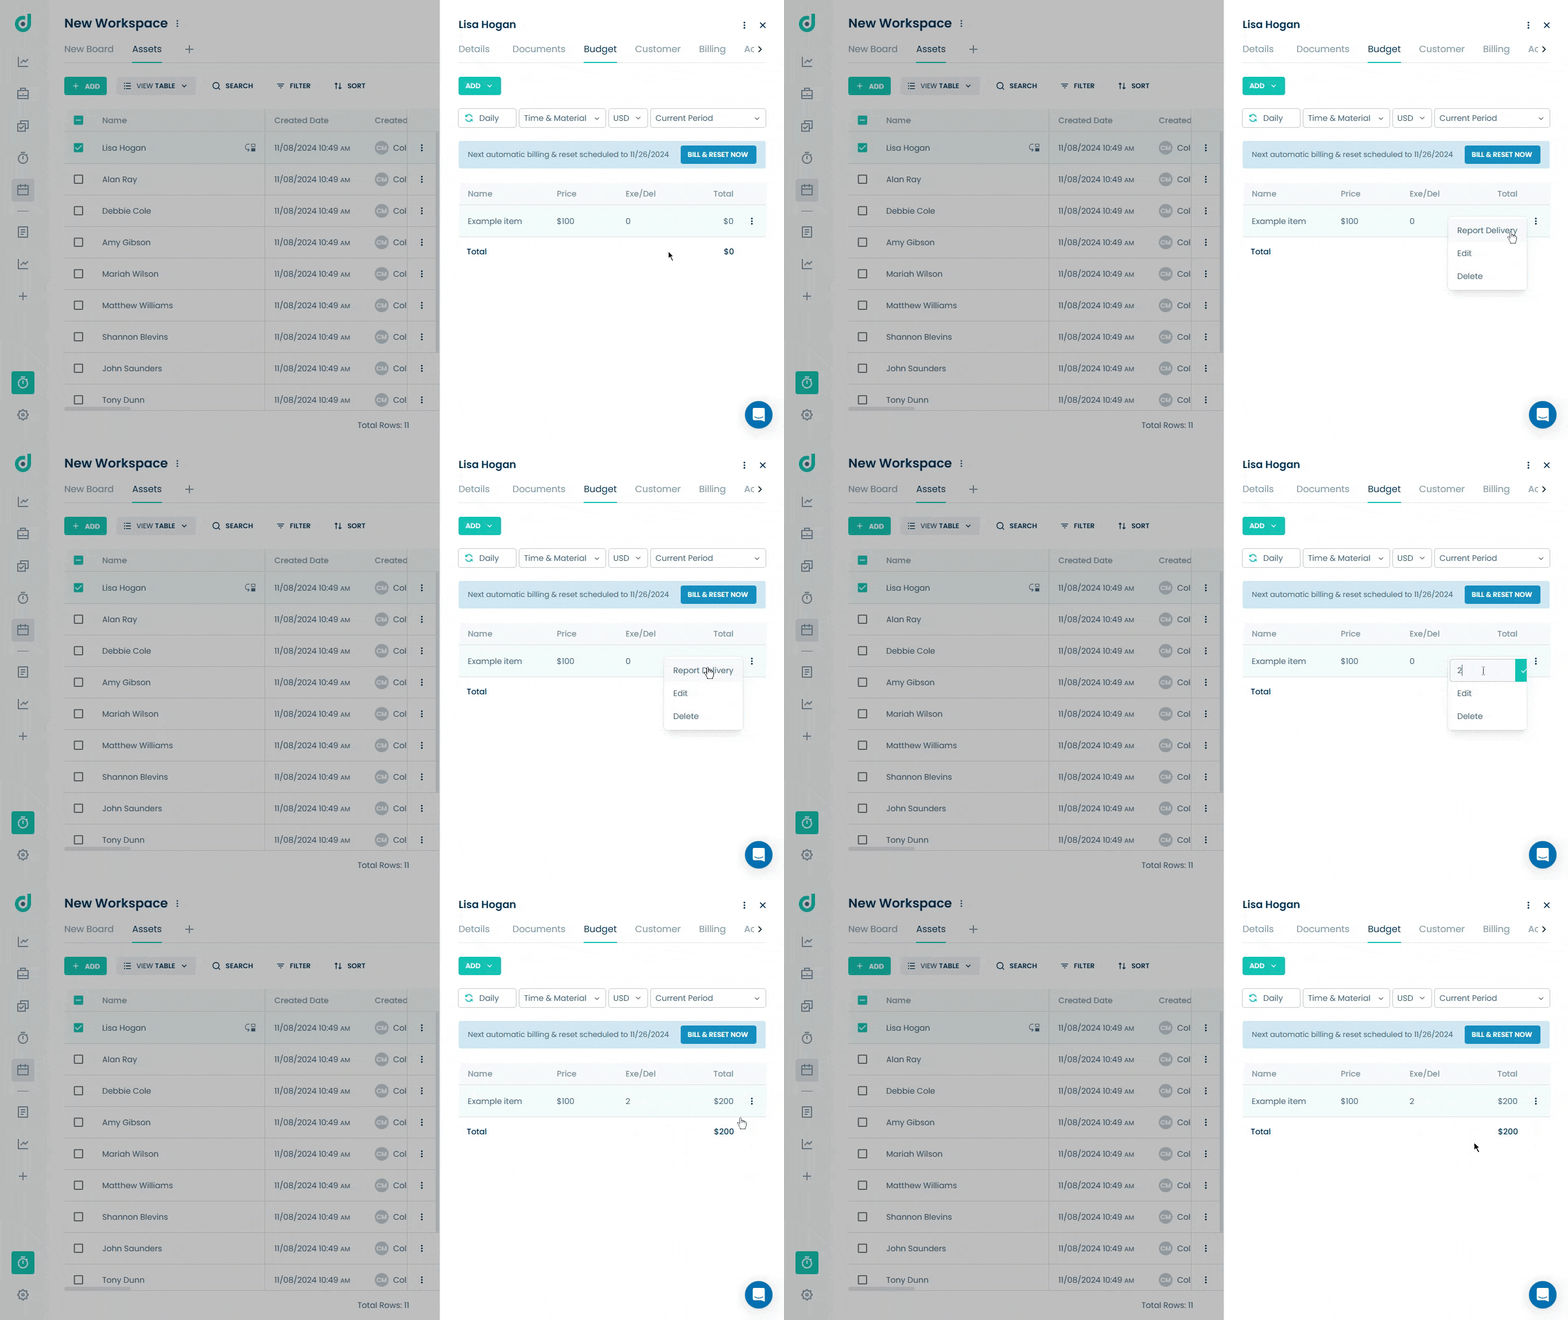
Enables users to generate the delivery of the budgeted item as complete, by selecting the “Report Delivery” option and entering the Exe/Del value, which represents specific parameters related to the delivery or execution of the item (e.g., quantity delivered, hours worked, or milestones achieved).
Budget Billing
Automatic Billing: You can set up billing schedules at predefined intervals (e.g., weekly, or monthly).
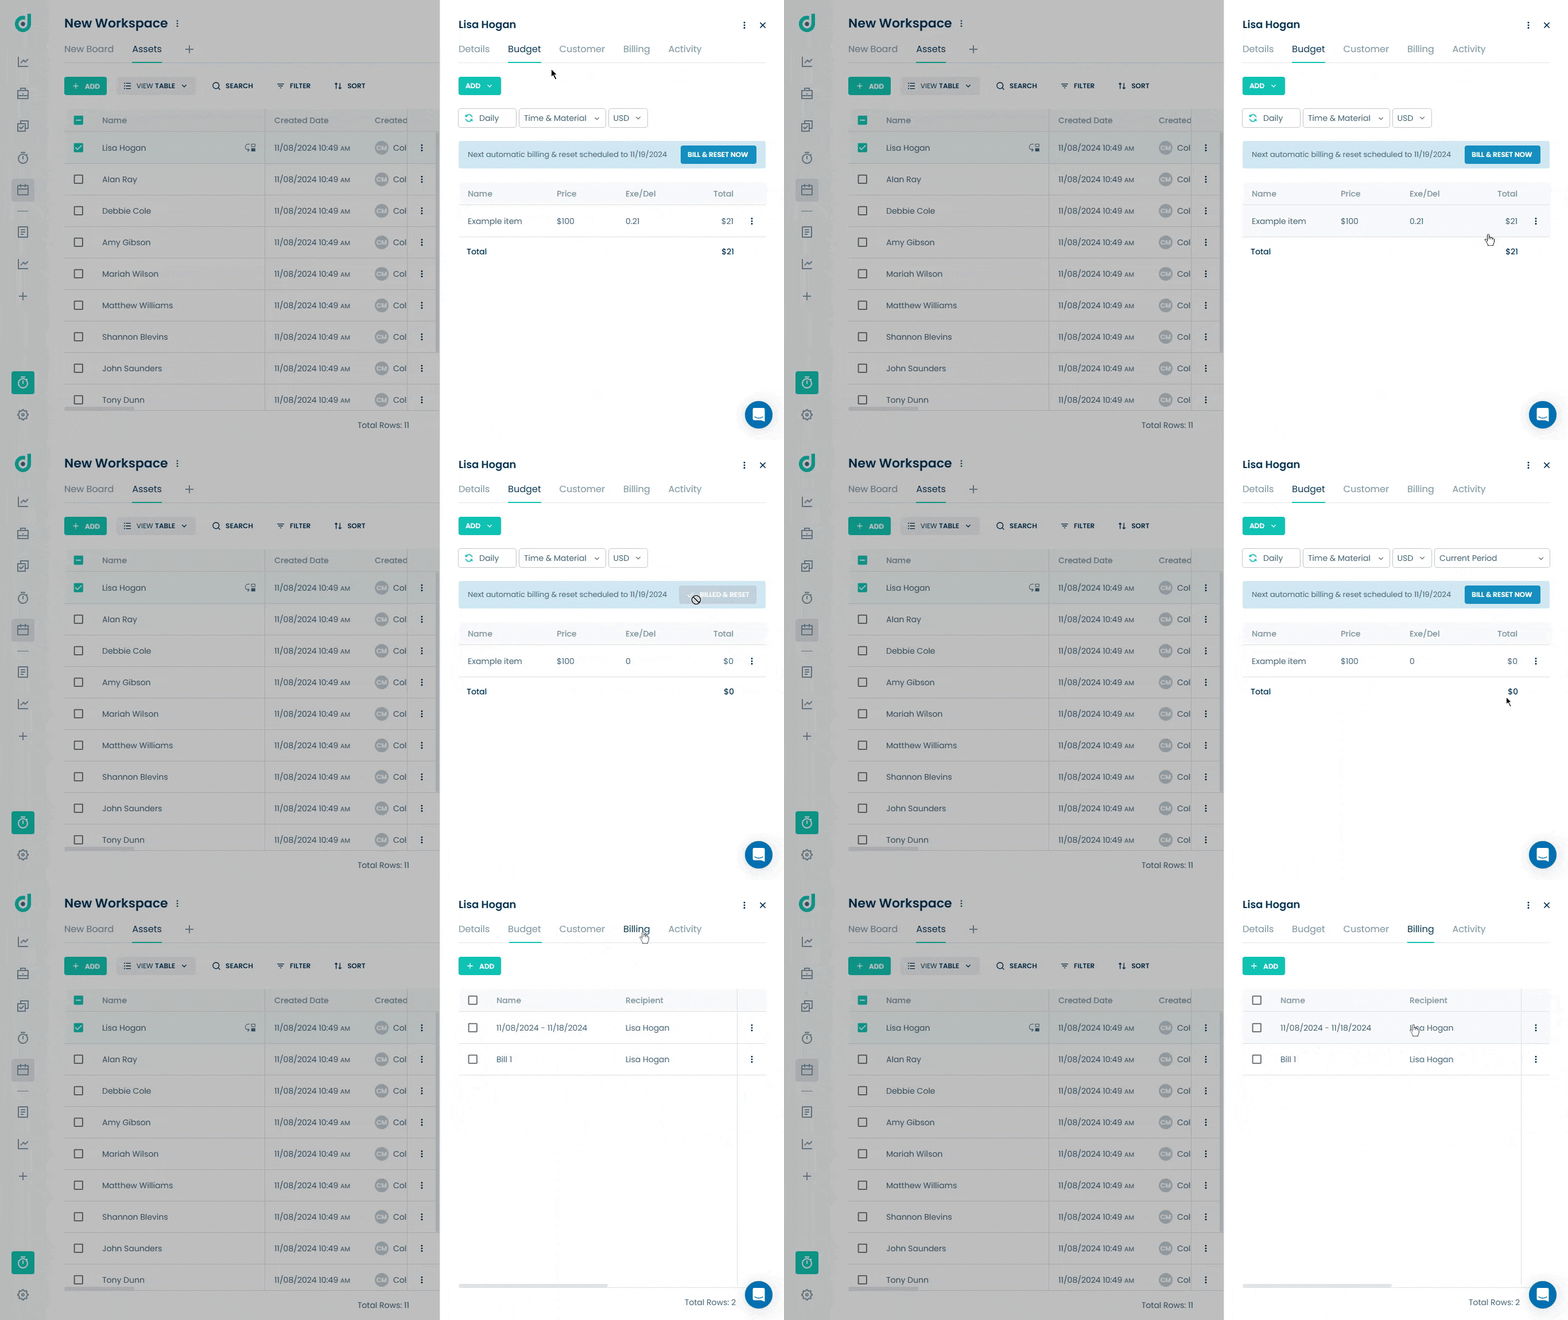
Manual billing (in Time & Material): You can also manually create a billing without waiting for the schedule, from the “Budget” tab, click the “BILL & RESET NOW” button. This is useful for urgent invoicing or when adjustments to the current budget have been made.
Timer
Allows users to track time spent on specific budgets, that bill clients based on time worked such as:
Start/Stop: Users can easily start and stop timers to capture accurate time spent on budget.
Hourly Rate: Users can assign hourly rates to set budgets, allowing for automatic calculation of billing amounts based on recorded time. For more information, refer to the Timer document.
Budget Repeat
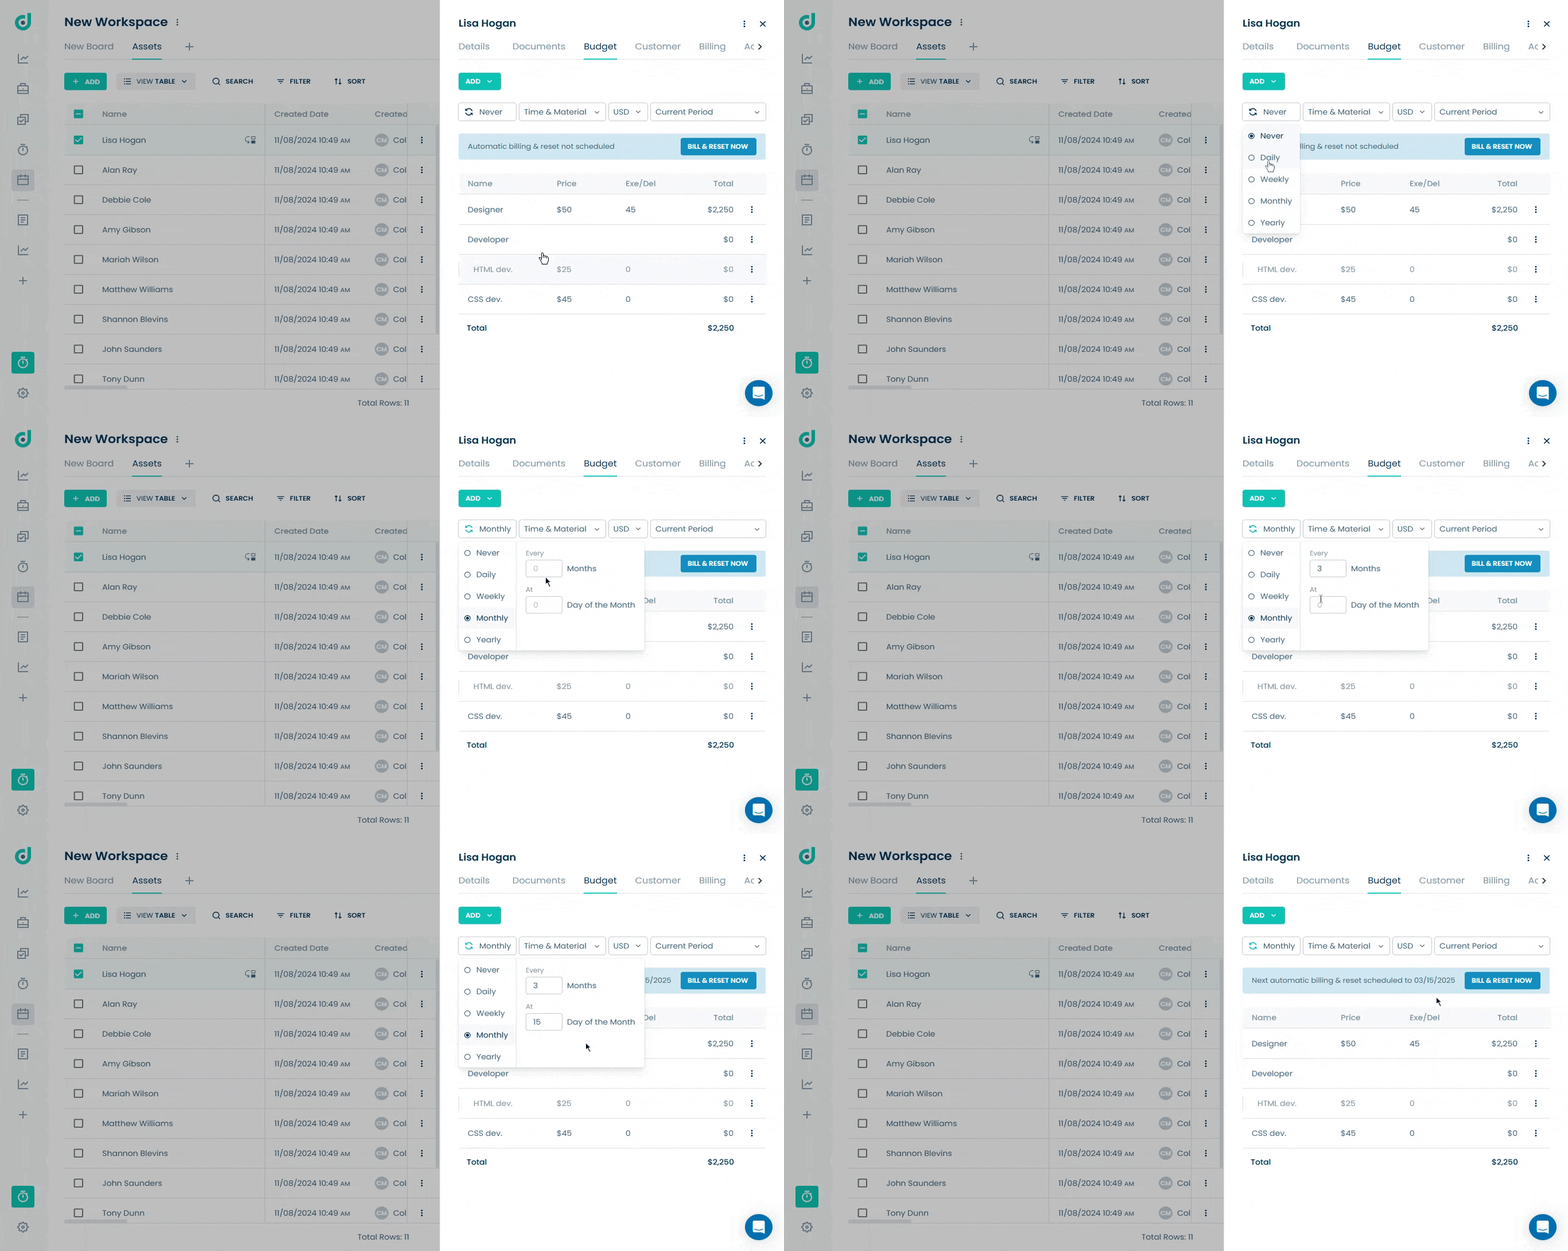
Allows you to streamline financial management by setting recurring budgets for client billing cycles. For example, set a monthly budget to bill a client $500 for Google Ads campaigns on the 1st of every month.
To do this, go to the Budget tab, click on the Budget Repeat option, and select a recurrence option:
| Options | Description | |
| Never | The budget will not be repeated automatically. | |
| Daily | The budget repeats every day. | |
| Weekly | Set the budget to repeat every week by selecting the which day (Monday - Sunday). | |
| Monthly |
Enables to set a budget to repeat on a monthly interval. The configuration includes: Every [0] Month: Specify how often (in months) the budget should be repeated. At [0] Day of the Month: Choose the exact day of the month for the repeat. |
|
| Yearly |
Enables users to set a budget to repeat every year. The configuration includes: Every : Specify in which month of the year the budget should repeat. At [0] Day of the Month: Choose the exact day of the month for the repeat. |
