OneDeck Help Center
How to Integrate OneDeck with Other Apps
OneDeck integrates with over 1,000 applications, directly through webhook connections or through third party tools like Make.com and Zapier, enabling automated workflows to keep your data synchronized, centralized, and up-to-date.
In this documentation, we’ll walk you through the steps to integrate OneDeck with other apps.
Let’s get started 🚀
Direct Webhook Connection
OneDeck lets you automate workflows by directly integrating with applications like Slack, Microsoft Teams, GitHub and more using webhook URLs.
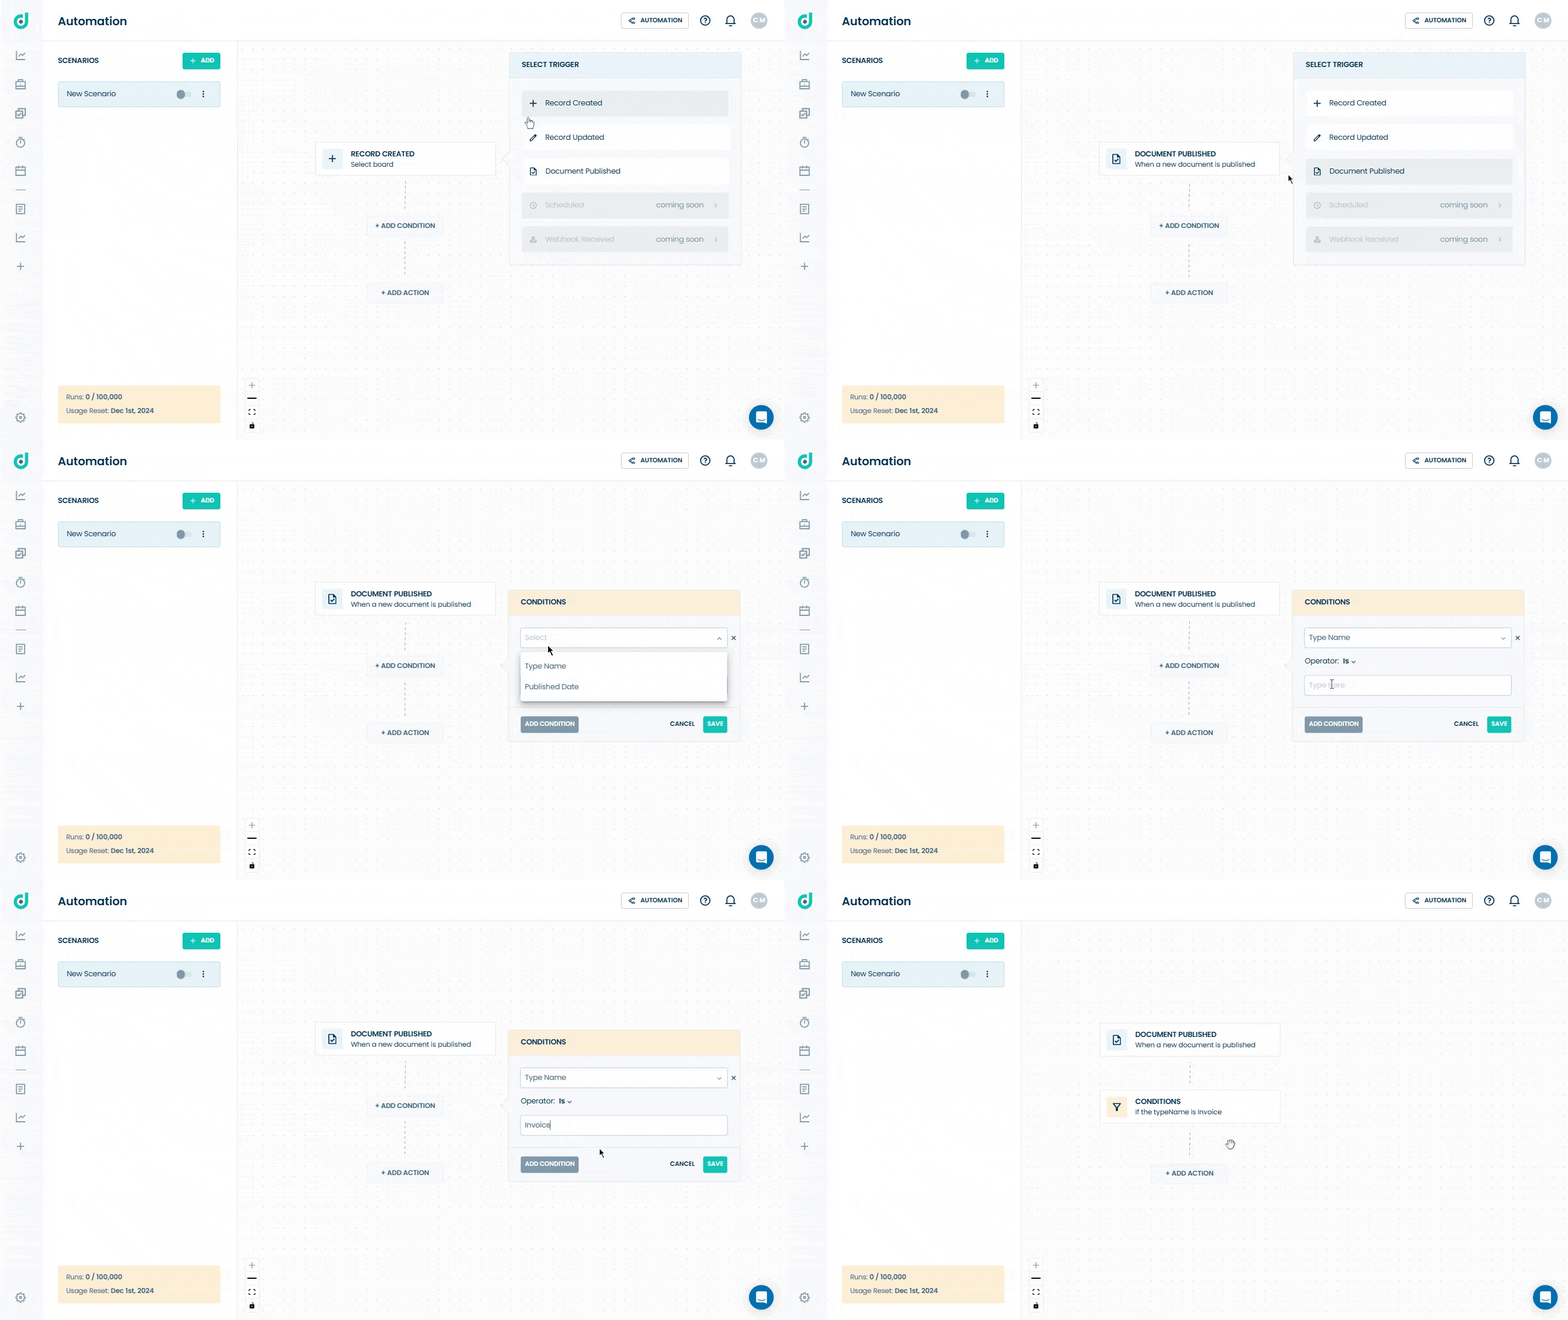
Step 1: Create an automated workflow, by adding a scenario, selecting one trigger option and specify a condition with logical operators.
Step 2: Generate Webhook URL from your application. For more information on creating webhooks, refer to this link.
Step 3: Add the action HTTP Request (send webhook) and paste the application’s webhook URL to which you want to integrate.
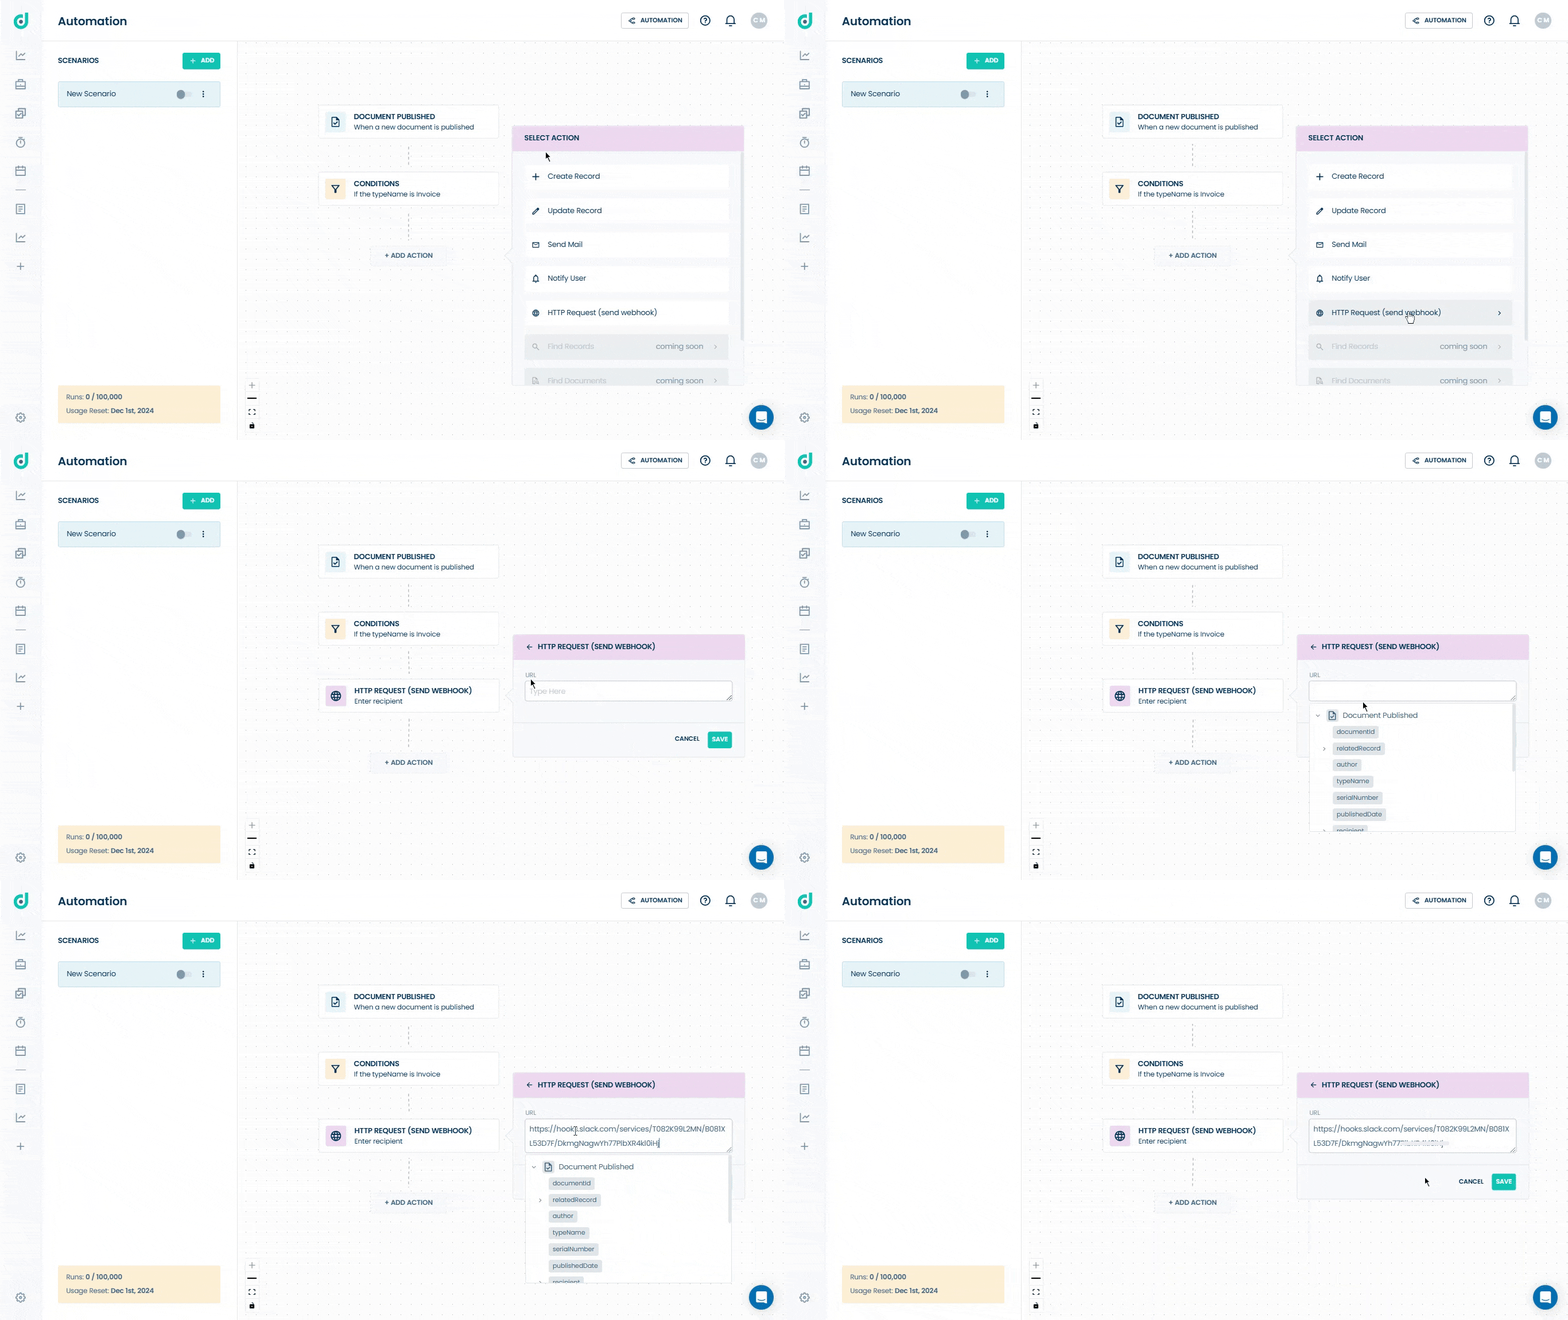
Step 4: Once you pasted the webhook URL, click on the Save button.
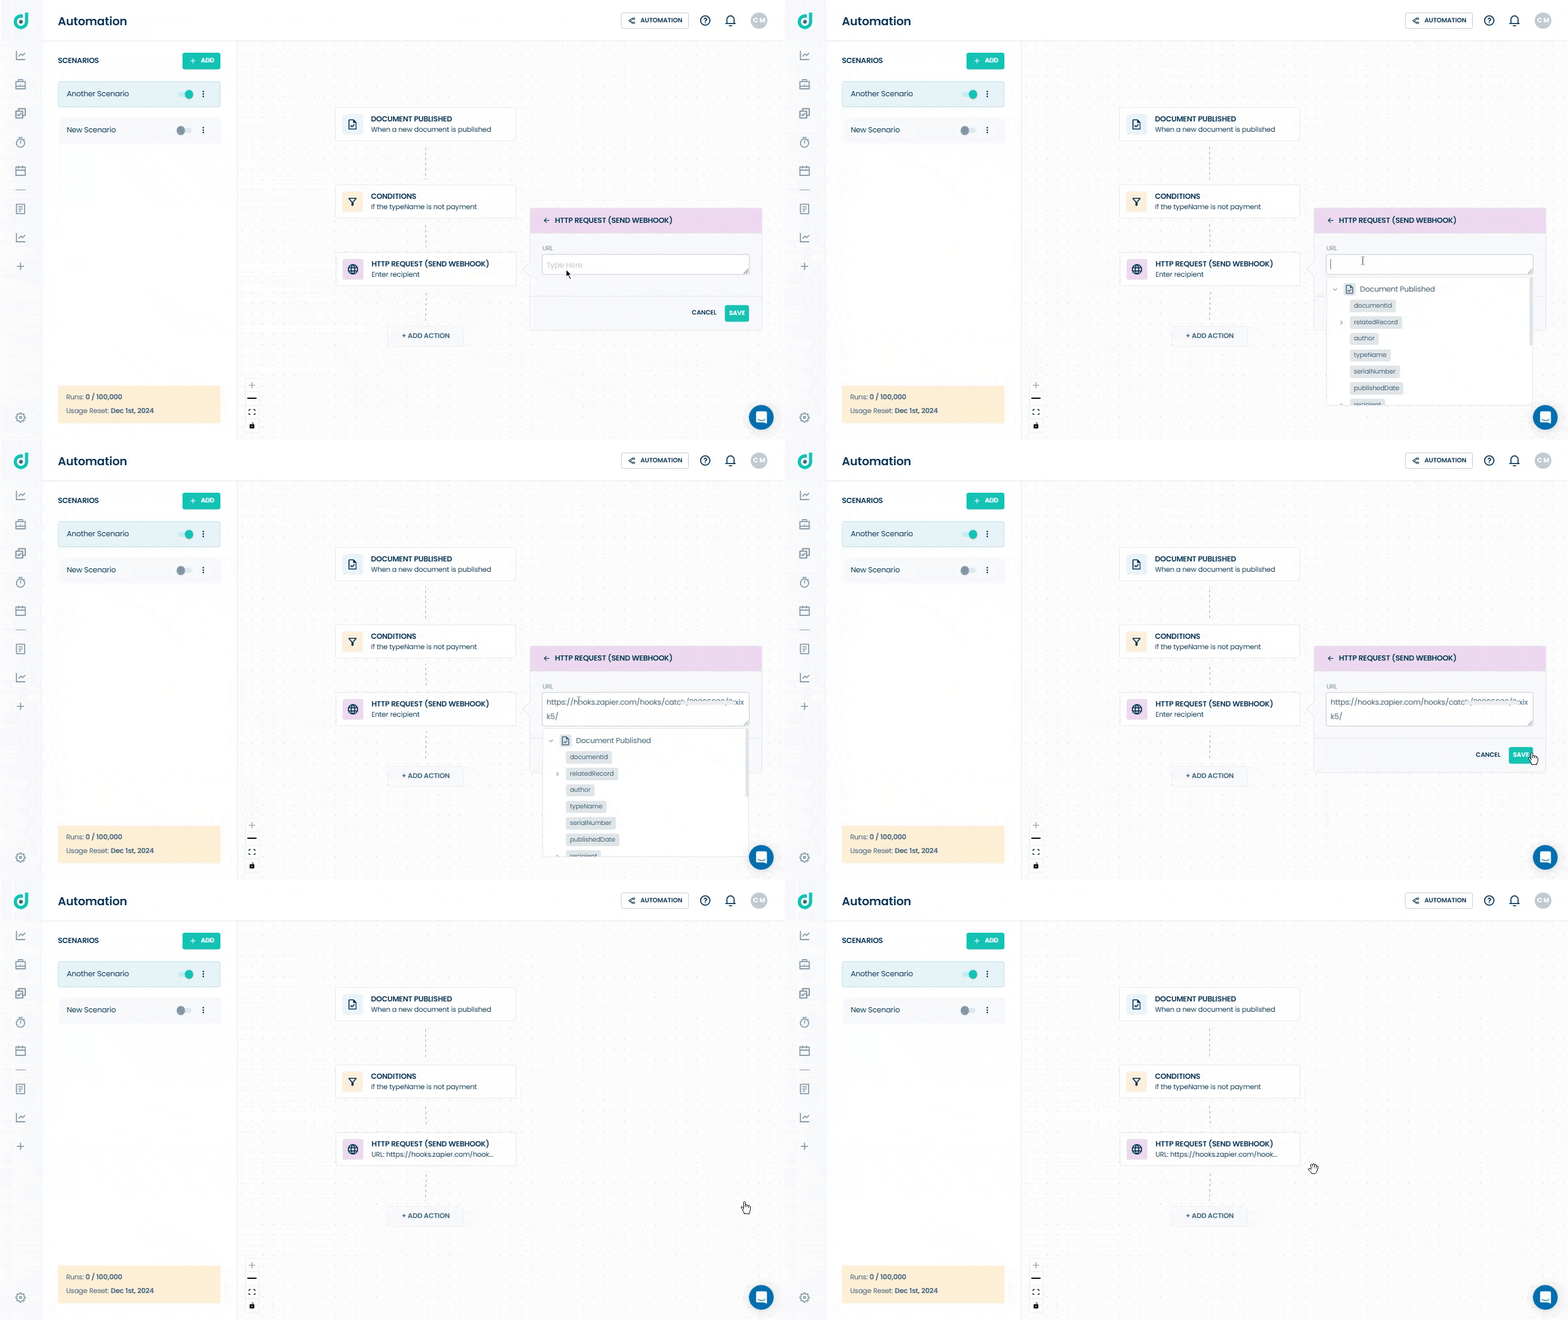
This will trigger specific actions in the integrated application based on triggers that occur within OneDeck. For example, when a document is published in OneDeck, a message can be automatically posted in a designated Slack channel to inform the team.
Indirectly Via Third-Party Tools
OneDeck enables you to streamline workflows by integrating with third-party tools using webhooks and then creating custom workflows there or from customizable templates to automate tasks seamlessly across platforms.
Method I: Create Automated Workflows
Allows you to create custom automated workflows that connect OneDeck with other applications, enabling task automation across platforms via third-party tools such as:
Make.com
Step 1: Log into your Make.com account and click on the Create a new scenario button.
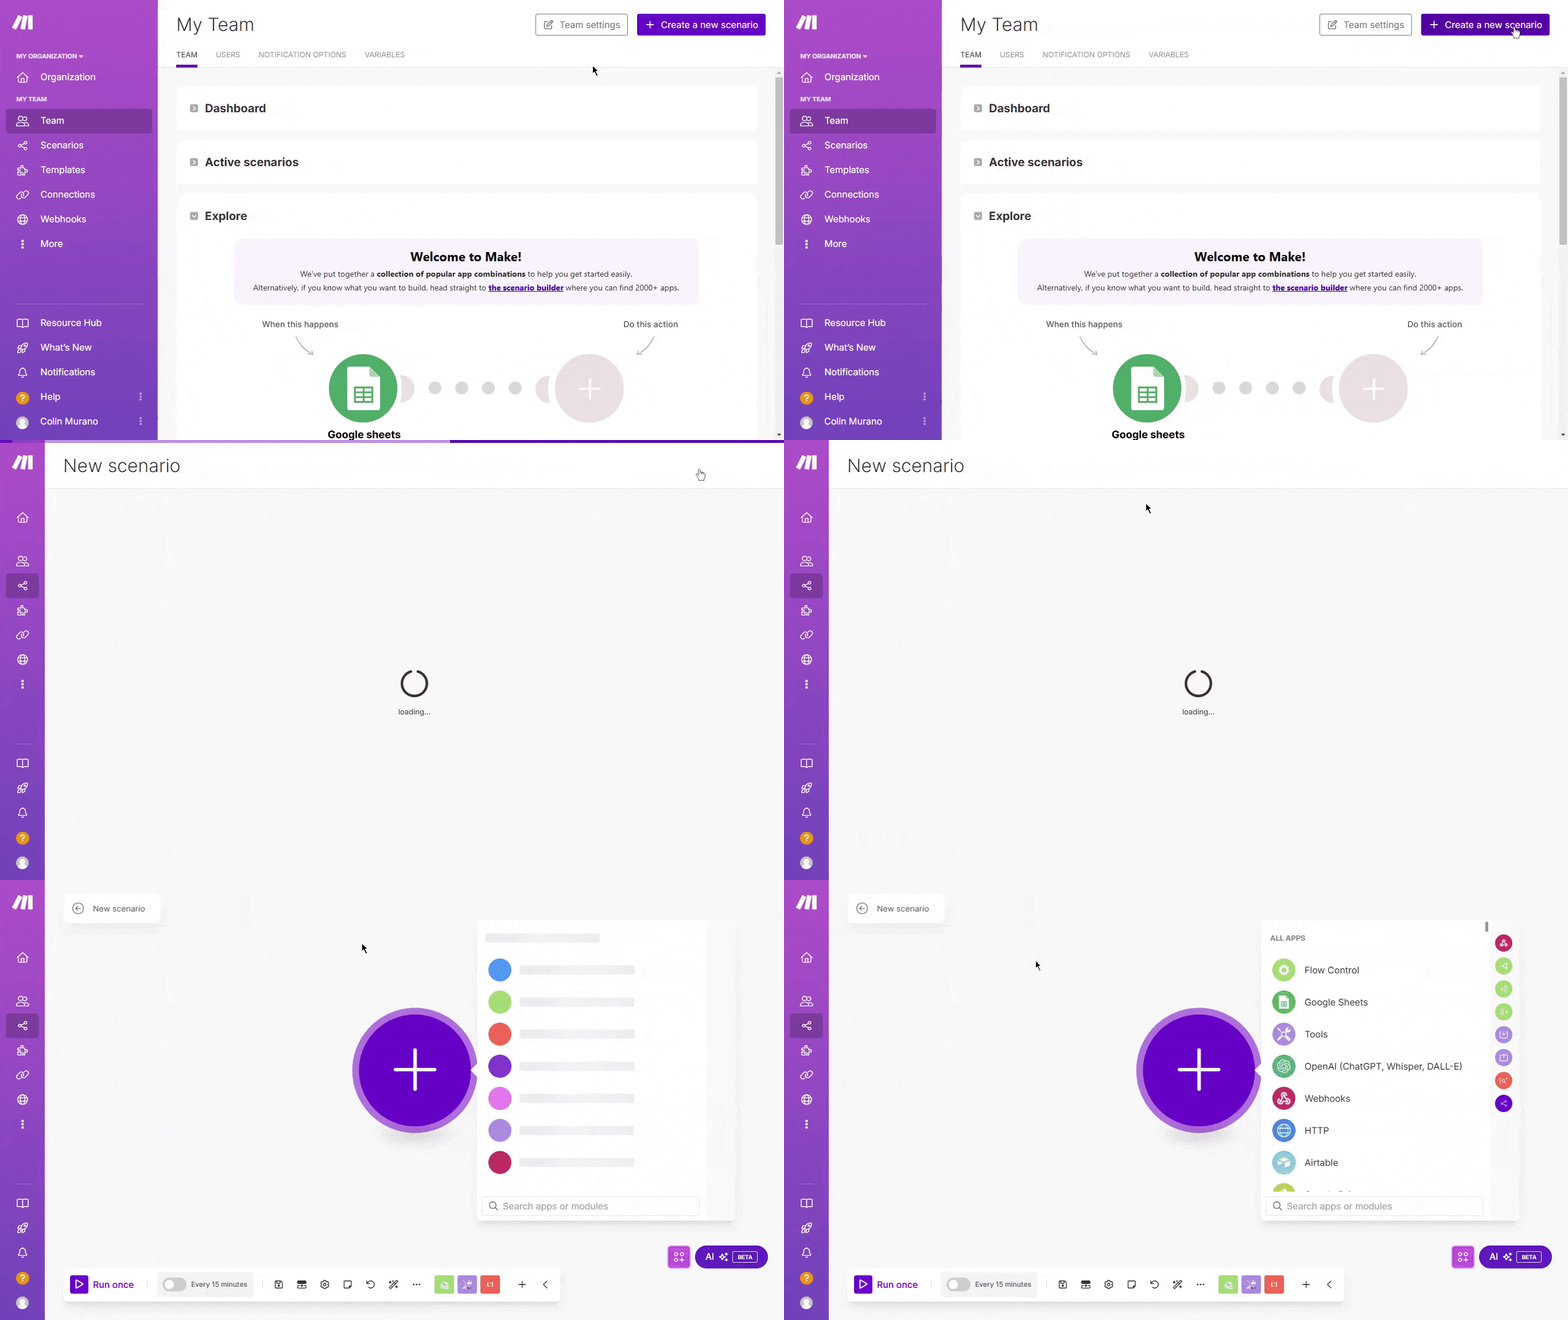
Step 2: Search the Webhooks module and choose the Custom webhook option.
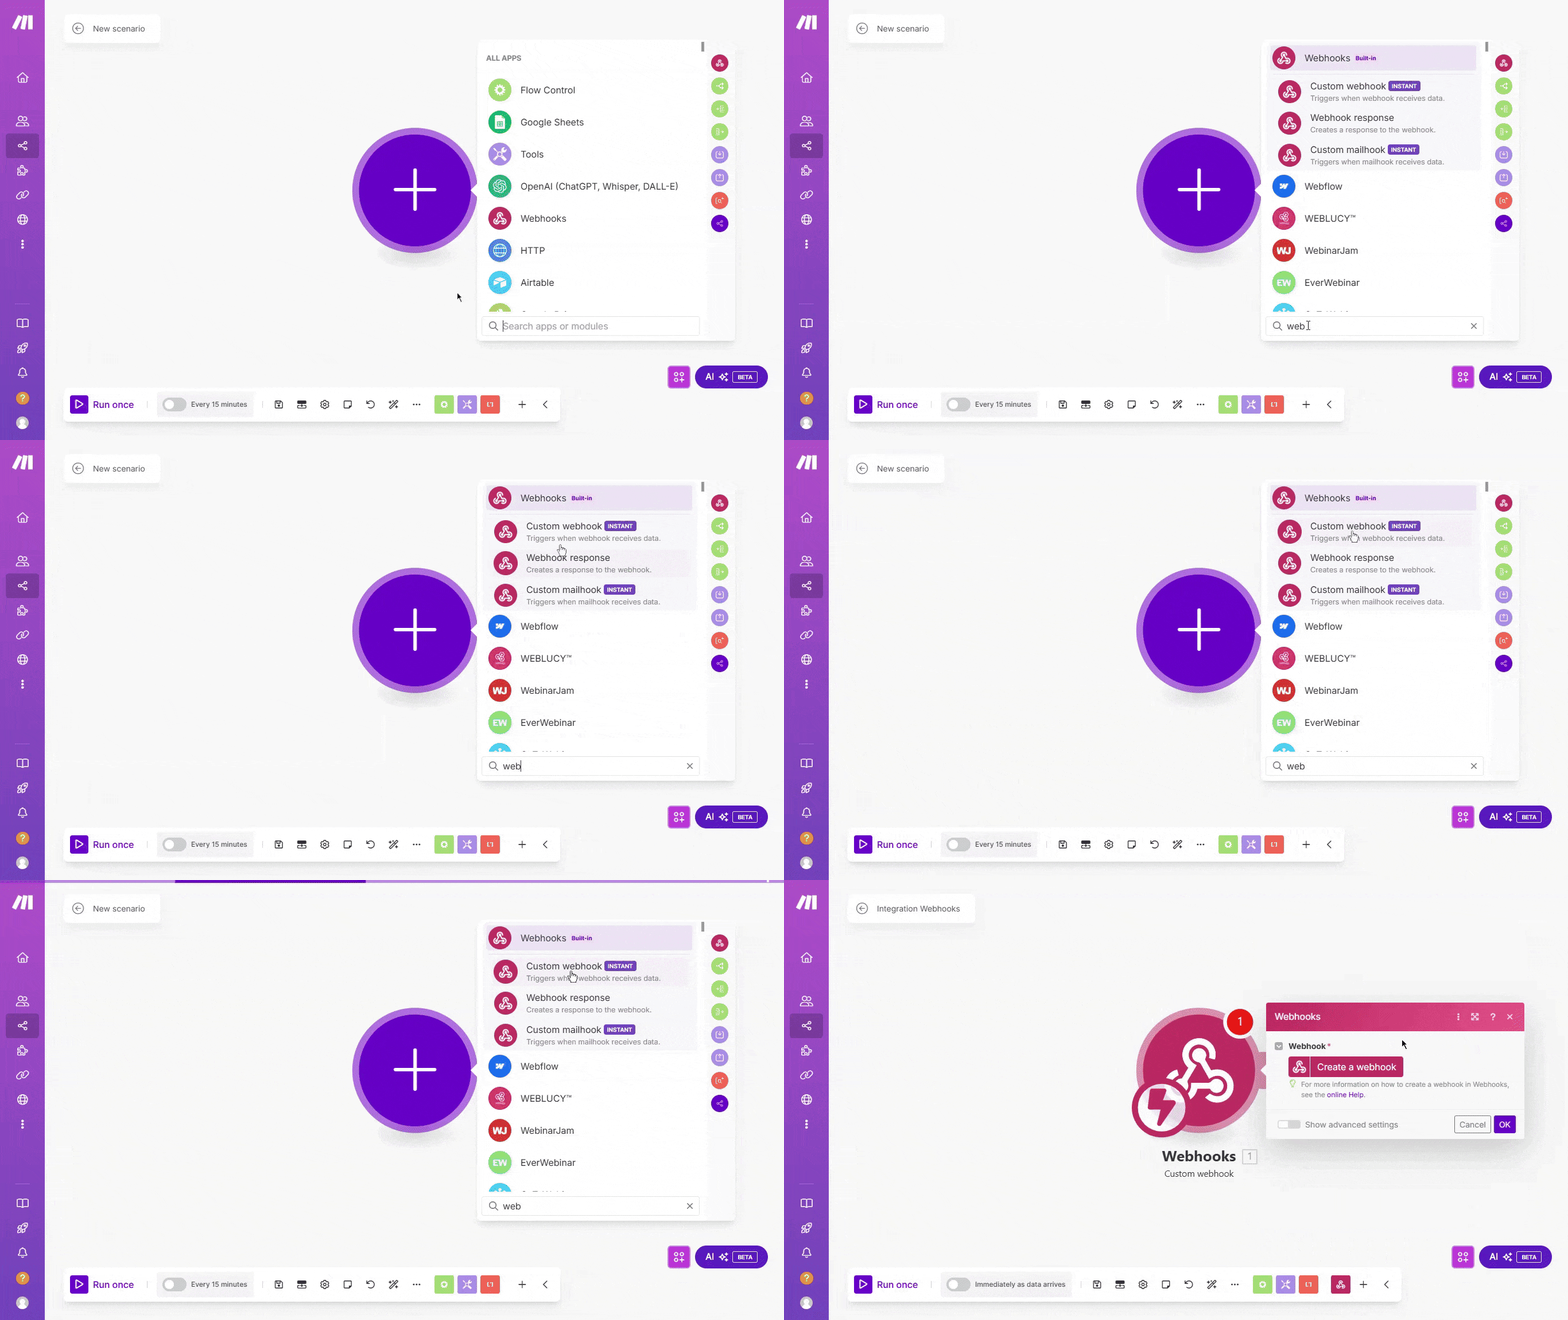
Step 3: Click on the Create a Webhook option to add a webhook name and save it.
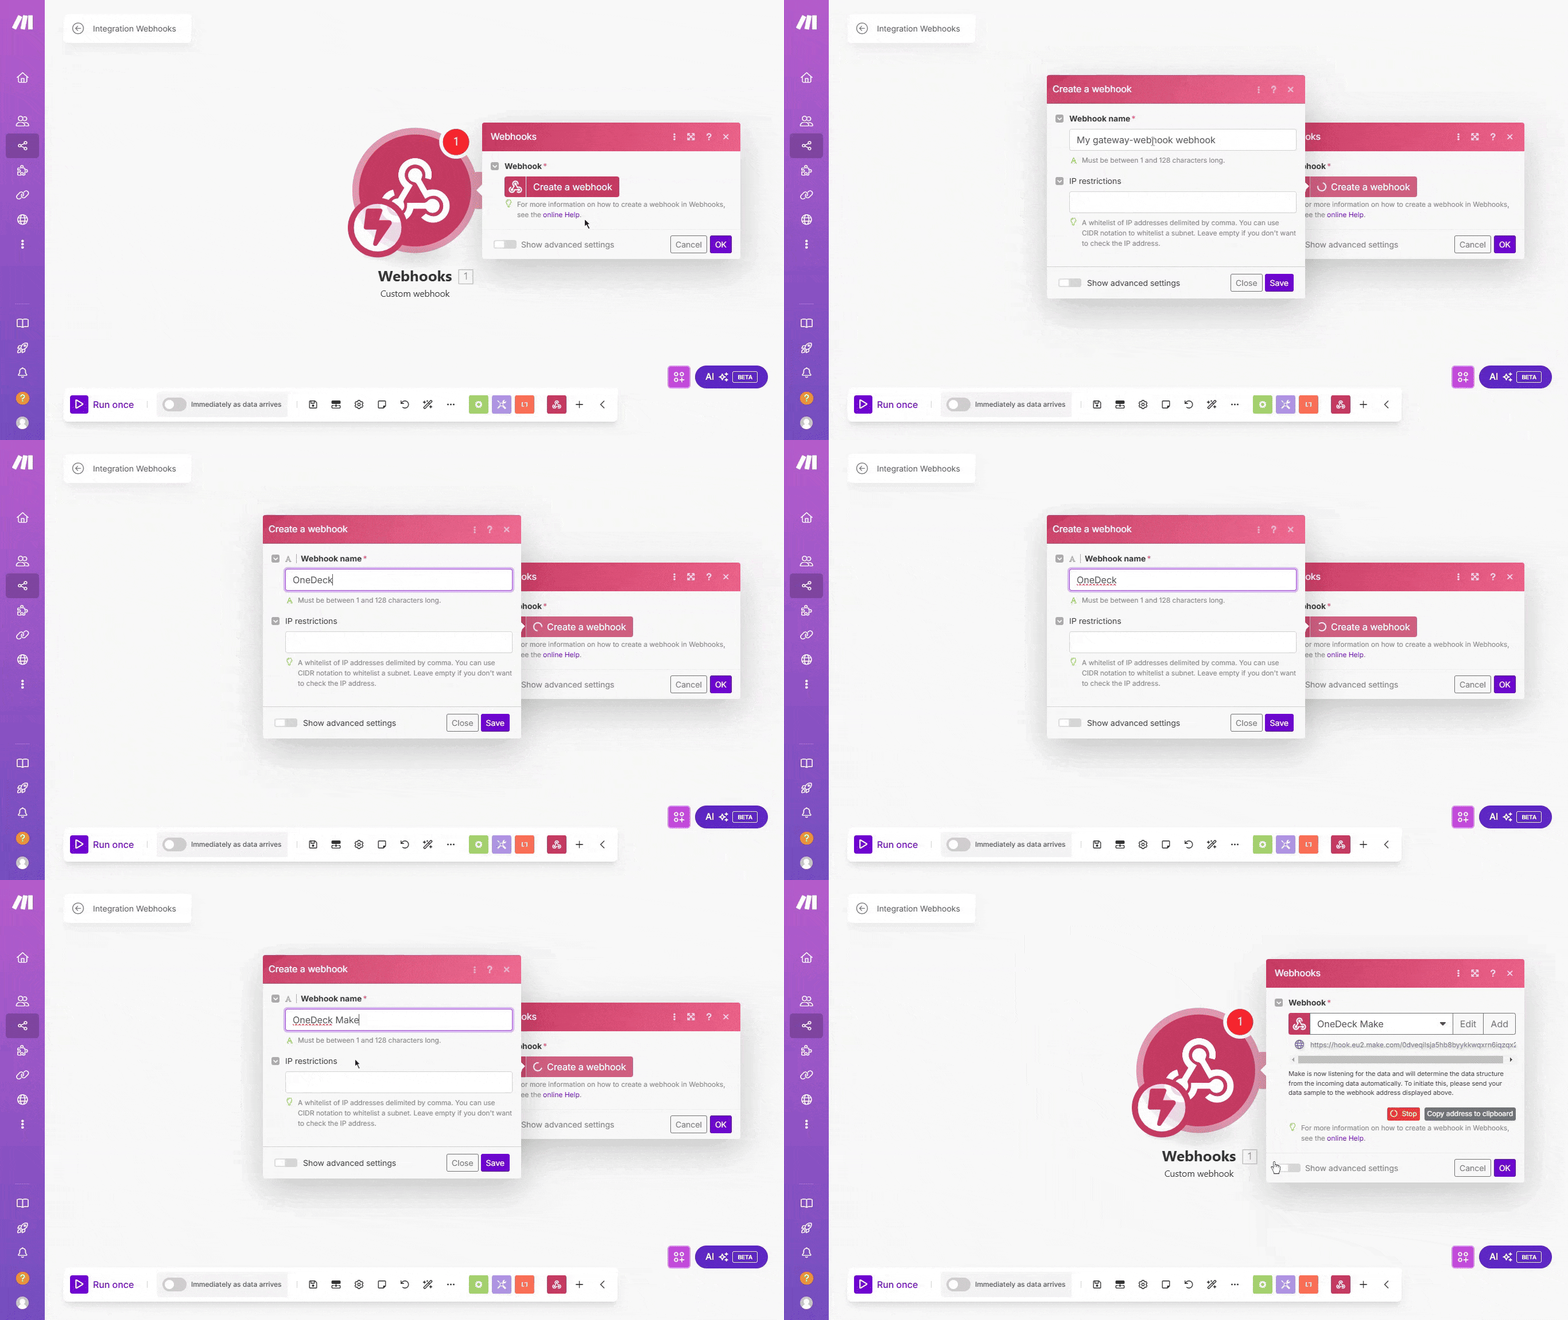
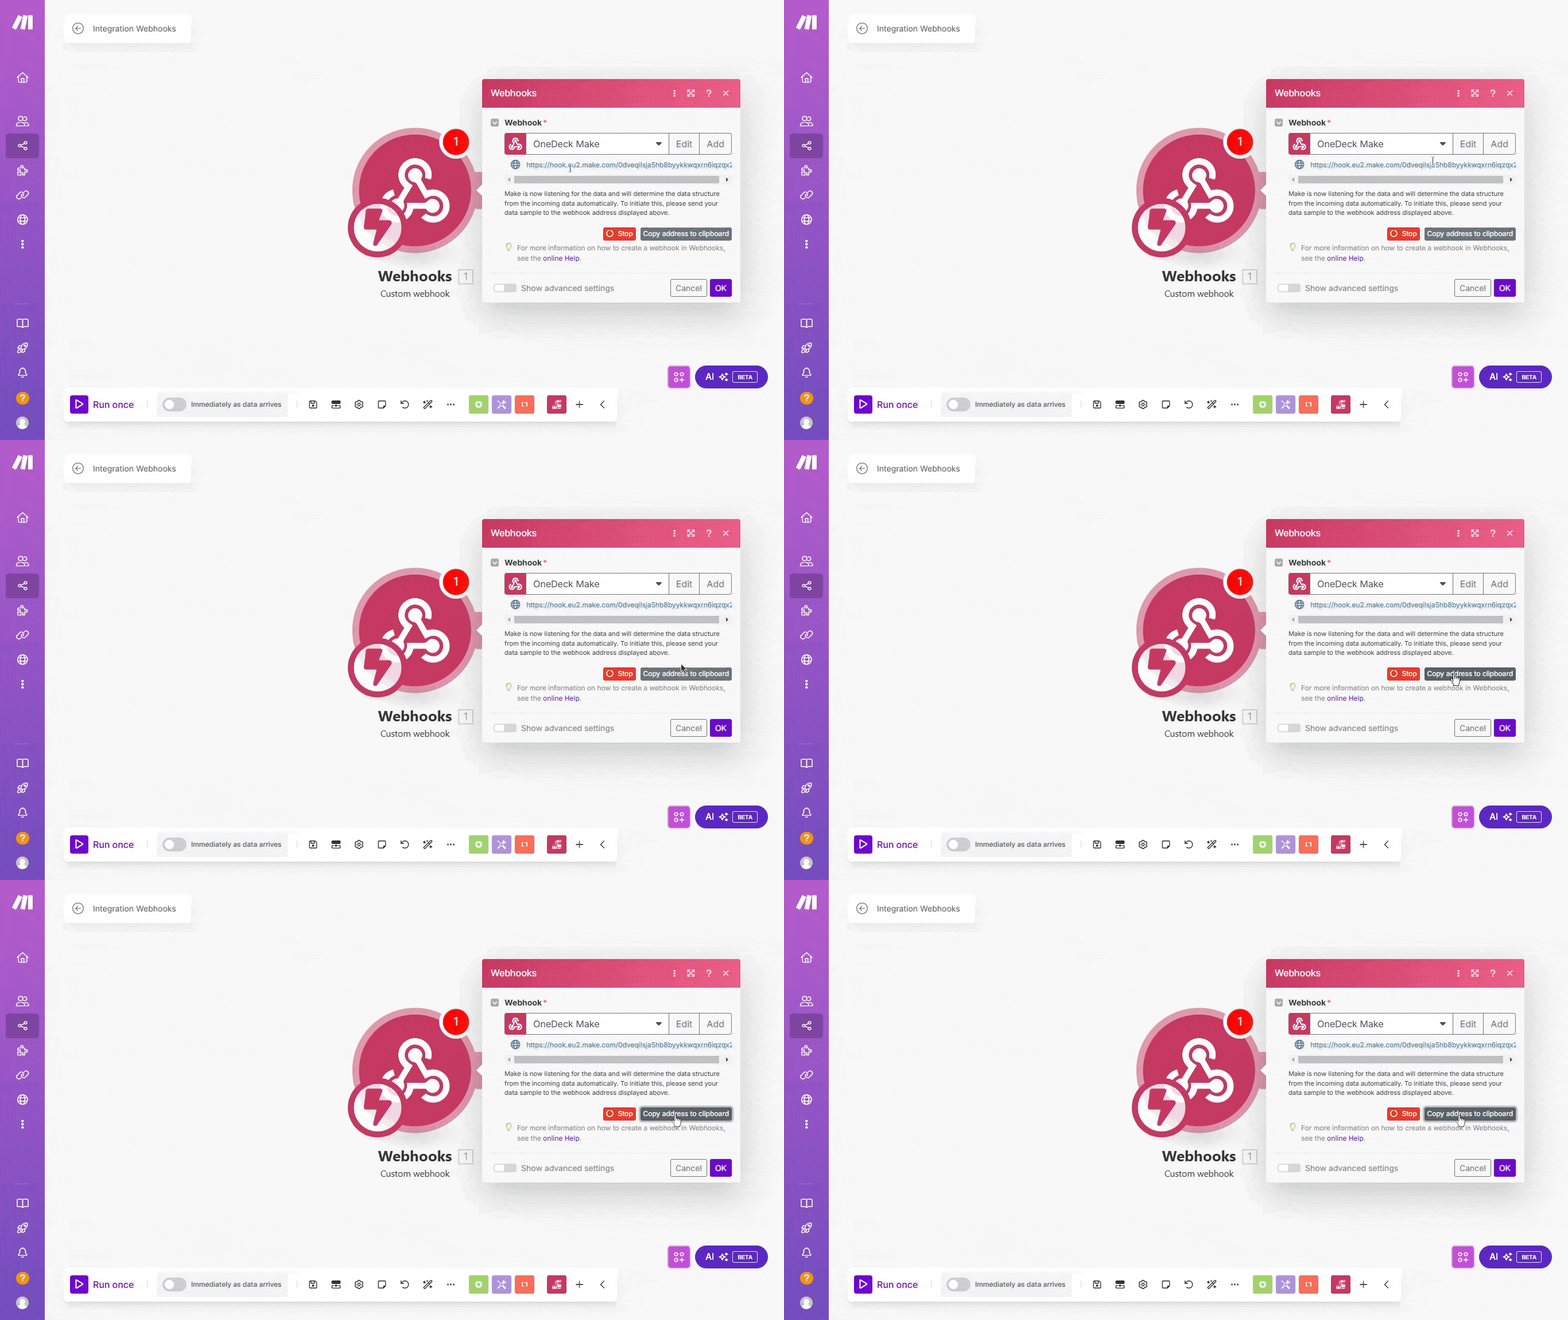
Step 4: Click the Copy address to clipboard to copy webhook URL.
Step 5: Go to the OneDeck automation page and add action to select the HTTP Request (send webhook) option.
Note: You need to set up the OneDeck scenario first by specifying which event should trigger the webhook, then follow step of adding action of webhook URL.
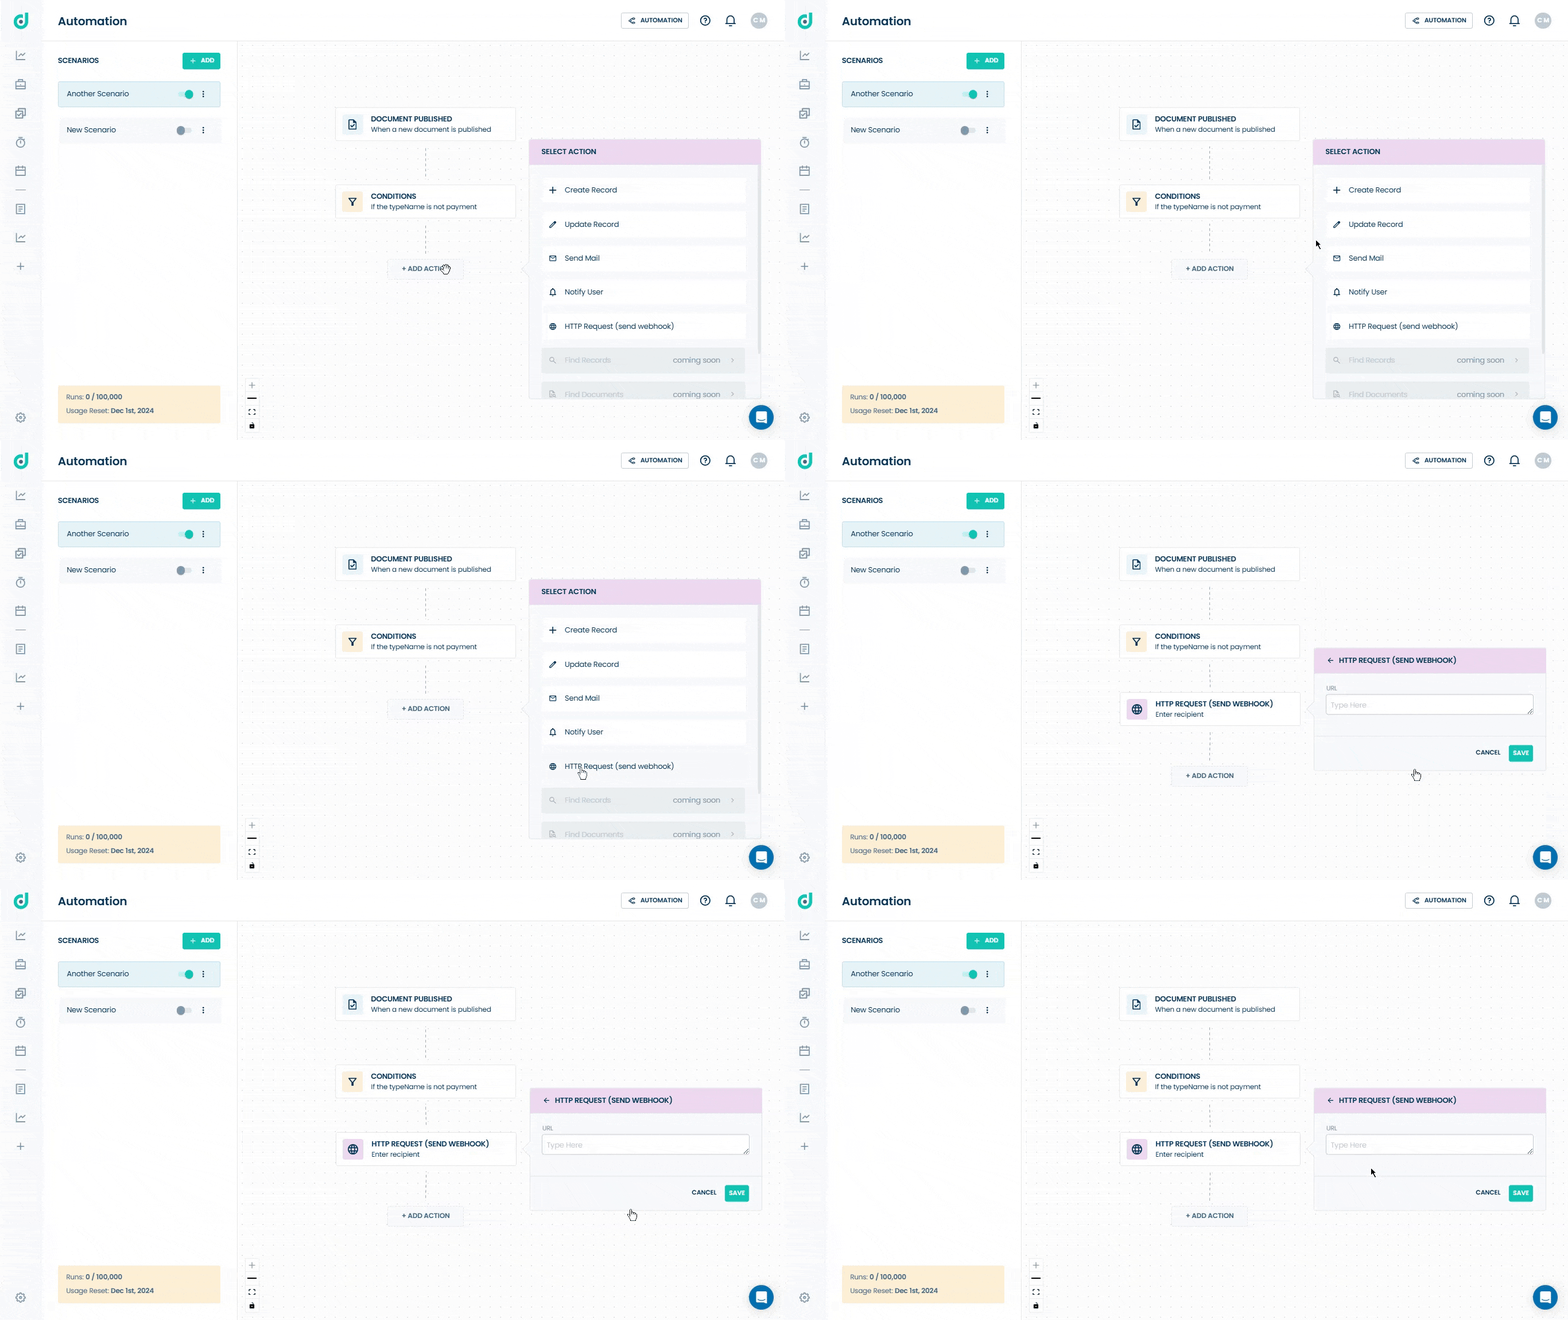
Step 6: Paste the Webhook URL and save it.
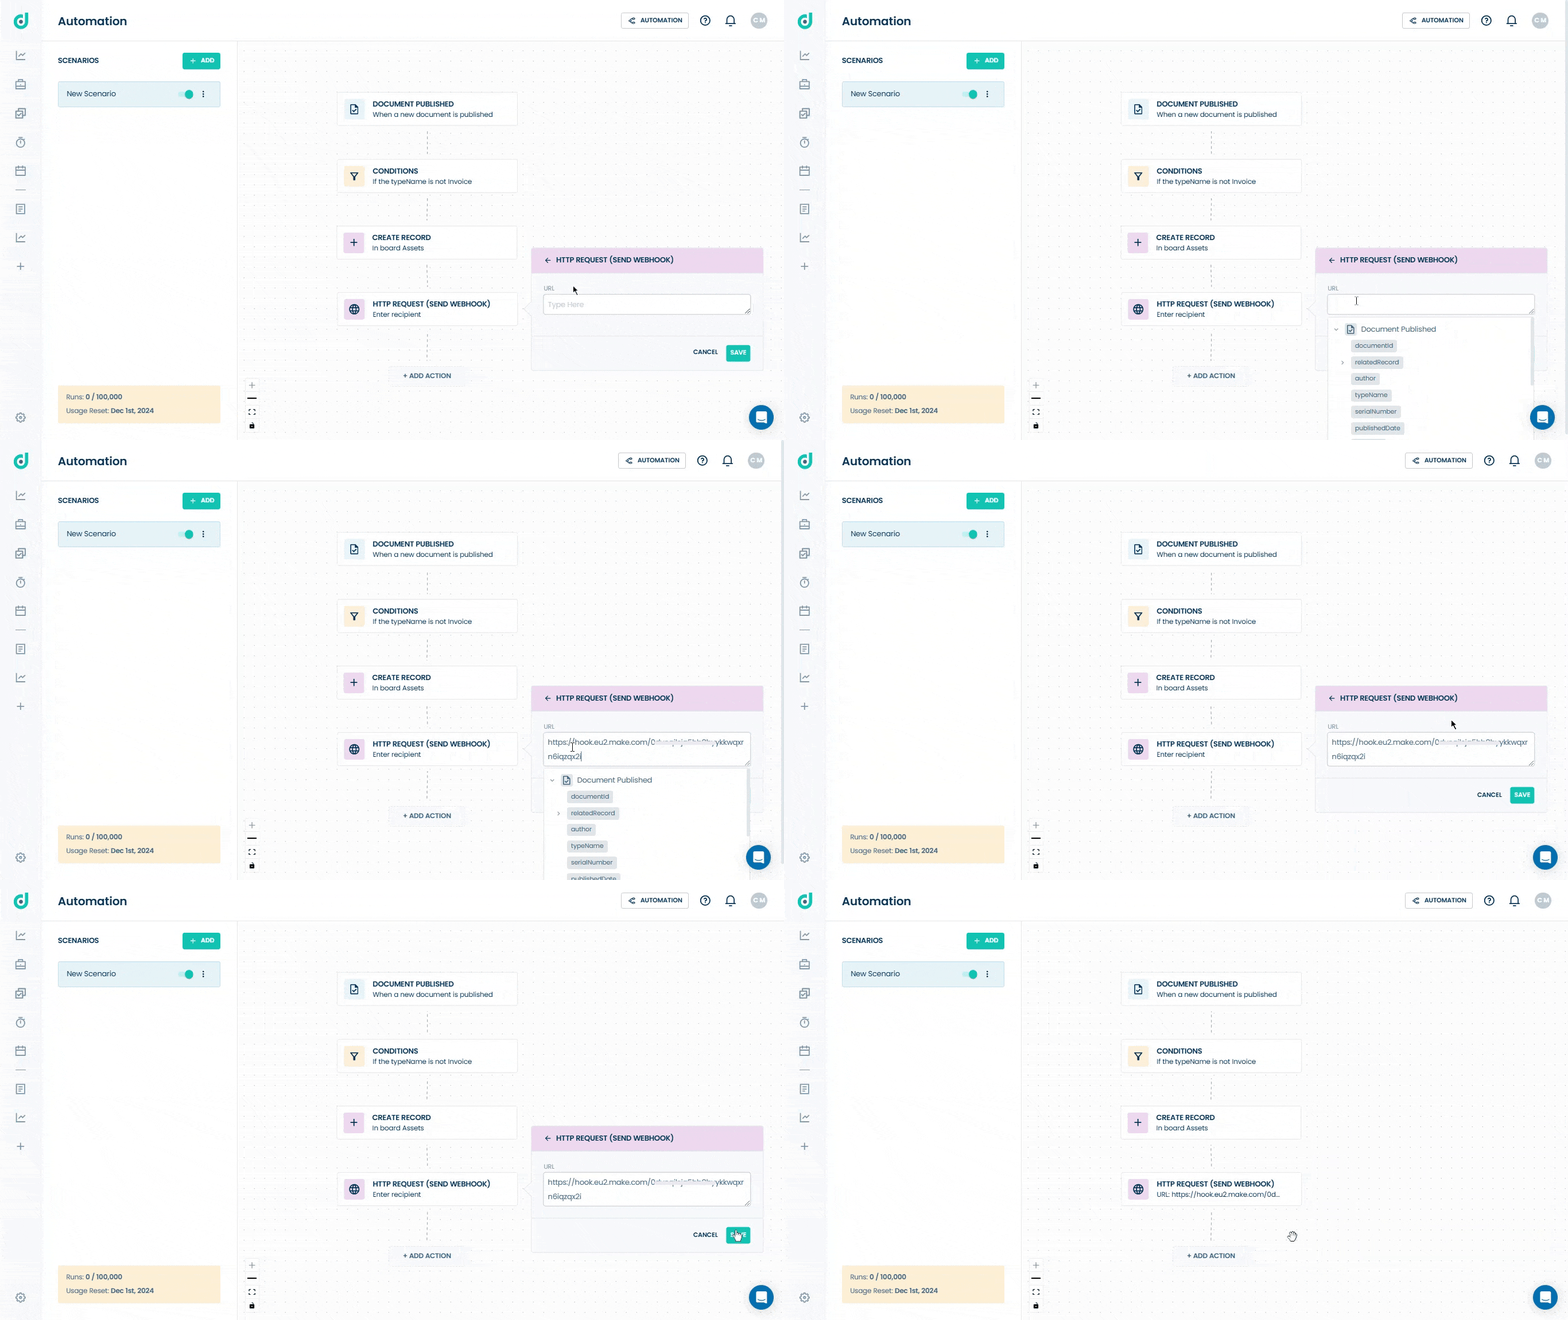
Once the webhook is added on the actions, go to Make.com and connect it to other application by adding a new module.
Step 1: On Make.com, click on the Add button to add another module.
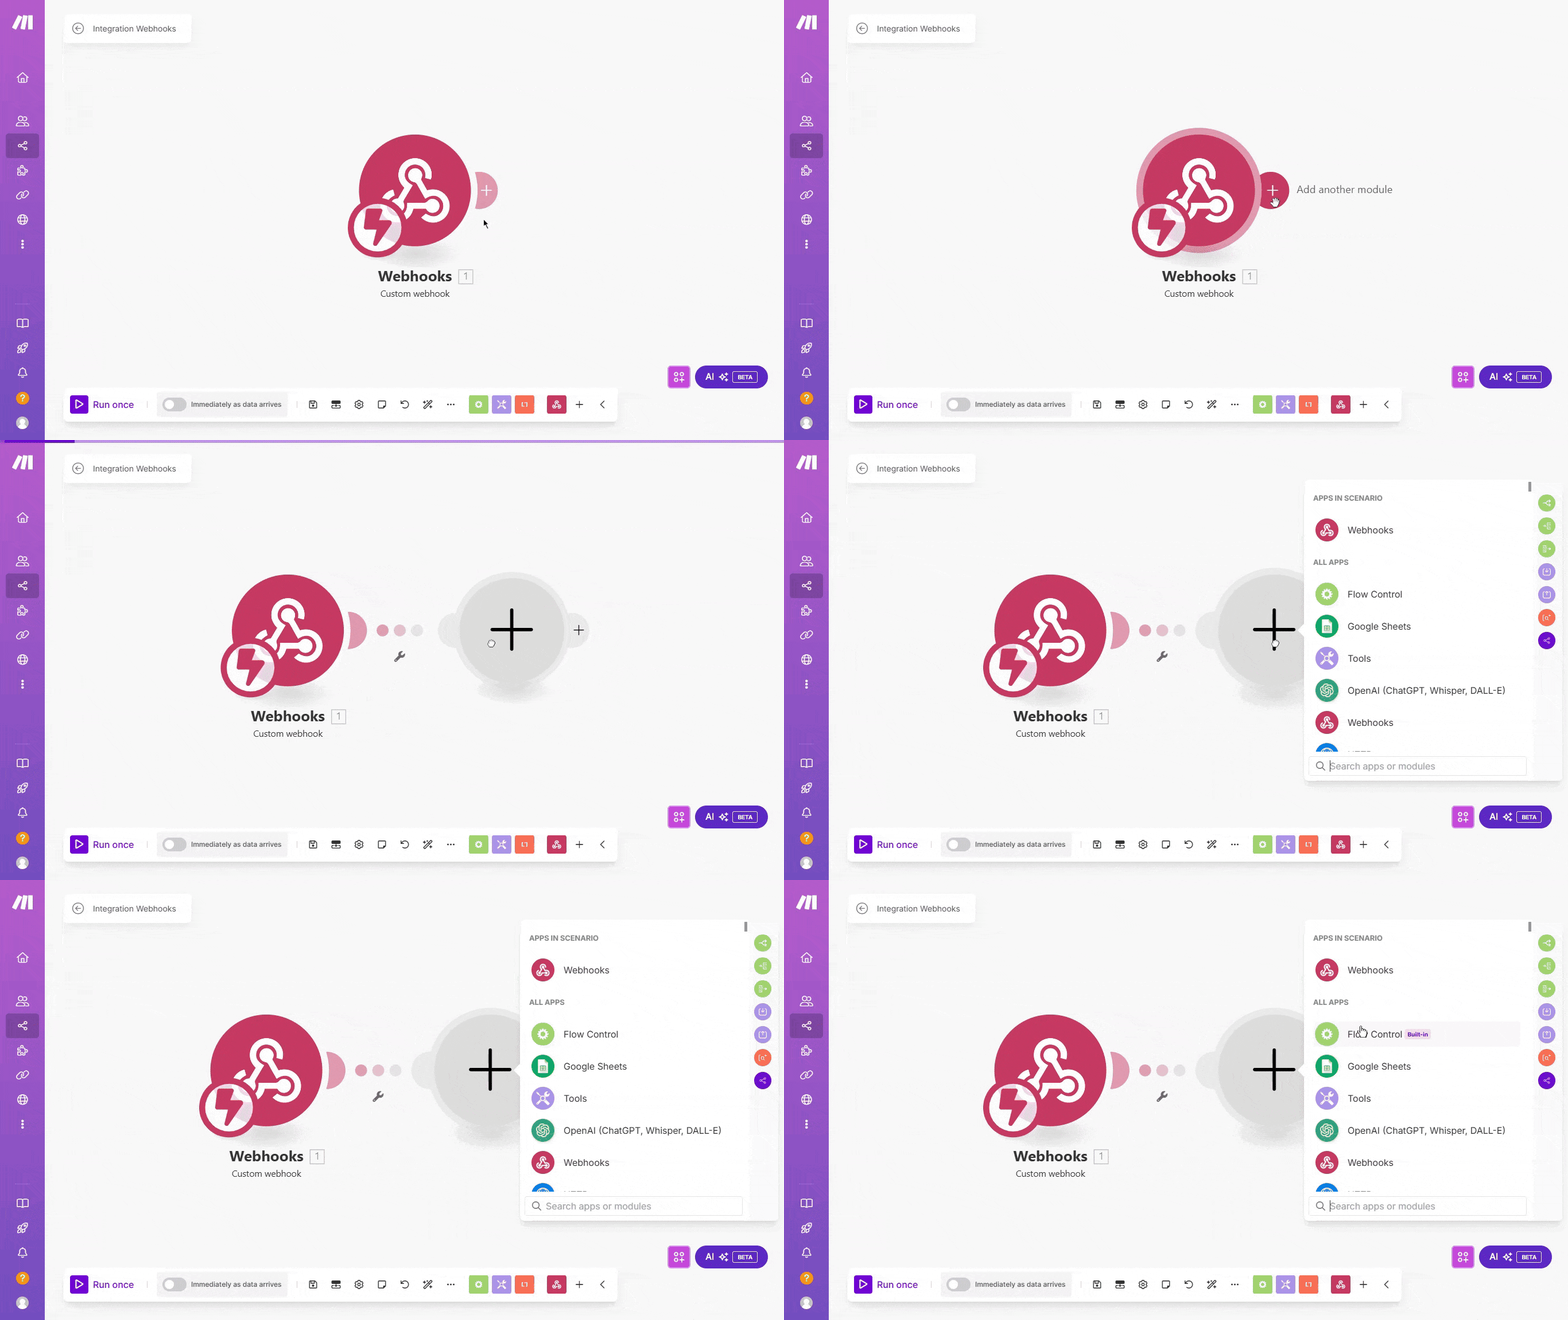
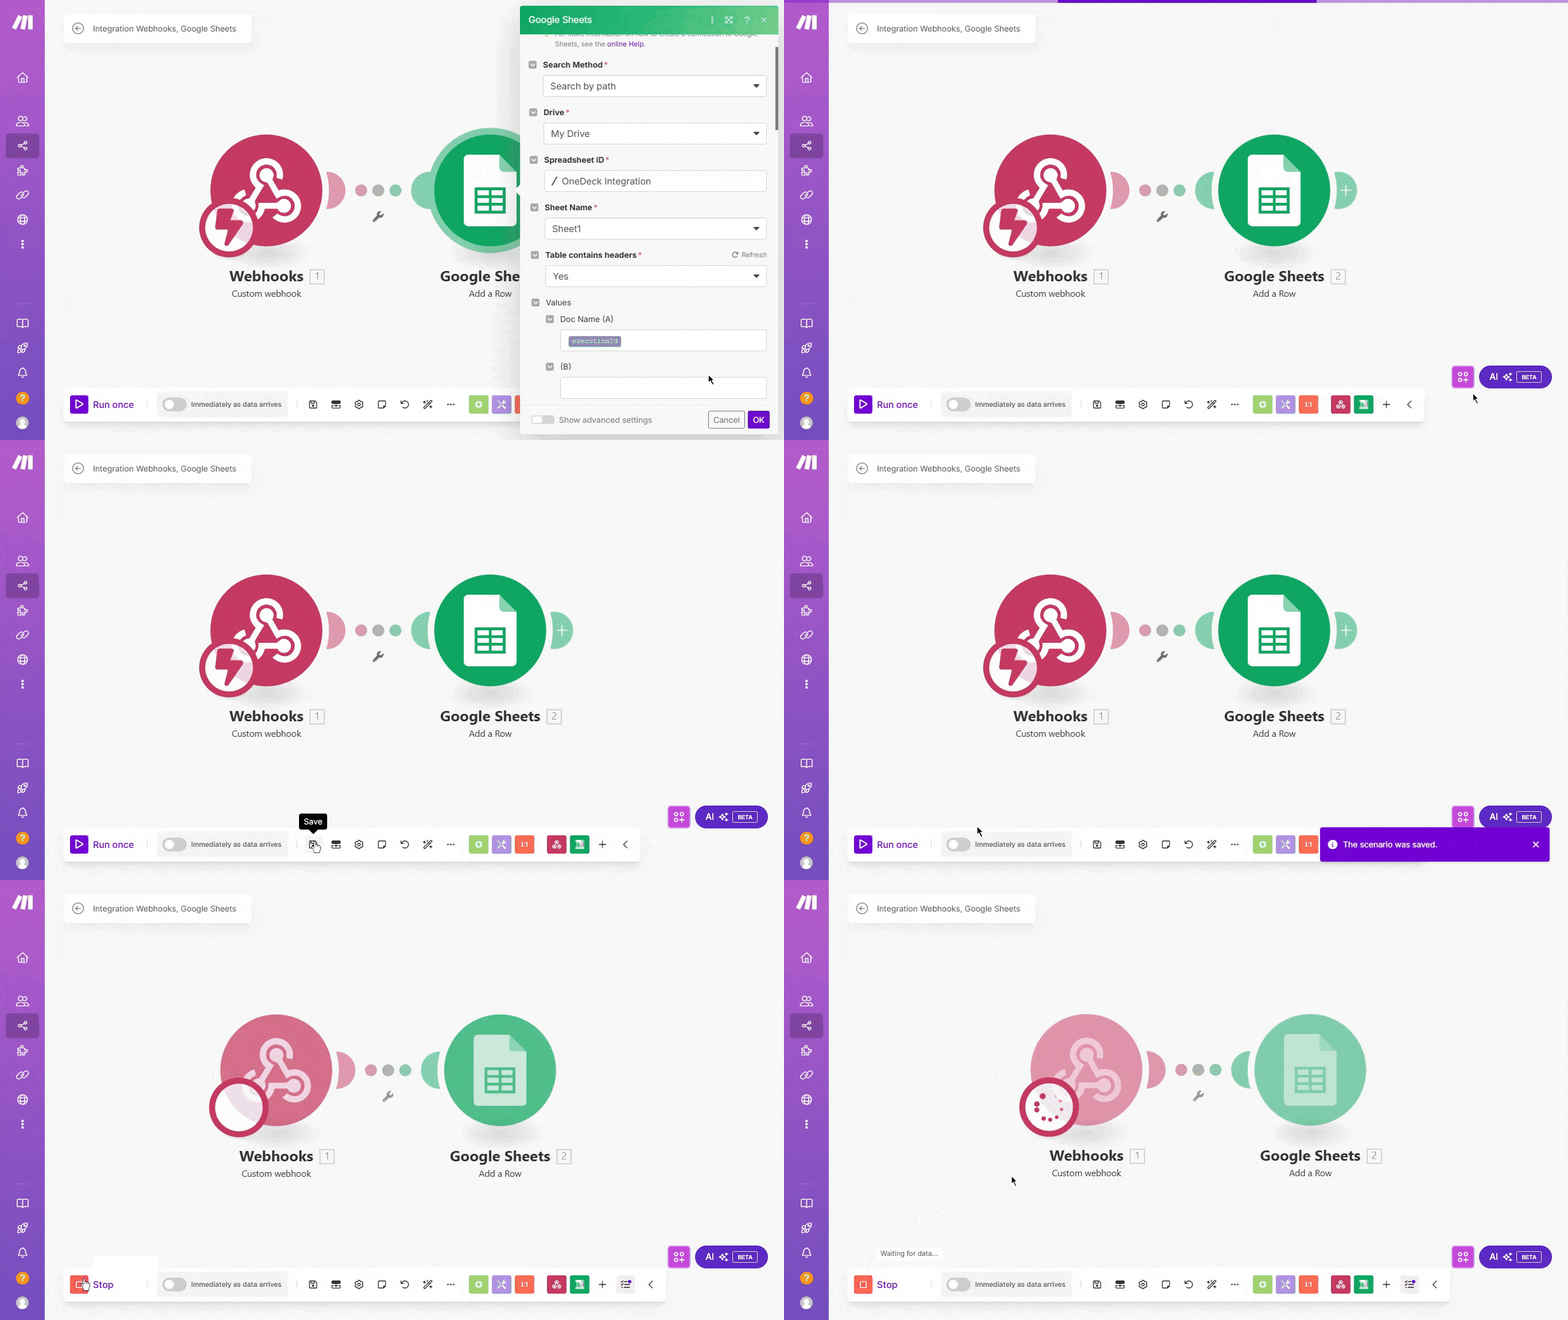
Step 2: Search for the application name (e.g., "Google Sheets") and select it. Then, choose the desired action, such as "Add a Row."
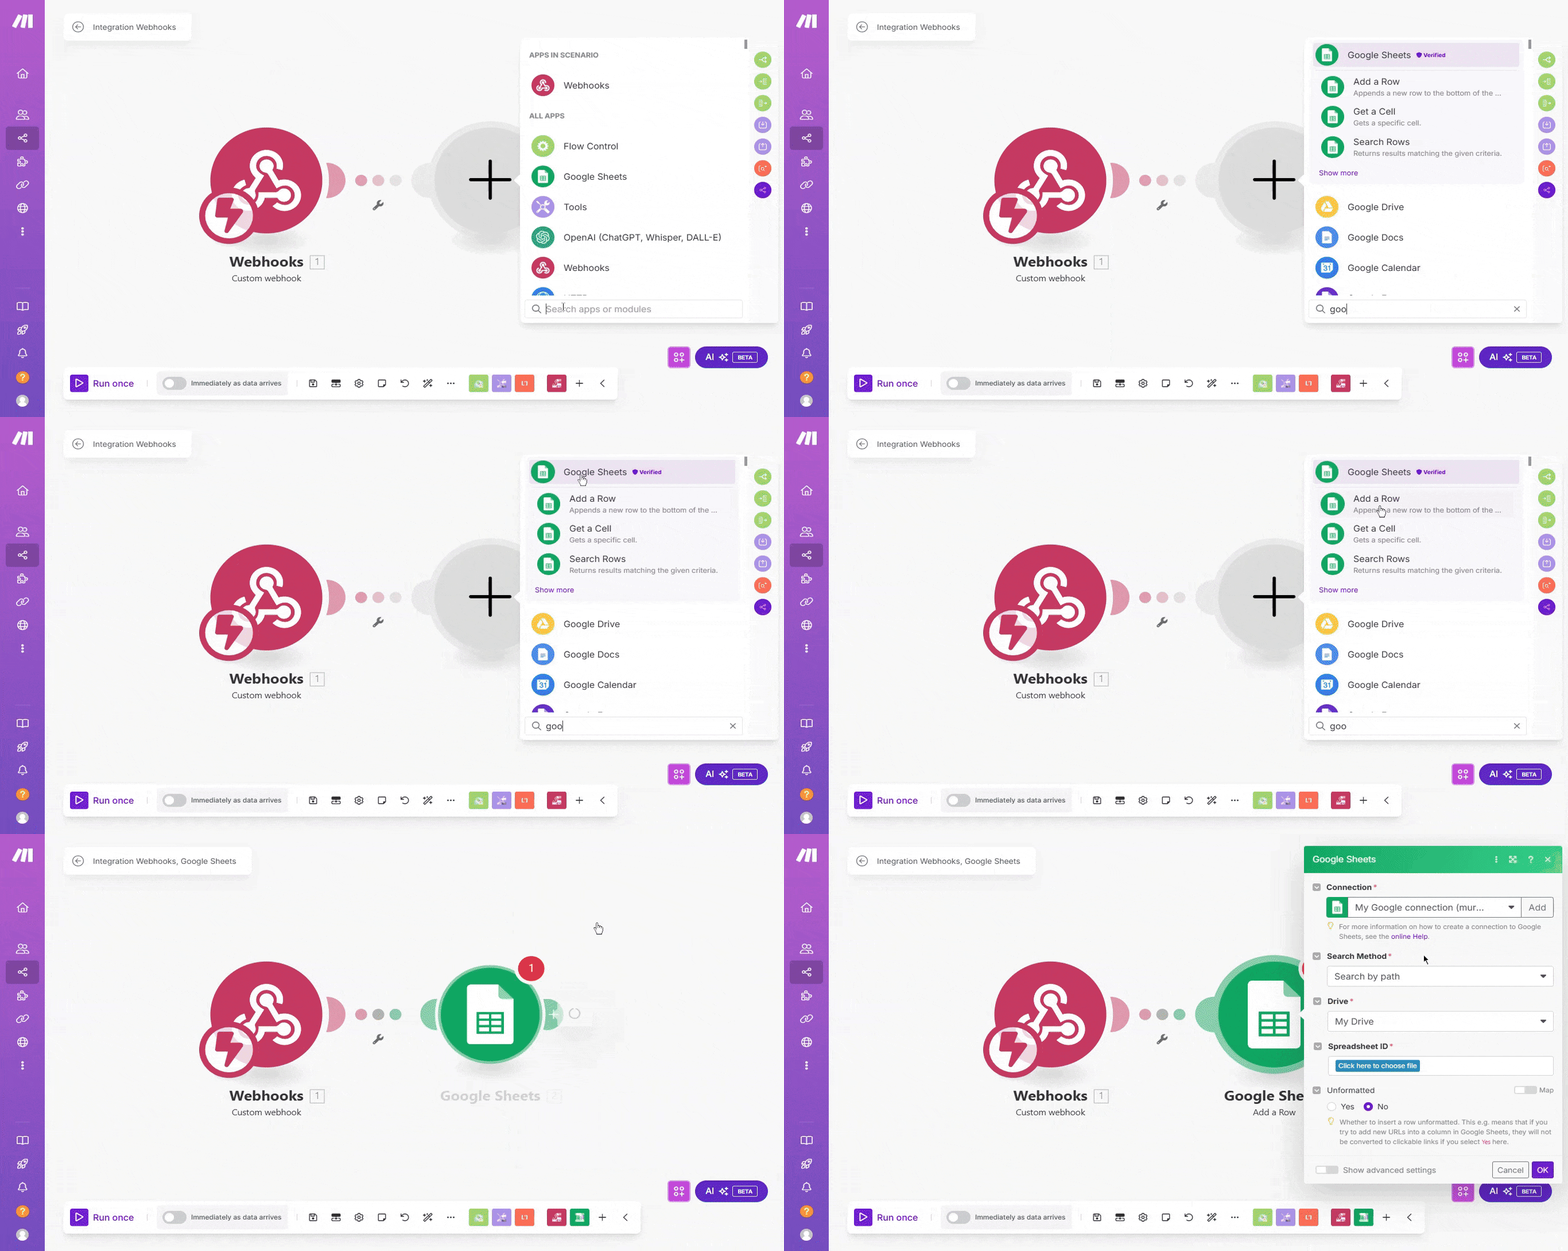
Step 3: Configure the selected application by authenticating your account and specifying the fields for sending data. For example, authenticate Google Sheets, select the spreadsheet, and map data to the desired fields.
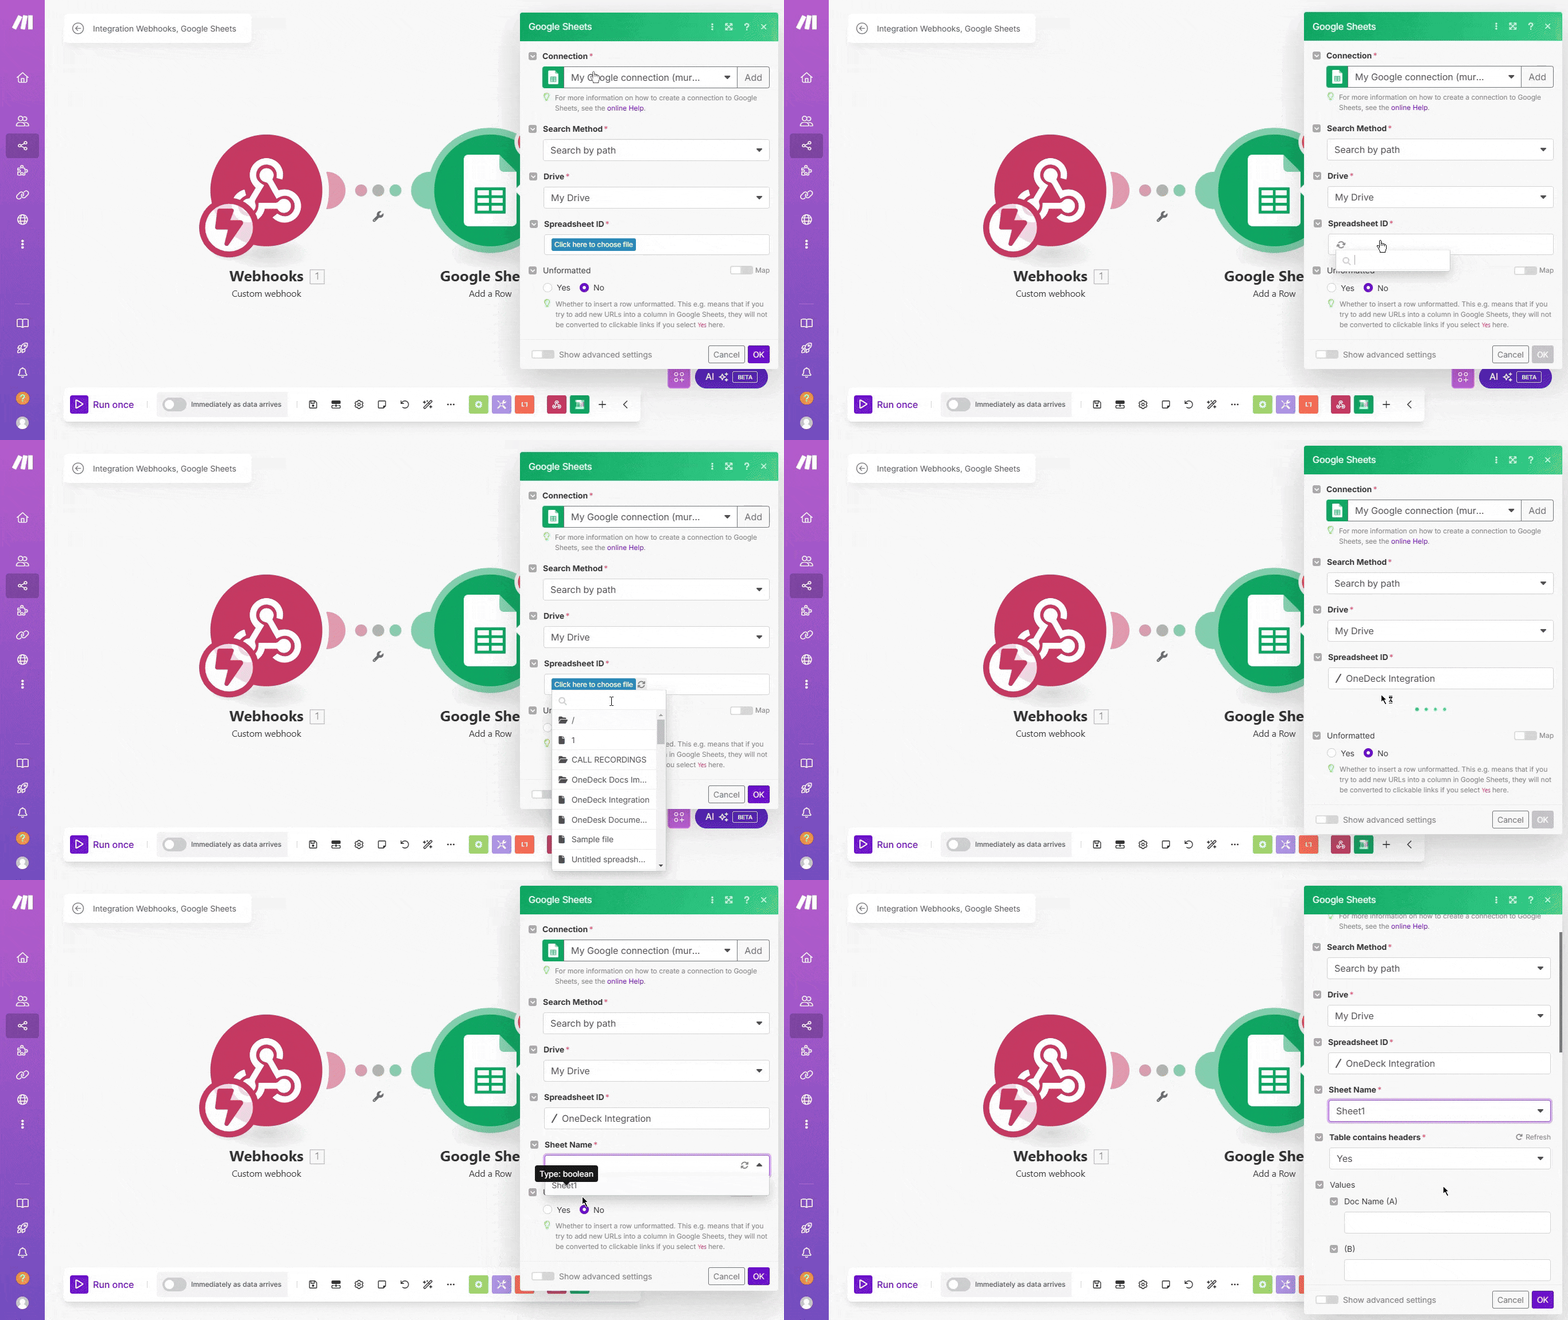
Step 4: Click OK, save the setup, and run once to test the scenario.
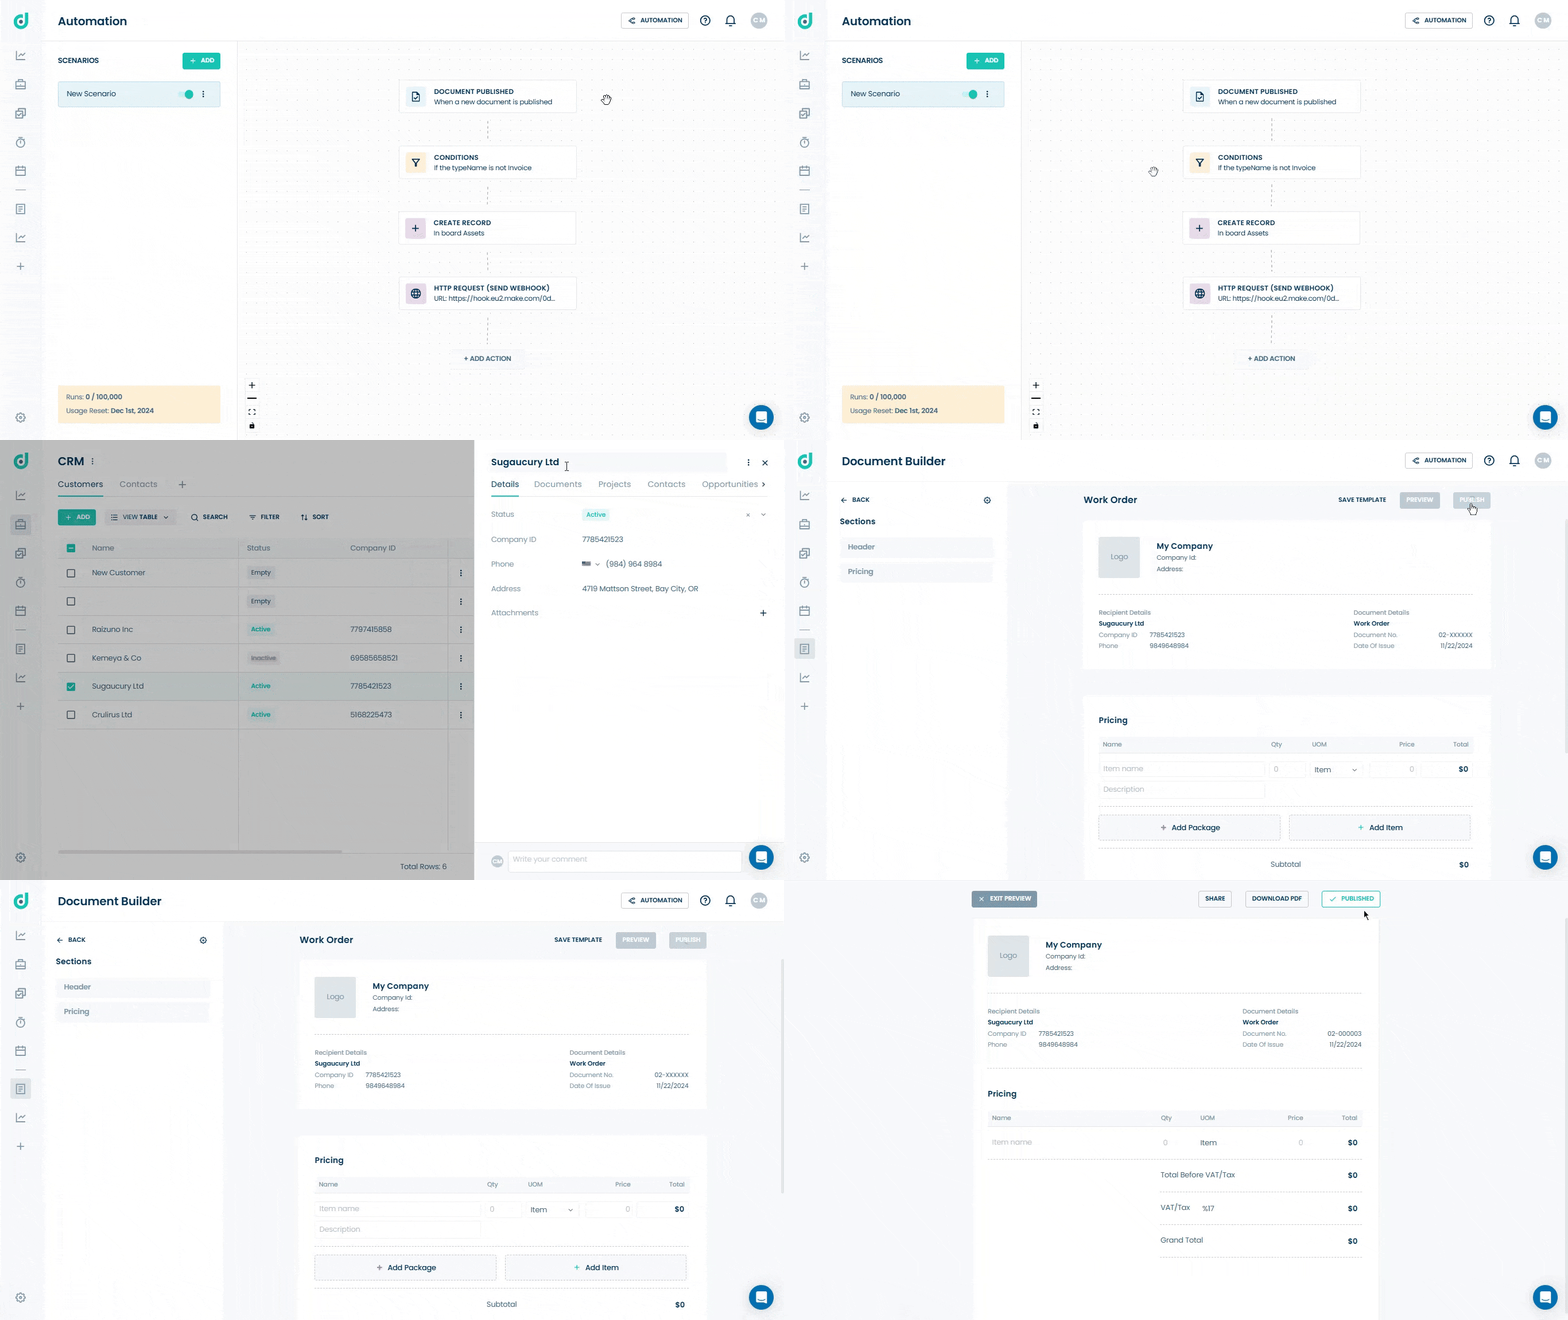
Step 5: Go to the OneDeck dashboard and execute the scenario using the selected trigger and predefined conditions.
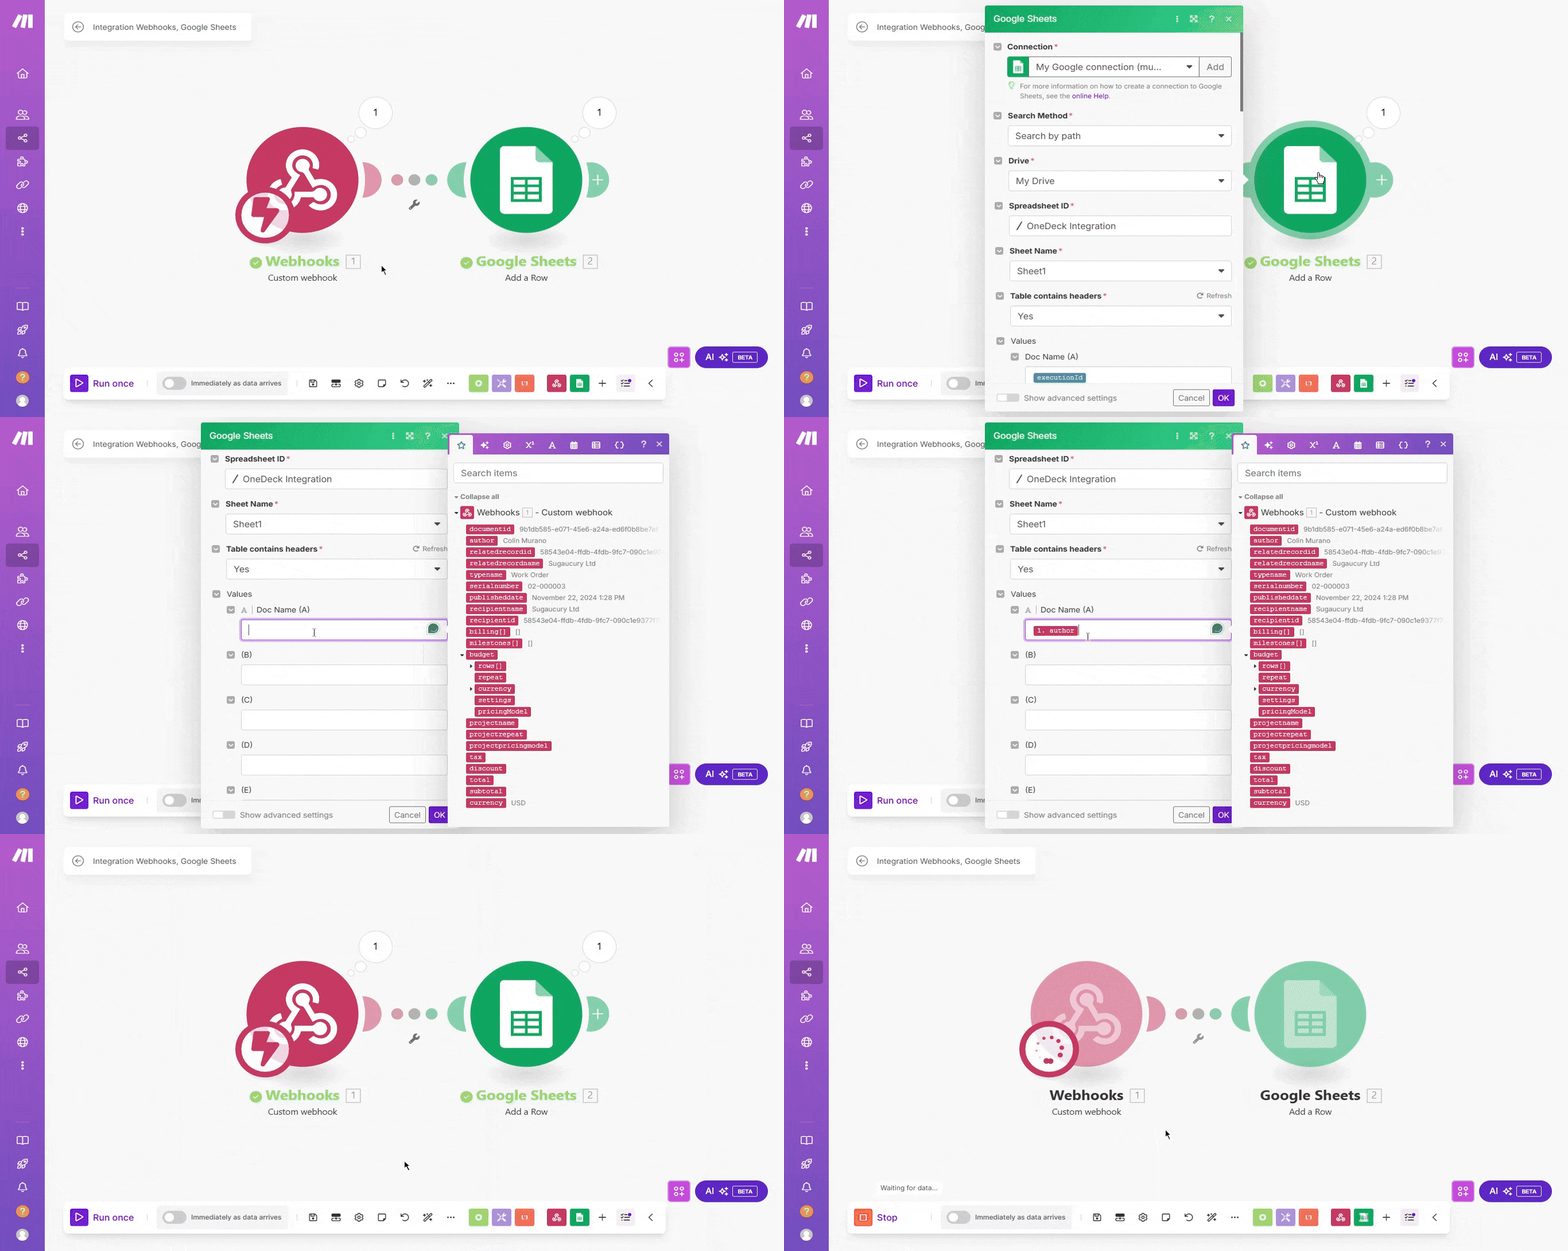
Step 6: Return to Make.com to verify that the scenario works as expected. Once confirmed, configure OneDeck as needed and run it again to activate the scenario and reflect the changes in the application.
Zapier
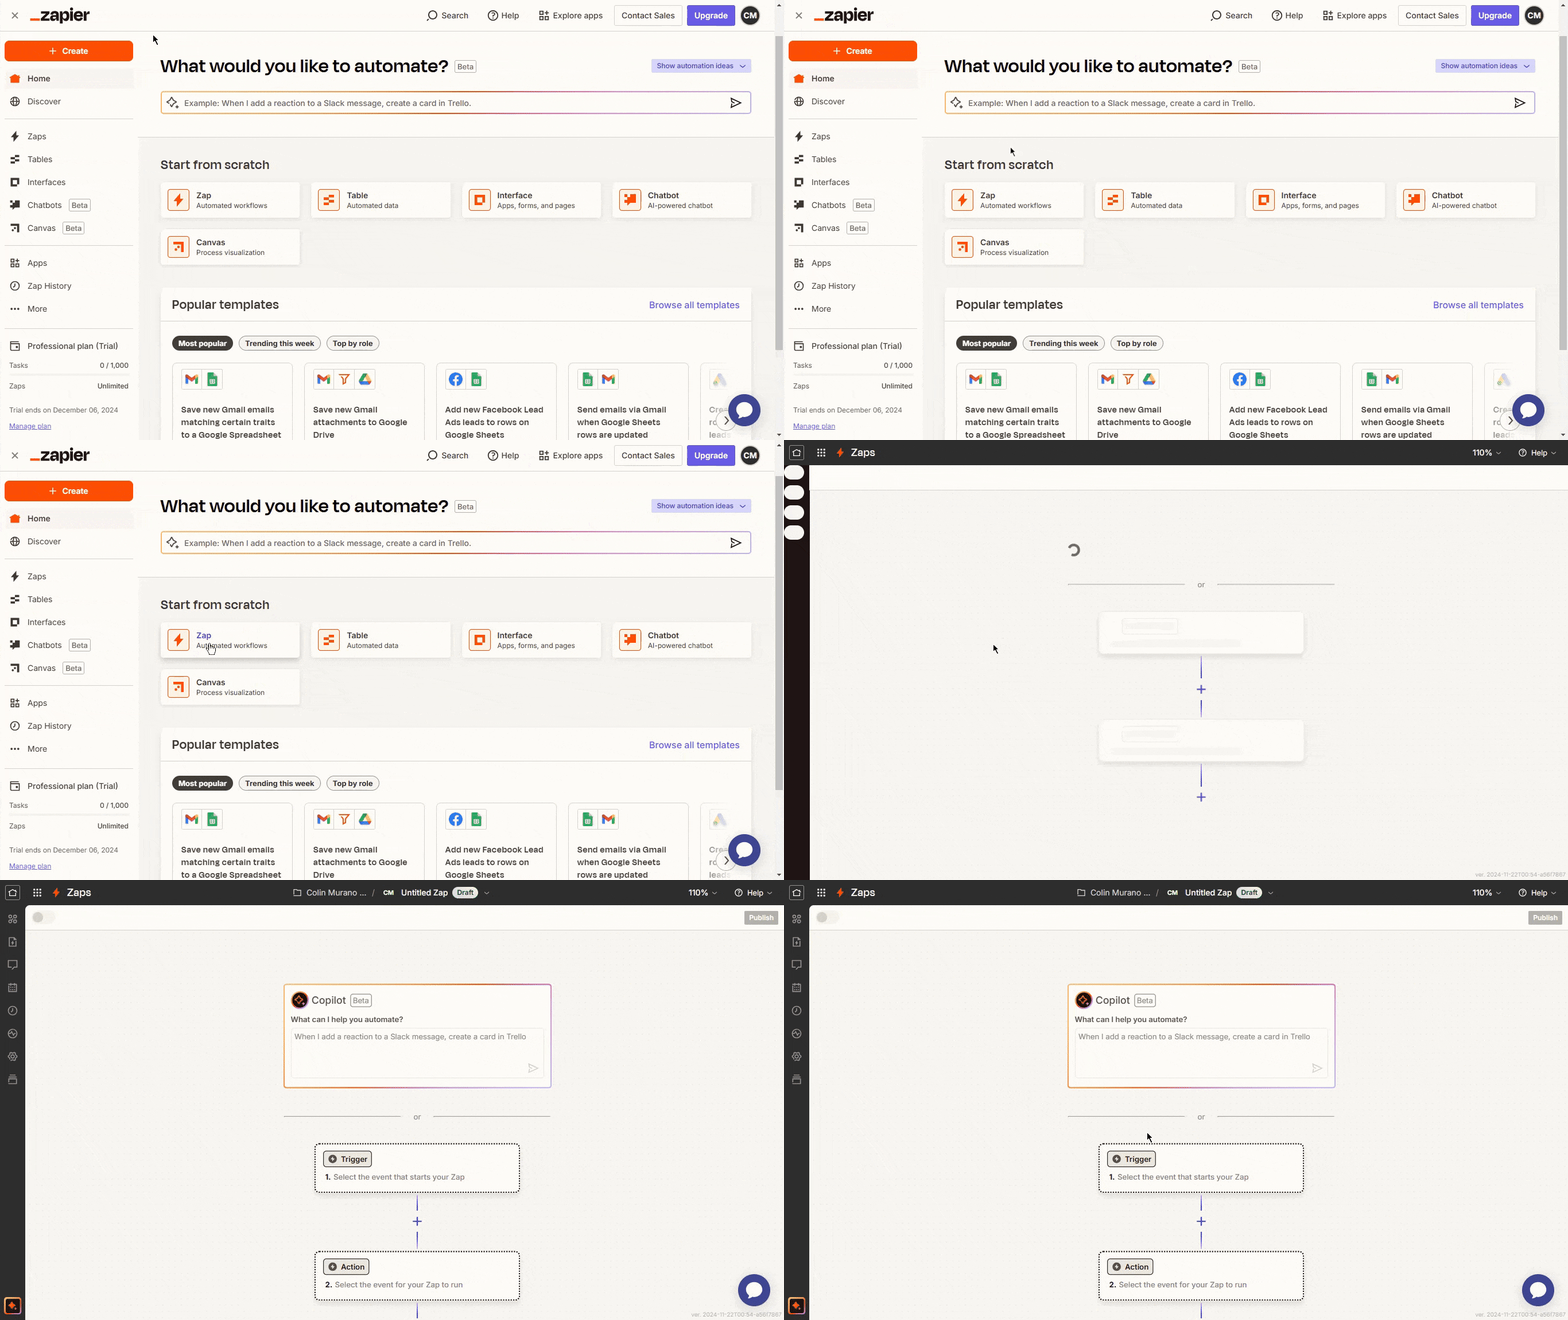
Step 1: Log into your Zapier account and click on the Zap for automated workflows.
Step 2: Click on the Trigger button, search for and select Webhooks option.
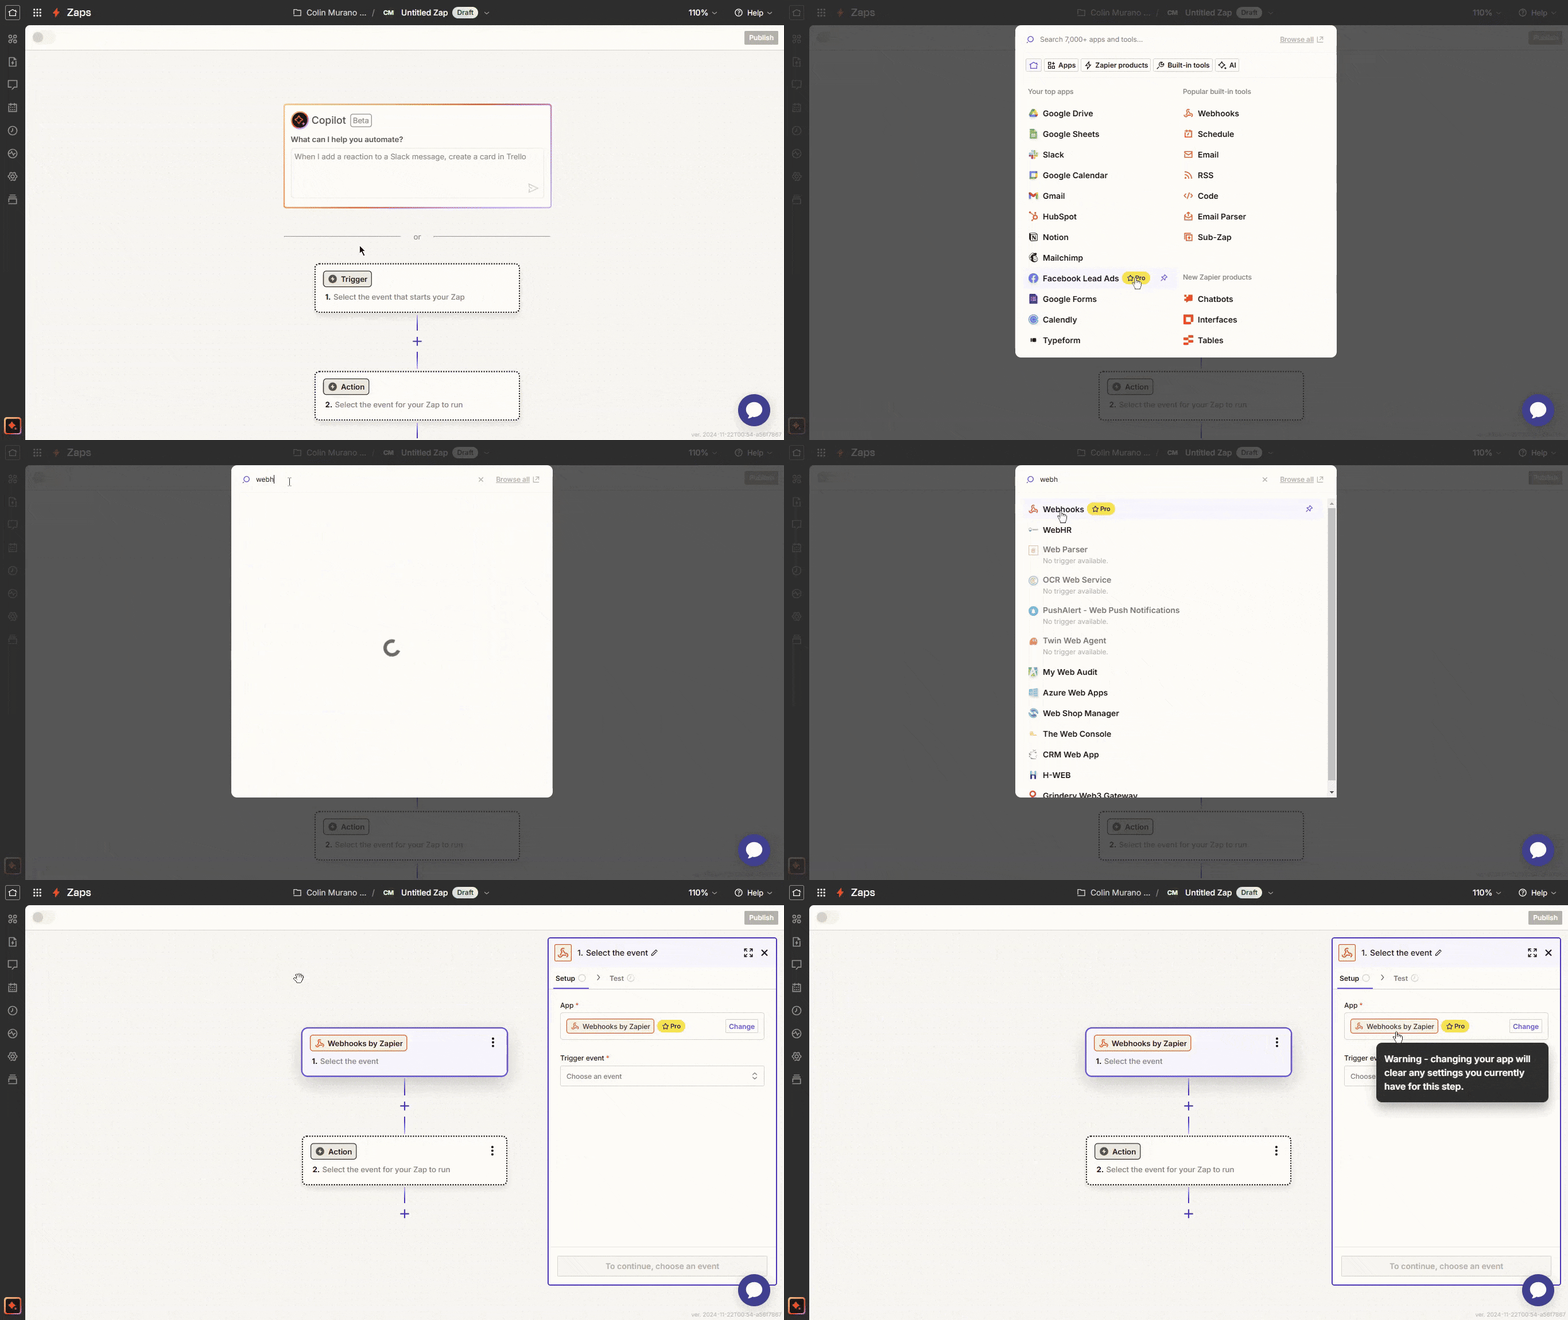
Step 3: Choose Catch Hook as the trigger event, click Continue and provide a name to it.
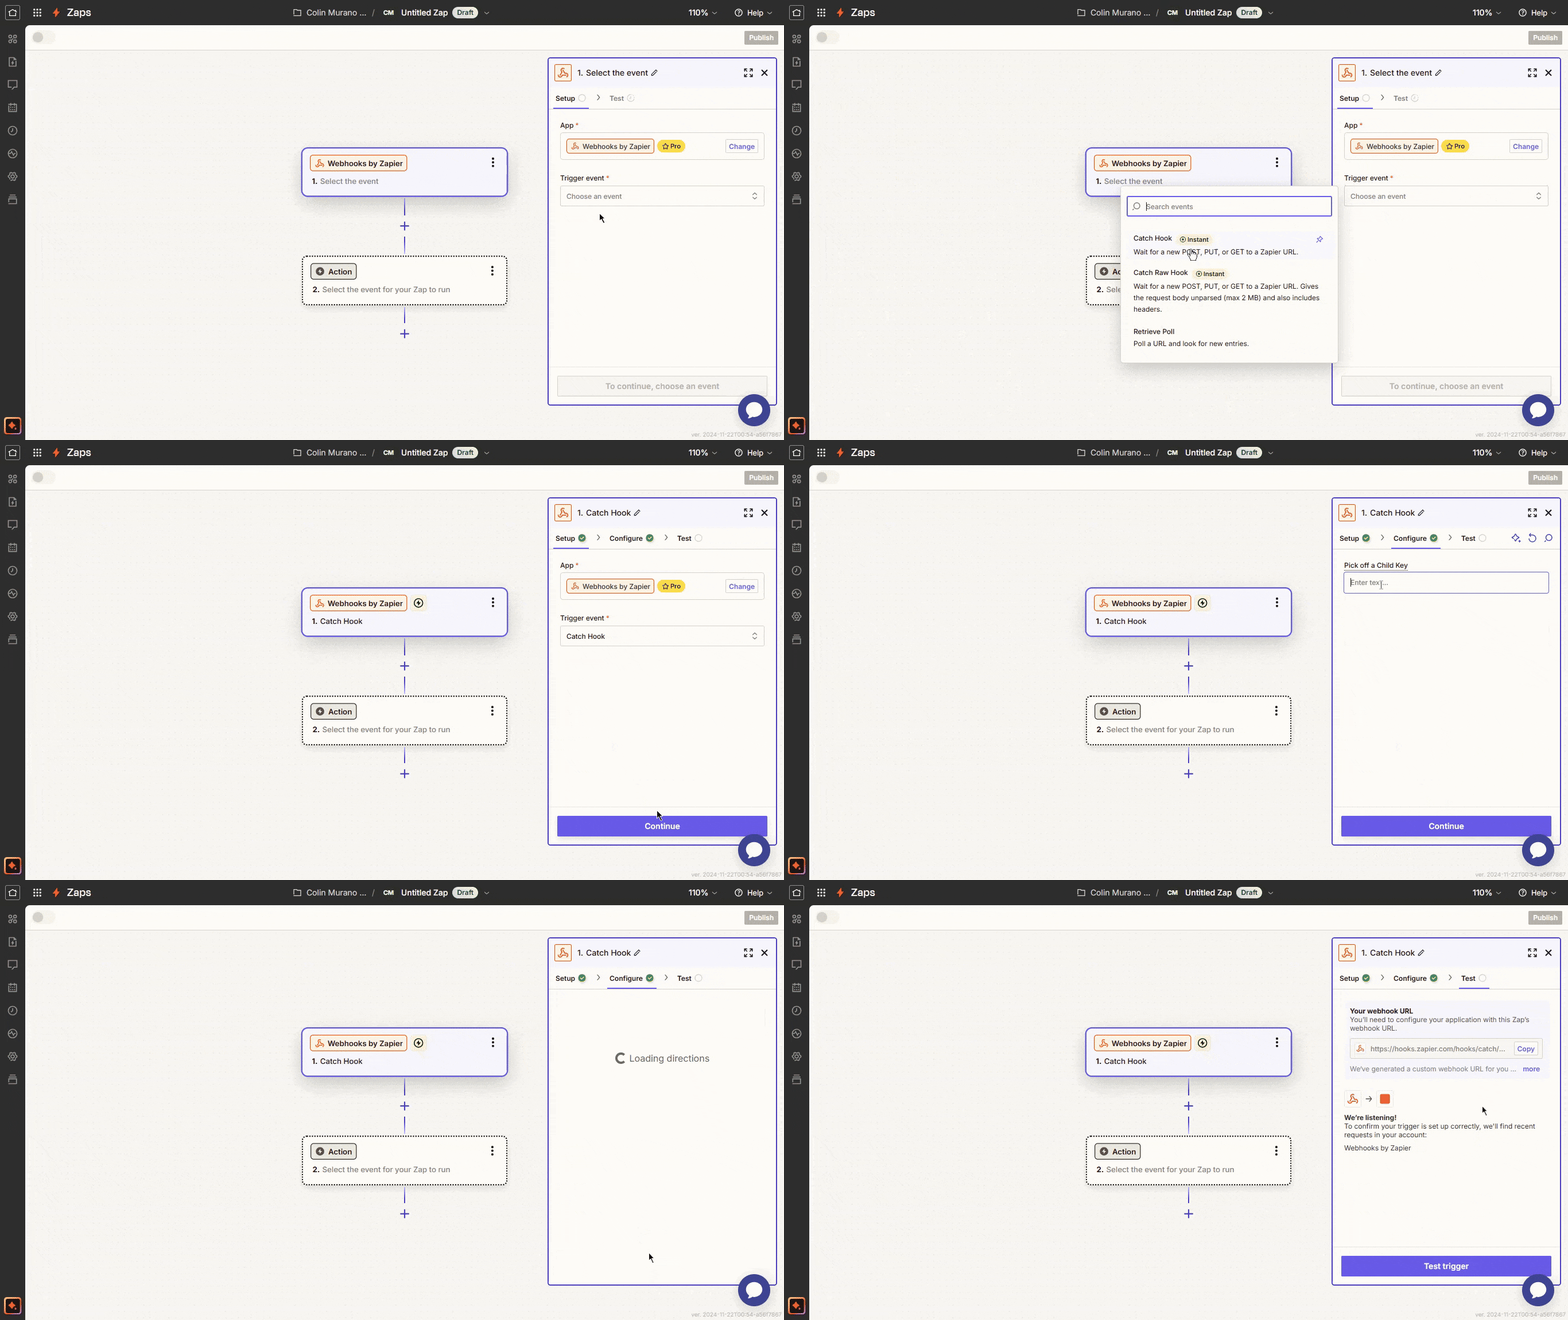
Step 4: Copy the generated Webhook URL, as you will need it to configure OneDeck.
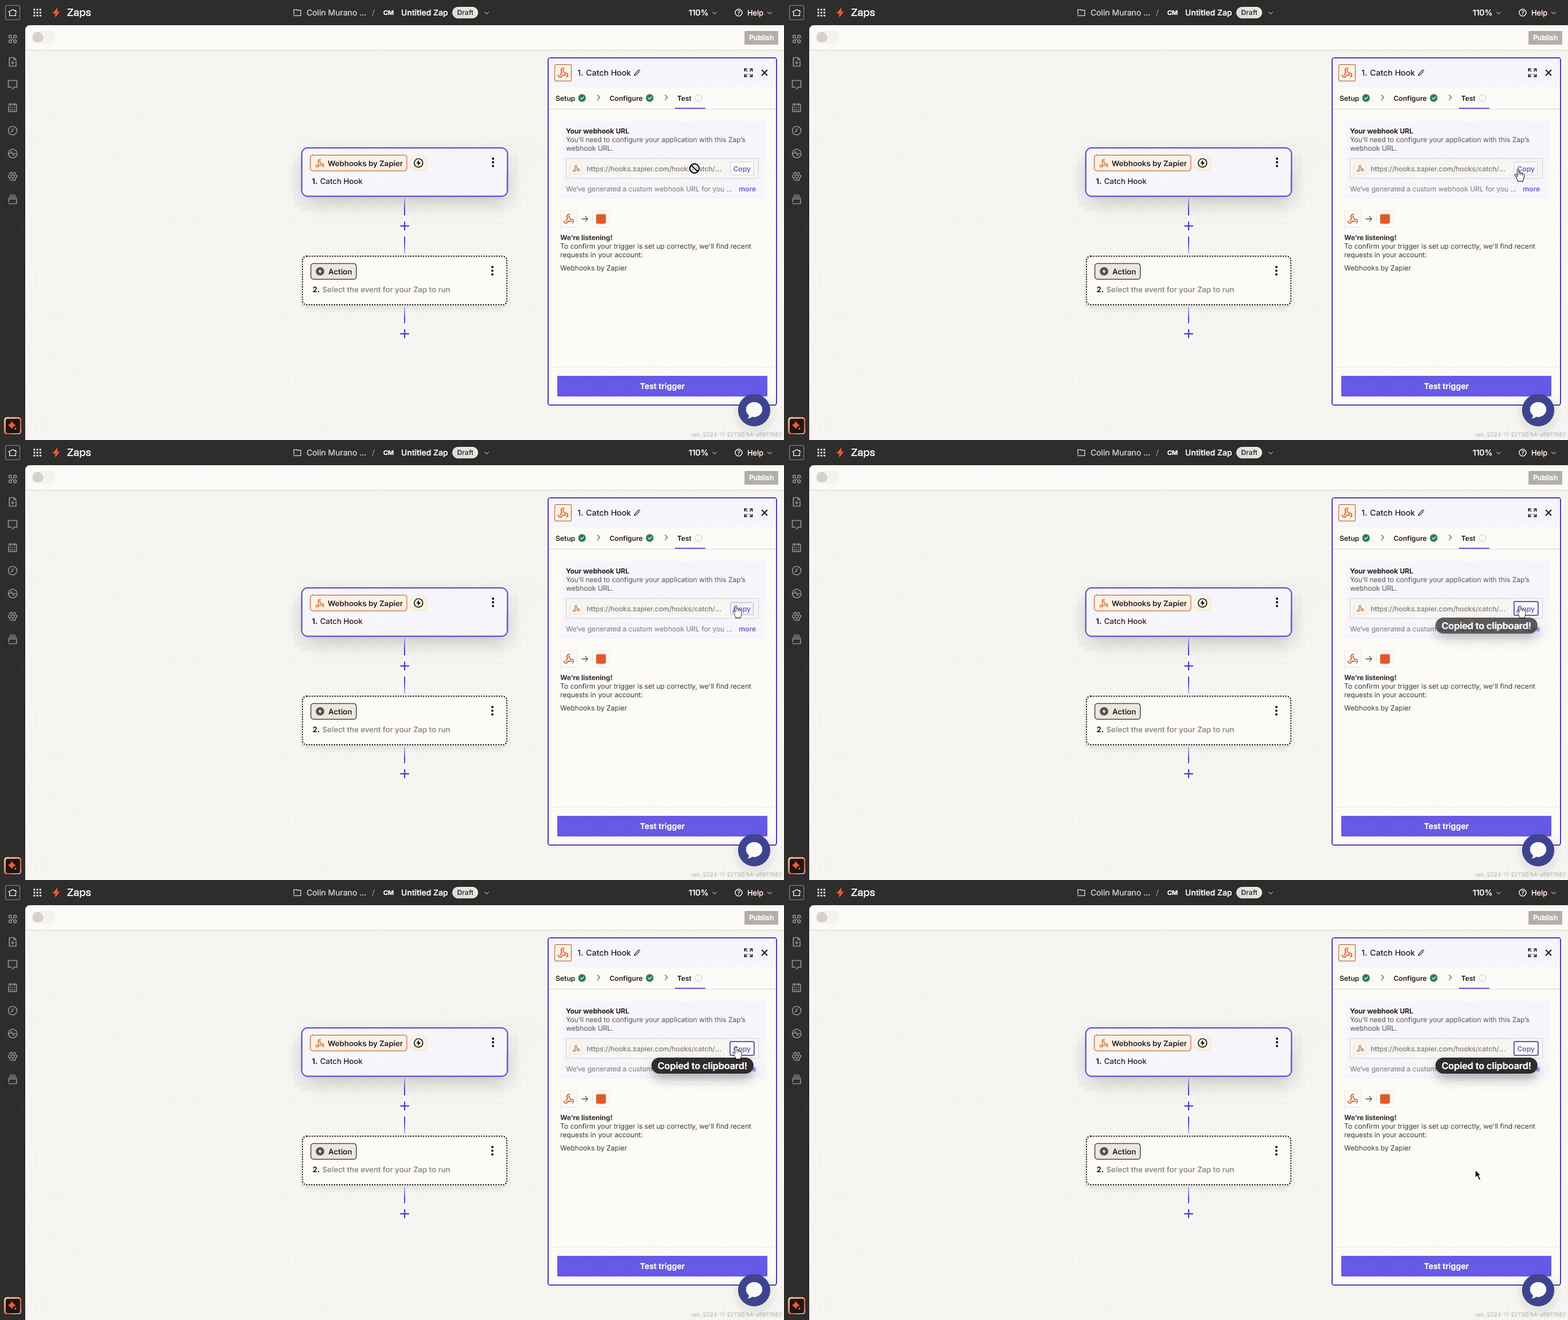
Step 5: Go to the OneDeck automation page and add action to select the HTTP Request (send webhook) option.
Note: You need to set up the OneDeck scenario first by specifying which event should trigger the webhook, then follow step of adding action of webhook URL.
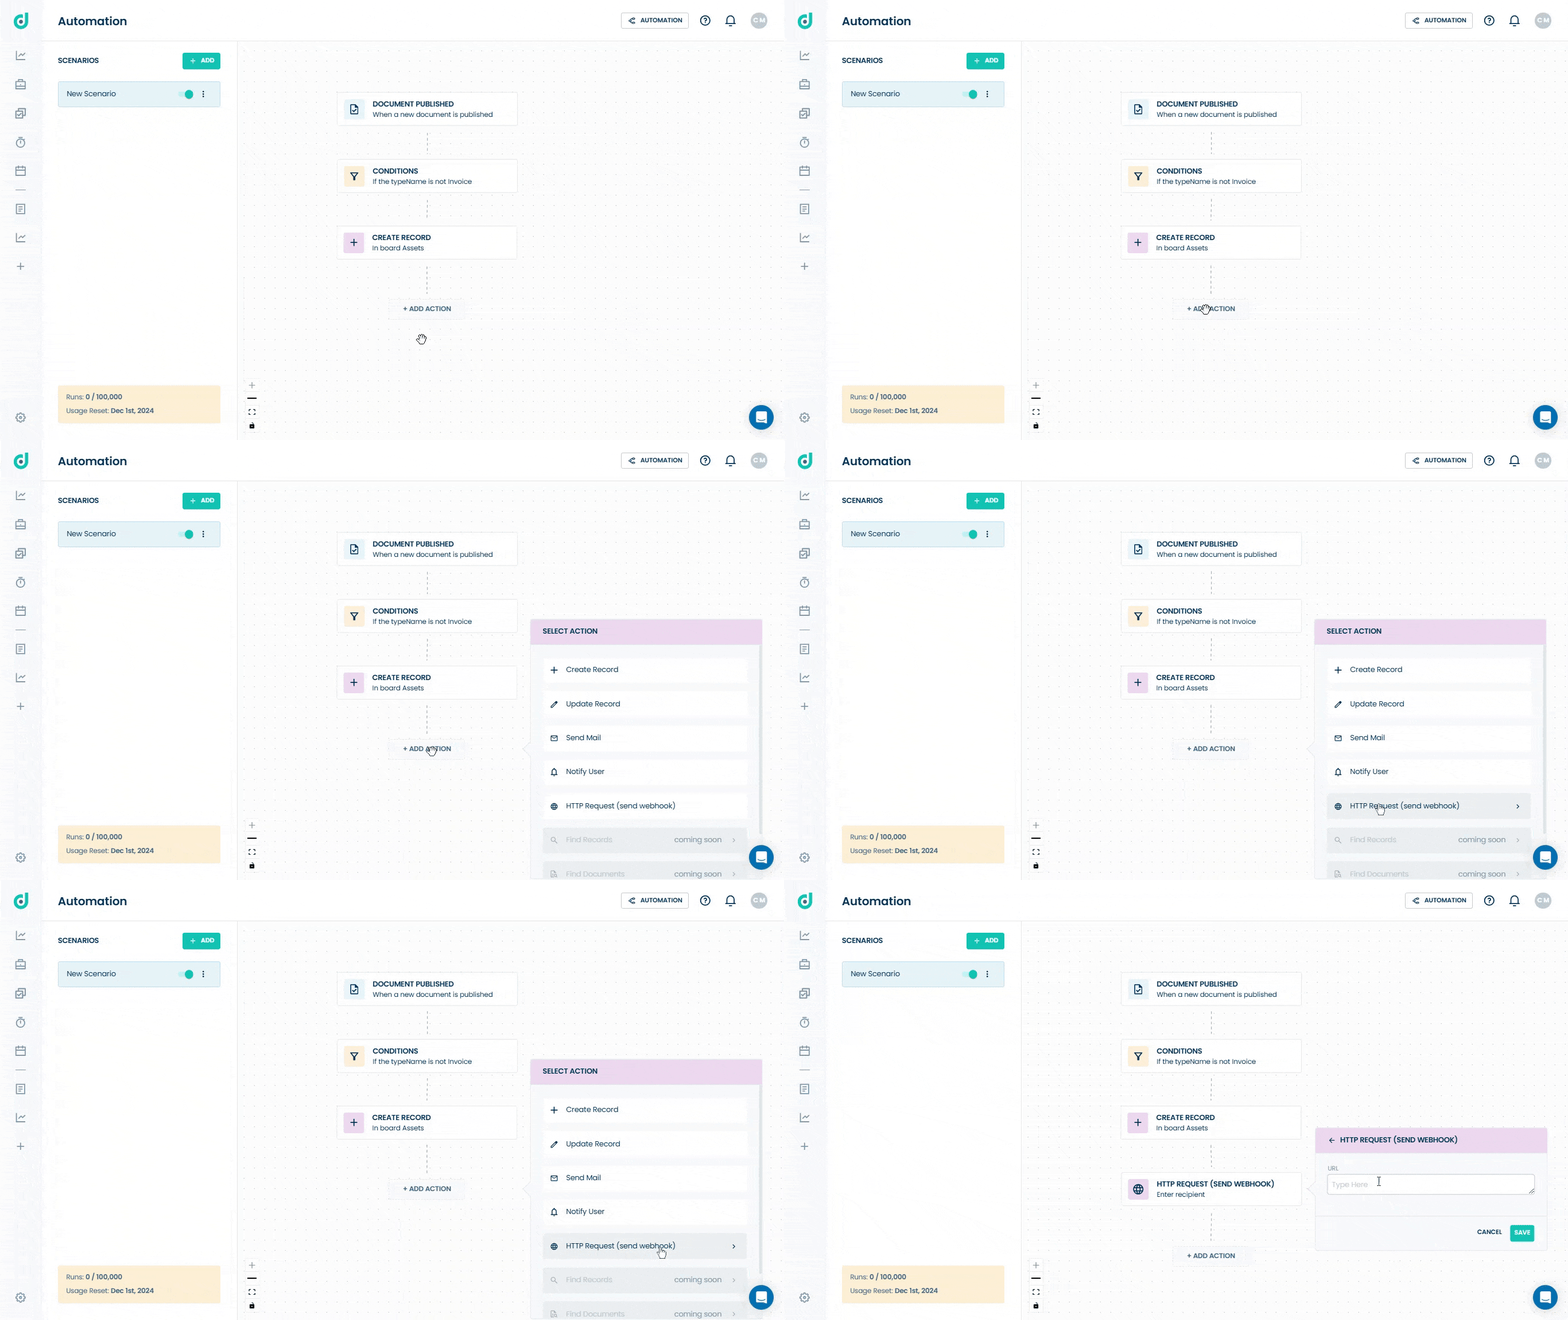
Step 6: Paste the Webhook URL and save it.
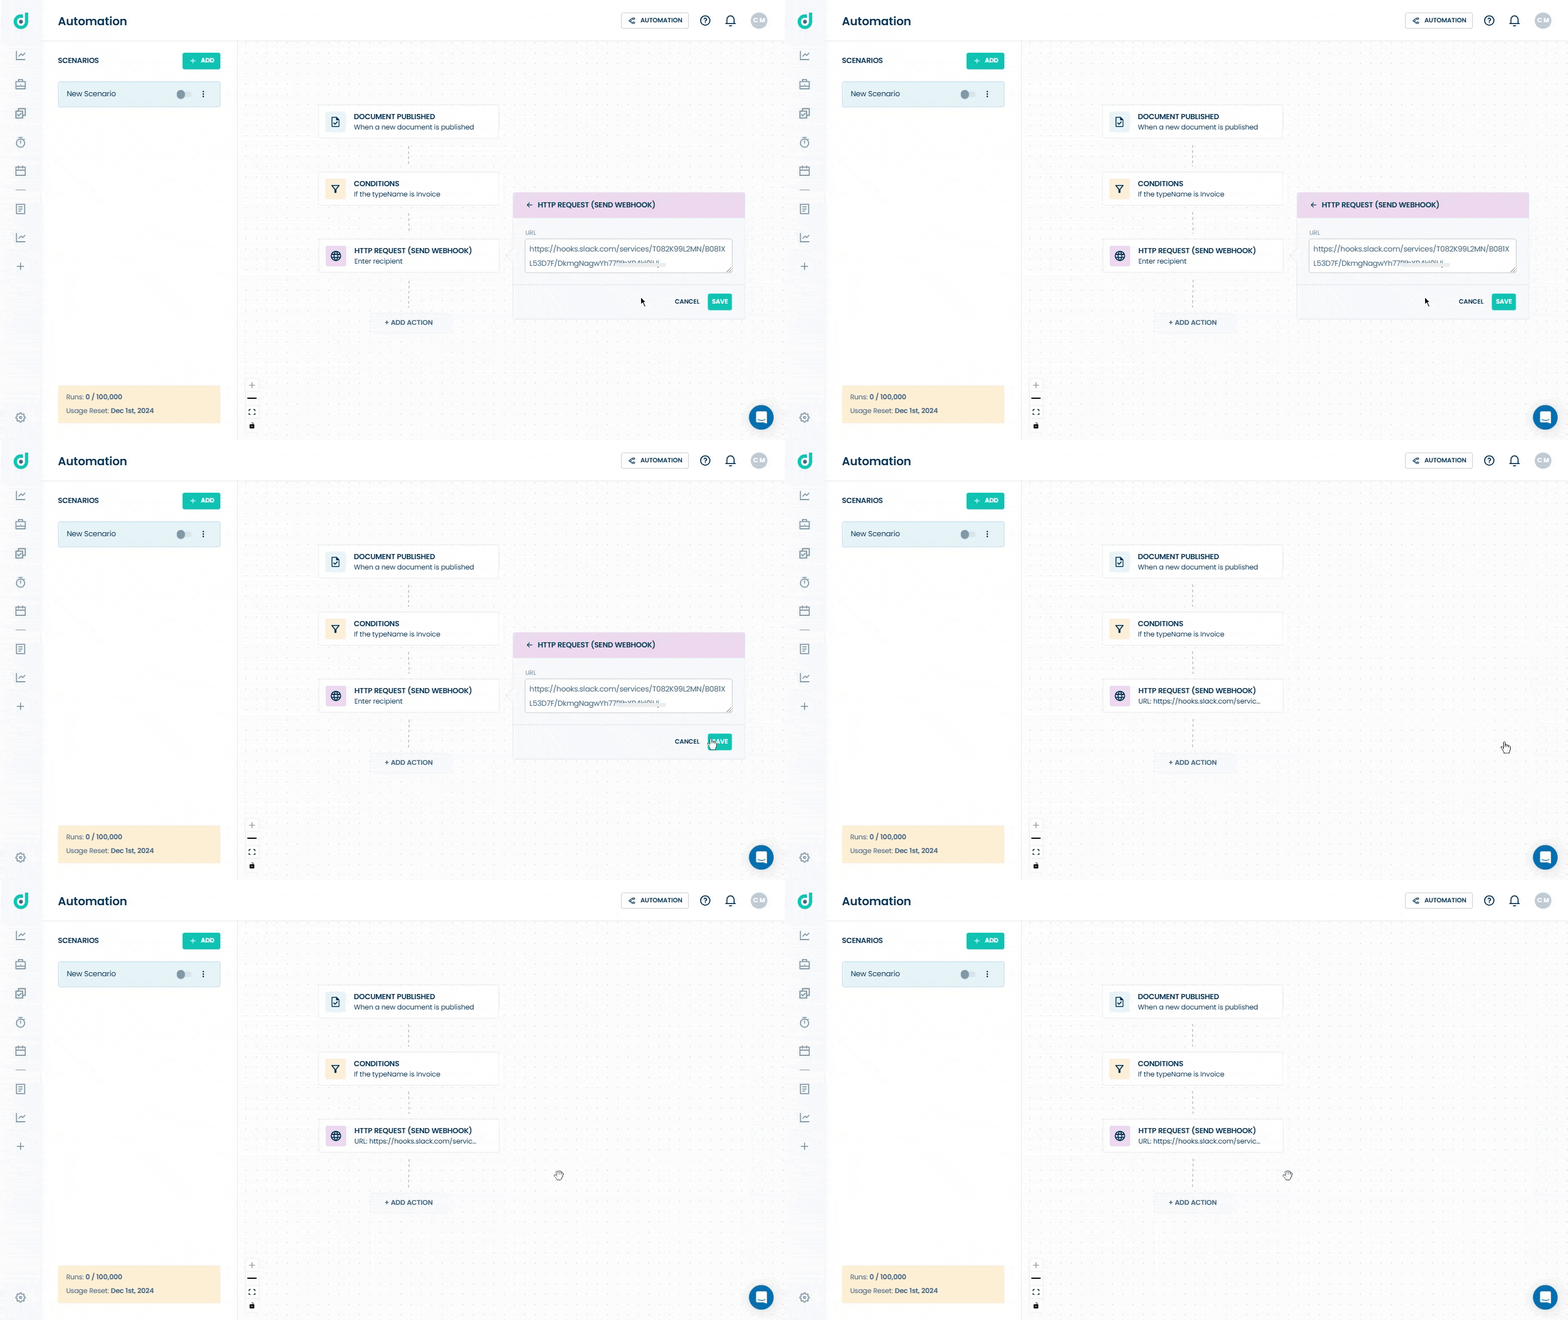
Once the webhook is added to the actions, go to Zapier and connect it to another application by adding an action.
Step 1: On Zapier, click on the Continue button and then search the application name (e.g., "Google Sheets") and select it.
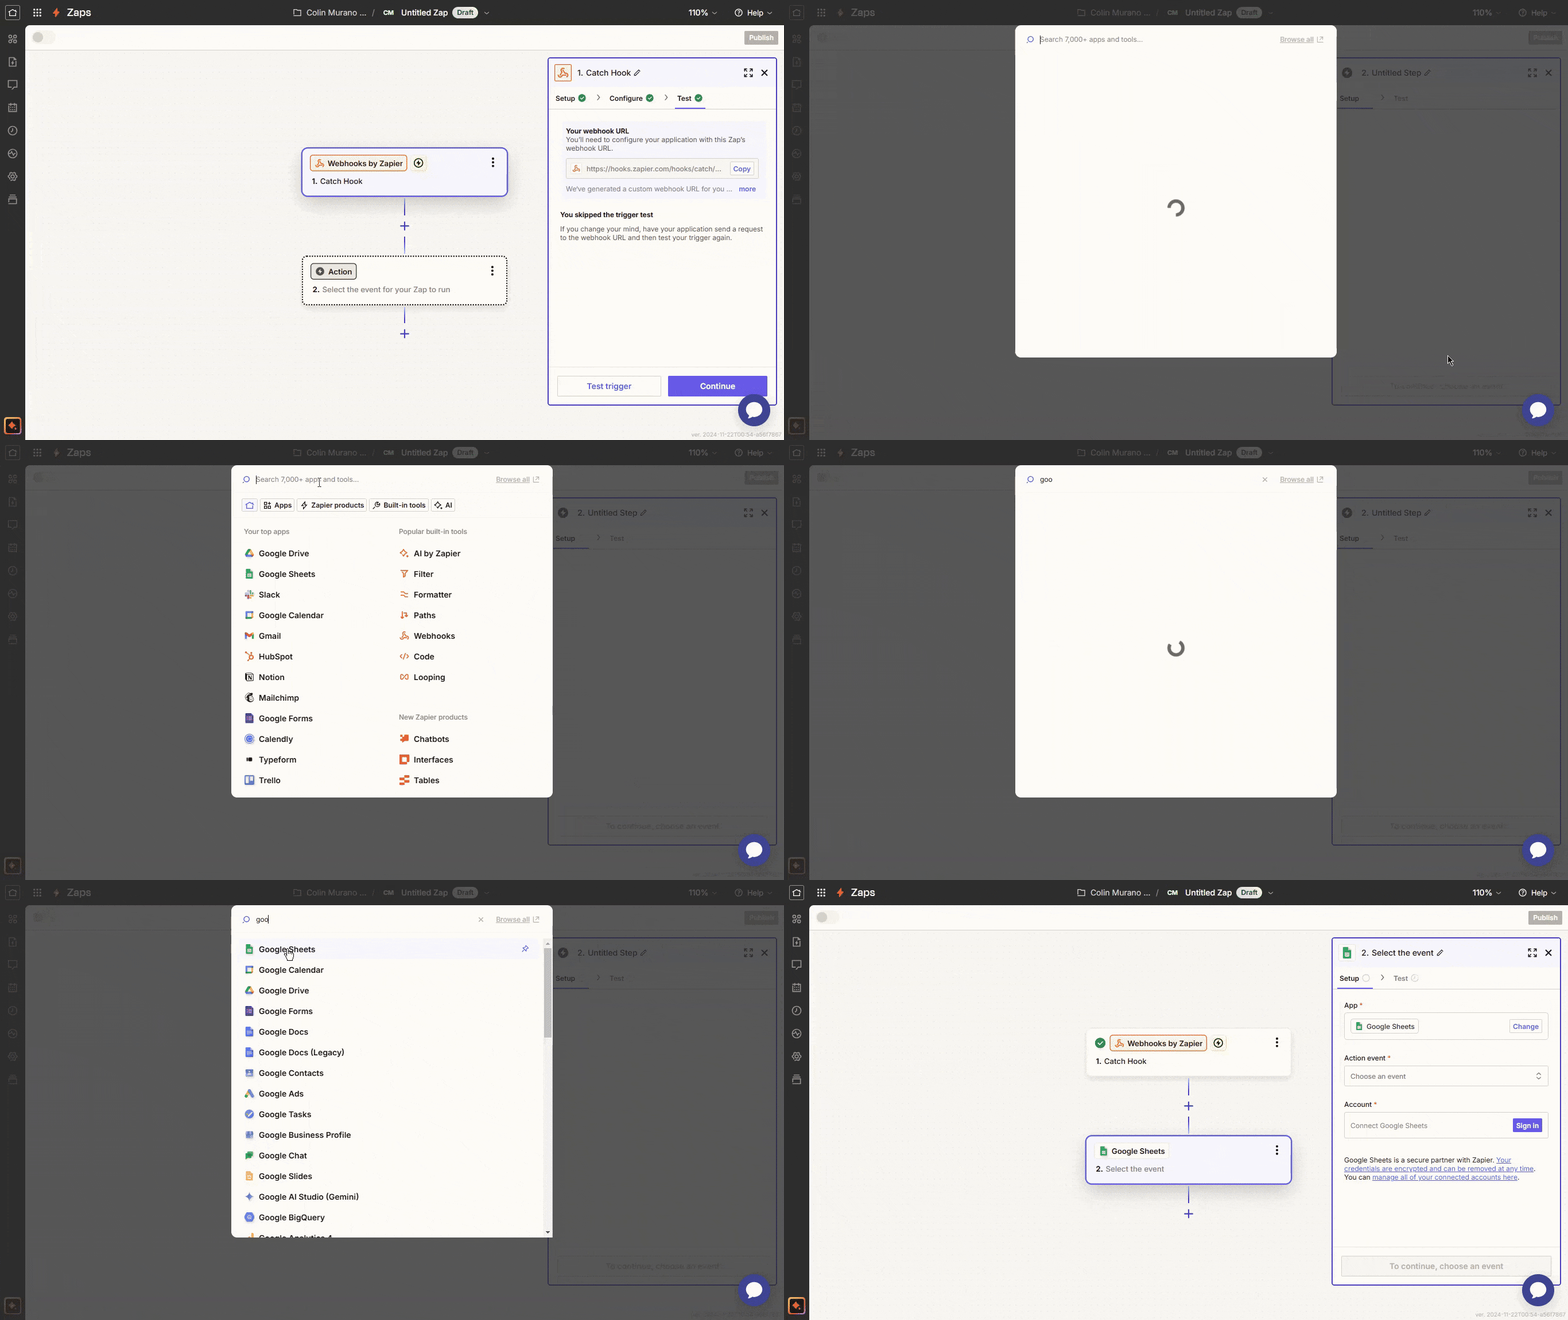
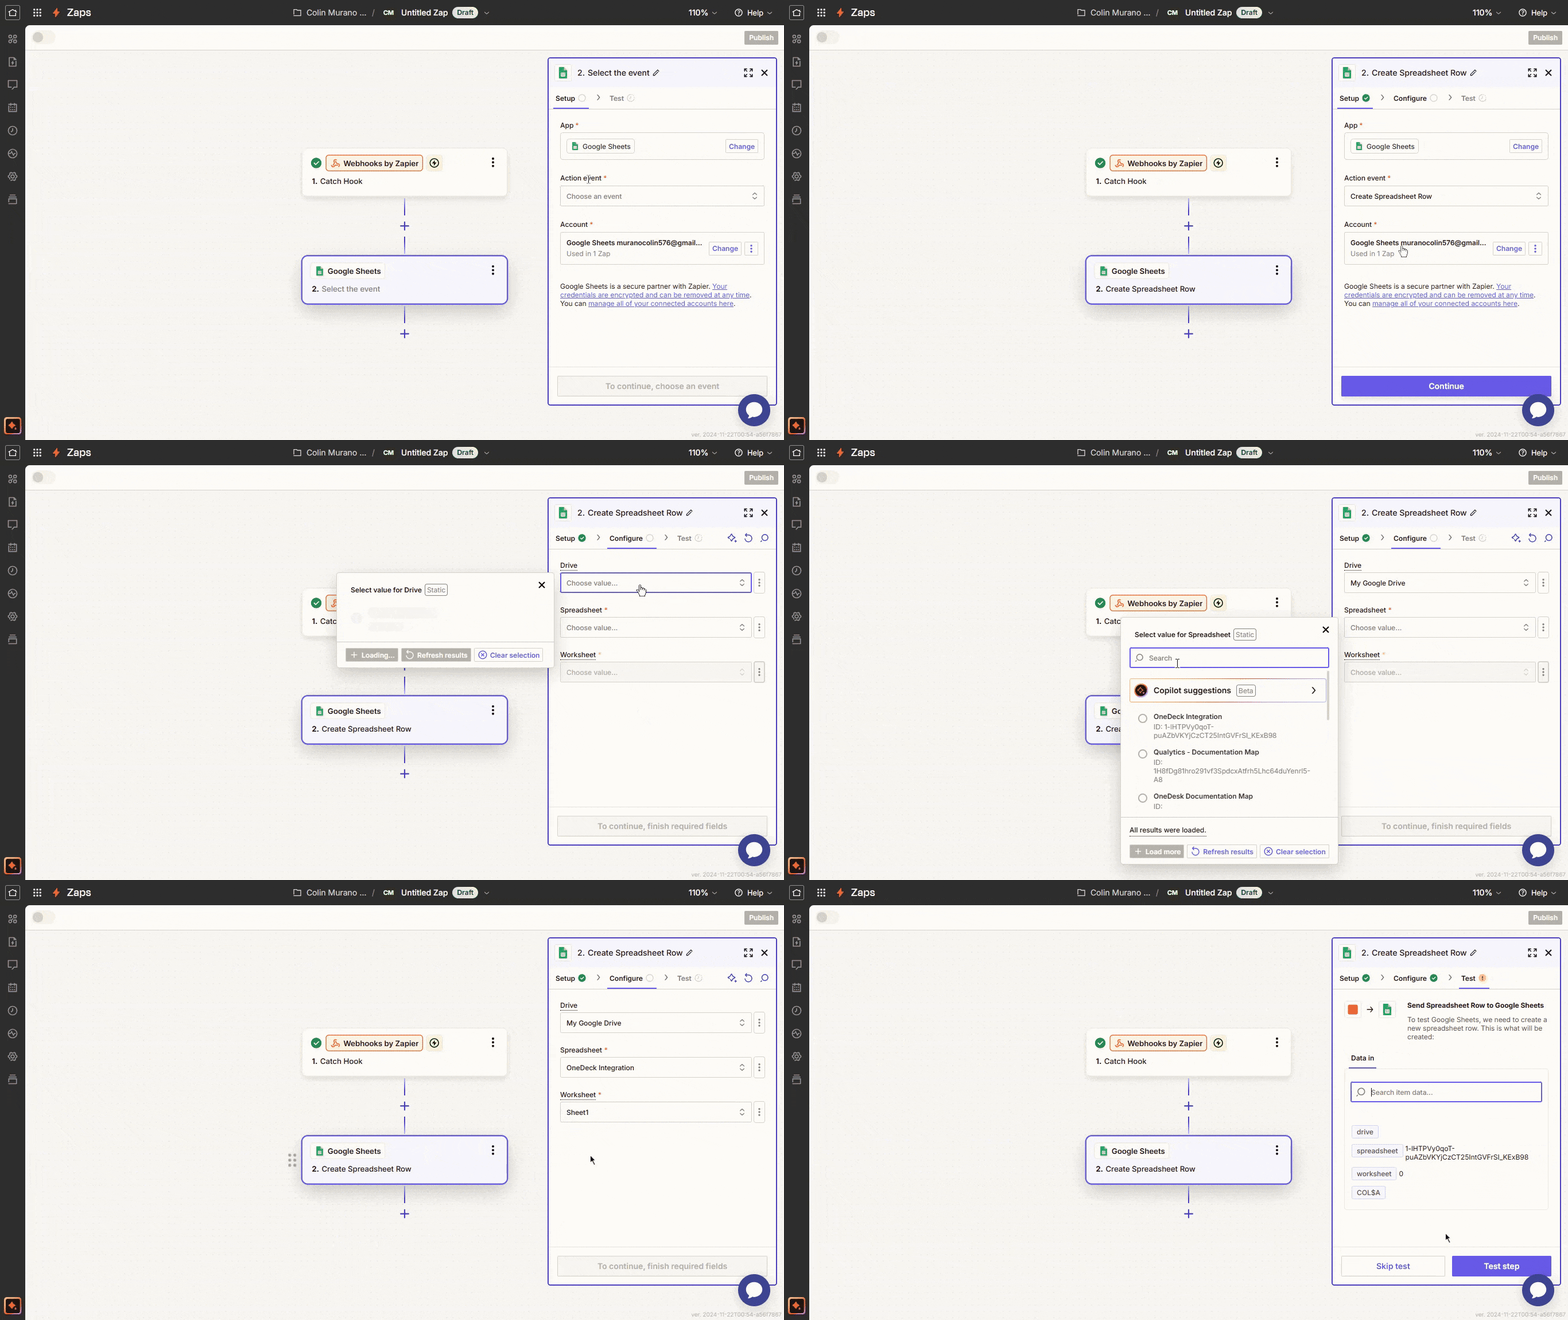
Step 2: Choose the desired action, such as "Create a Row in Google sheet" and configure the selected application by authenticating your account and specifying the fields for sending data.
Step 3: Click the Test Step button and then Publish to test the scenario.
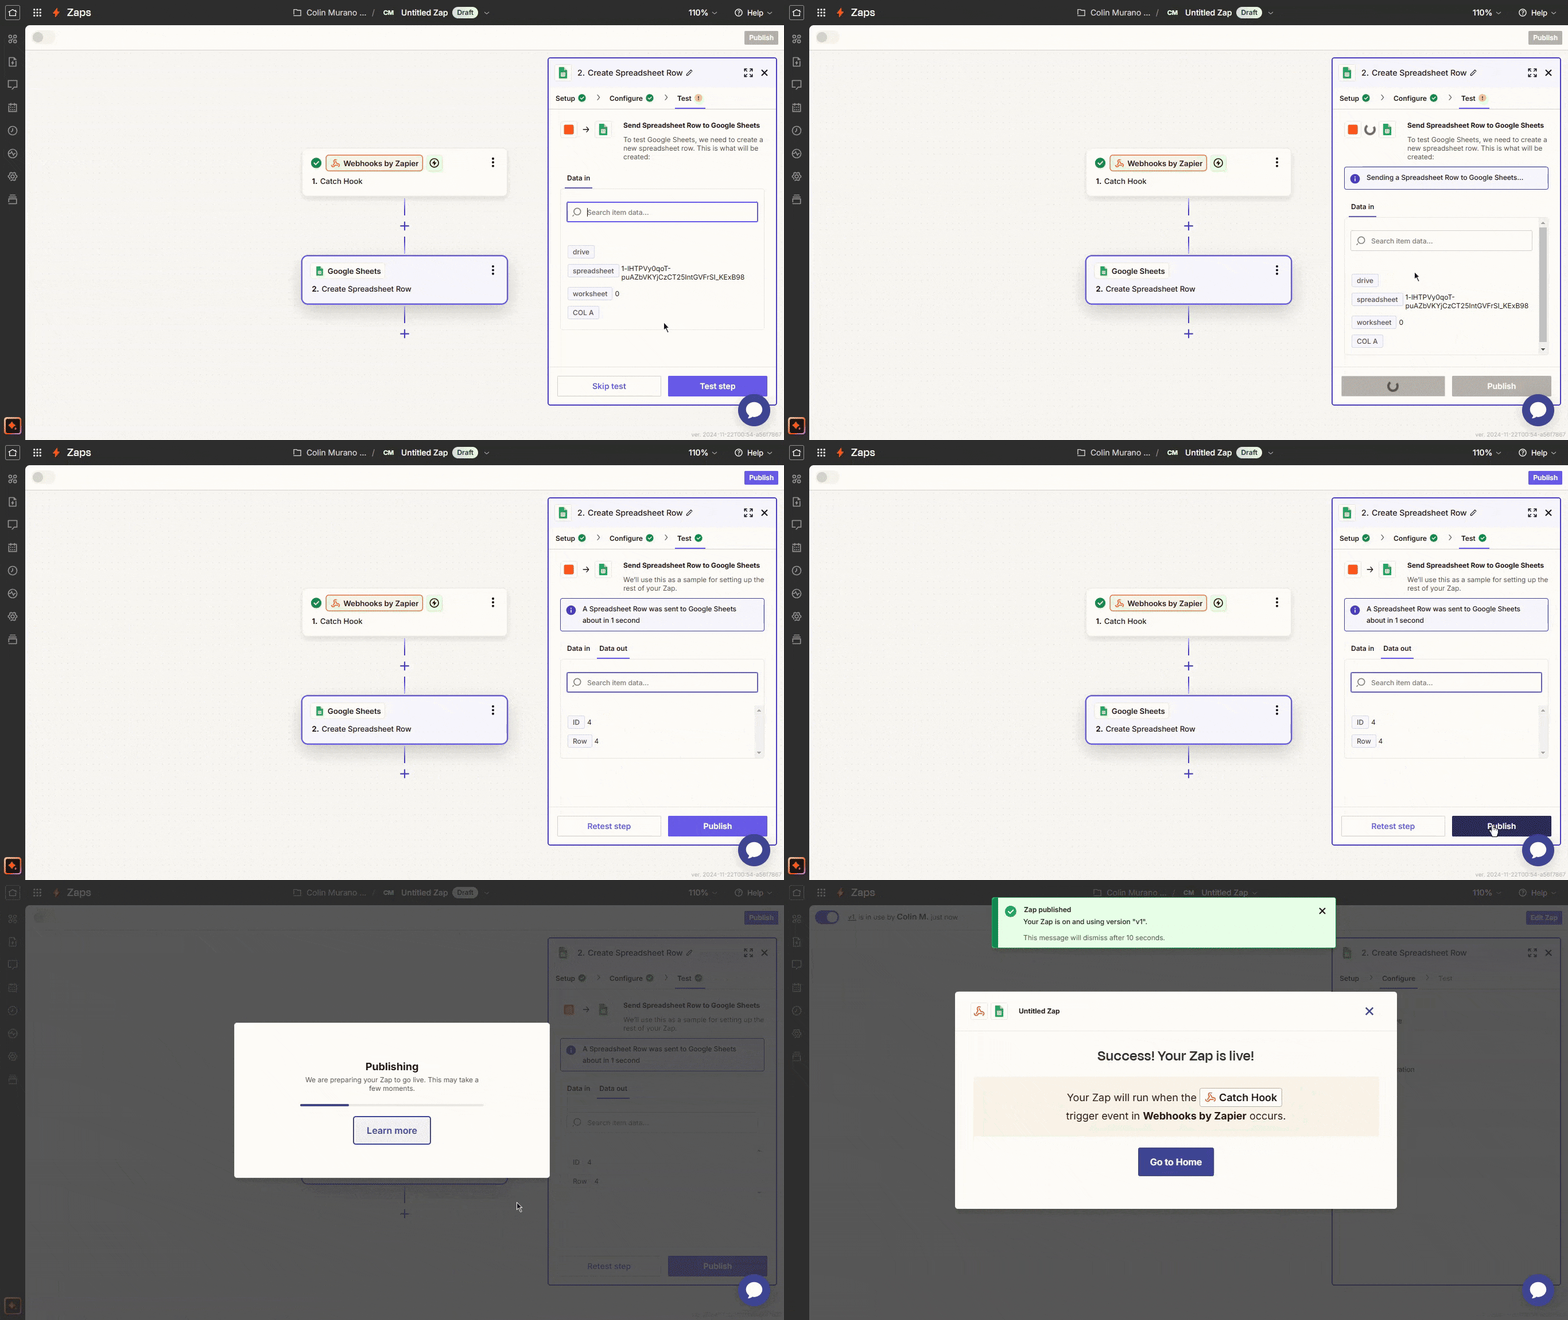
Step 4: Go to the OneDeck dashboard and execute the scenario using the selected trigger and predefined conditions.
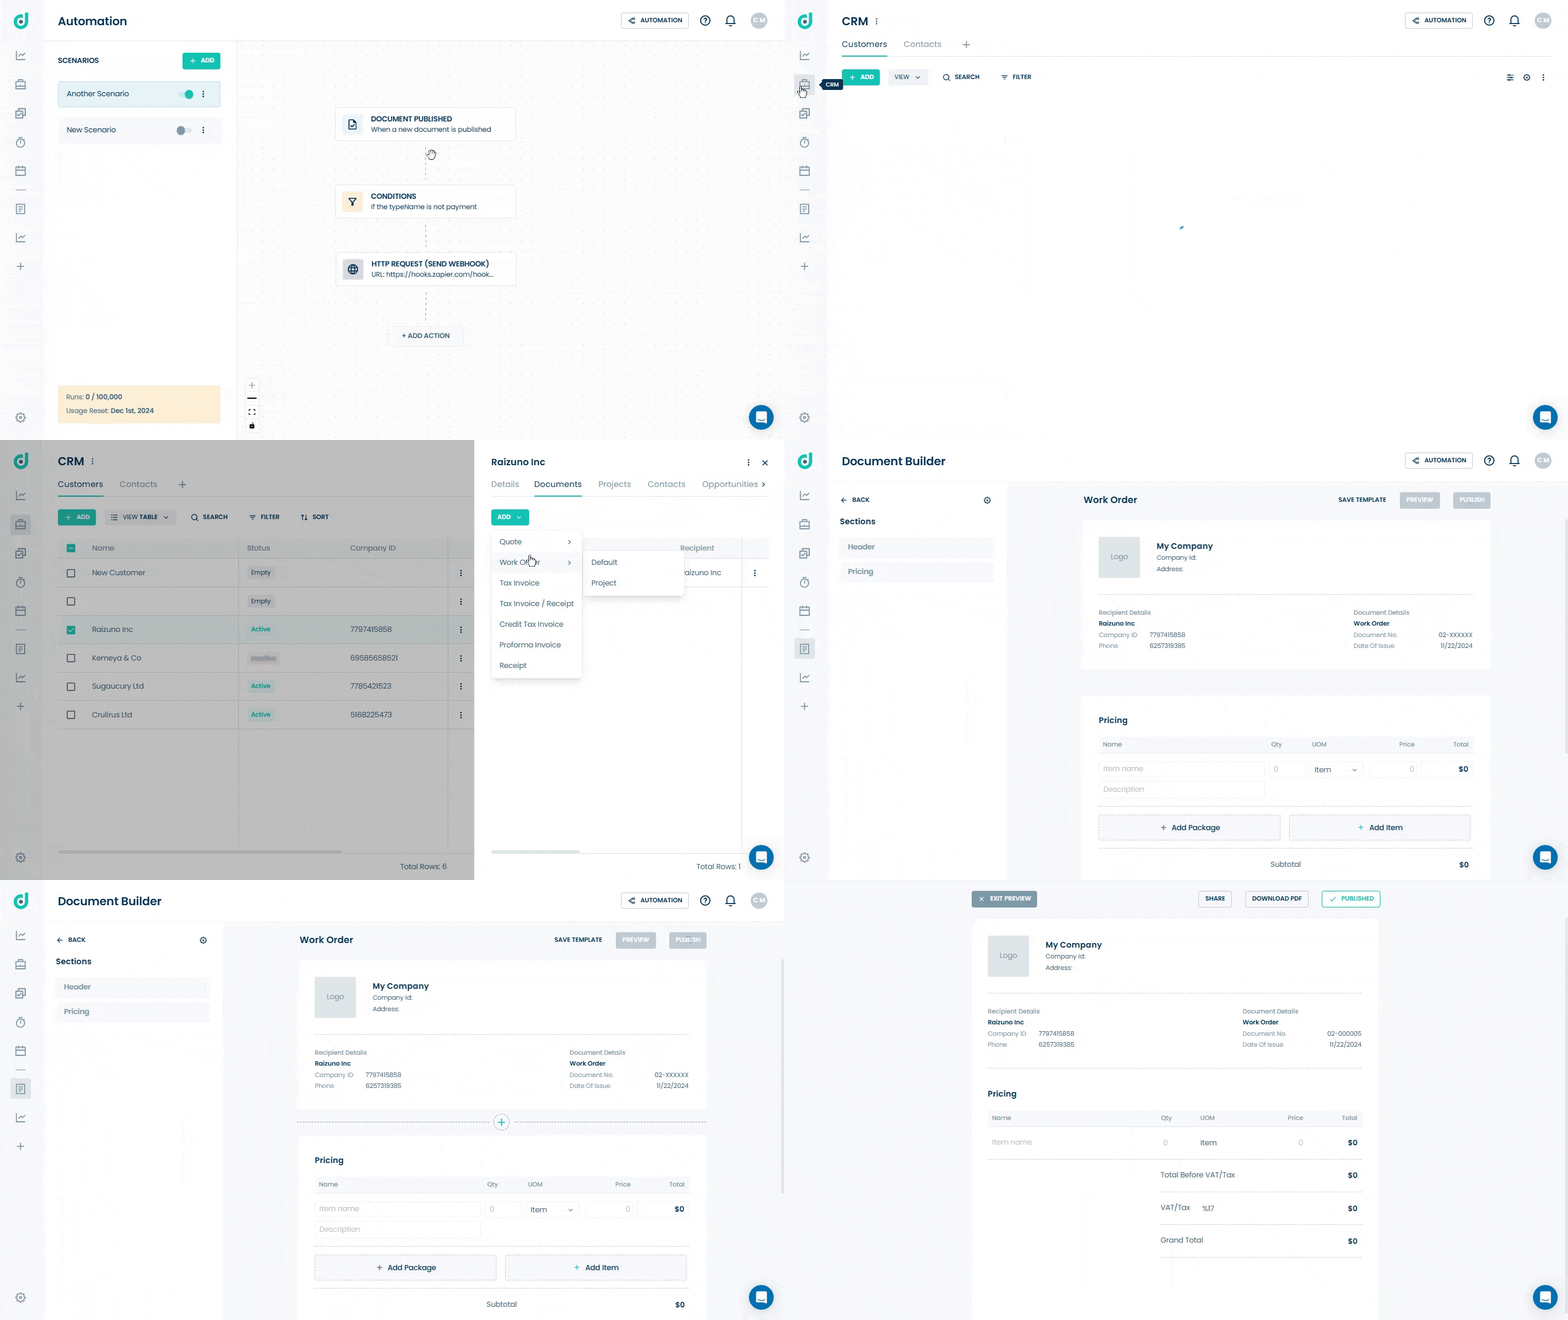
Step 5: Return to Zapier to verify that the scenario works as expected. Once confirmed, configure OneDeck as needed and run it again to activate the scenario and reflect the changes in the application.
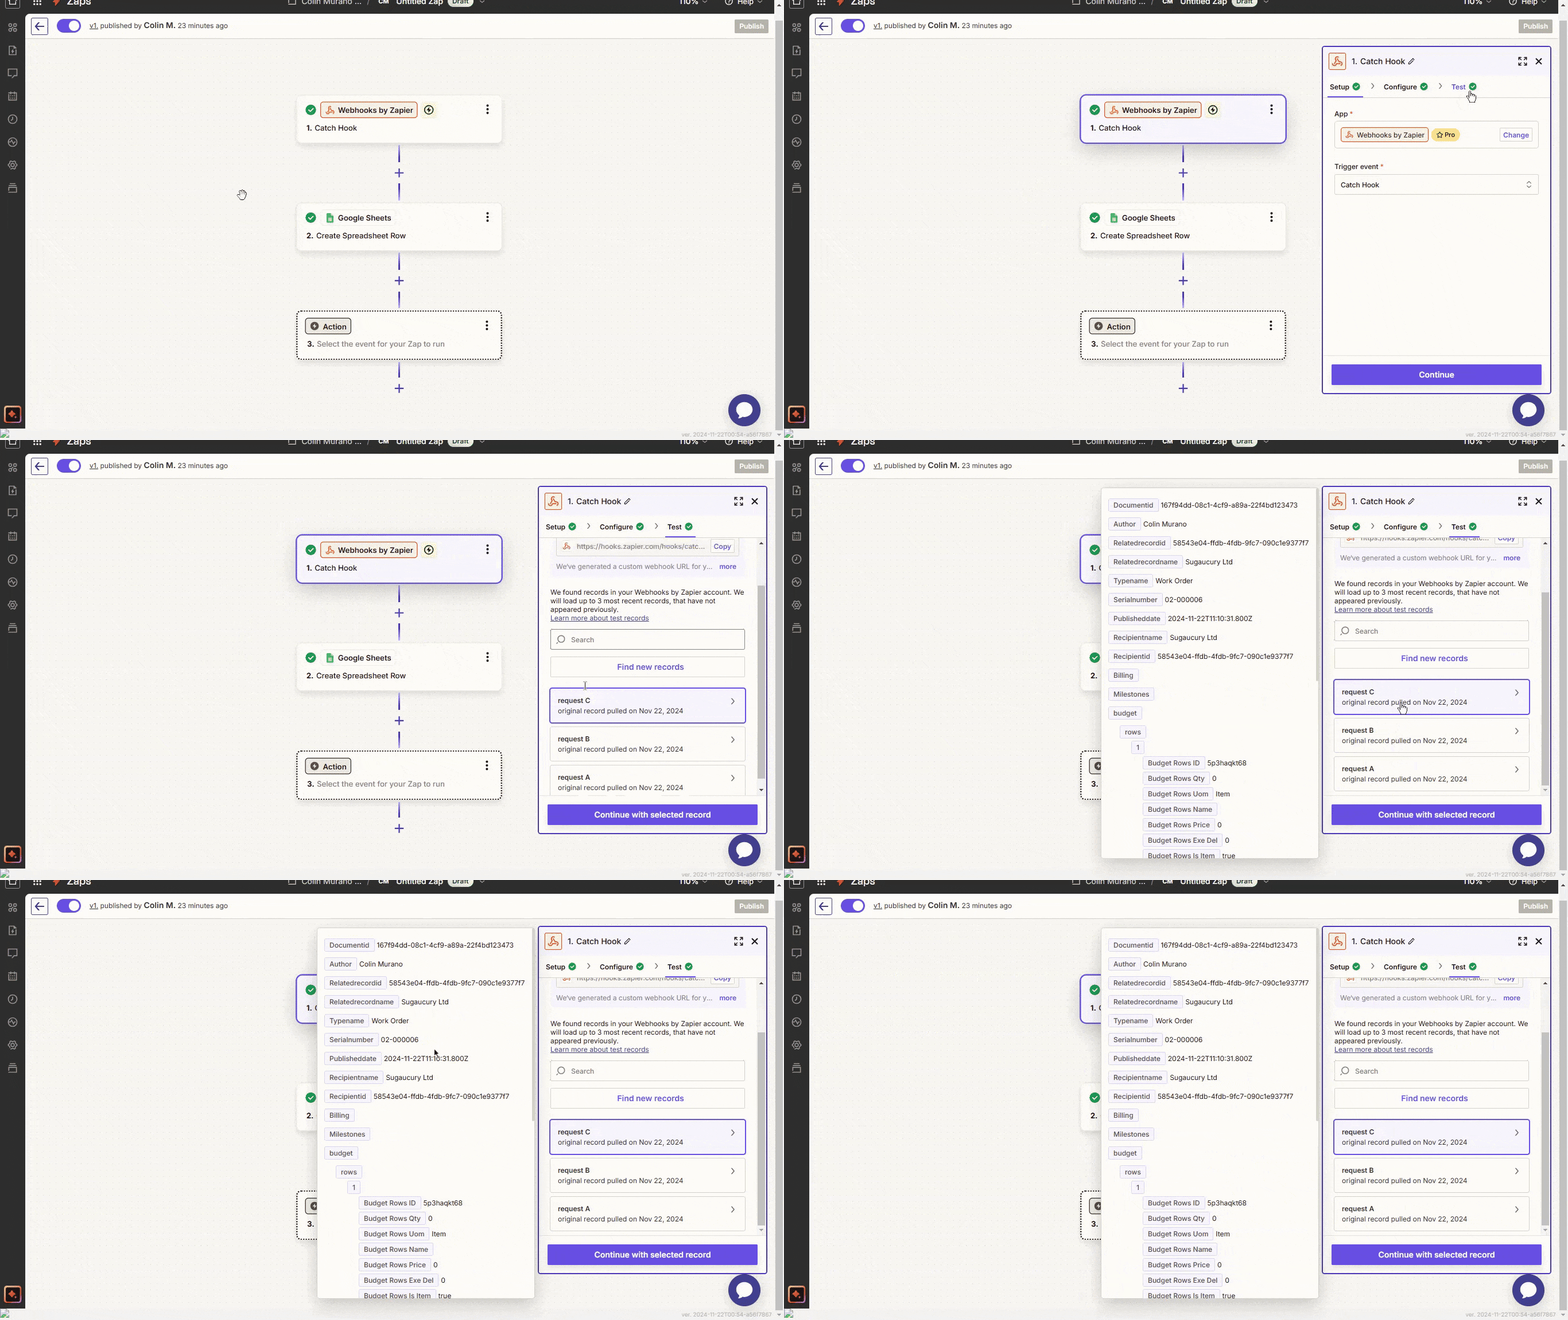
Method II: Use OneDeck App in Third-Party Tools
Allows you to automate the workflow directly from third-party tools such as Zapier or Make.com by integrating OneDeck with other applications without needing a webhook.
Via Zapier
Step 1: Log into your Zapier account and click on the Zap for automated workflows.
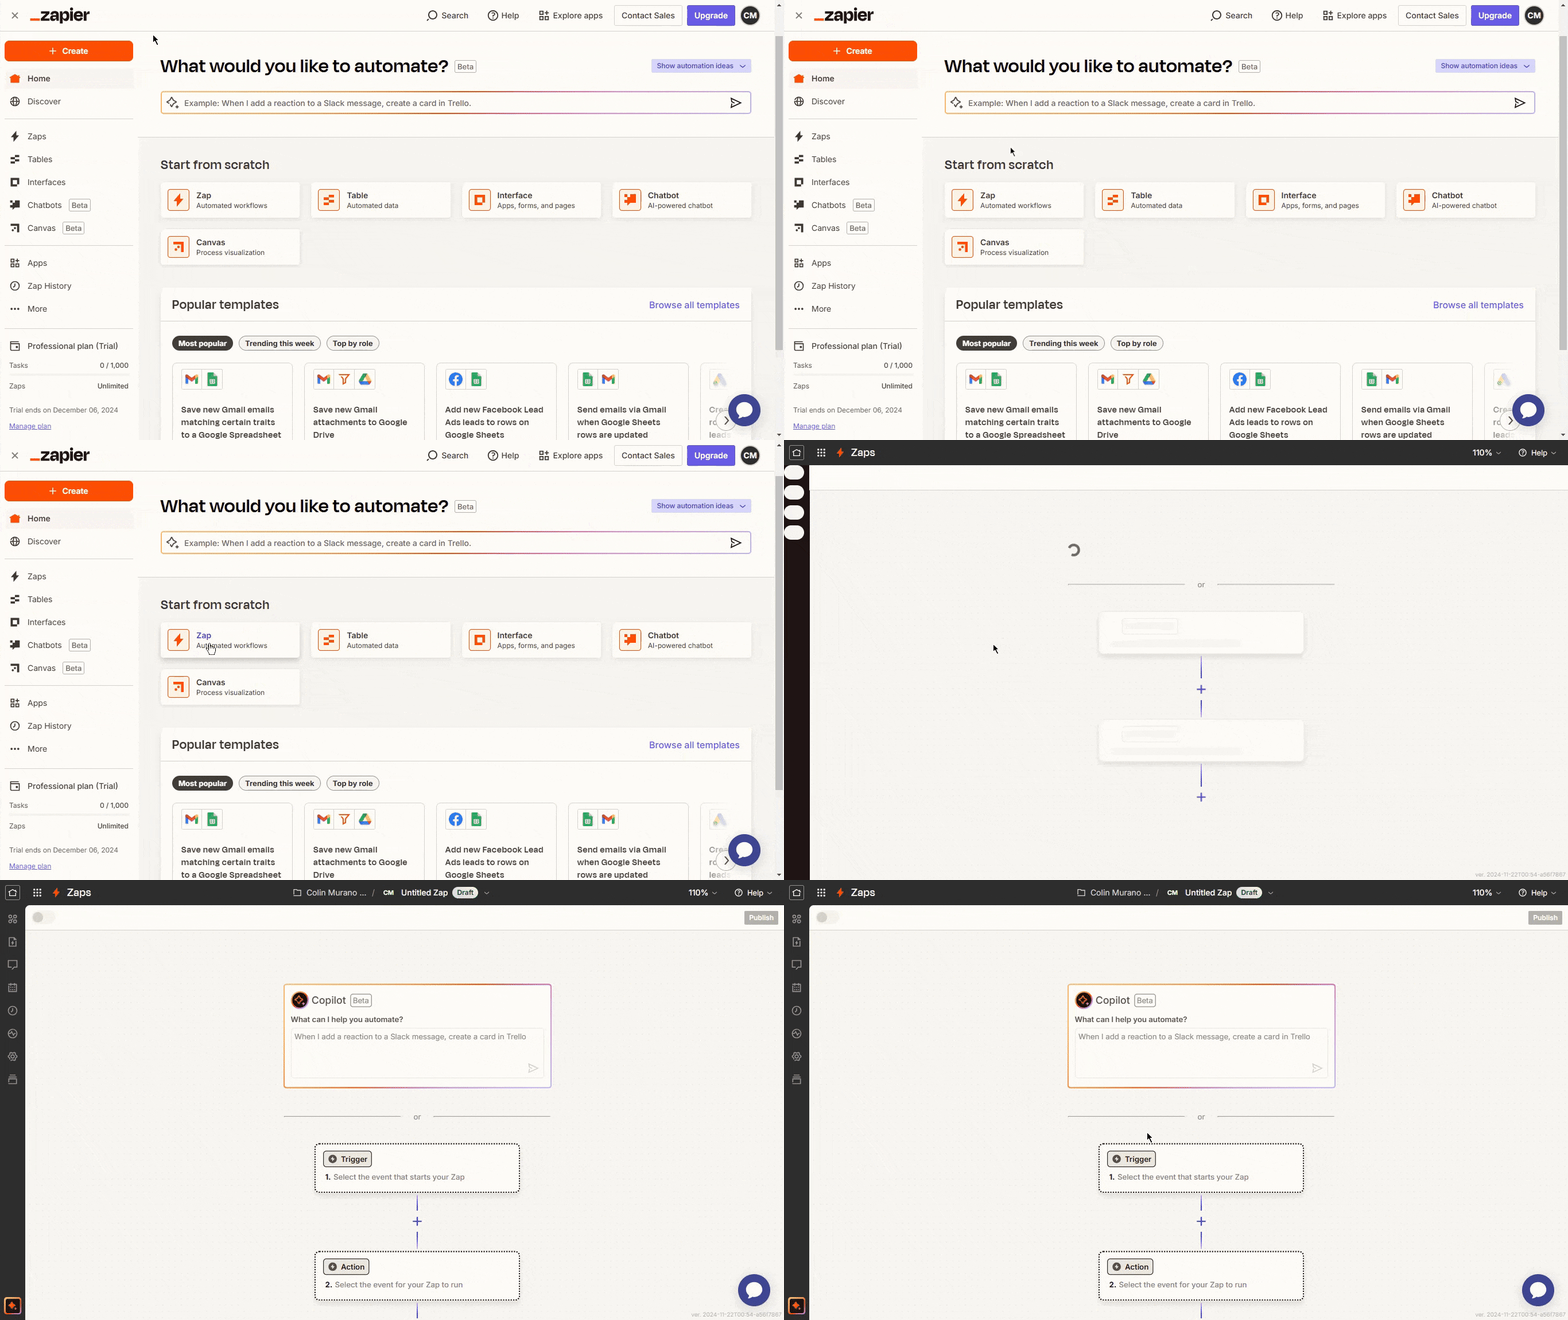
Step 2: Click on the Trigger button, search for and select the OneDeck app.
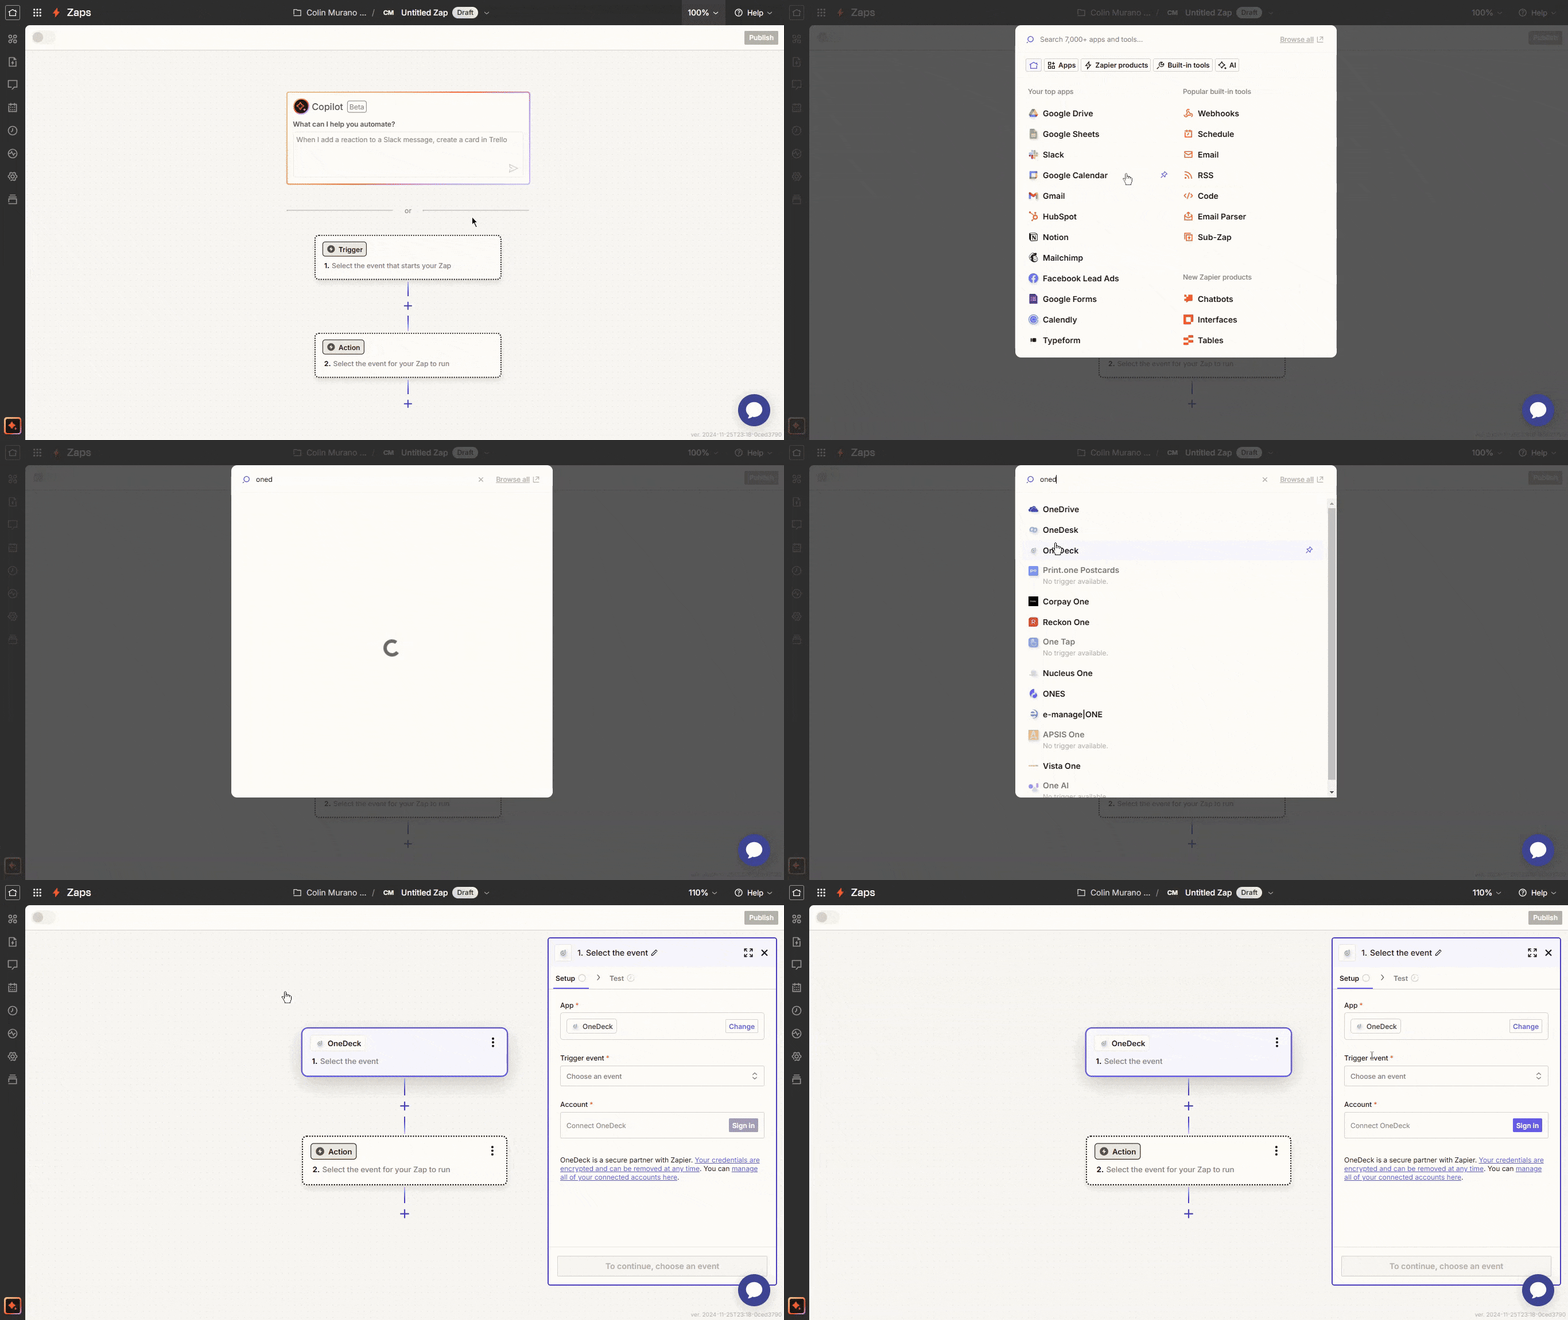
Step 3: Select a specific trigger event, such as "Record Created" or any other relevant option that fits your workflow needs.
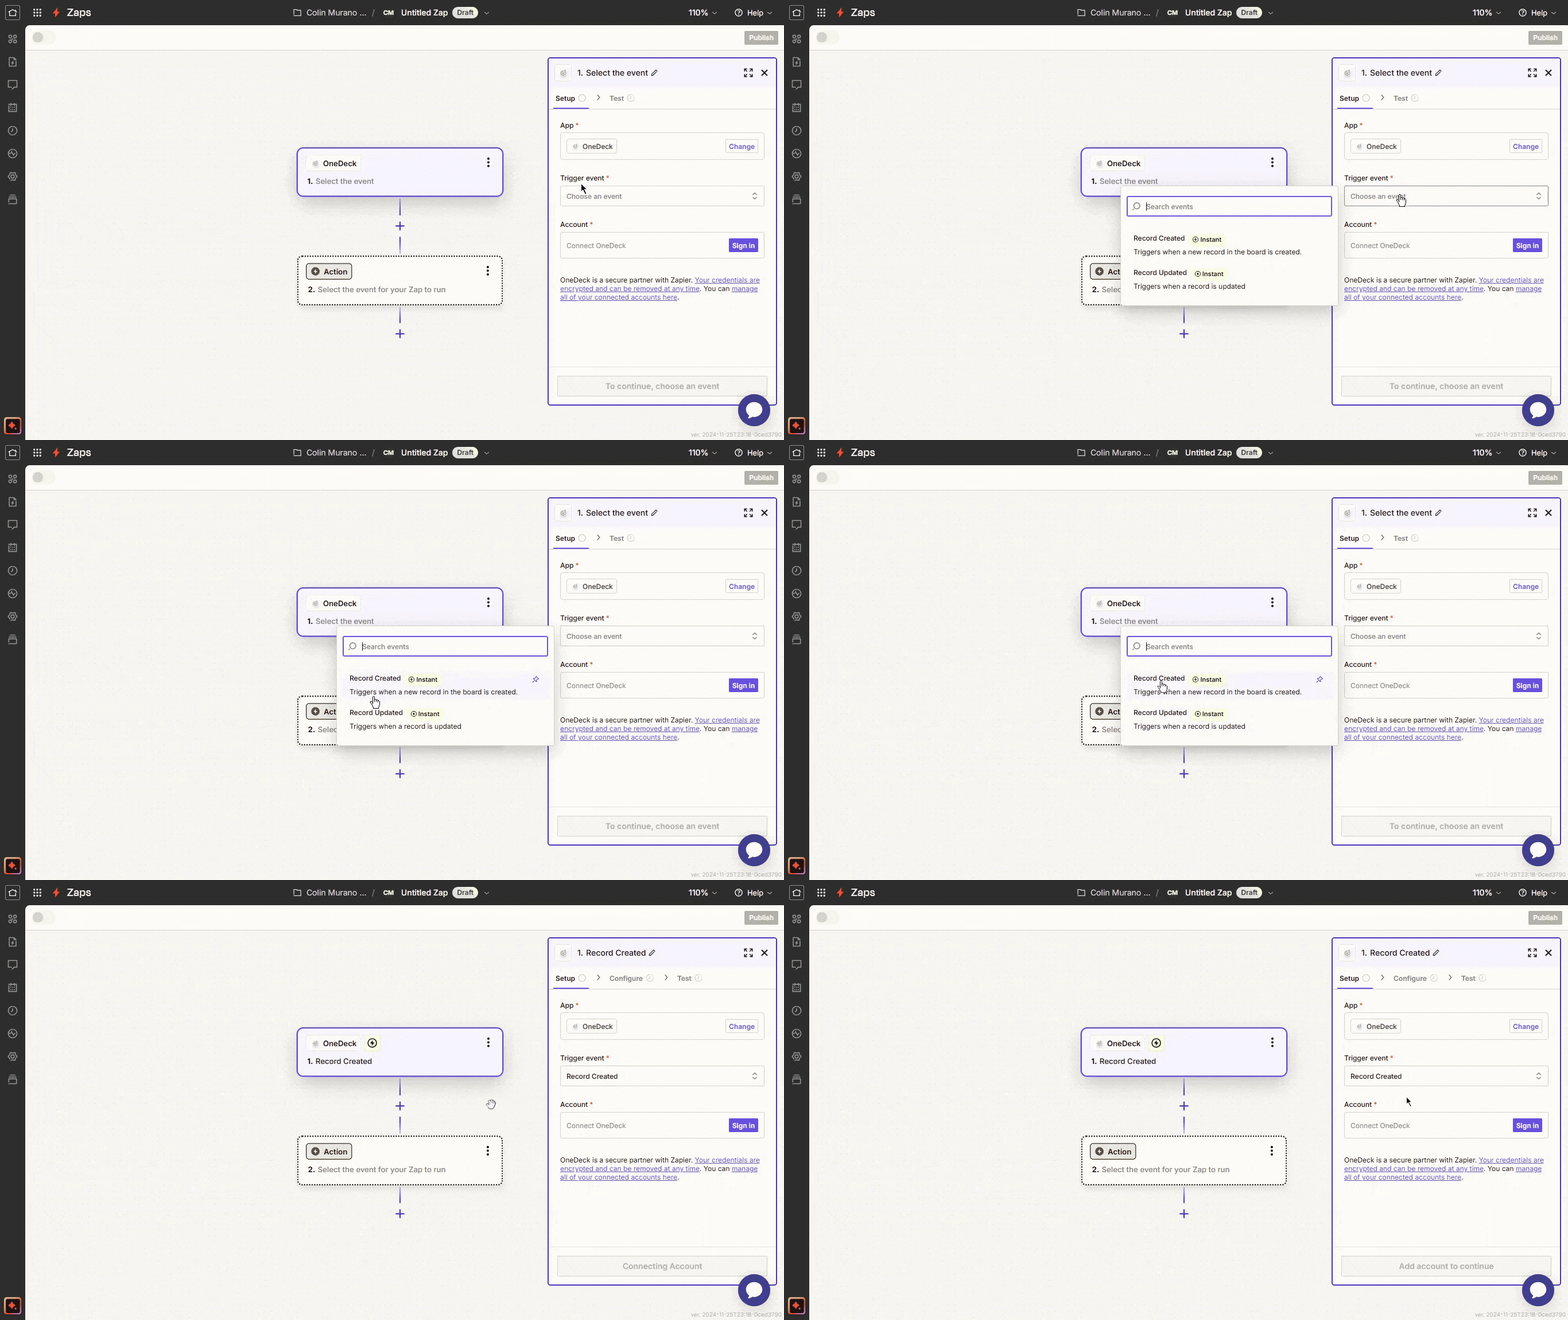
Step 4: Connect your OneDeck account to Zapier via Signing In.
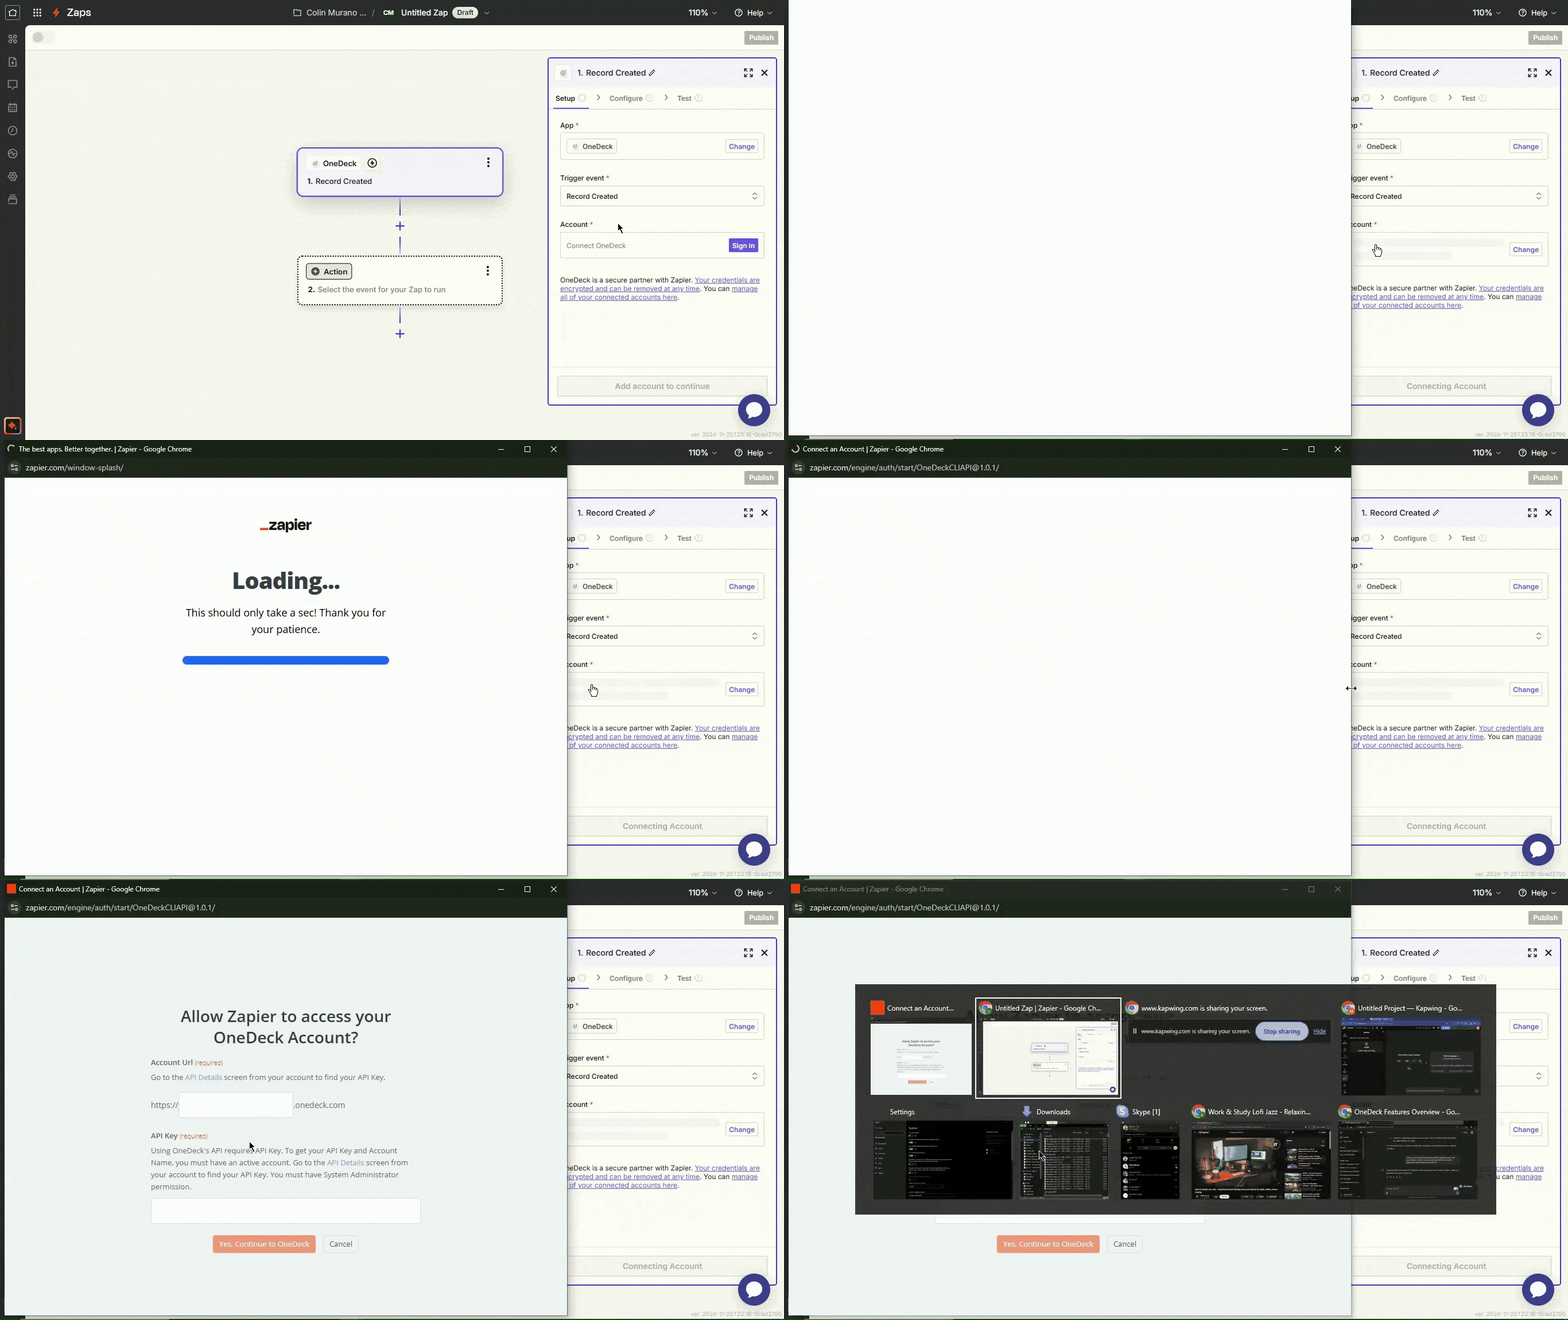
Step 5: Go to the OneDeck Settings page and copy the API key.
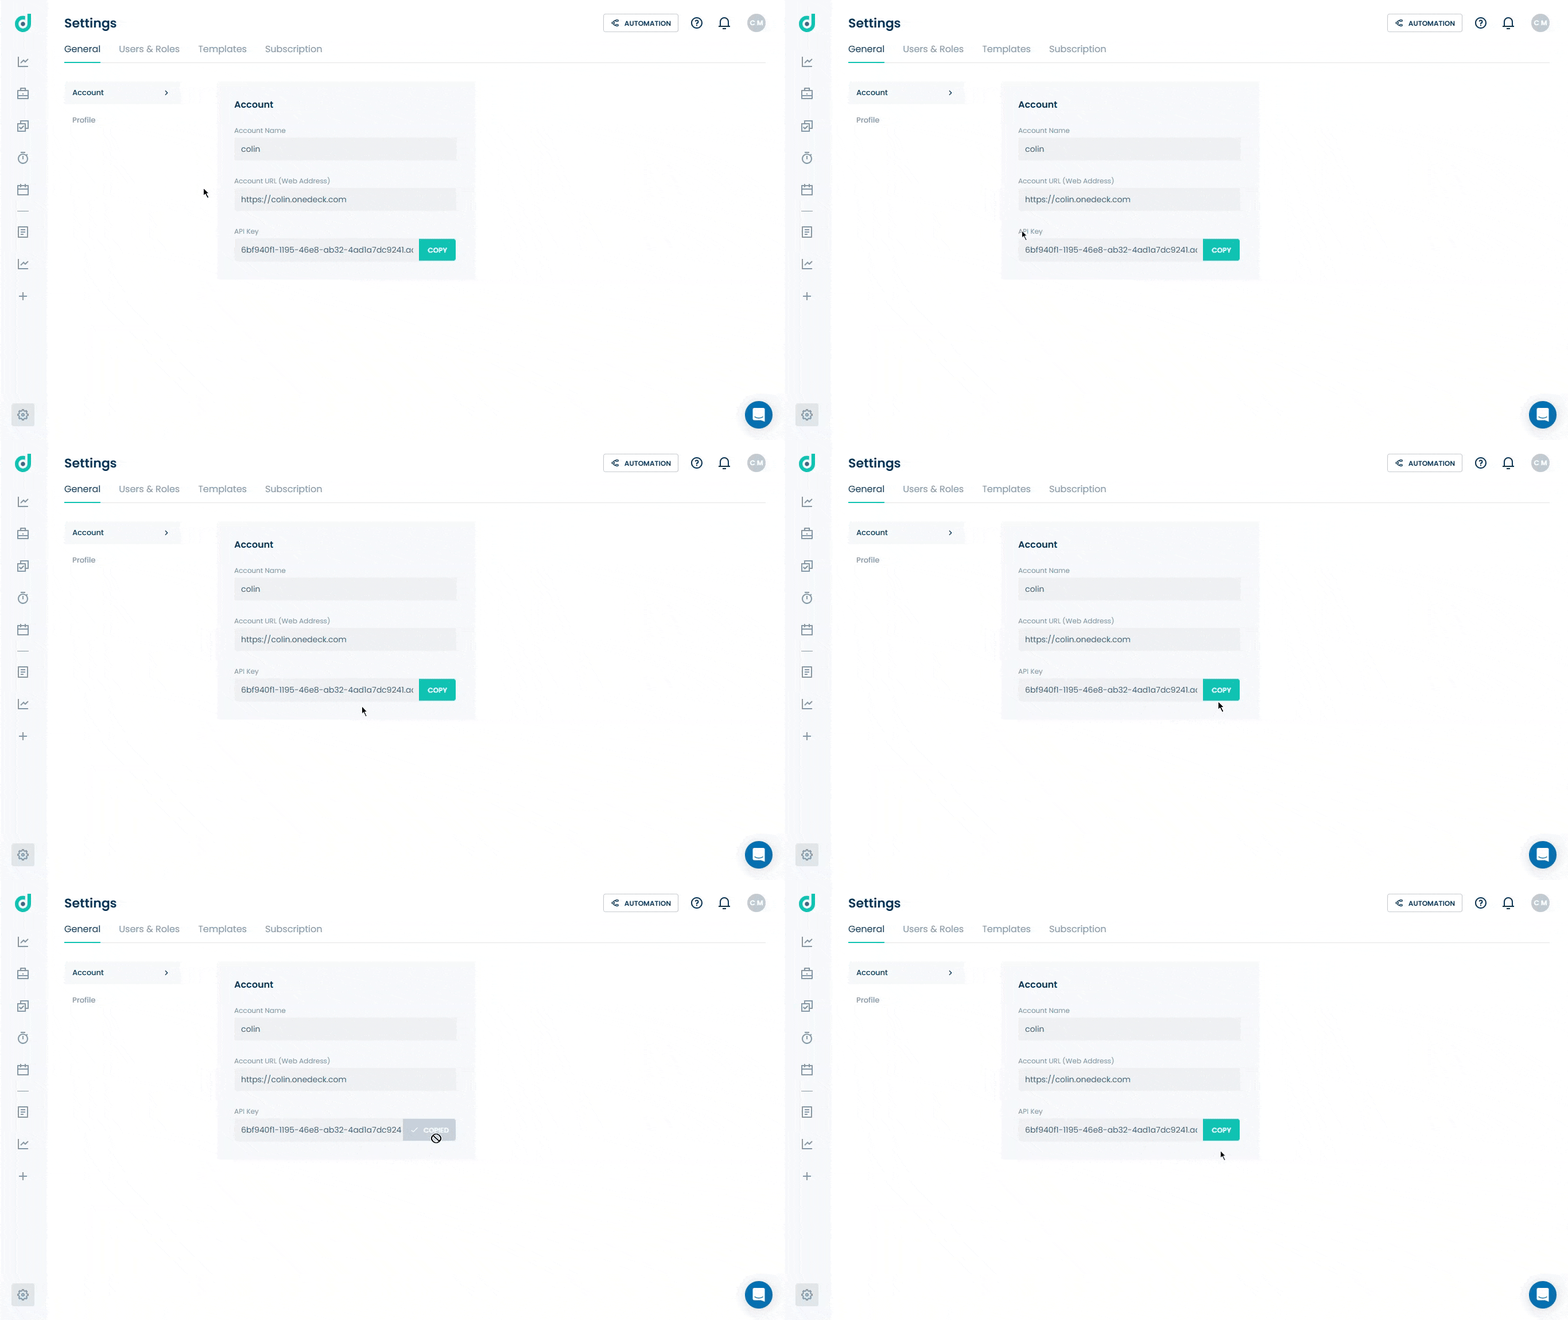
Step 6: Enter OneDeck’s account name, paste the copied API key, and click Yes, Continue to OneDeck.
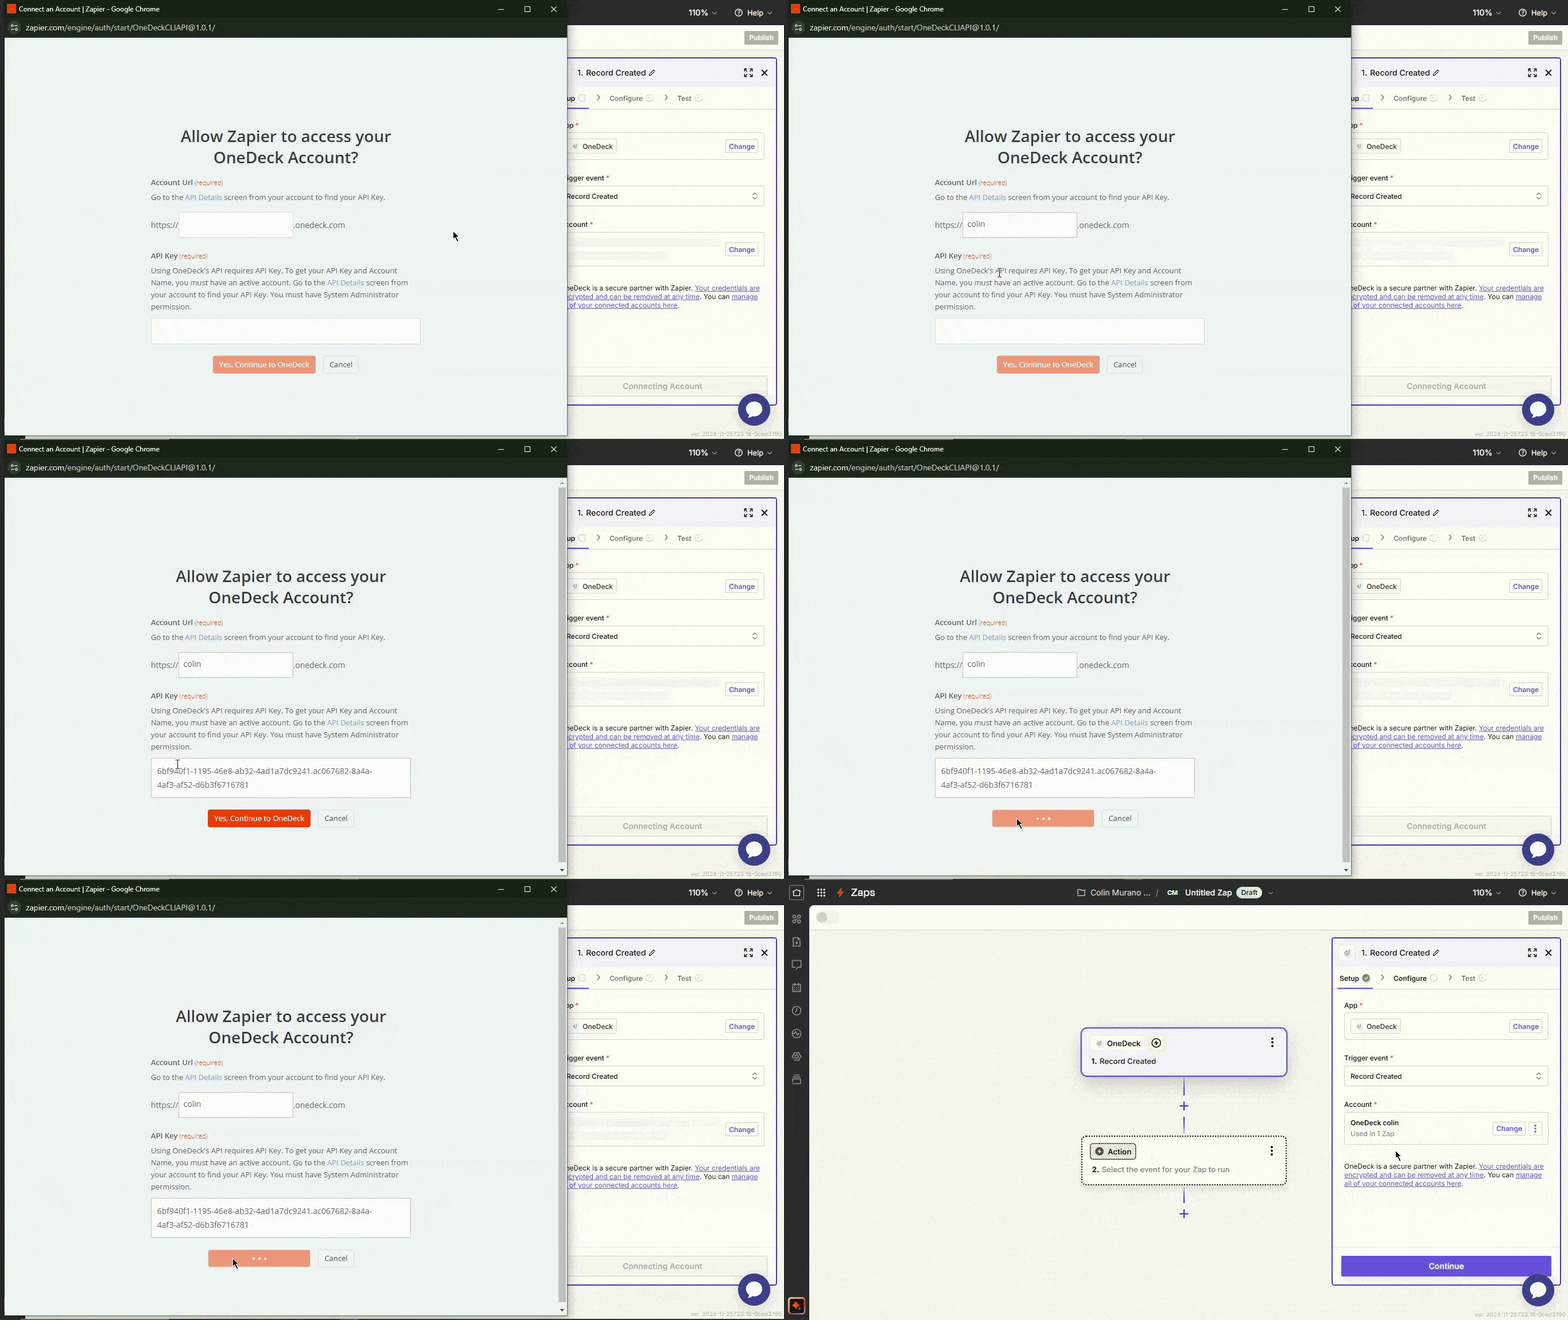
Step 7: Once the account is added, click on the Continue button and select OneDeck’s Board ID.
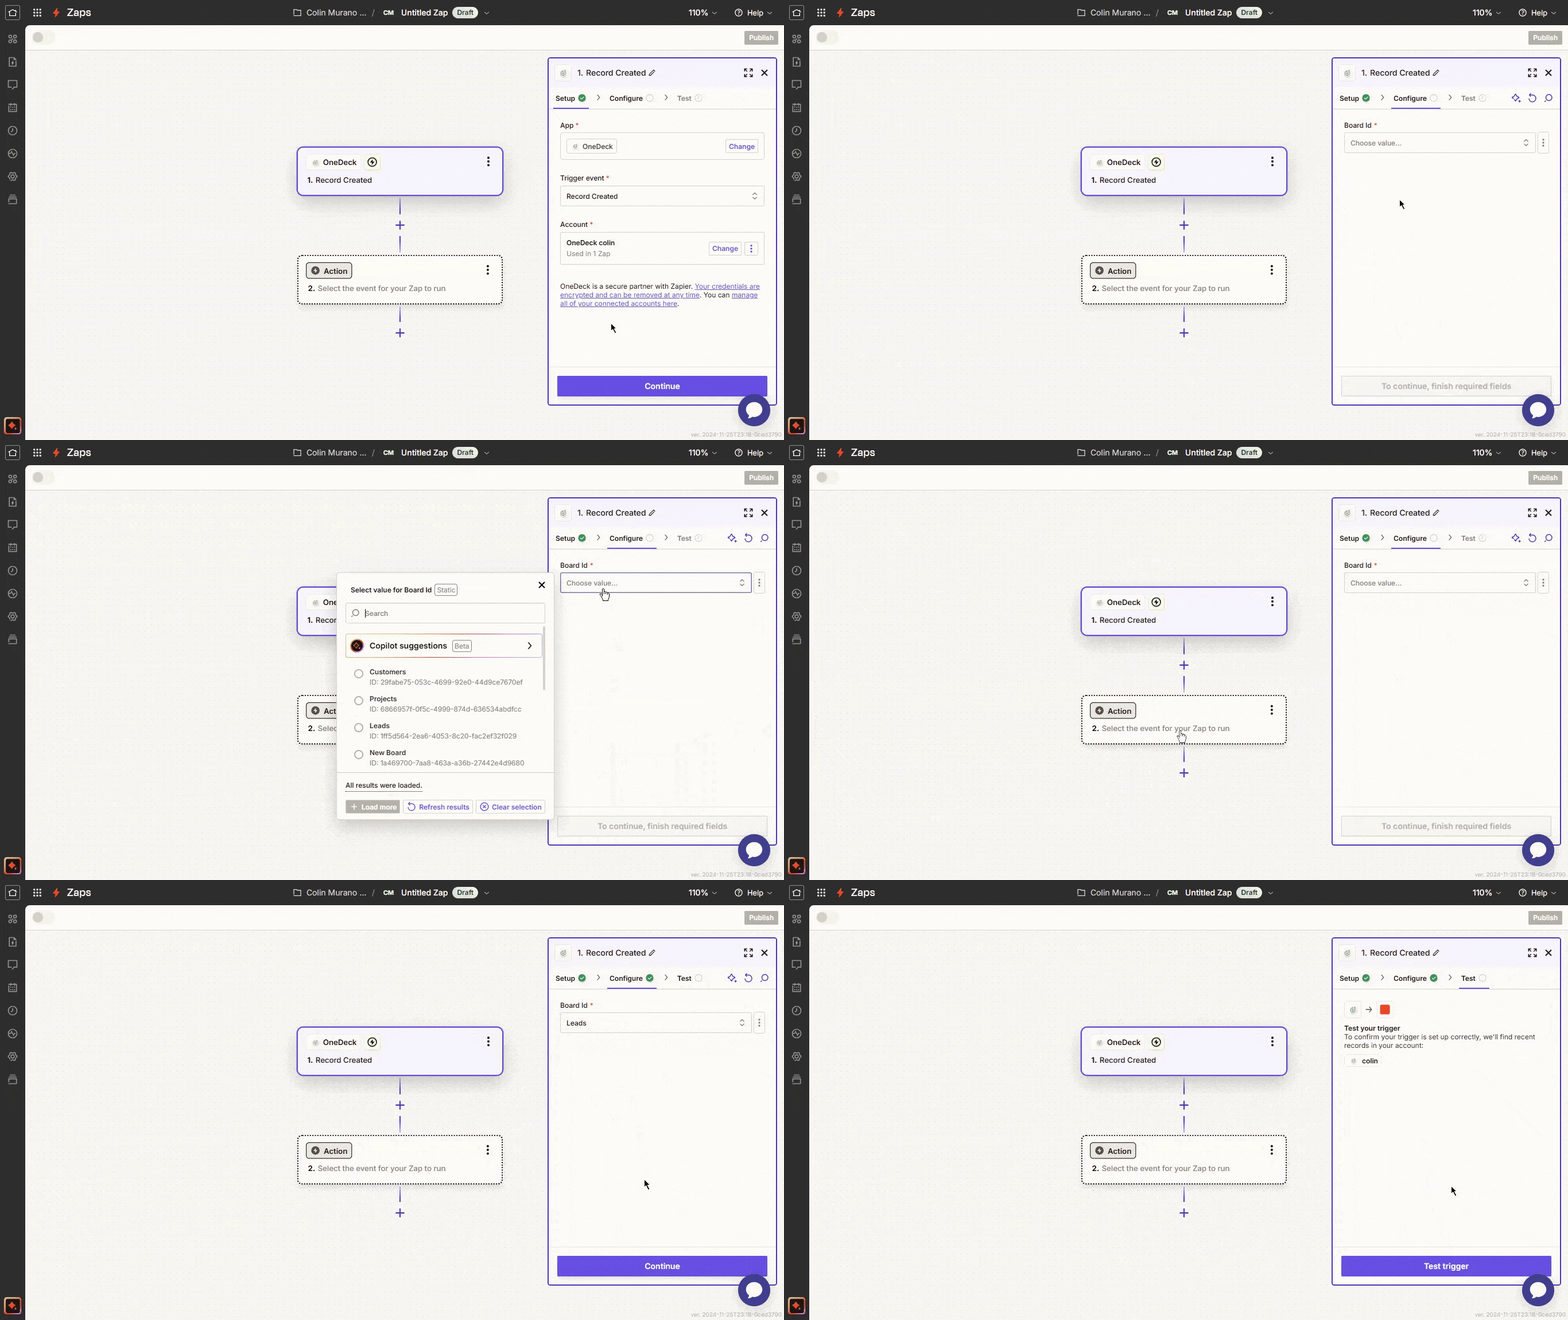
Step 8: Click on Test Trigger and it will trigger the event of “Record Created” in OneDeck, as you can see the details here.
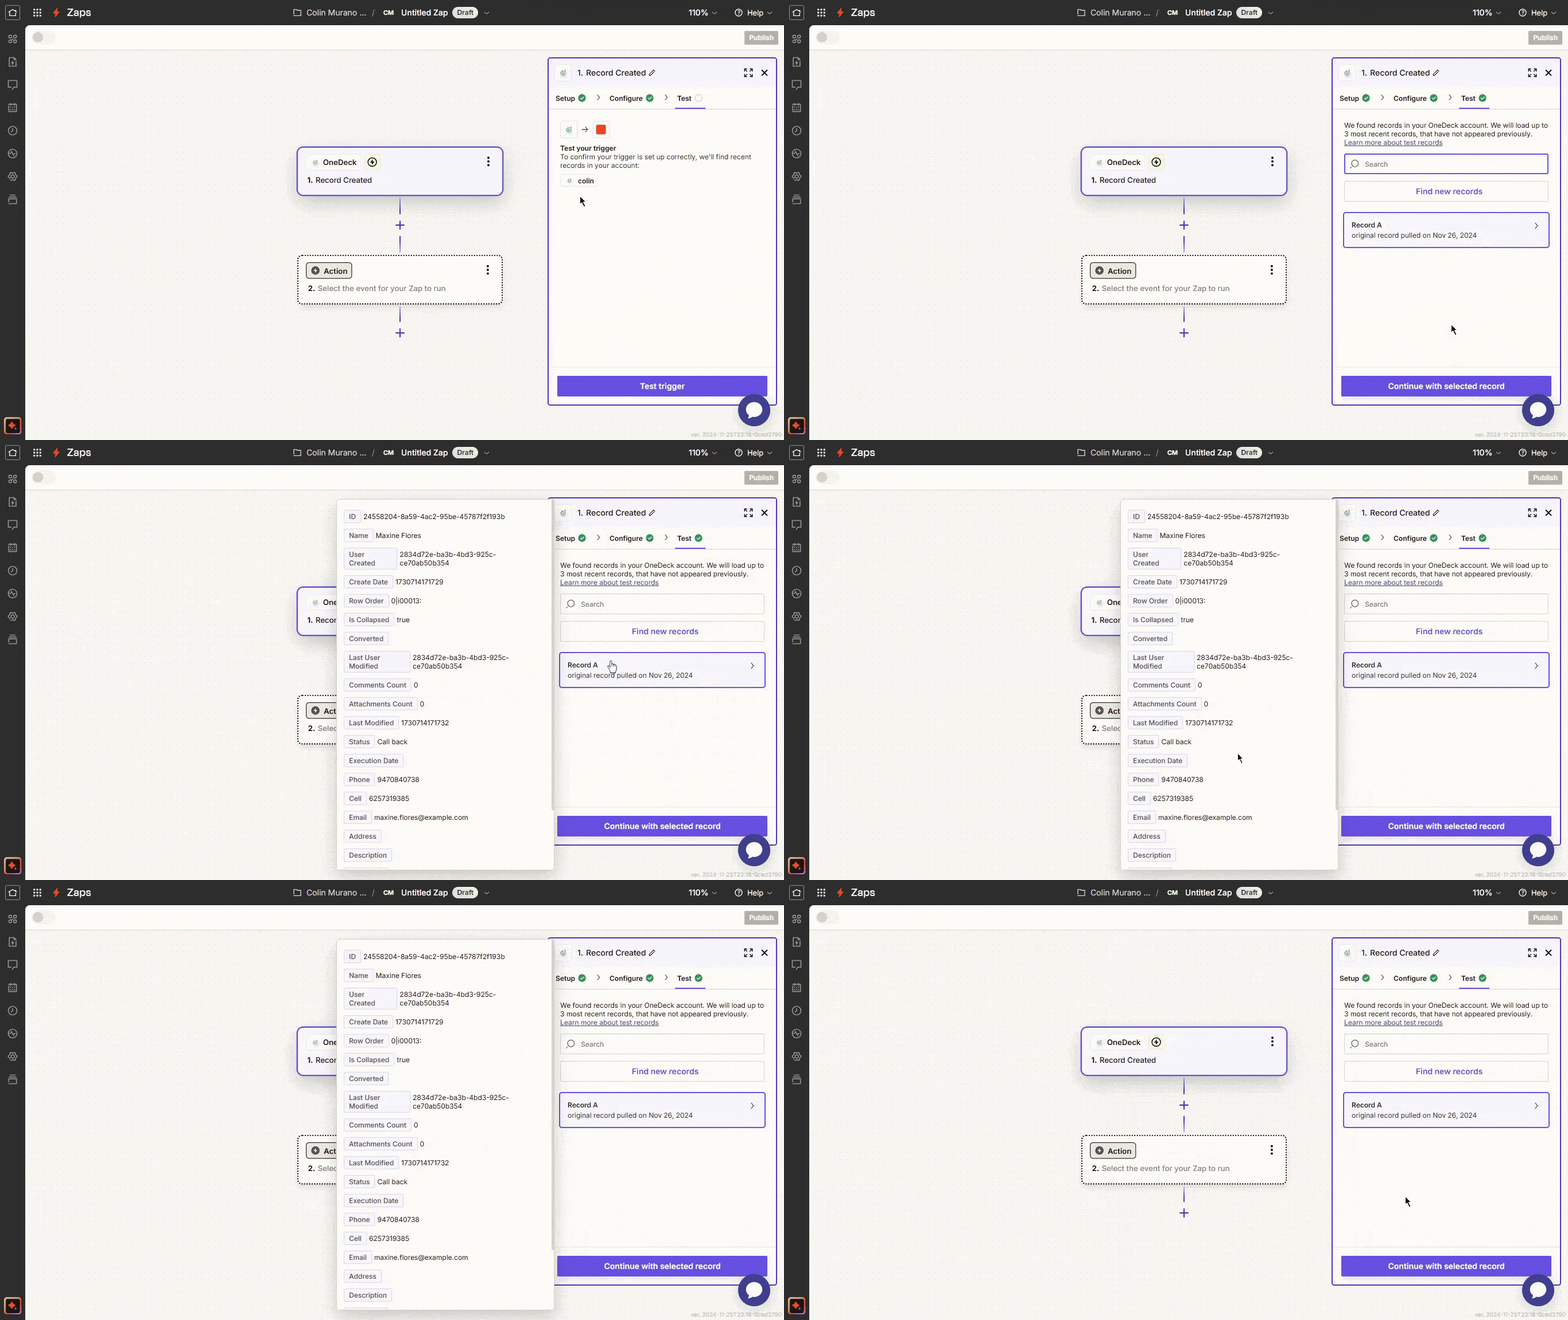
Once the trigger is all set, select the application as the action app where you want the response to occur.
Step 1: Click on the Continue with the Selected Board button and search for the application name (e.g.,"Slack") and select it.

Step 2: Choose an action event, such as "Add Reminder" or “Create Channel” that fits your needs and connect the App account.
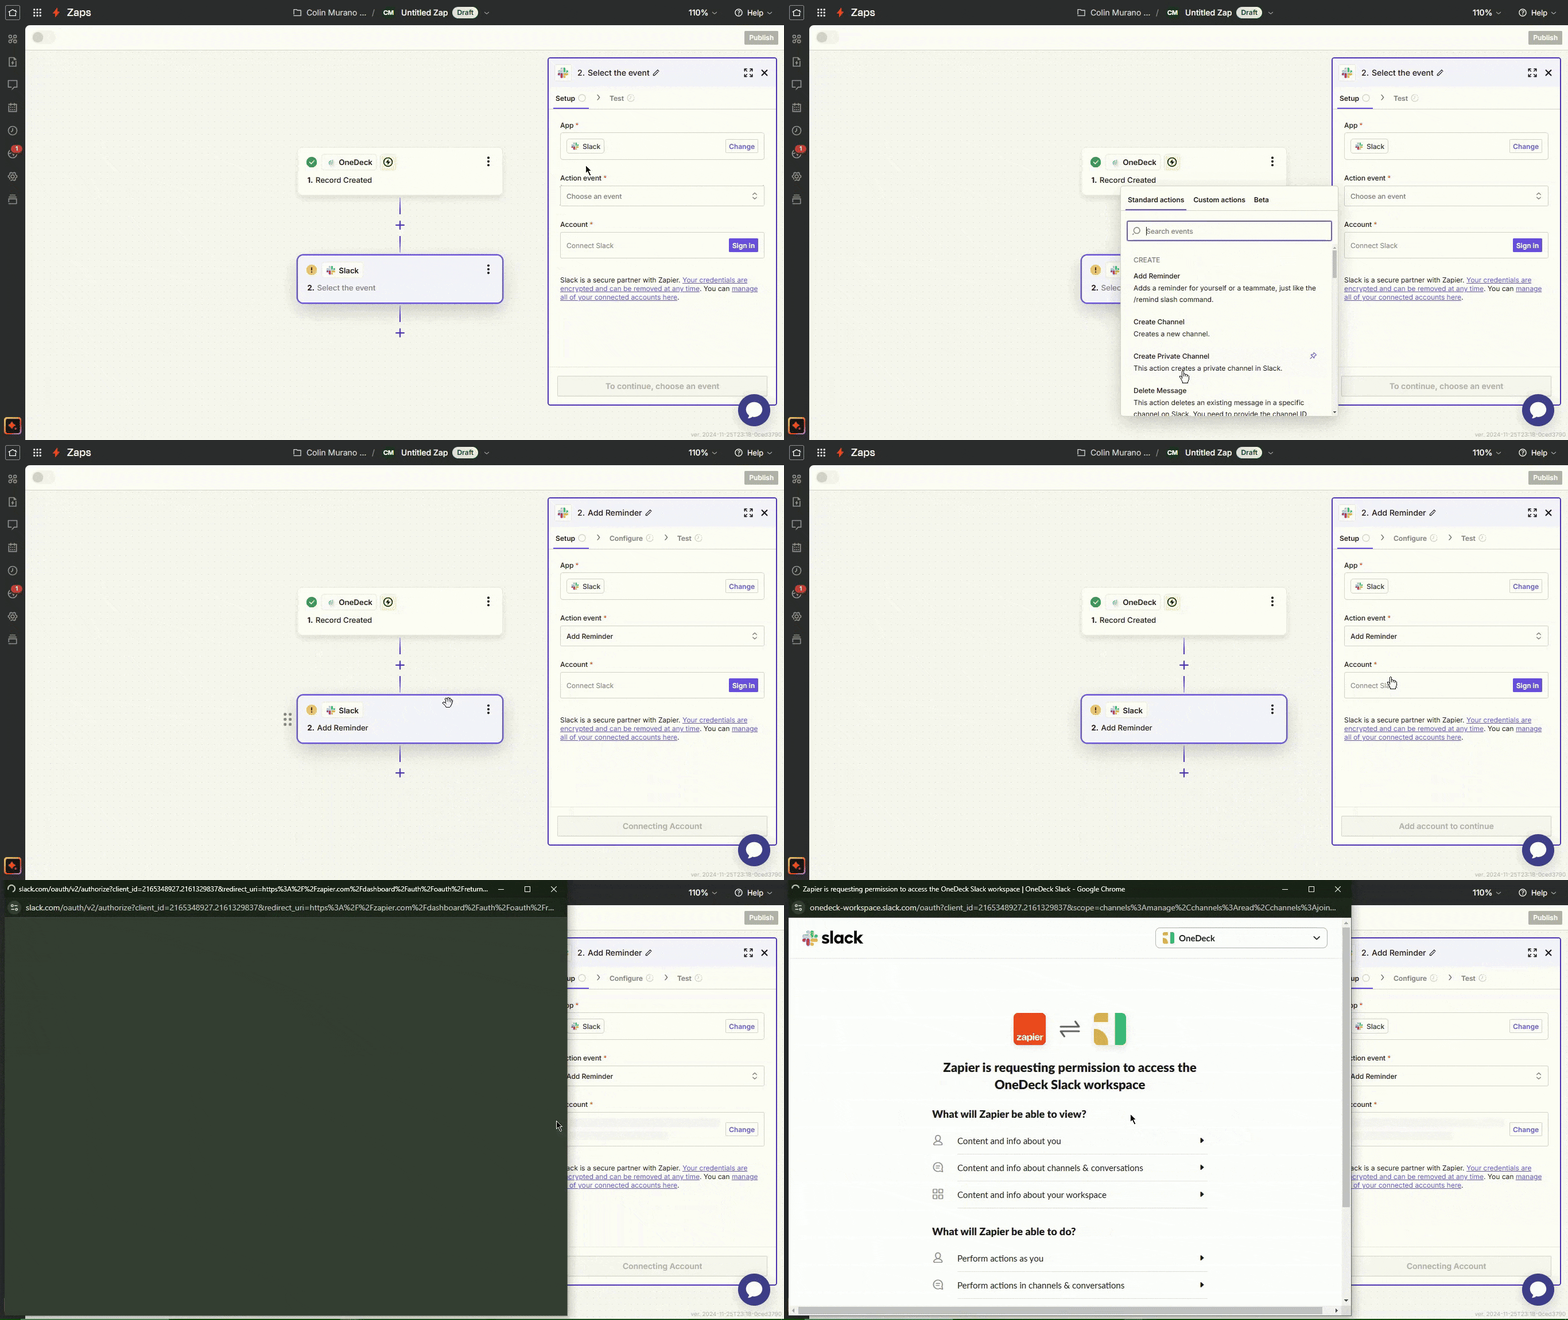
Step 3: Click on the Allow button to access the Slack Workspace that Zapier requested and then Continue it.

Step 4: Set up the action details, such as what message for the reminder and what specific time or schedule for it.
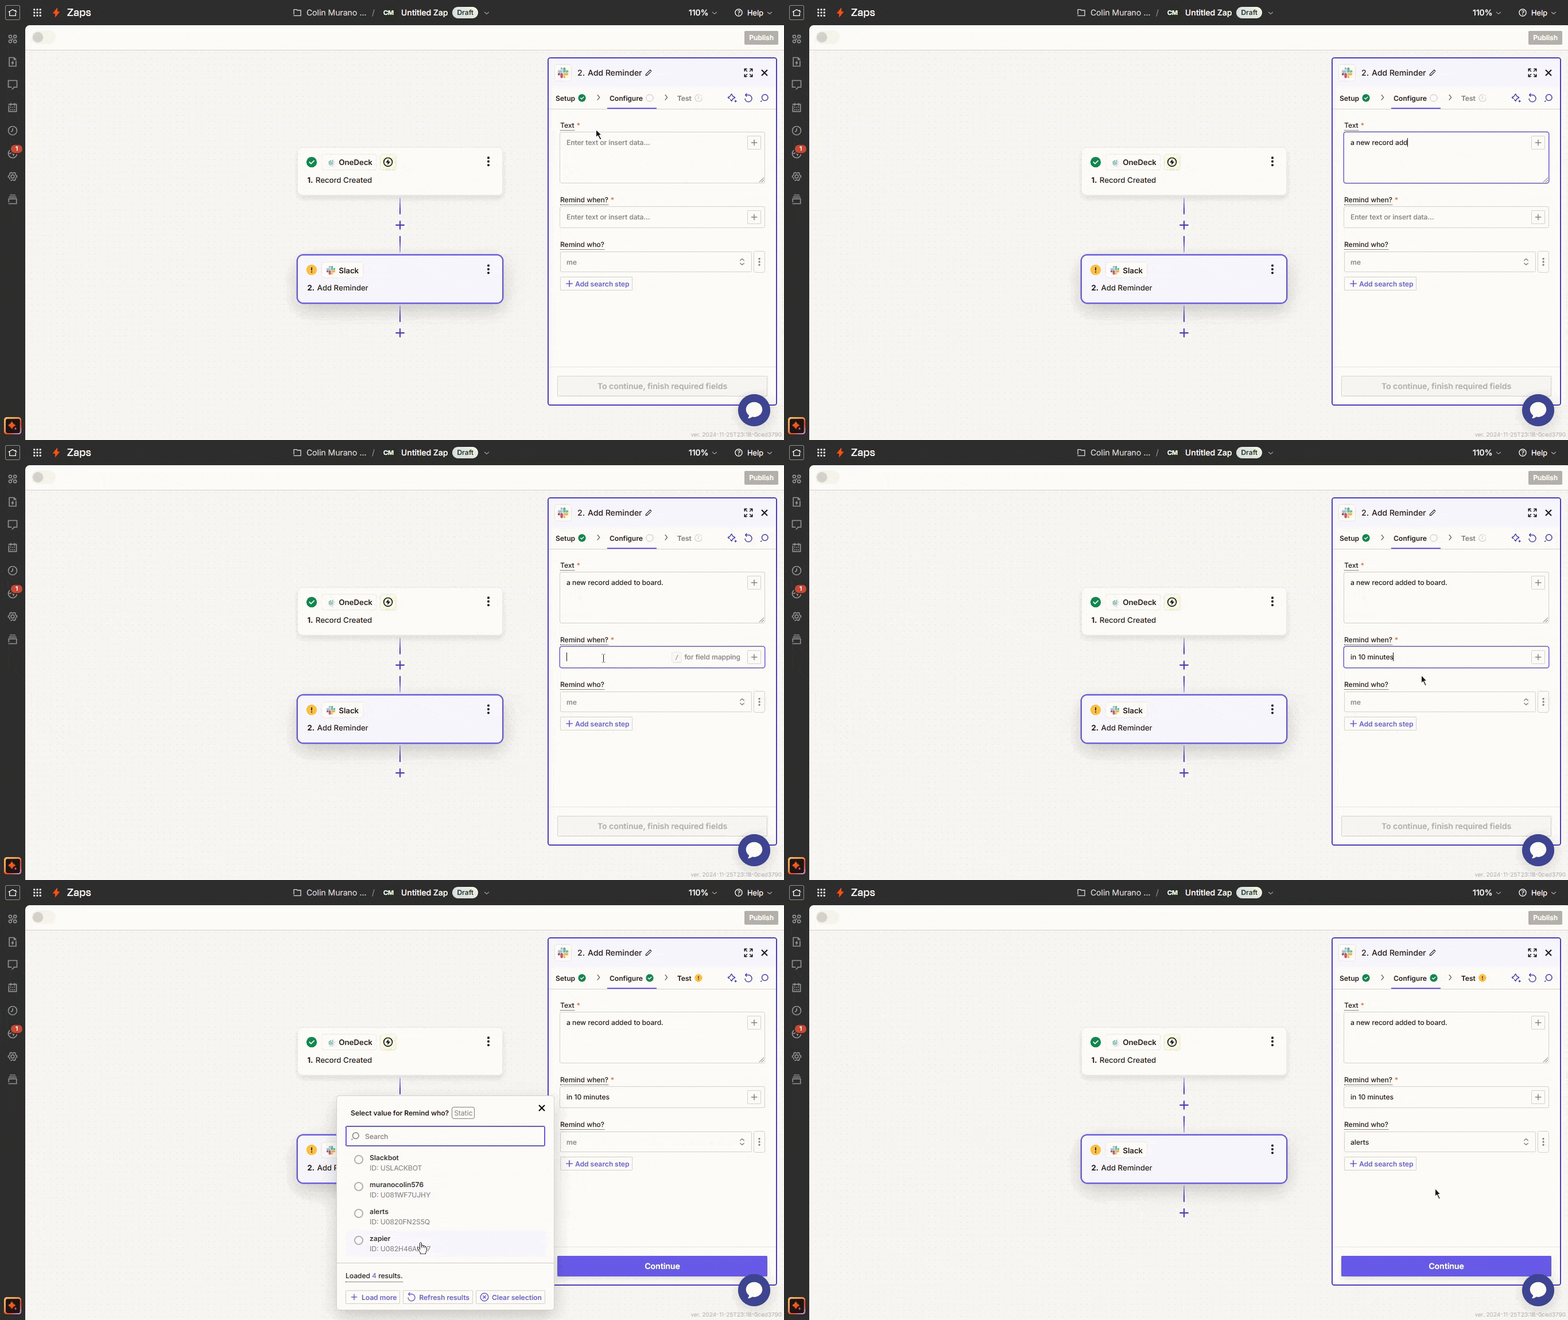
Step 5: Click on the Continue button and test your Zap to ensure it works as intended. This helps verify that OneDeck triggers correctly lead to actions in the selected application.
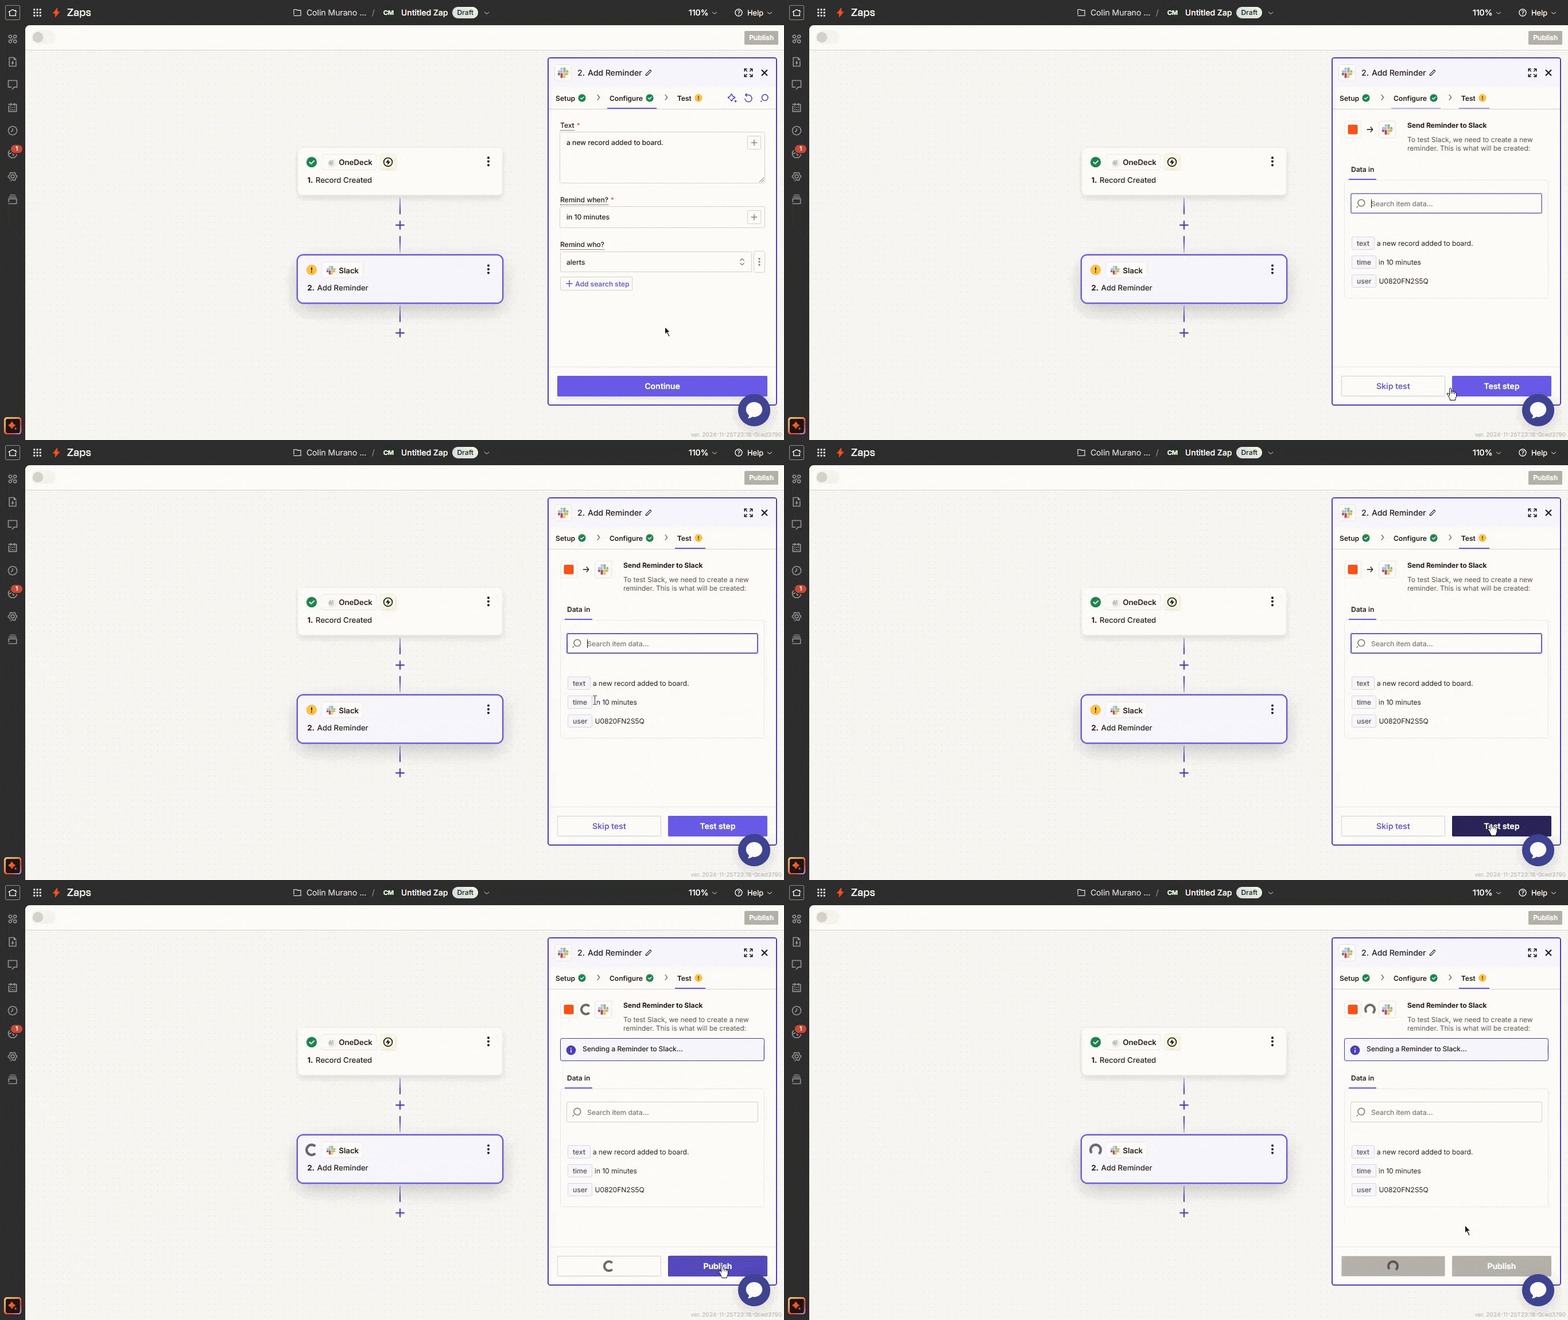
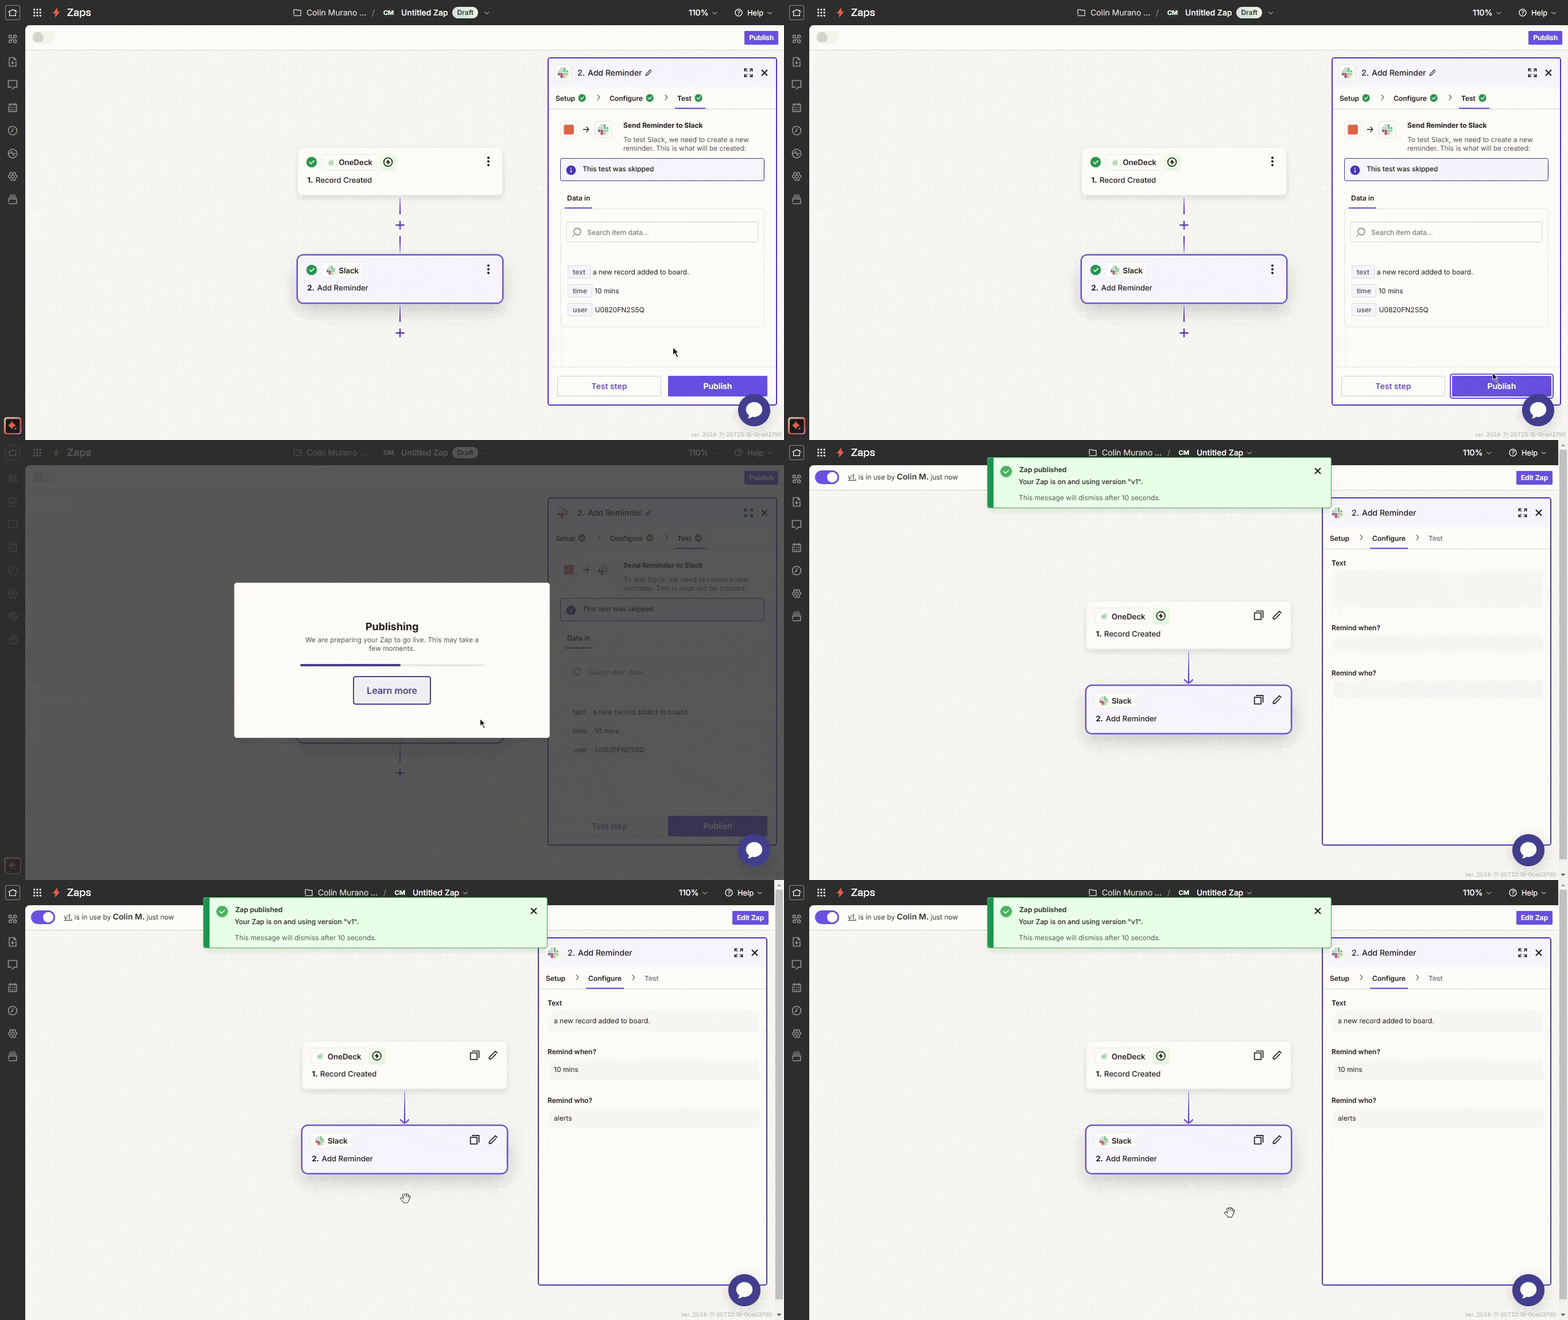
Step 6: If the test is successful, Publish it. Your integration is now live, and tasks will be automated based on your specified triggers and actions.
Via Make.com
Step 1: Log into your Make account and click the Create a new scenario button for automated workflows.
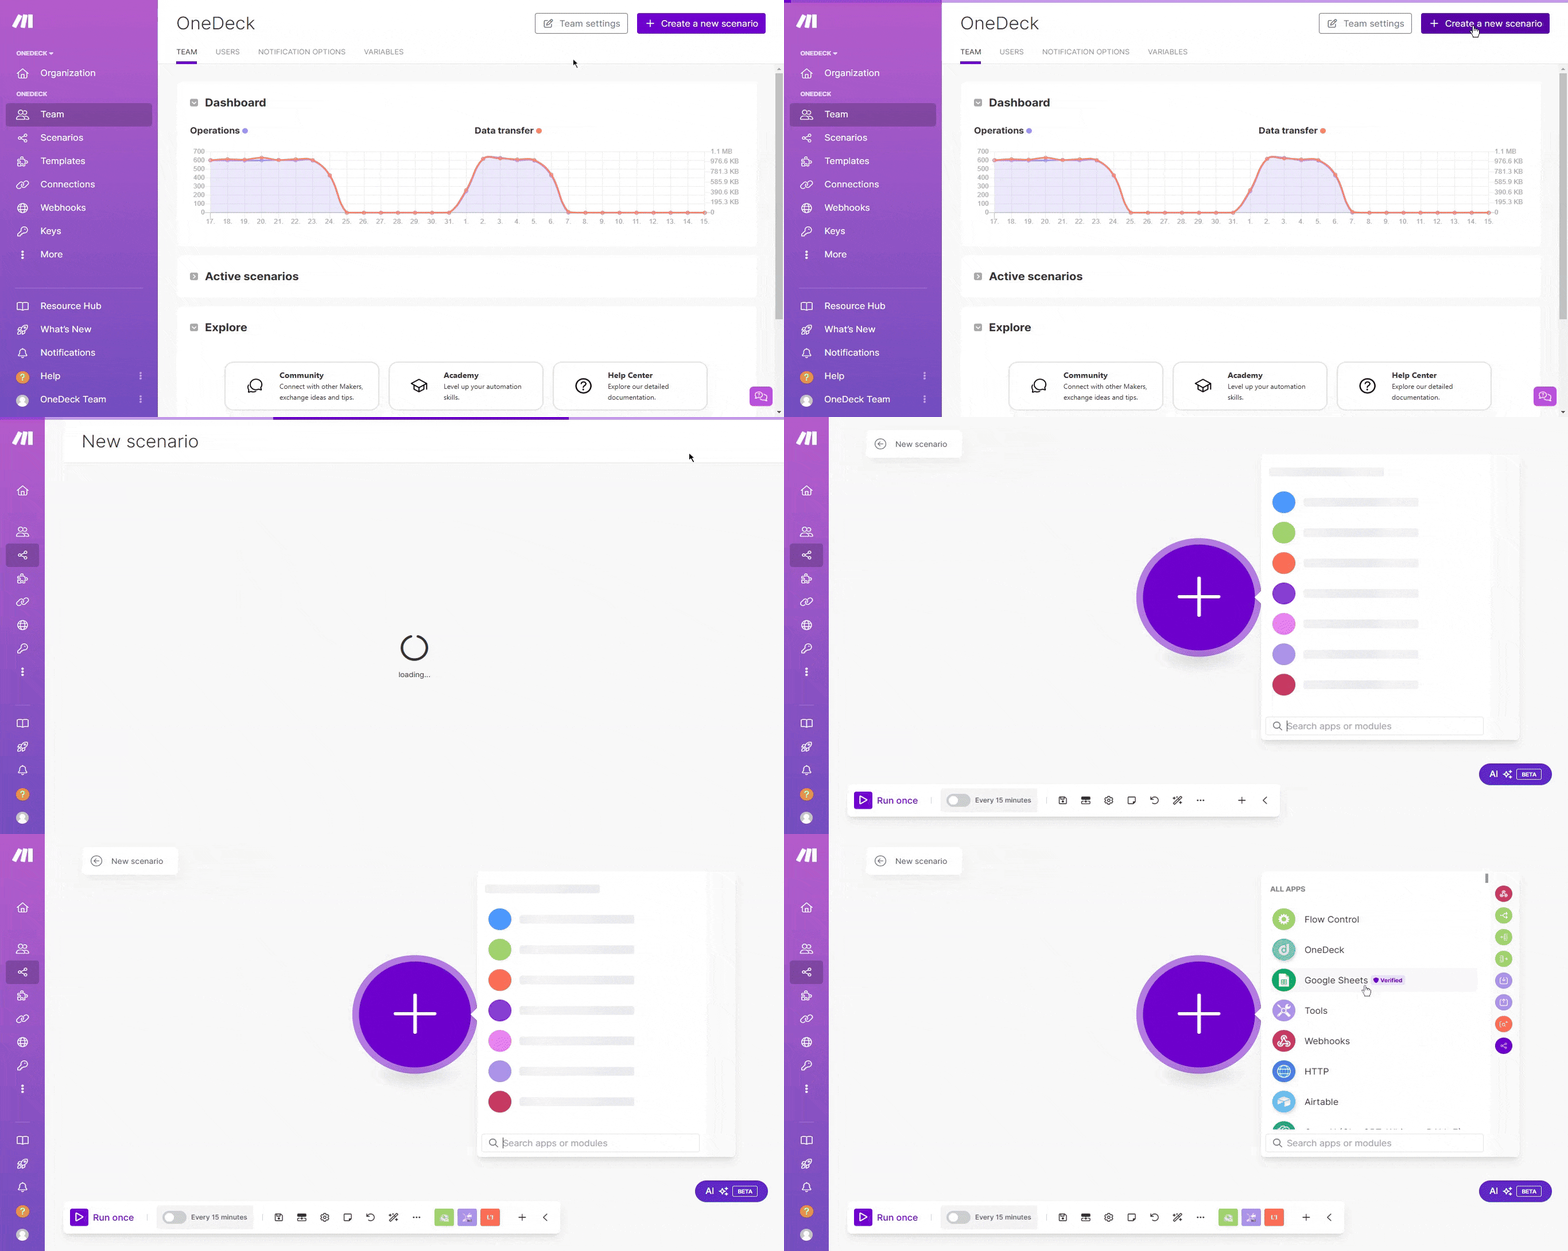
Step 2: Search and select the OneDeck module.
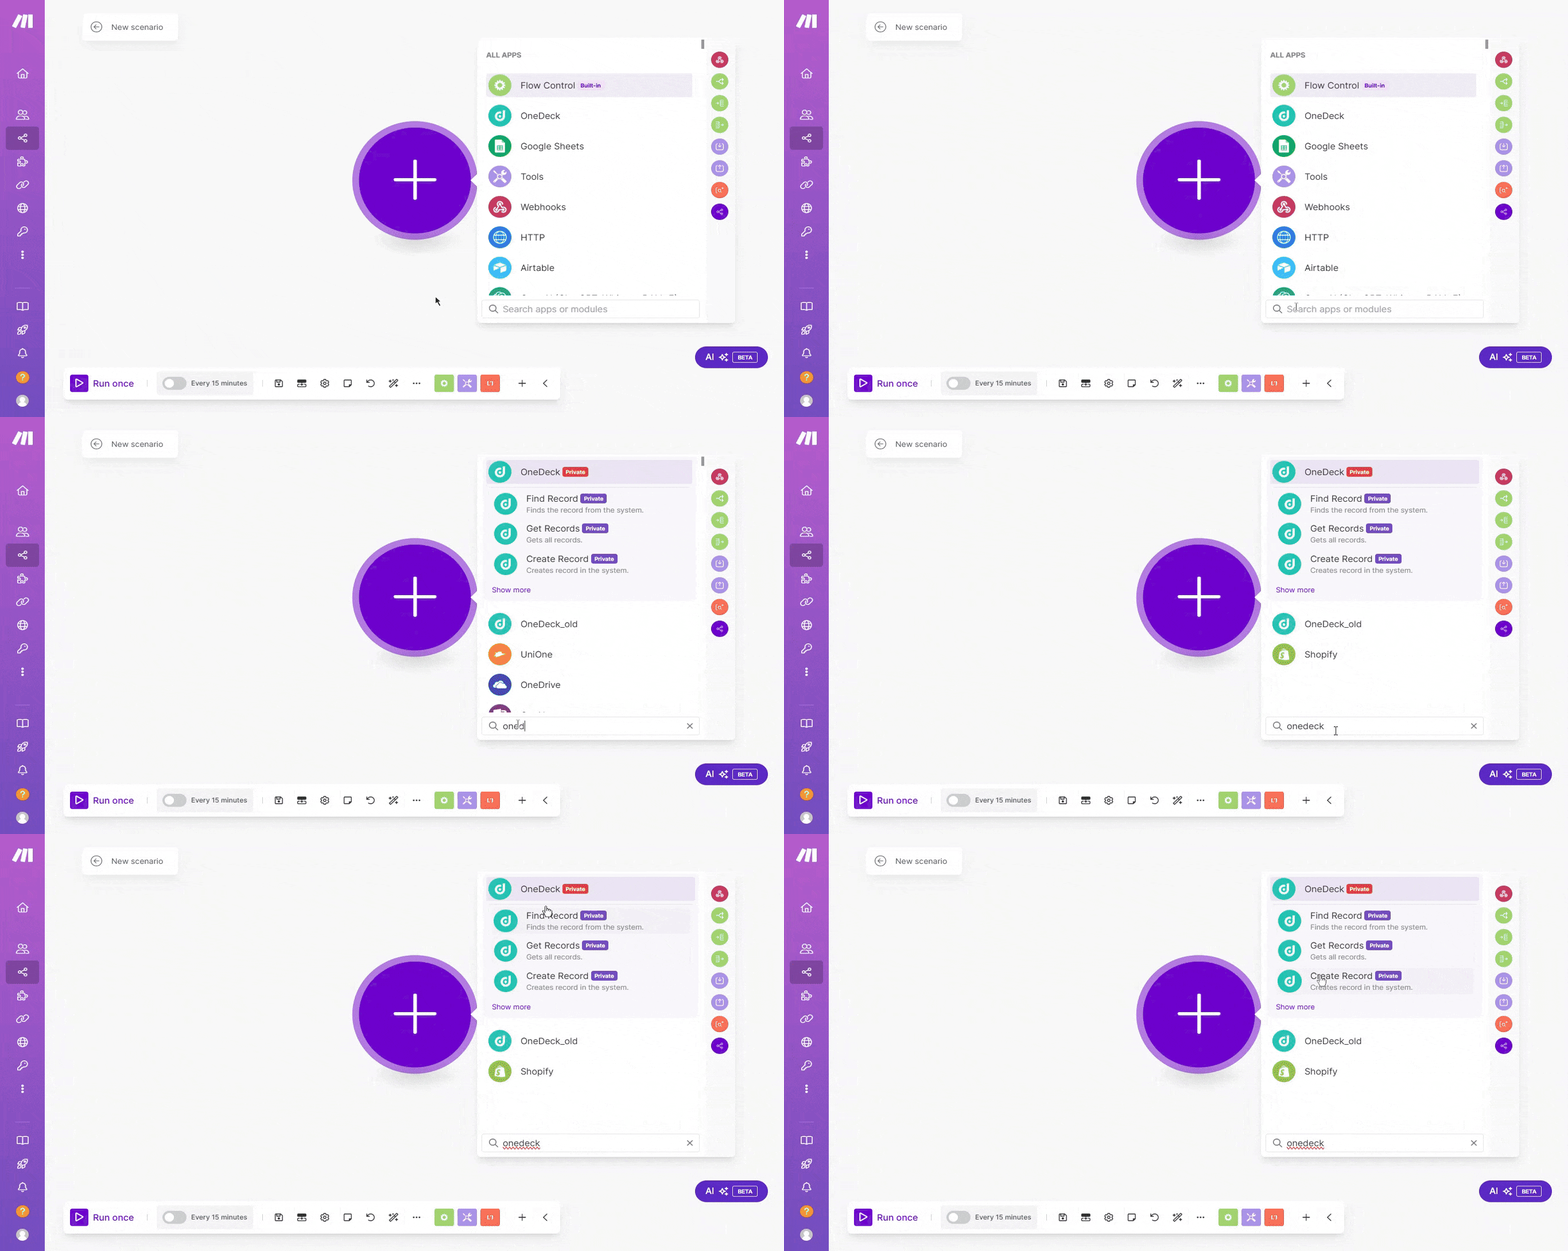
Step 3: Select a specific trigger event, such as "Record Created" or any other relevant option that fits your workflow needs.
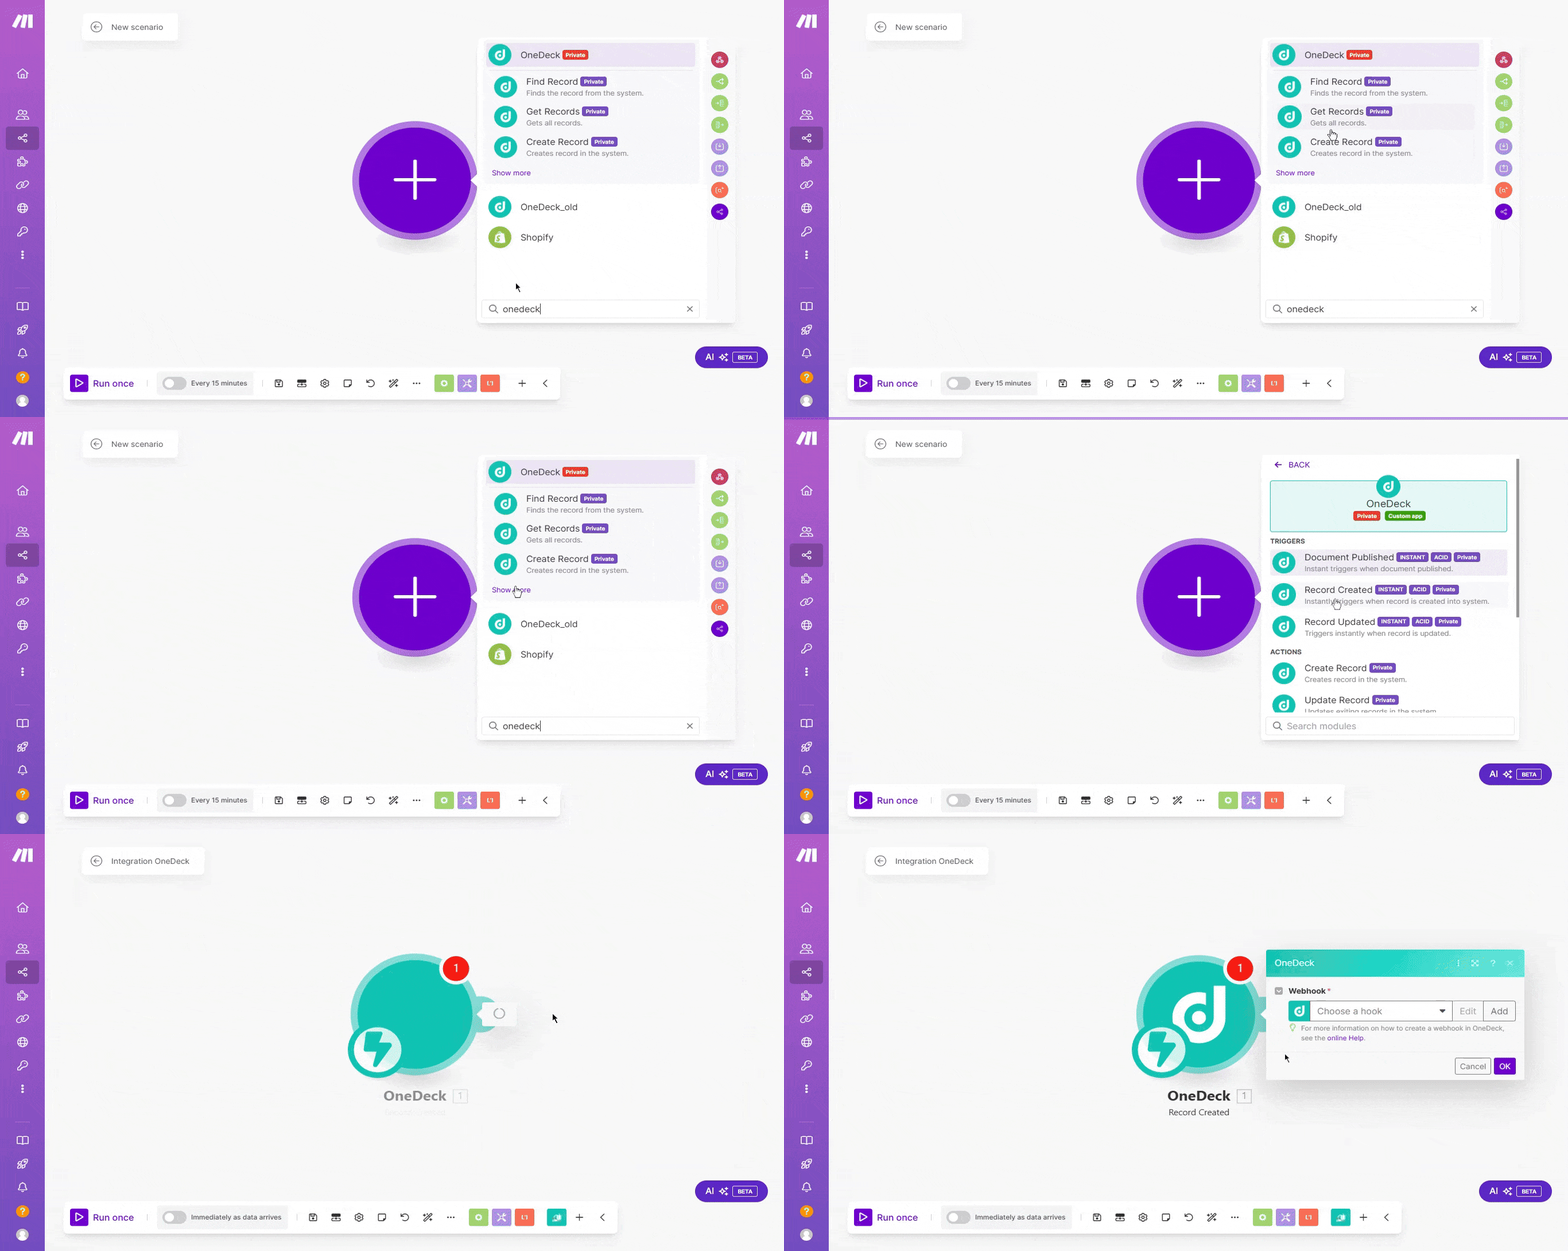
Step 4: Choose an existing webhook or add a new one and click Ok to save it.
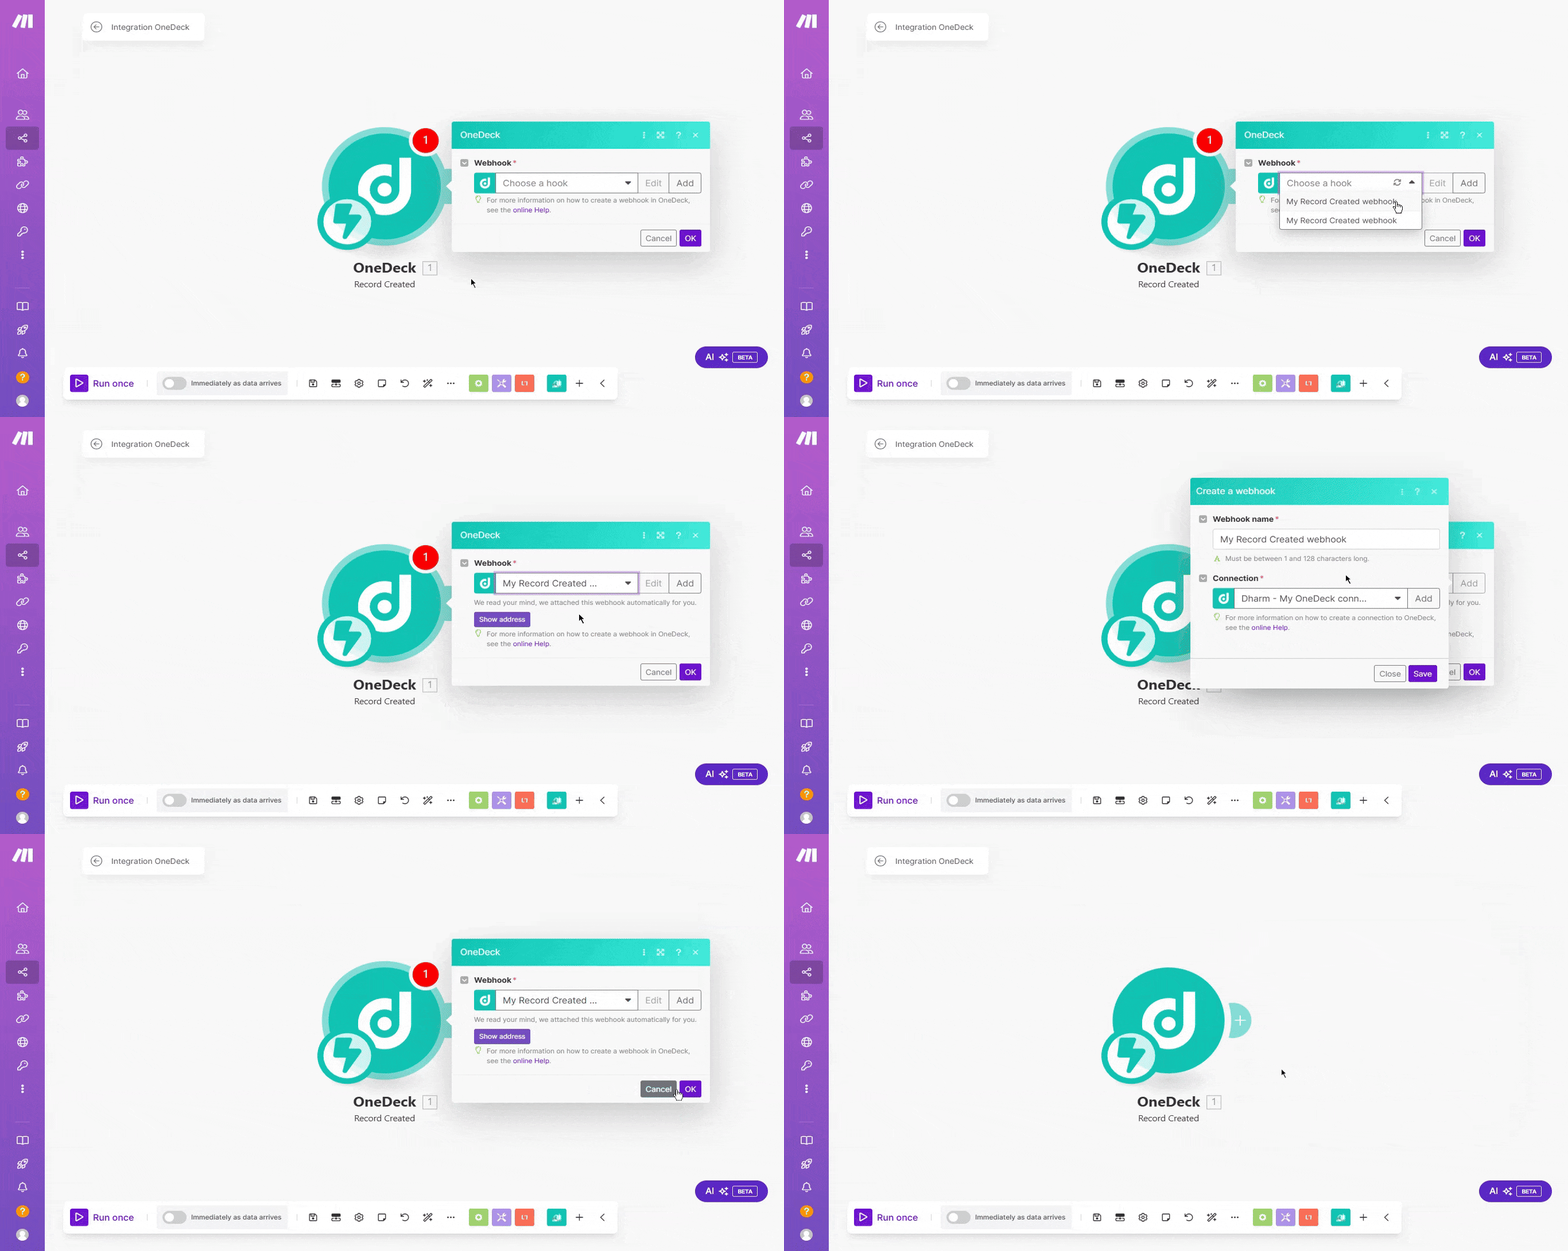
Once the trigger is all set, select the application as the action app where you want the response to occur.
Step 1: Click on the “+” button to add a new module, search for the application name (e.g., "Slack"), and select it.
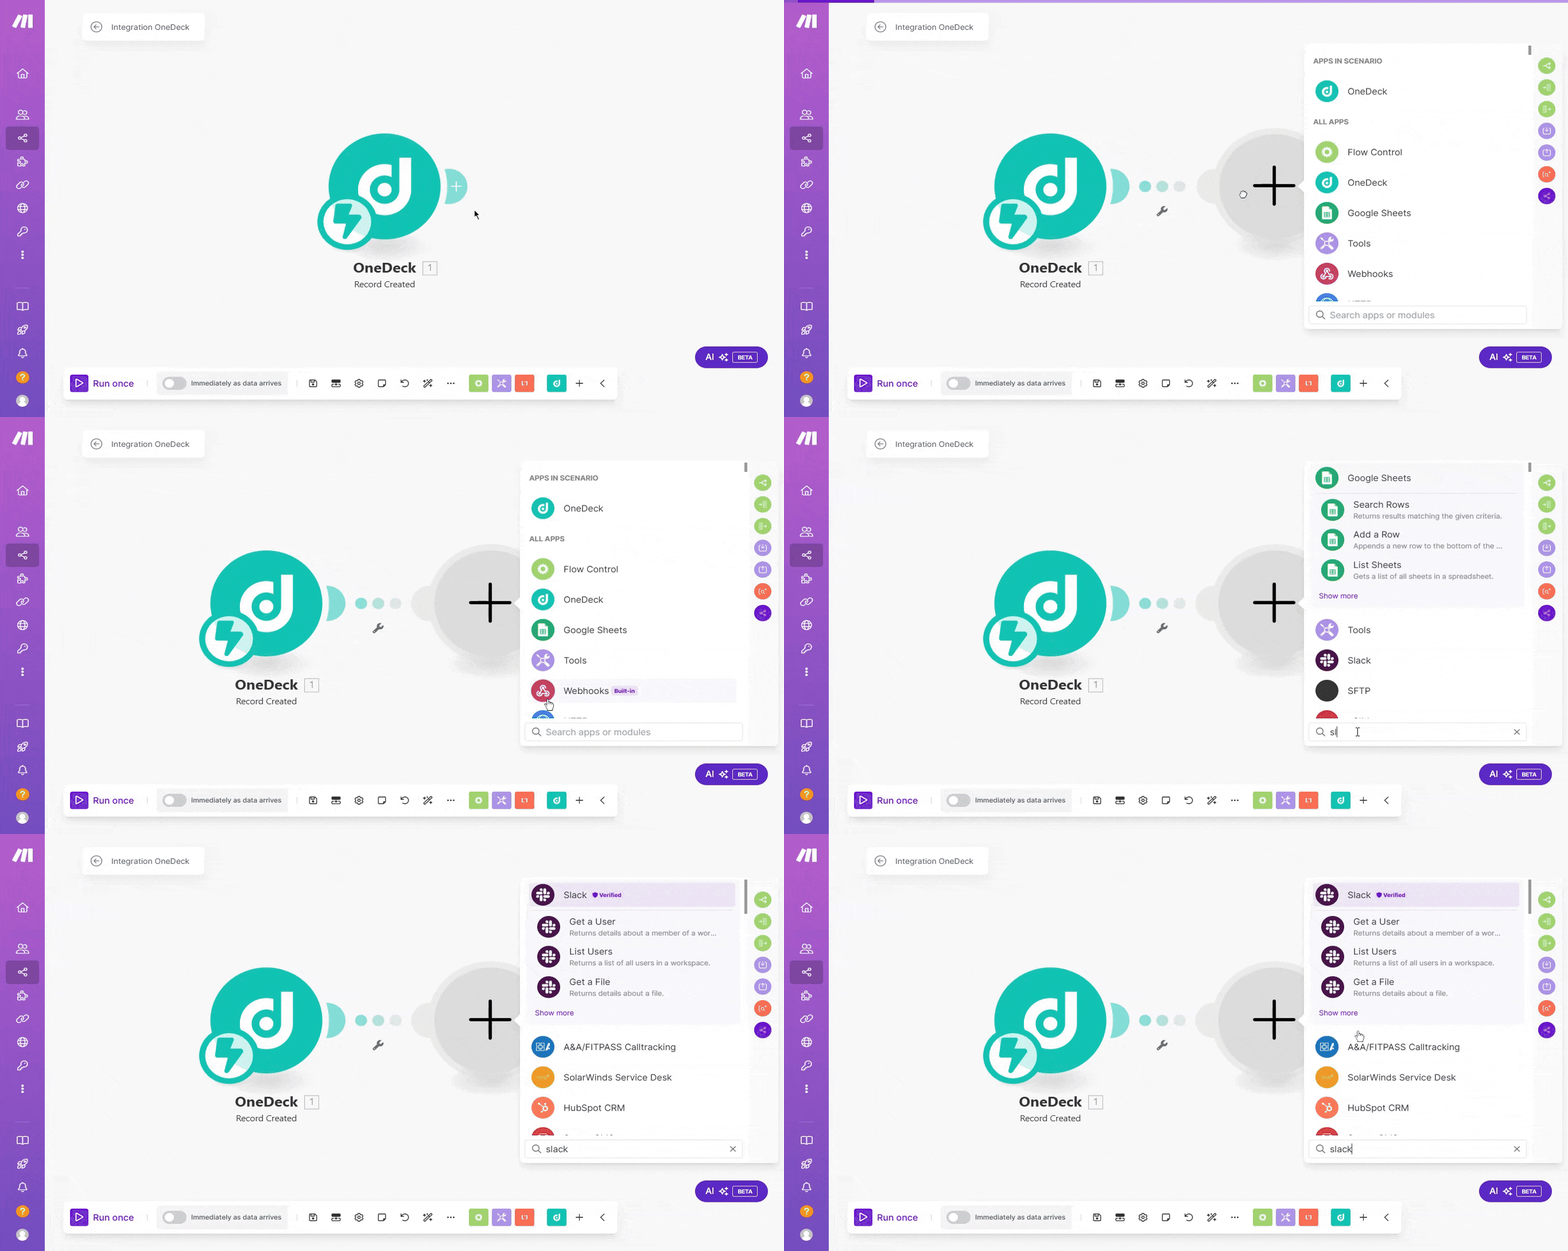
Step 2: Choose an action event, such as "Search for message" or “Create a Message” that fits your needs.
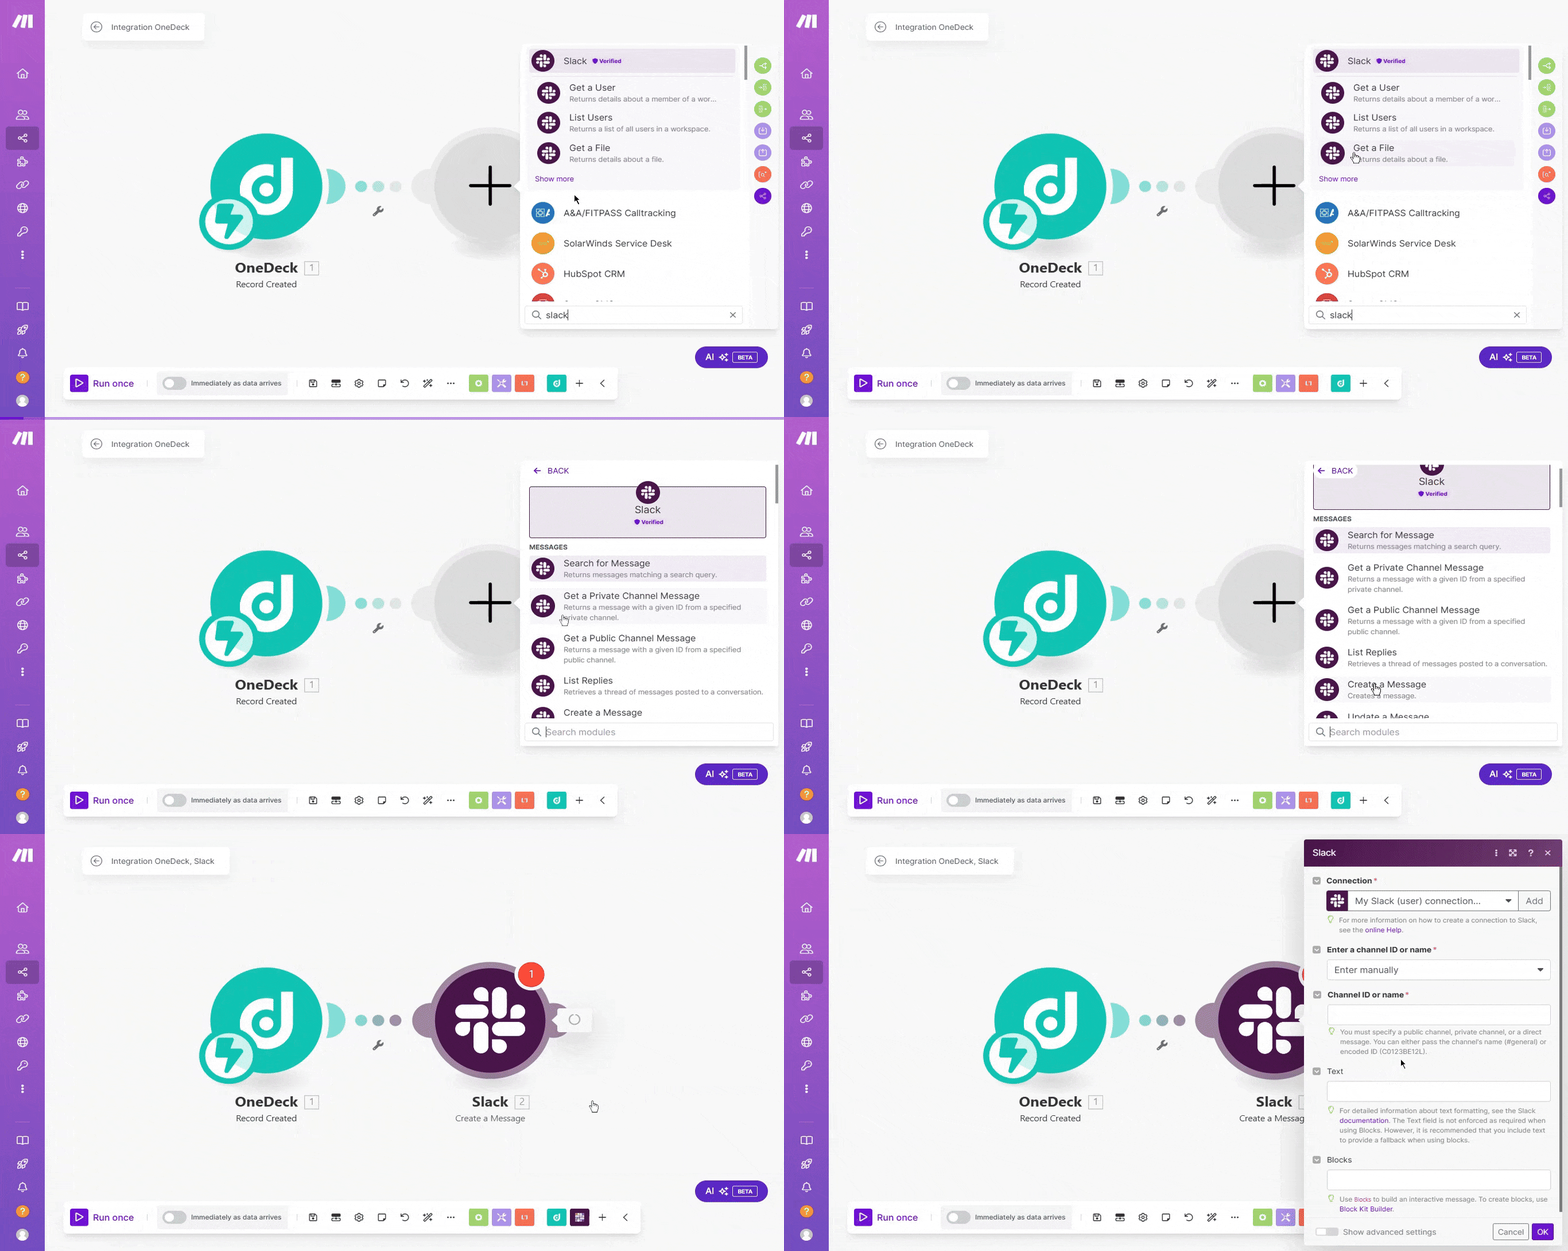
Step 3: Select the Connection type and set up the action details, such as by selecting the channel, entering the message, or designing interactive Blocks.
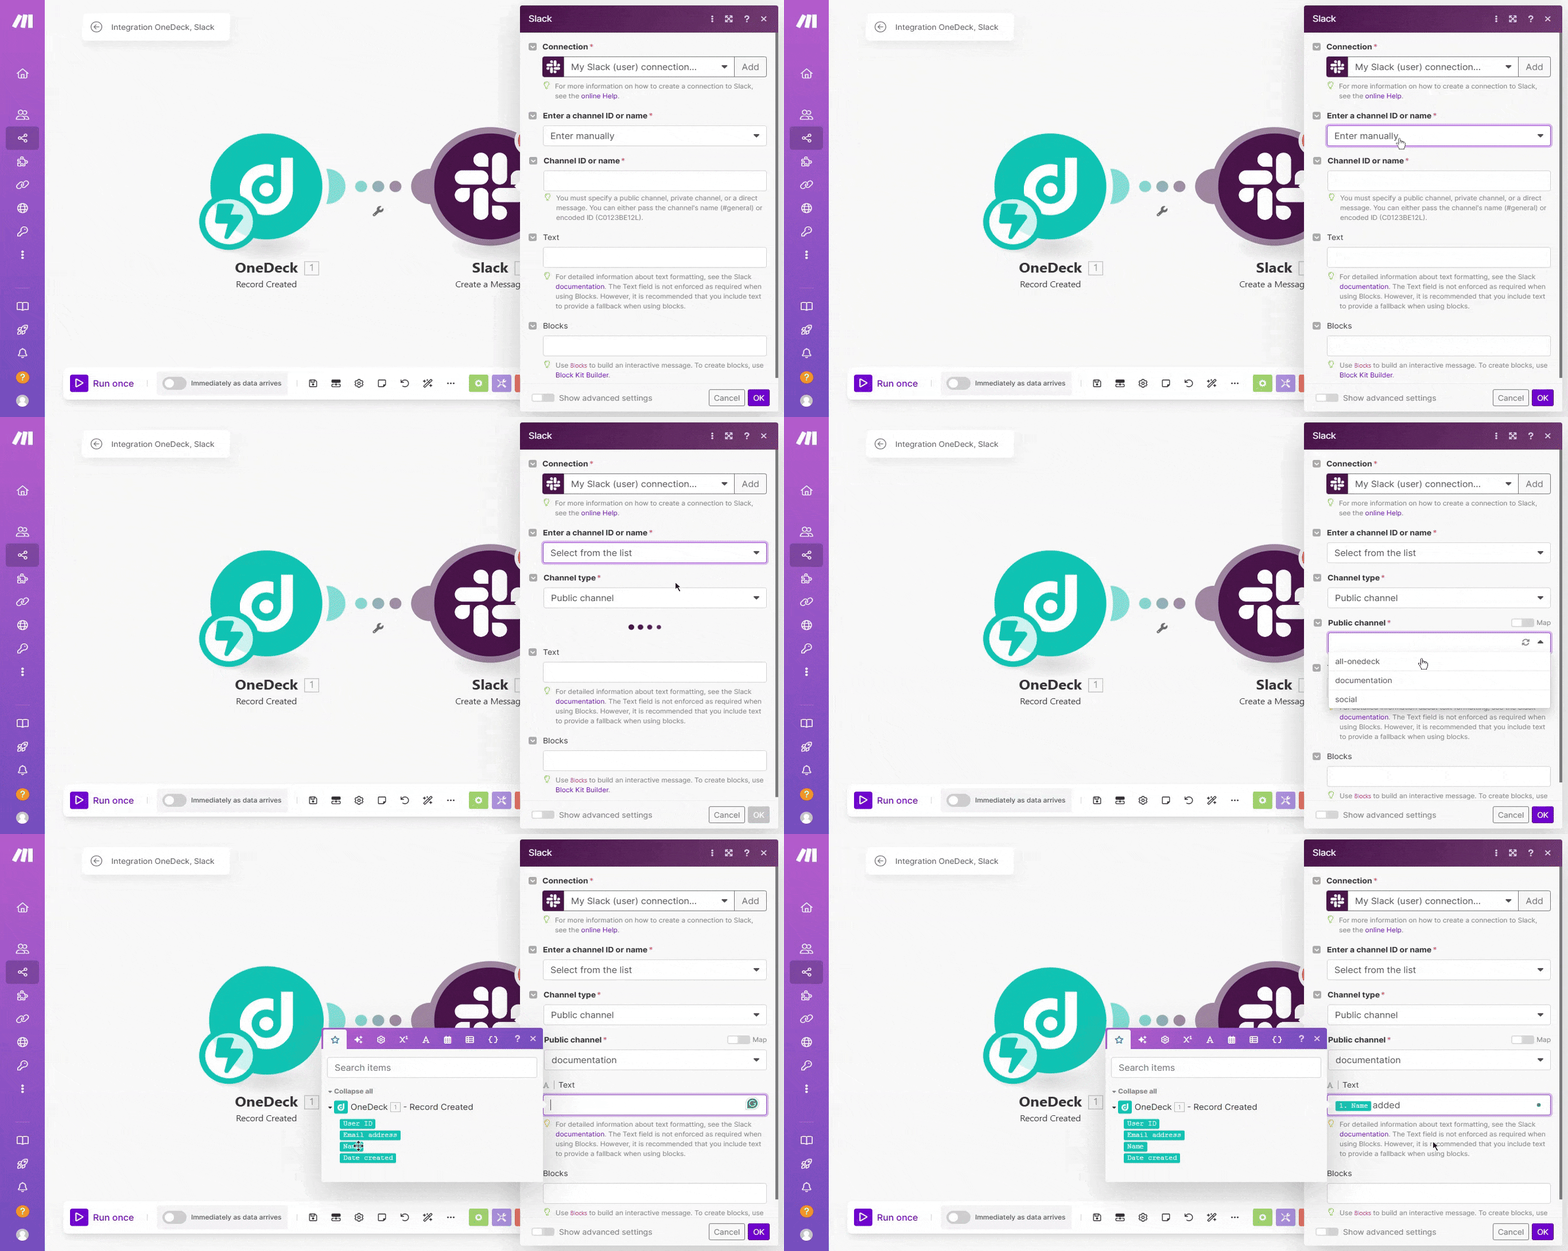
Step 4: Click OK, save the setup, and run once to test the scenario.
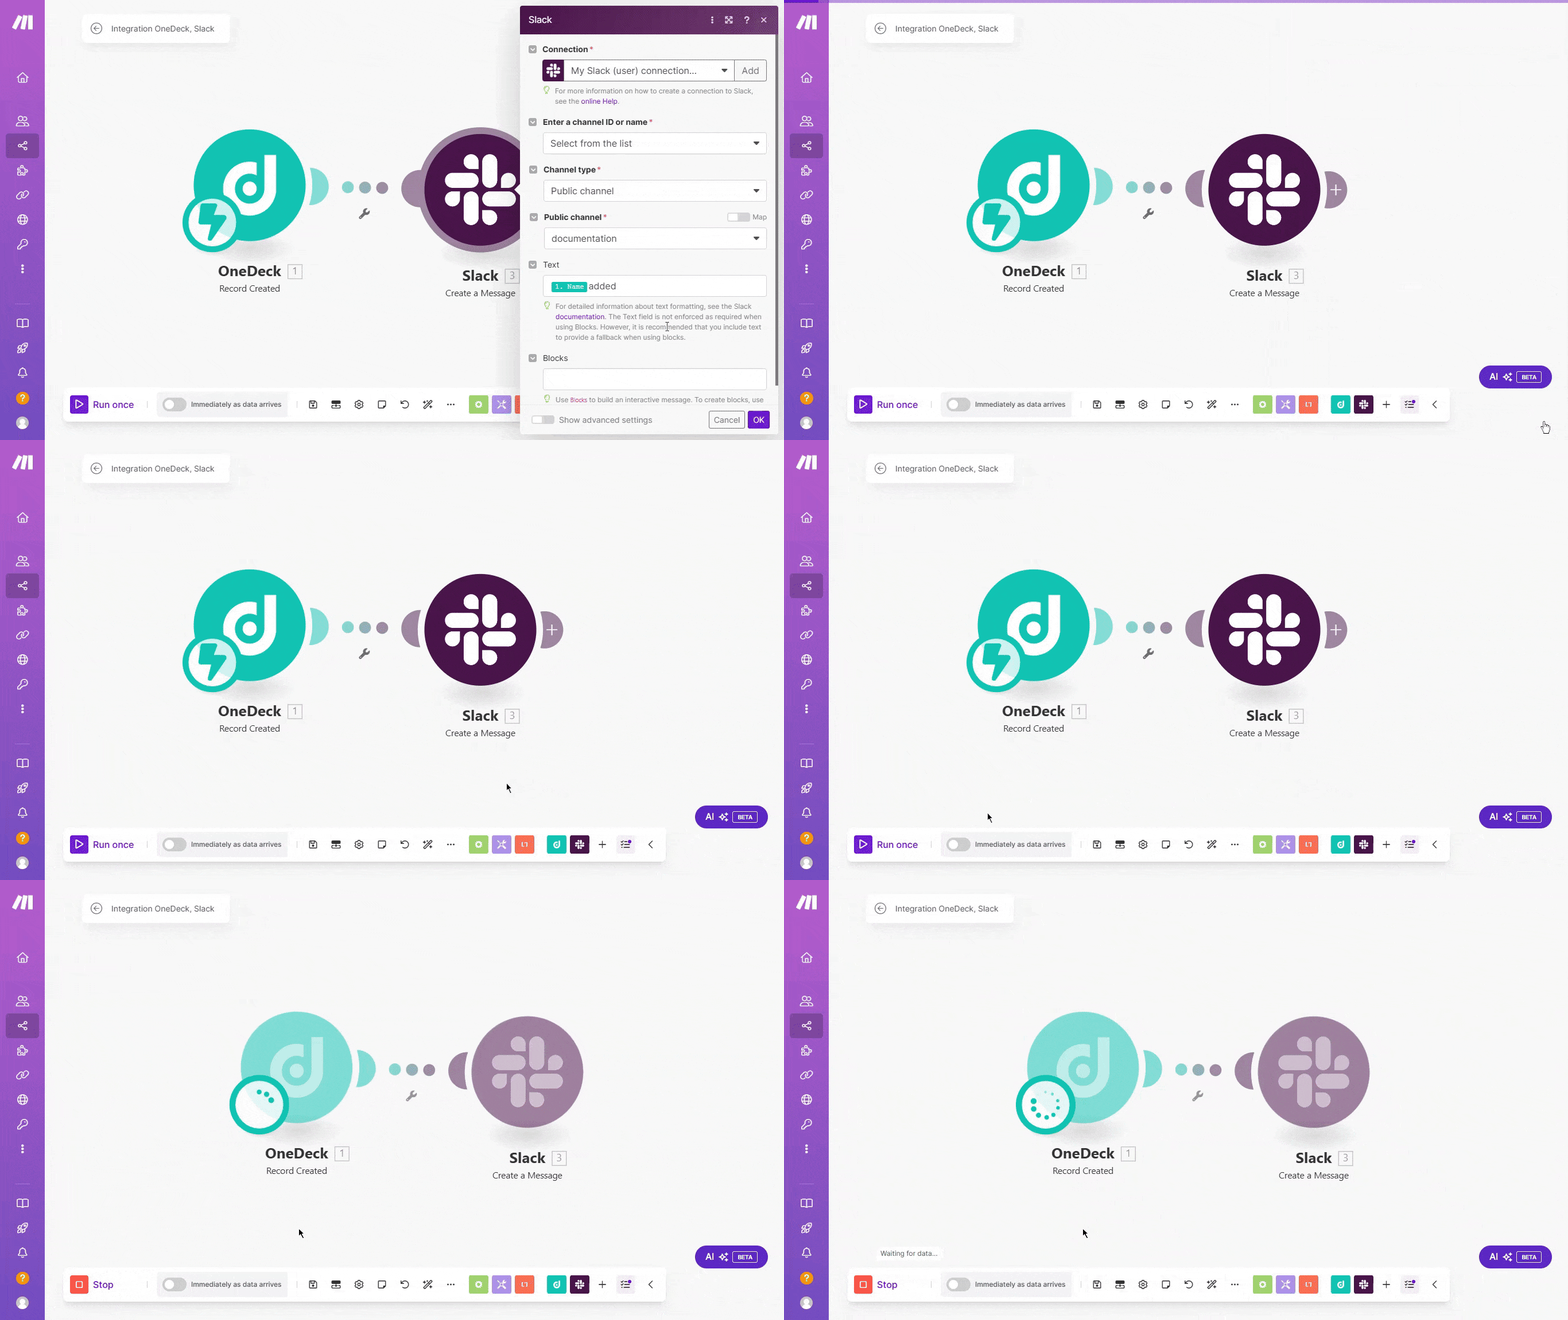
This will allow you to automatically send messages to Slack (selected action) whenever a new record is created (selected trigger) in OneDeck, streamlining your workflow.


