OneDeck Help Center
How to Translate Language
OneDeck empowers you to customize your platform experience by adding and managing languages of your choice, whether native or preferred. This allows you to adjust the language direction (Left-to-Right or Right-to-Left) and translate common OneDeck terms and options like “Add”, “Filter”, “Cancel”, “Logout”, and more.
In this documentation, we’ll walk you through the steps on how to:
- Add new Language
- Manage Language
Let’s get started 🚀
Add new Language
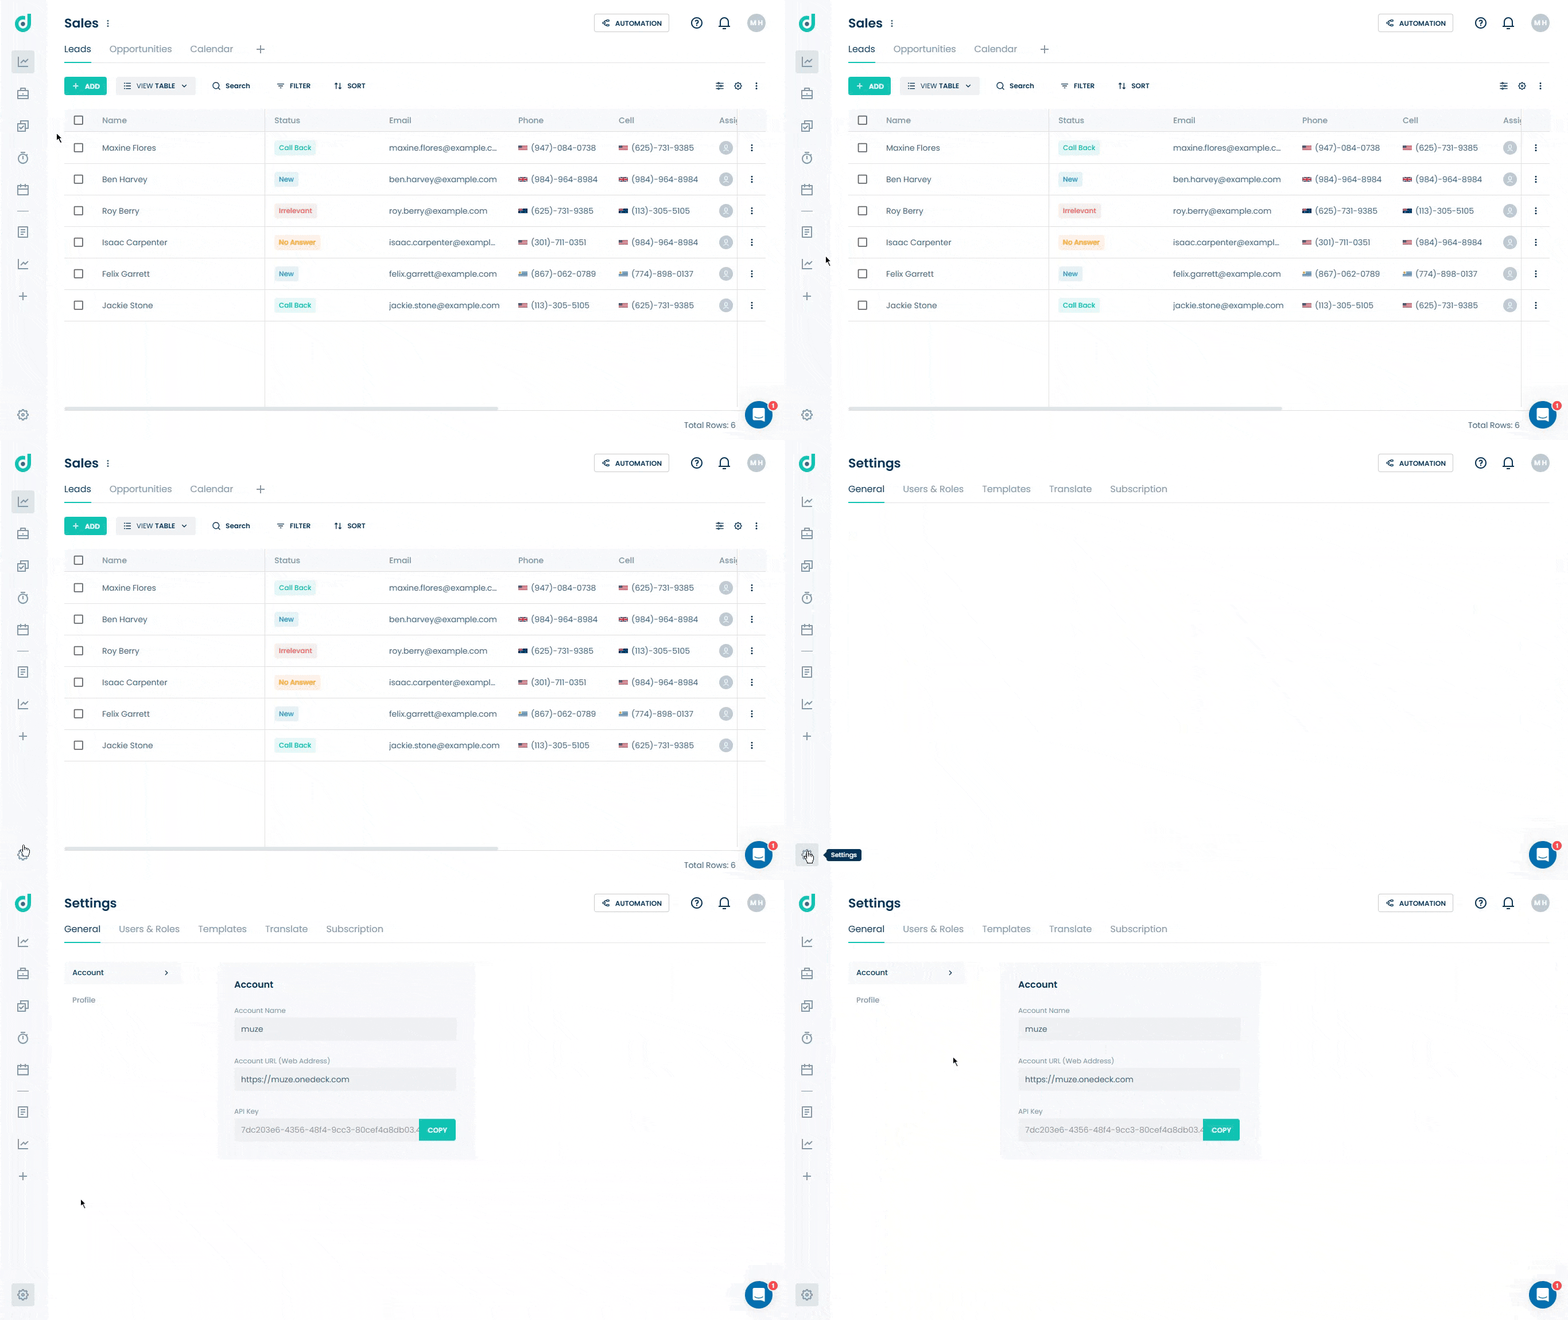
Step 1: In the side navigation panel, click on the Settings option from the bottom-left corner of the interface.
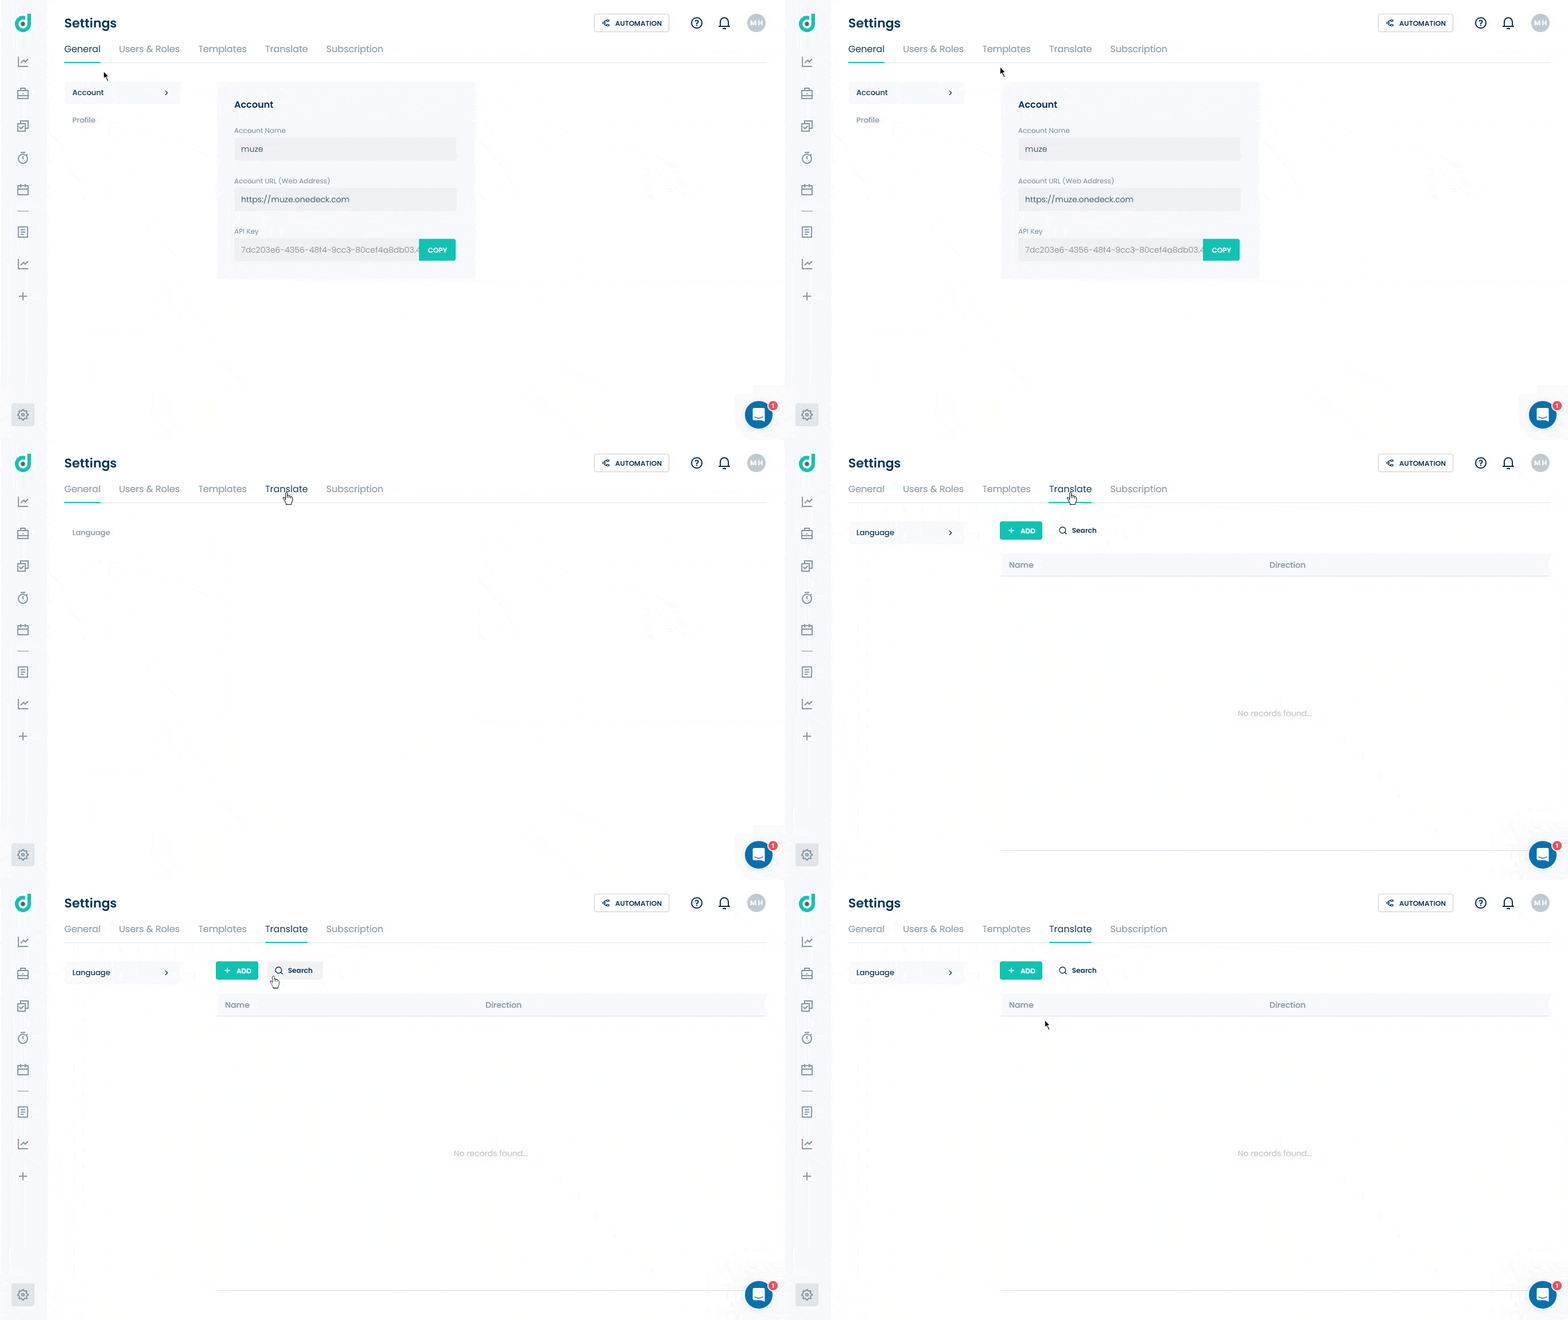
Step 2: Select the Translate tab from the settings menu.
Step 3: Click on the + Add button to add a new language.
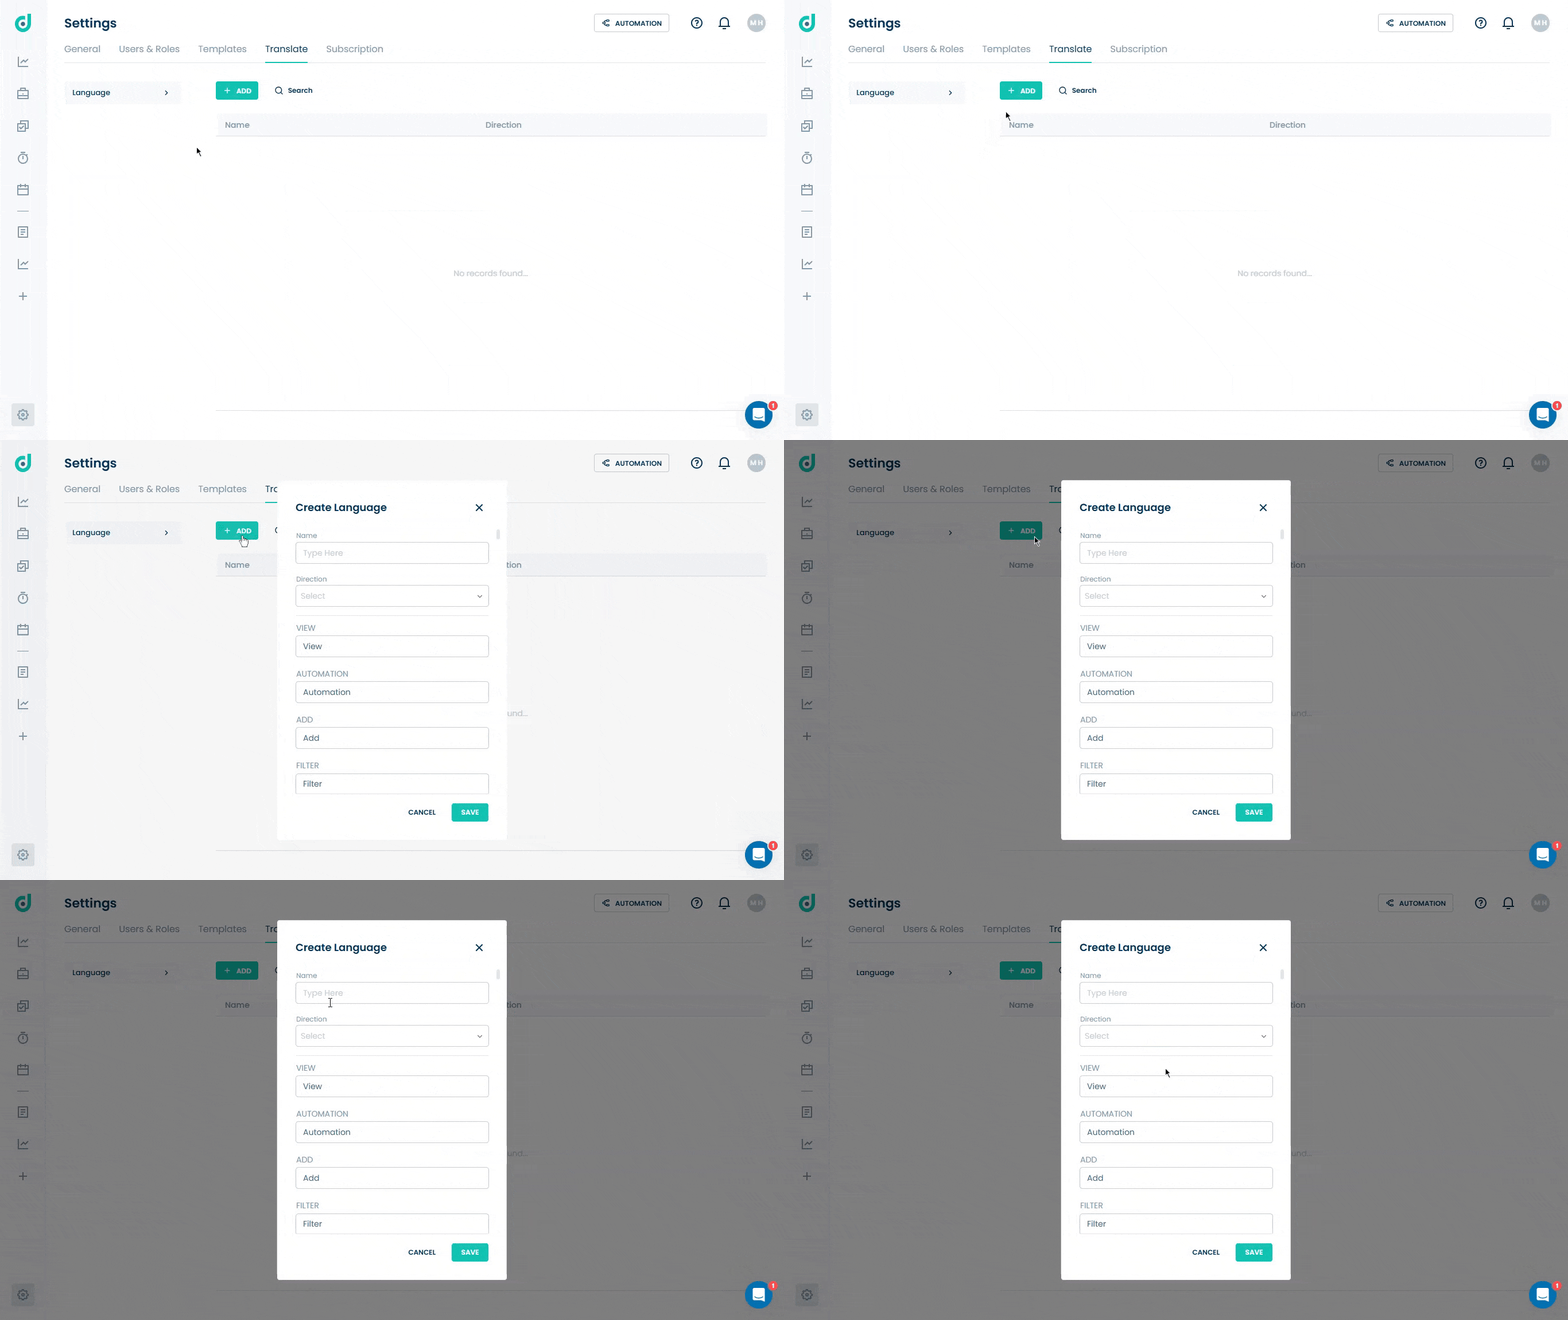
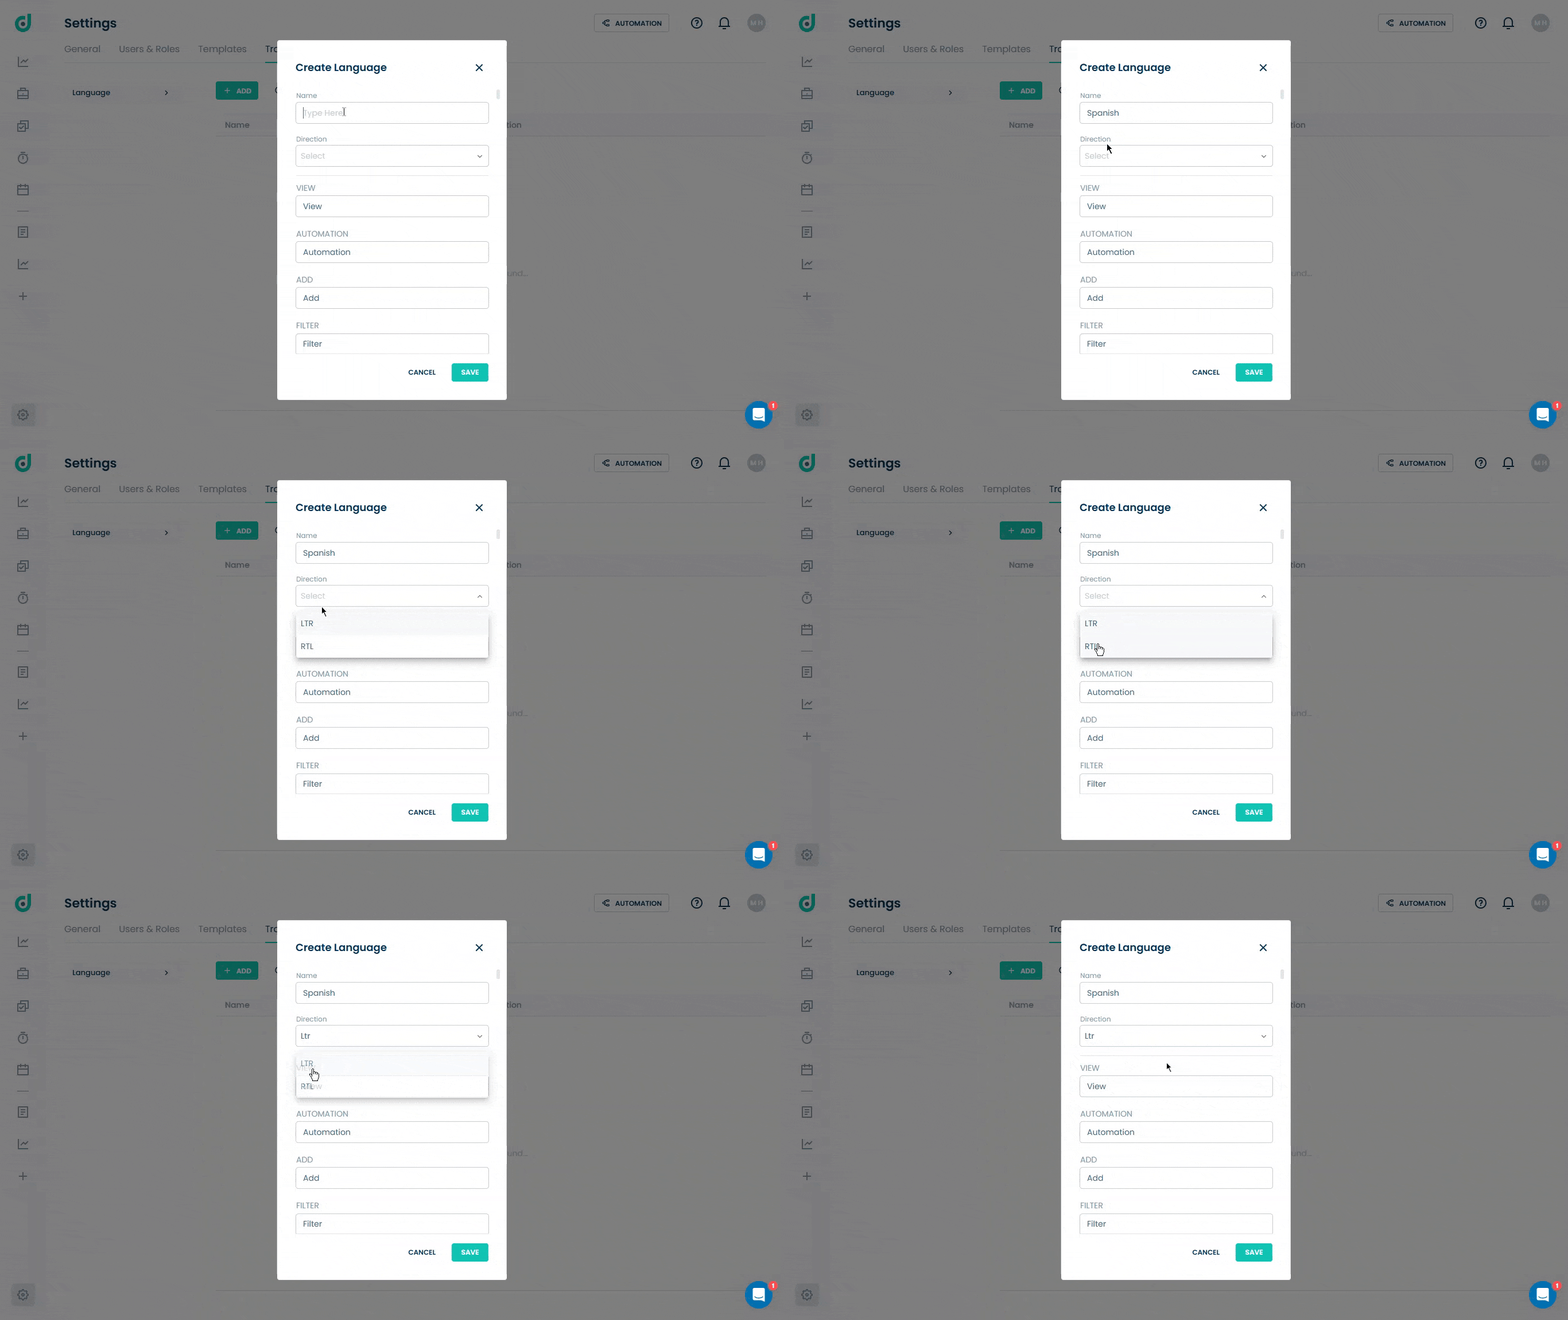
Step 4: A new window will appear, asking you to enter the following fields for inviting new users:
| Fields | Description |
| Name | Input the name of the language or translation (e.g., French, Spanish, or Urdu). |
| Direction | Dropdown to select the translation direction from Left to Right or Right to Left. |
Note: Languages like Arabic, Urdu, and Persian are written and read in a Right-to-Left (RTL) direction, and users can fully utilize them for both reading and writing.
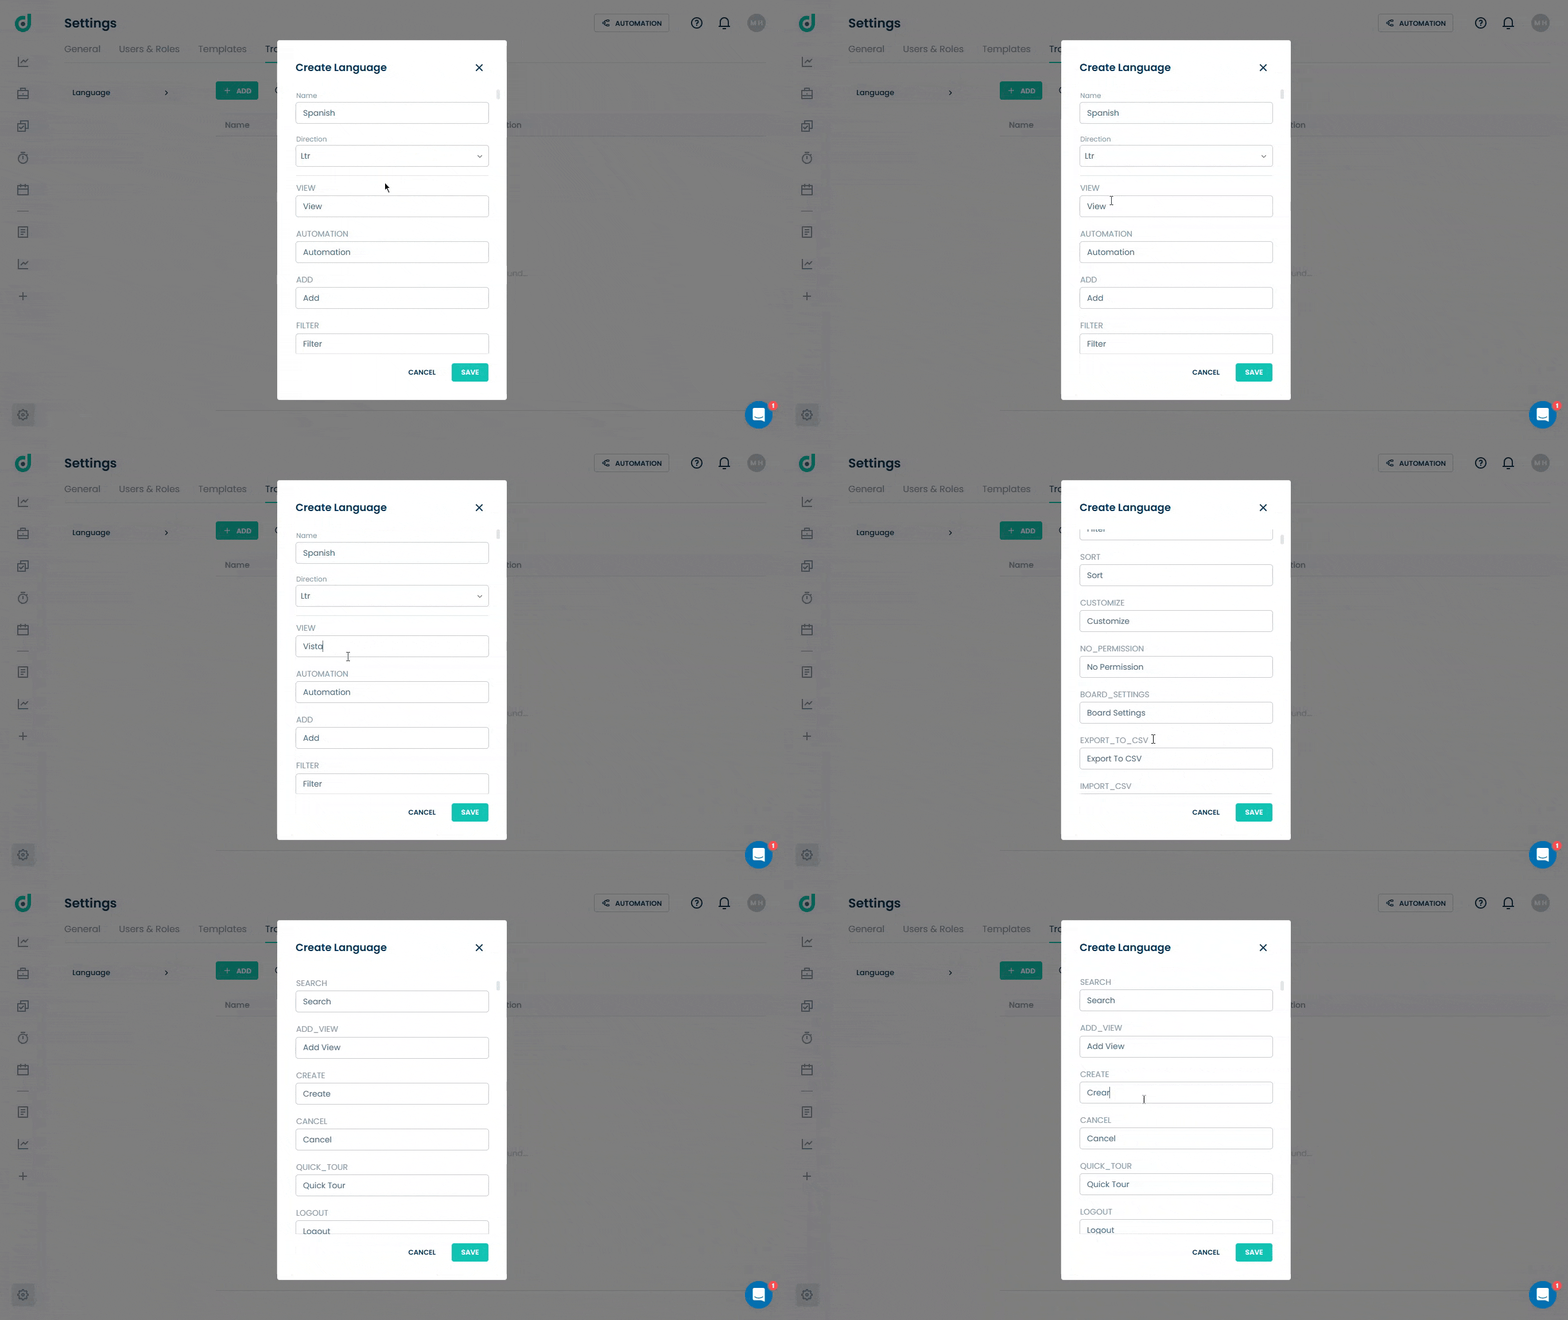
Step 5: Specify the translation for the following terms/options in the selected language.
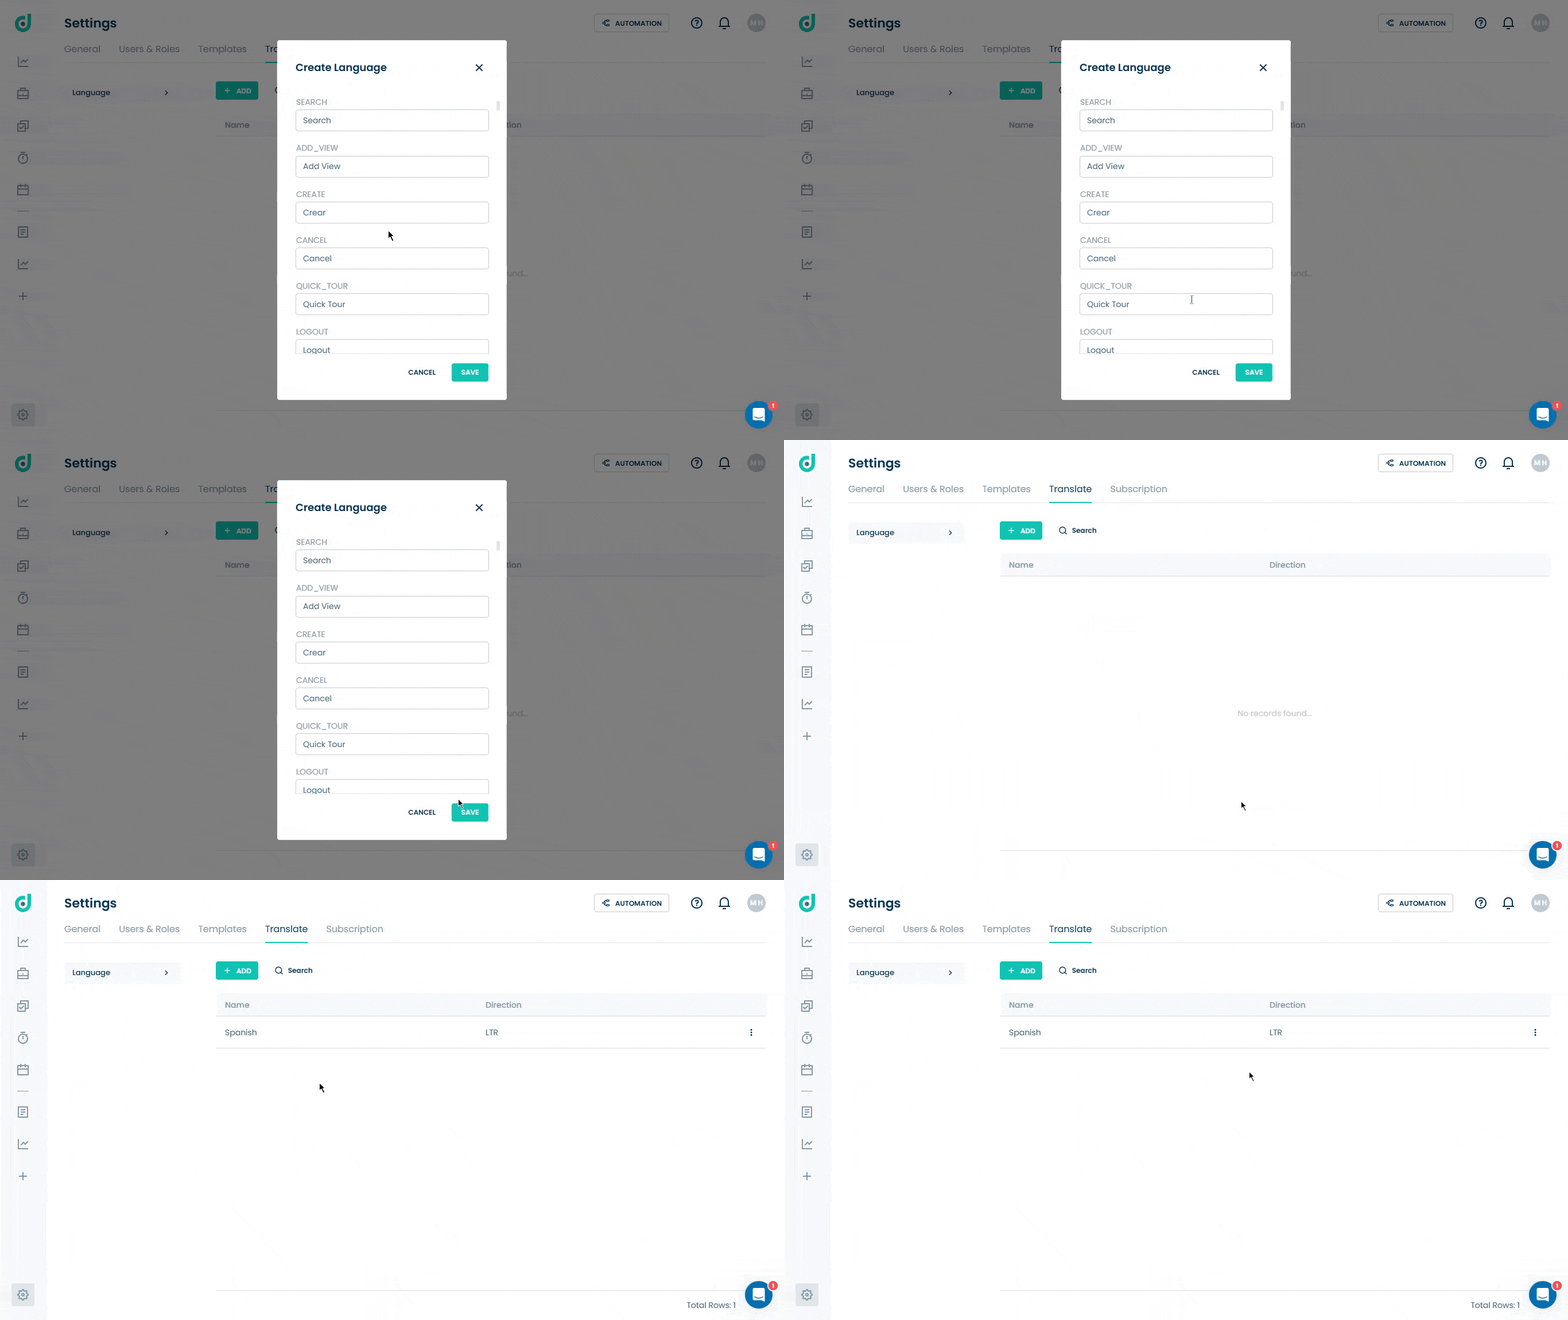
Step 6: Once done, click on the Save button.
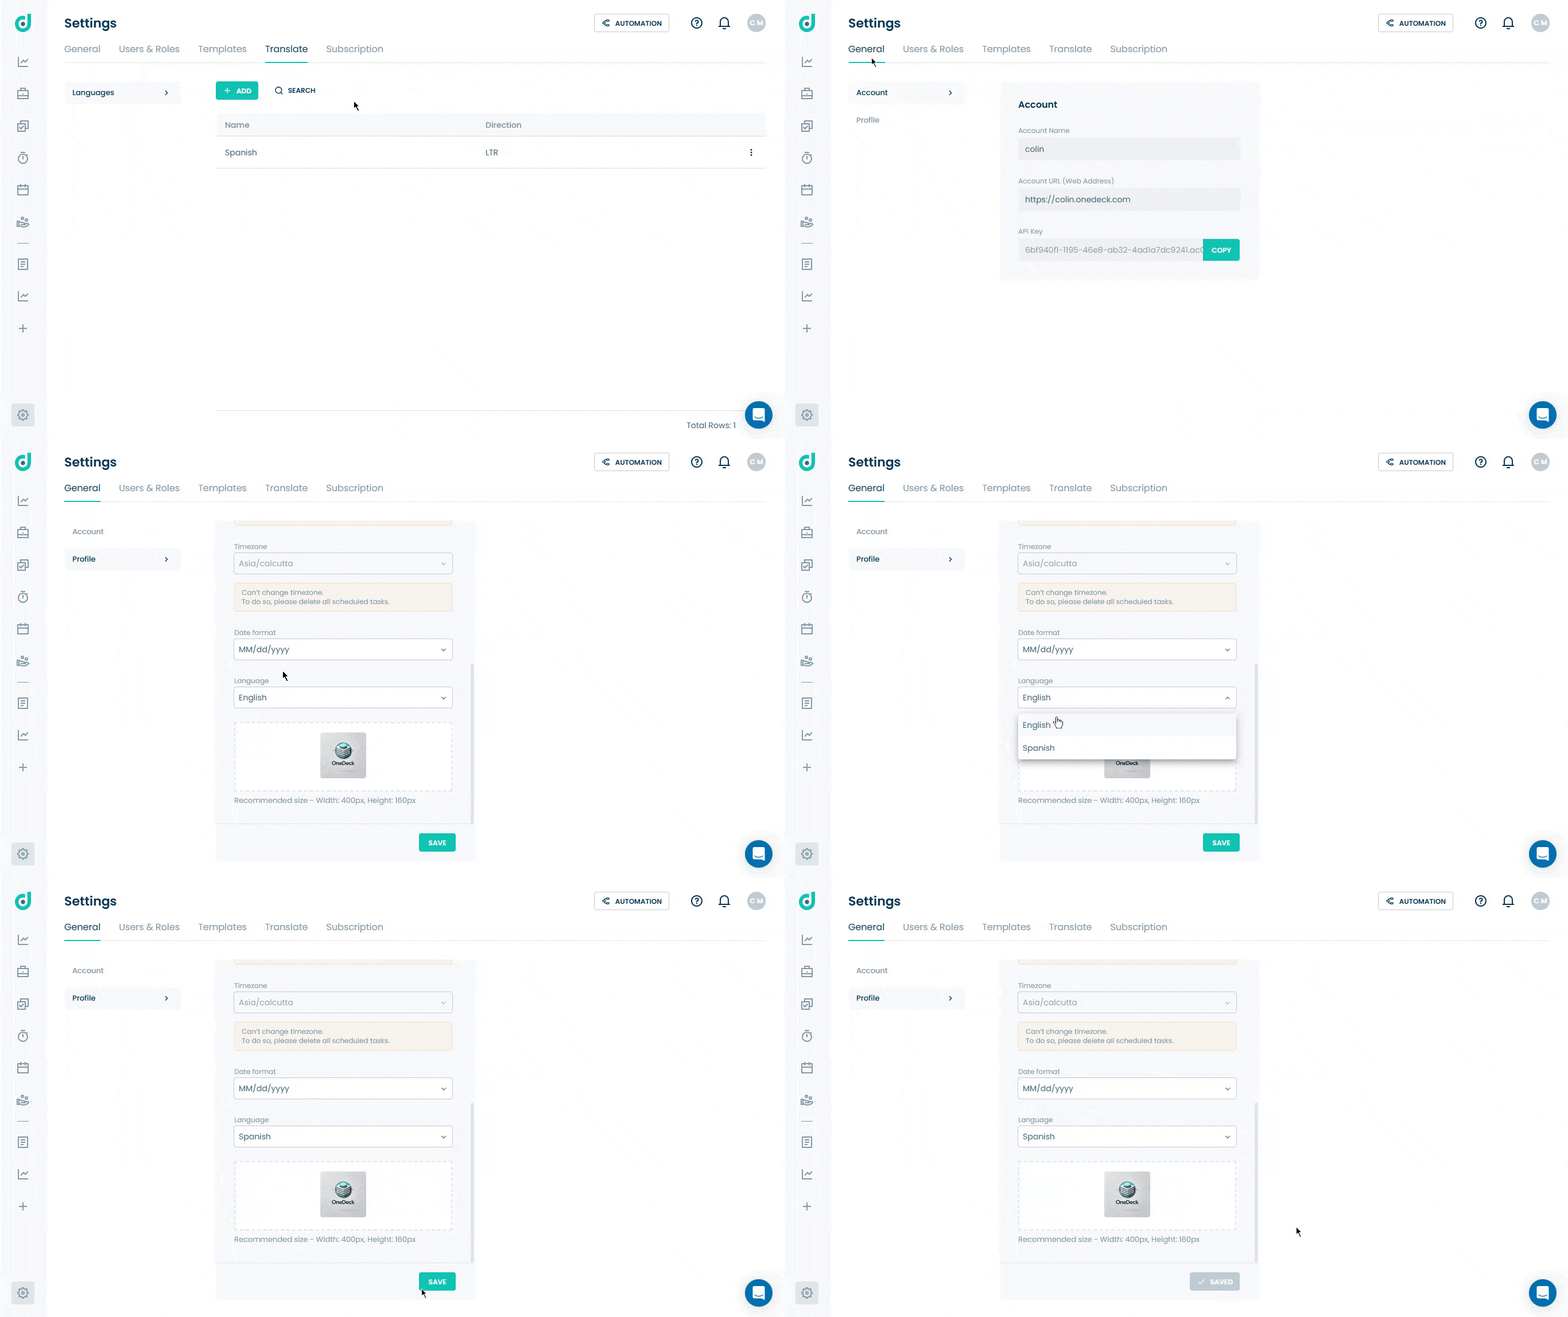
Note: To change your account language, navigate to the General tab, select the Profile option, and choose your added language from the dropdown menu.
Manage Language
Once the language is added, you can effectively manage that language with its direction and by the following options:
- Edit
- Delete
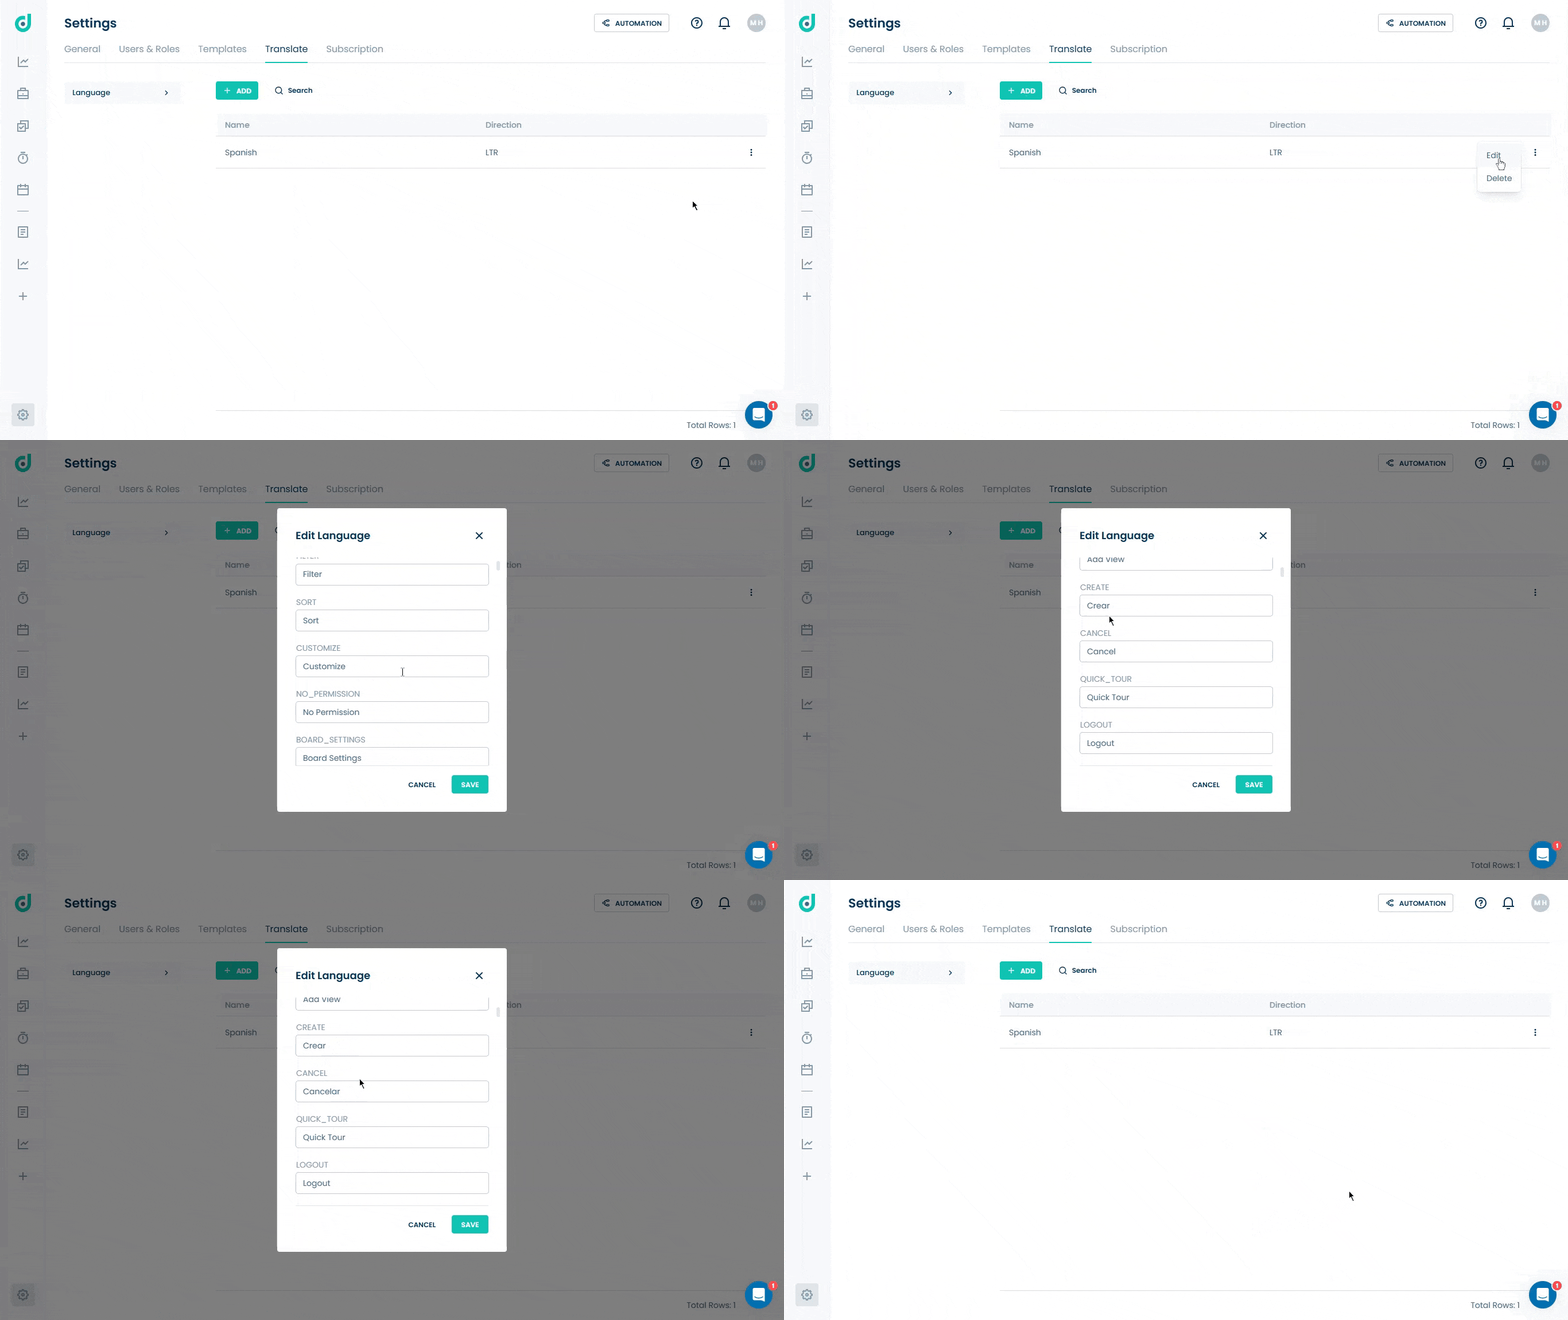
Edit
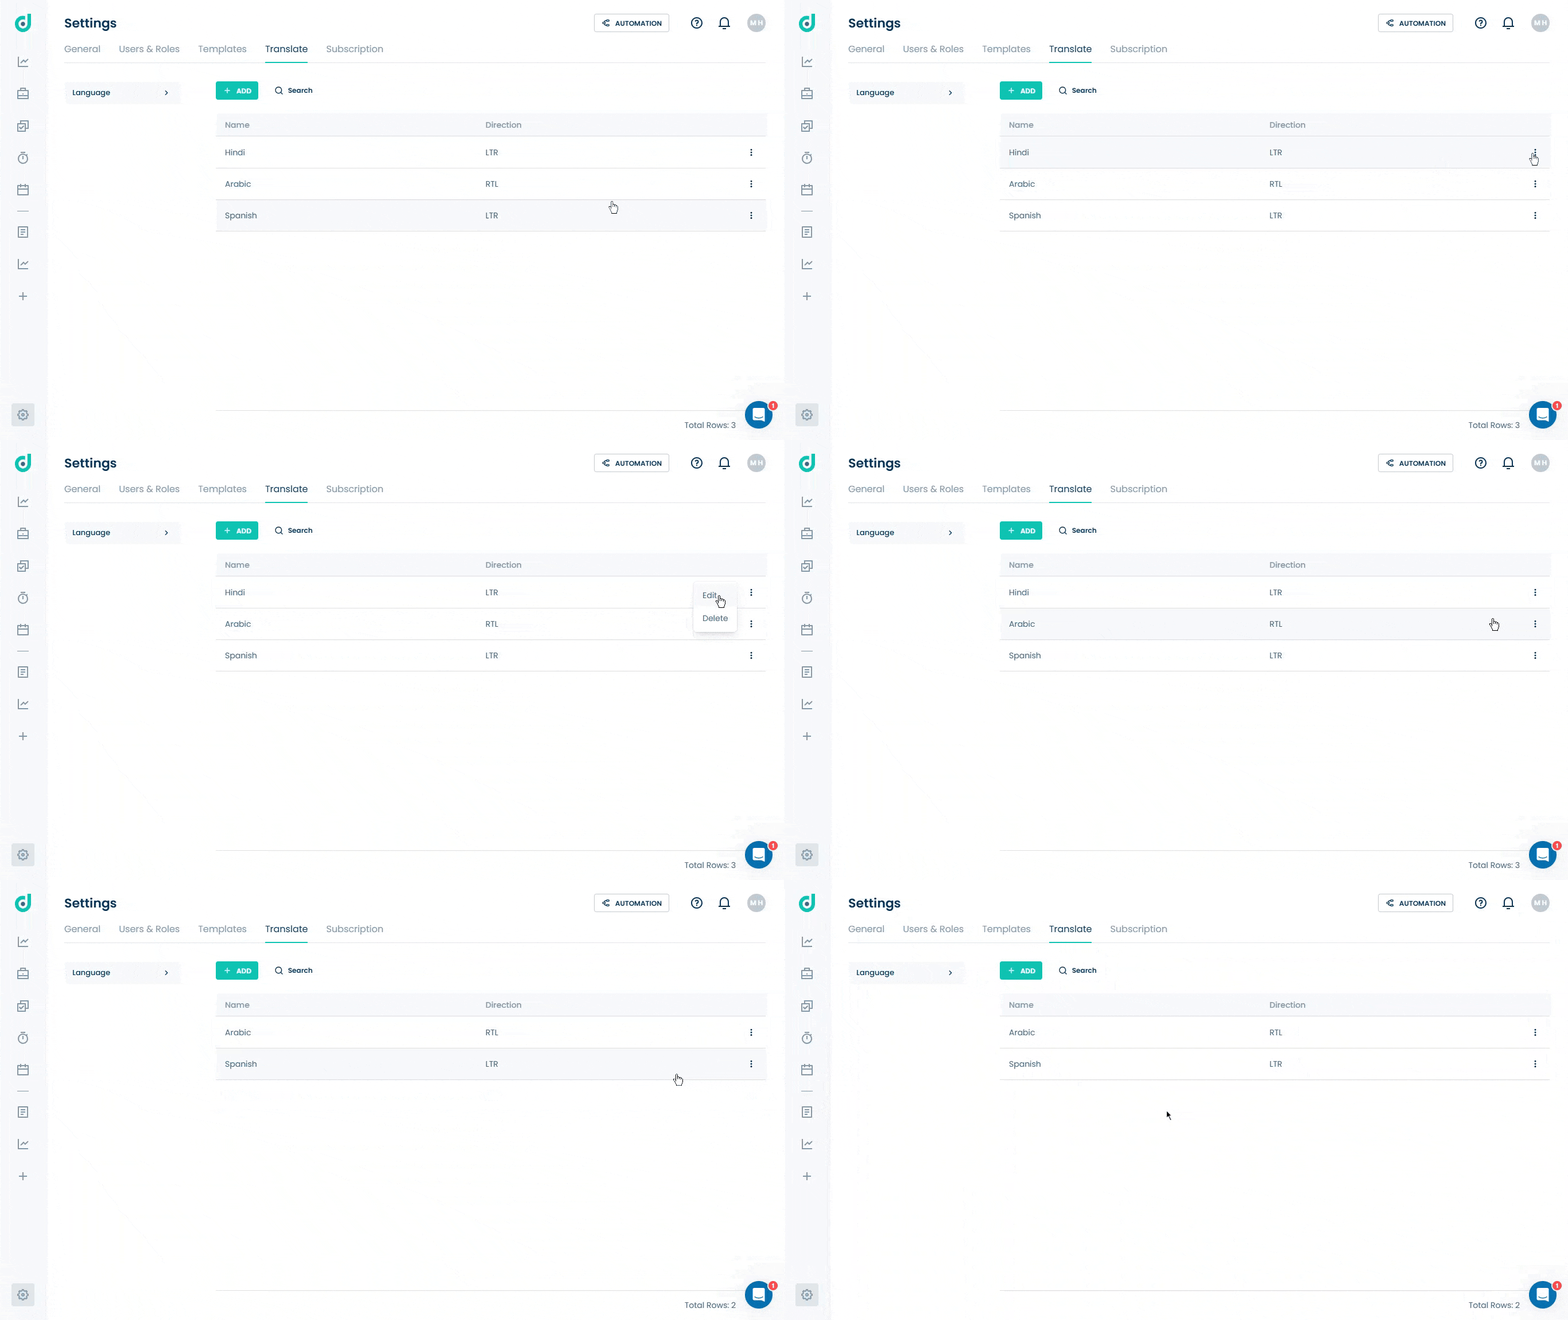
You can easily update the language name, direction, or translated terminology for OneDeck terms and options. Click on the Vertical ellipsis (three dots) and, select the Edit option.
Delete
You can remove the language when it is no longer needed. Click on the Vertical ellipsis (three dots), and select the delete option.
